Home Decor
DIY Colorful Lantern using craft Paper tutorial

Are you looking to add a touch of color and whimsy to your home decor decorations? This colorful lantern paper craft tutorial is the perfect solution for this! With just a few simple supplies, you can create a beautiful and unique lantern to hang in any part of your home to make it colorful. This tutorial will show you how to make a lantern out of a few materials. You’ll be able to customize the colors and patterns to create a unique decoration for your home. So grab your supplies and let’s get started!
Colorful Lantern Paper Craft Tutorial For Home Decor

Read More: Easy to Make Paper Chicken Craft Tutorial
Materials Required
- Colorful papers
- Double-sided tape
- Scissors
Procedure
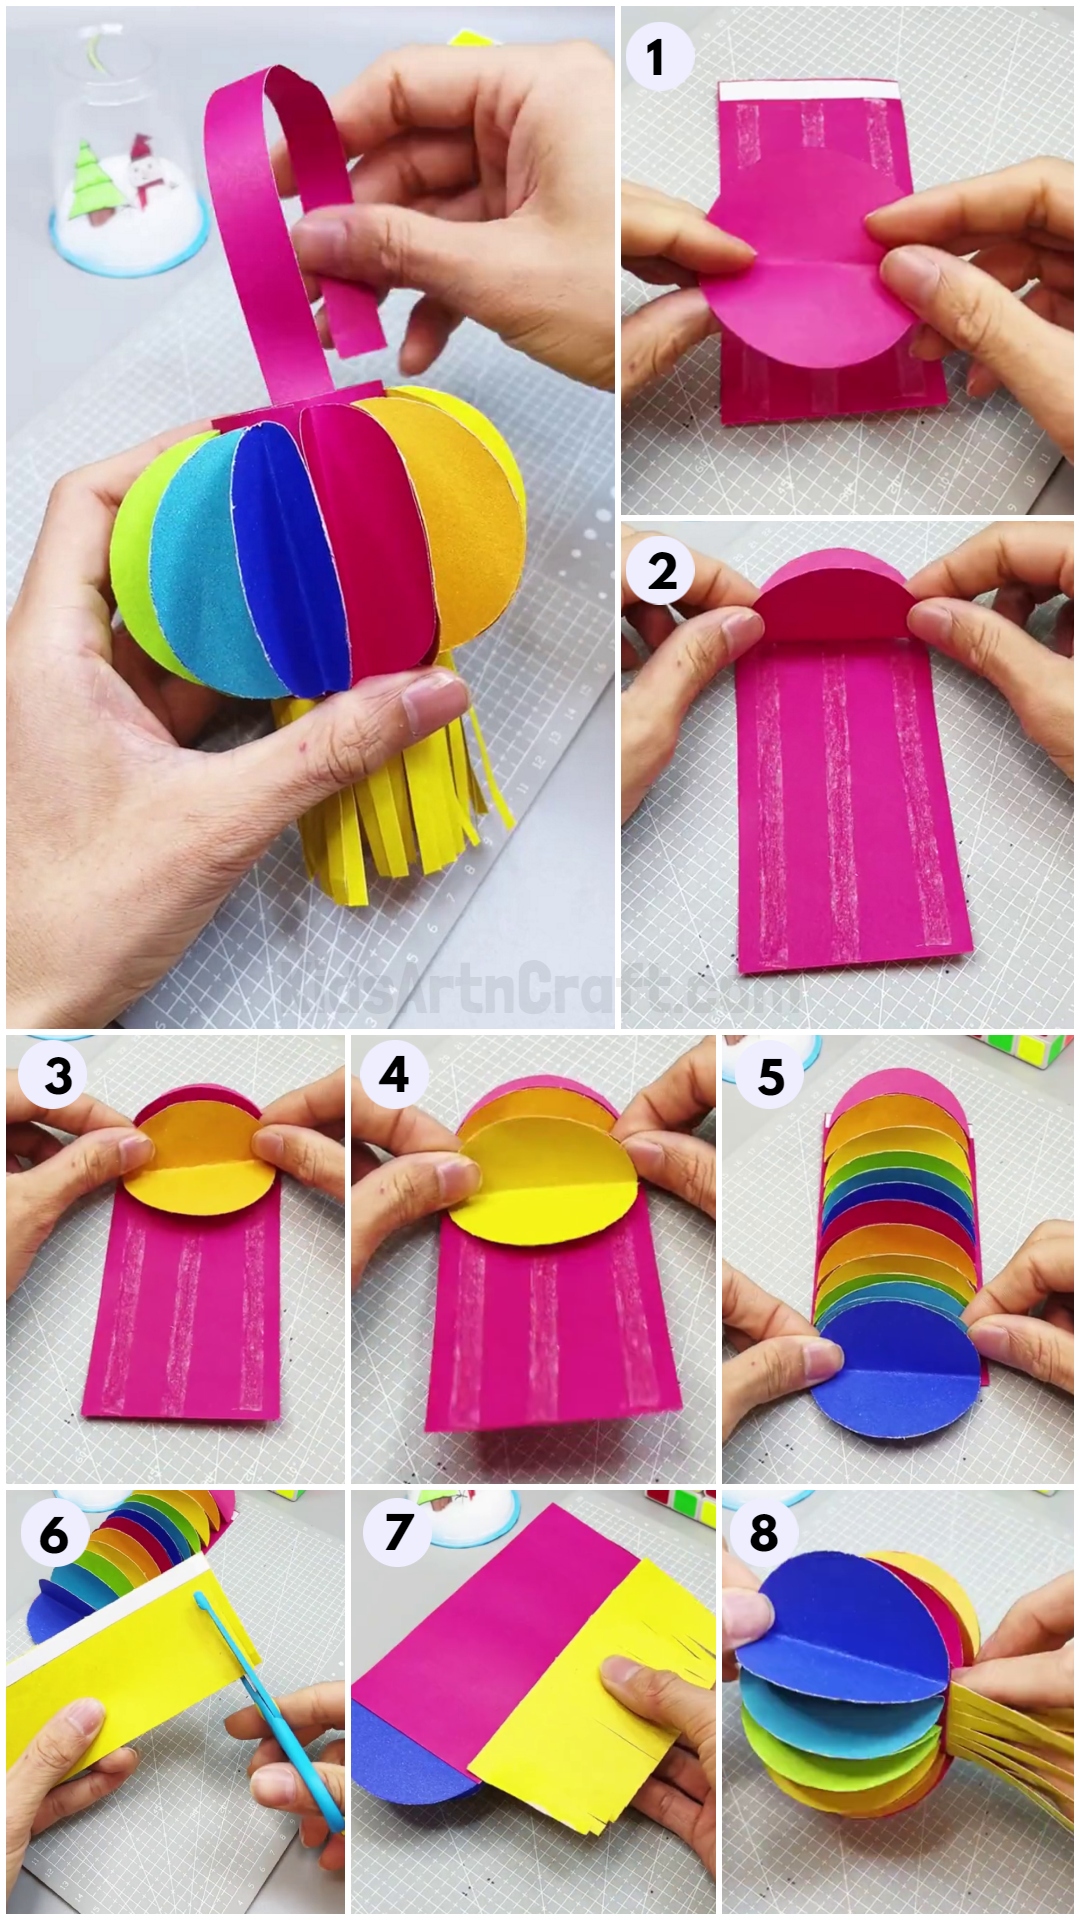
Step-1: Applying Tape Over the Rectangular-Sheet And Creasing Circles


Let’s start this craft by cutting out a rectangle from a pink-colored sheet and applying double-sided tape over it, over one corner and 3 in mid vertically. Then cut out a pink circle of diameter same as the breath of rectangle, fold it in half, and form a crease.
Step-2: Pasting Folded Circle Over Rectangle
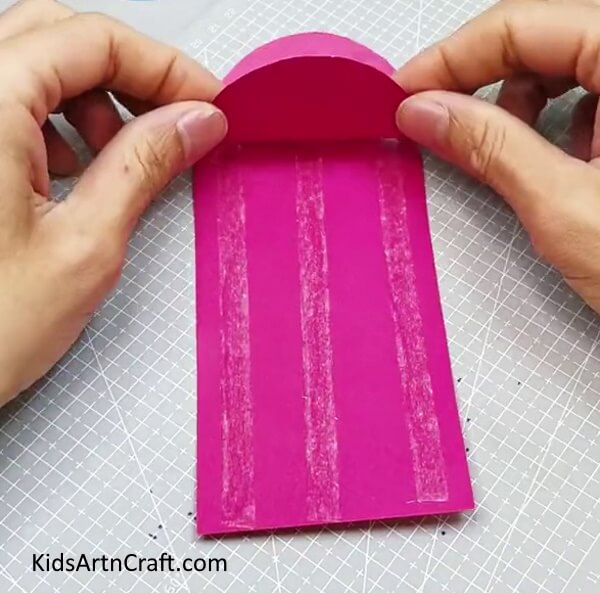

Start pasting the circle over the rectangle, making sure to stick only the folded edge of the circle.
Step-3: Pasting Other Color Circle To Pink Circle
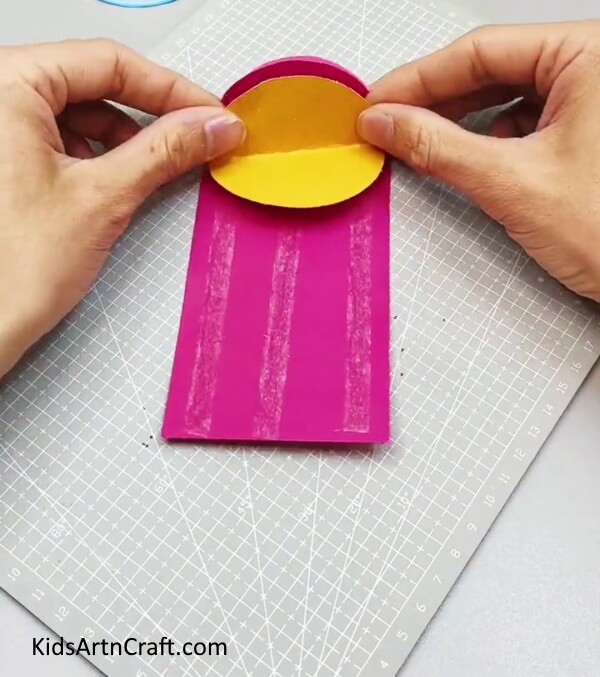

Cut out a yellow colored circle and stick it adjacent to the pink circle from its folded side using double-sided tape and over the rectangle from its folded edge
Step-4: Repeating Step 3
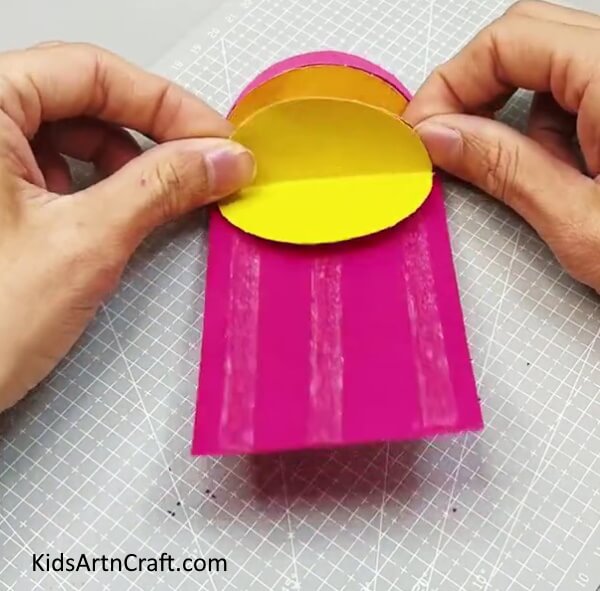

Again cut out a lemon-yellow colored circle and stick it adjacent to the yellow circle by repeating step 3.
Step-5: Completing Pasting All The Circles
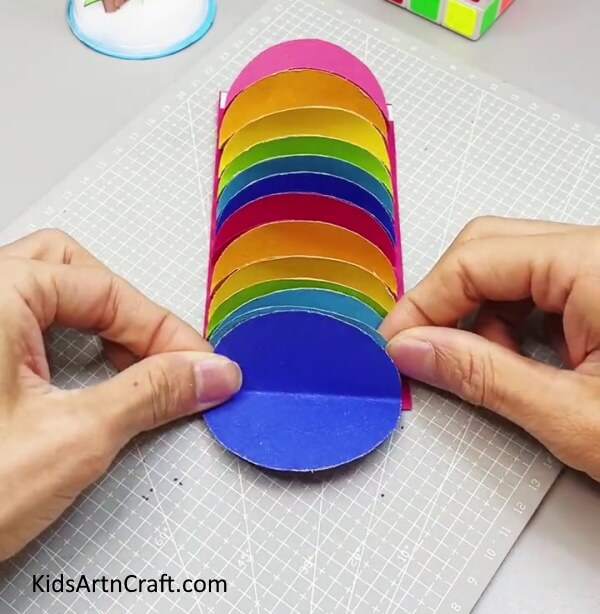

Complete pasting all circles of different colors, all adjacent to each other and stuck over the rectangle from the folded edge.
Step-6: Making Thin Strips Of A Yellow Paper
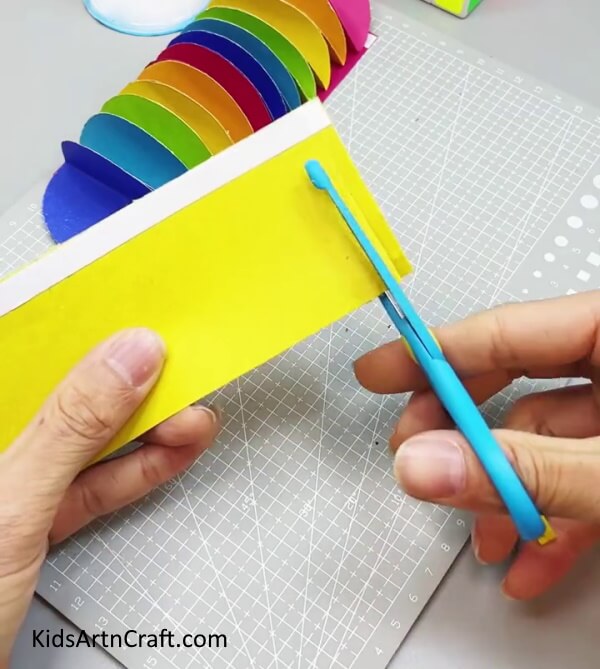

Cut out a rectangle of yellow paper of the same length as the pink rectangle. Apply double-sided tape over the larger side and cut out thin strips from the other side using scissors.
Step-7: Pasting The Yellow Sheet Over Pink
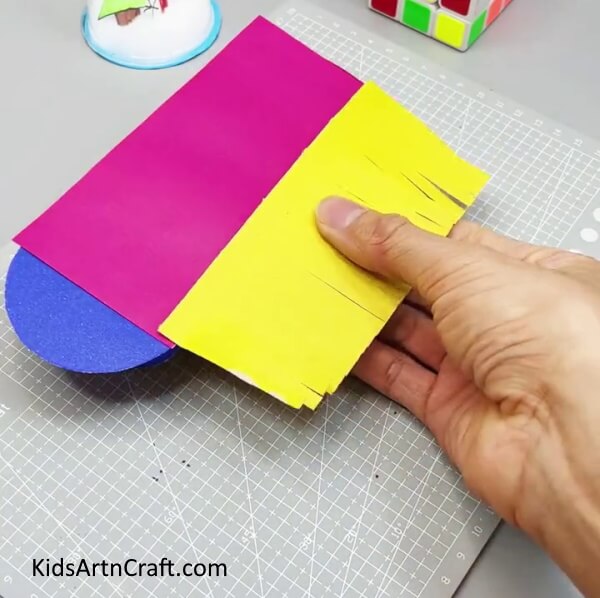

Invert the pink rectangle and paste the yellow paper over the end side of the pink with double-sided tape.
Step-8: Roll Over The Sheet To Form A Lantern
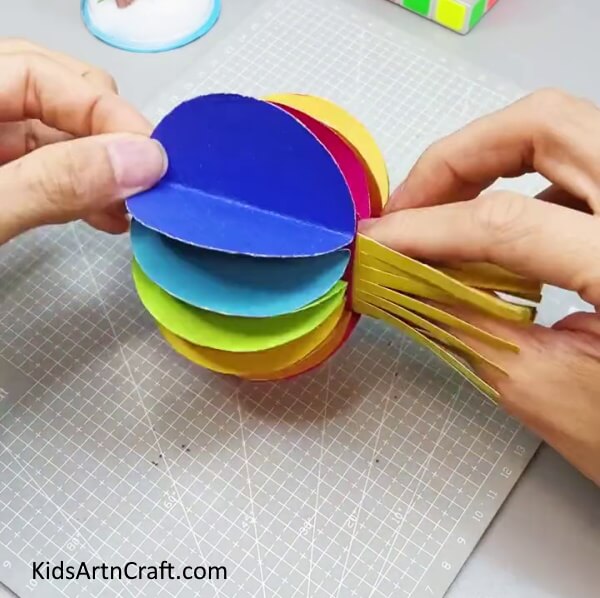
Roll over the sheet and paste the ending circles to each other and form a lantern.
Your Colorful Lantern Paper Craft Is Ready!
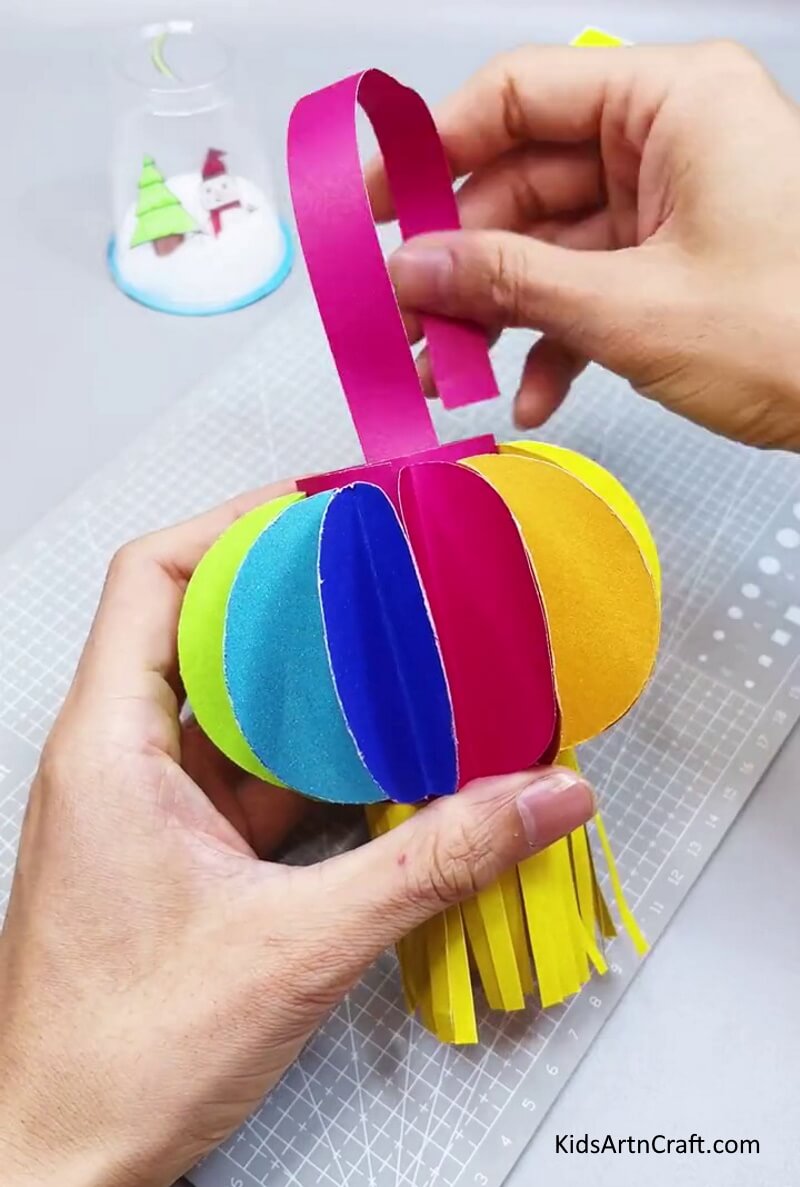

At the end paste a pink strip from inside the pink cylinder over the lantern to make its hanger.
This colorful lantern paper craft tutorial is a great way to add some extra flair to your home decor. With just a few supplies and some time, you can create a beautiful piece of art that will brighten up any room. or corner.
FAQ’s DIY Colorful Lantern using craft Paper
1. How do I cut the paper?
Use scissors to cut the craft paper into circles and other required shapes.
2. How long will the lantern last?
The lantern will last until its taken care properly.
3. Can I use a different material instead of colorful paper?
Yes, you can use parchment paper, tissue paper, or other thin, lightweight material.
4. Can I make the lantern bigger?
Yes, you can make the lantern bigger by using more circles of paper and a larger rectangle.
5. Can I make the lantern with other colors?
Yes, you can use any colors you want to make the lantern.
6. How do I hang the lantern?
You can hang the lantern using a paper hanger or wire, string, and ribbon.
This concludes that this Colorful Lantern Paper Craft Tutorial is a fun and easy way to spruce up your home decor. With the right materials and a few simple steps, you can make a beautiful piece that will be sure to impress.
Follow us on Youtube for art and craft tutorials and much more.
More Articles from Kids Art & Craft
- Learn To Make Tree with paper step by step Tutorial
- How To Make A Paper Heart Bee Craft Tutorial
- Easy to Make Handmade Bee Craft Tutorial for Kids
- Easy to Make Paper Pineapple with Step-by-Step Instructions
- DIY Paper Basket Step by Step Tutorial For Kids