


Paper Crafts
DIY Paper Box Easy Tutorial for kids

Looking for a creative and unique way to store items around the house or to give a special gift? Look no further than this simple and easily customizable DIY origami paper circular box. With just some paper and a few simple steps, you can make your own stylish box that will have everyone talking.
Origami is a traditional Japanese art of folding paper into decorative shapes and figures. With just a few simple steps, you can make a beautiful paper circular box using common origami techniques. This tutorial will guide you through the instructions and provide helpful tips along the way. Get ready to impress your friends and family with this unique and stylish gift box!
Creative Paper Box Craft Idea For Kids
Read More: Paper Origami Craft Video Tutorial for All
Materials Required
- Designer Paper
Procedure
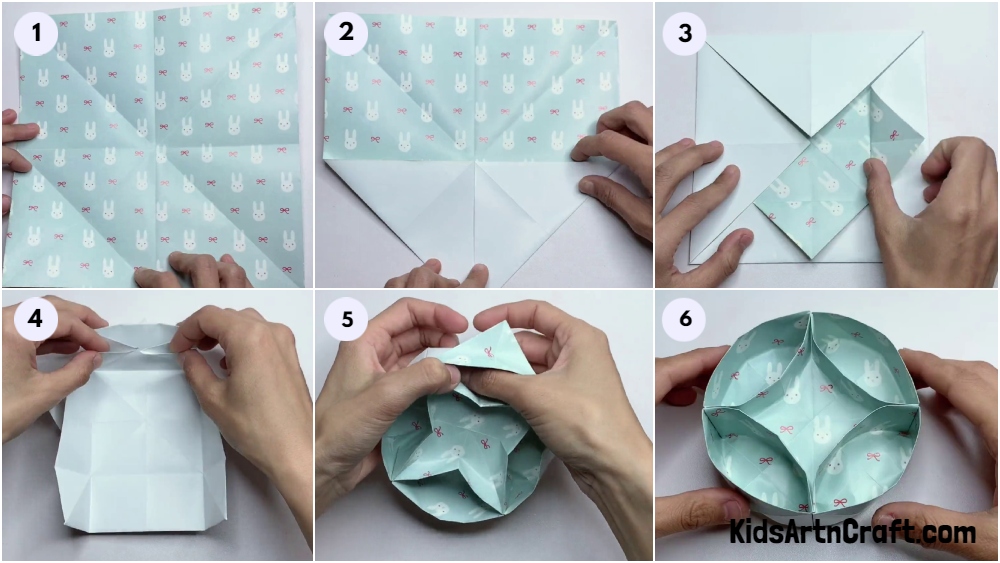
Step -1 Making Creases
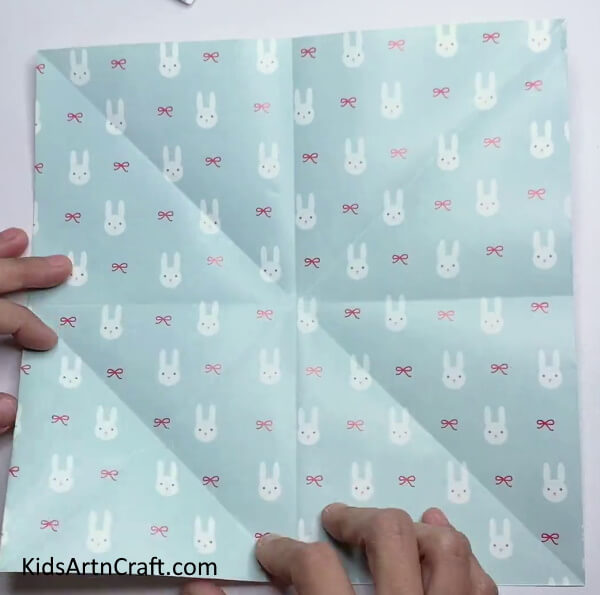
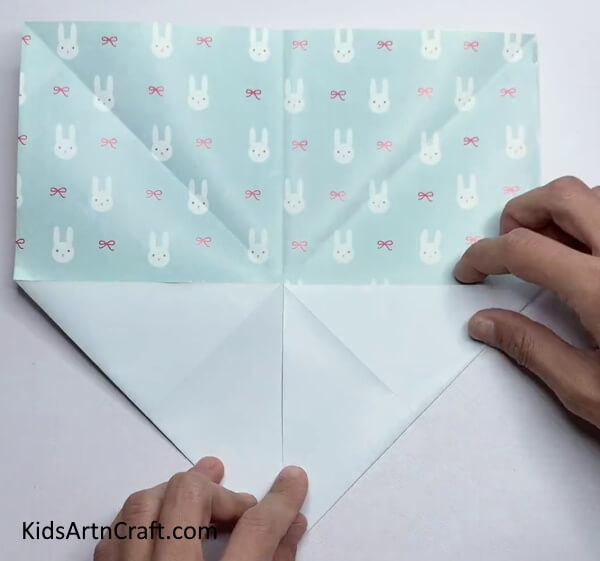
Let’s begin making a paper box by folding some creases. First, fold the square paper in half diagonally, crease it well, and unfold it. Repeat the same by folding square paper in half on another diagonal side.
Now, make the crease by folding the paper half vertically and horizontally. Take the bottom left corner of the paper and bring it to the center point of the paper which is visible after making creases.
Step -2 Folding Corners To The Middle
Similarly, bring the bottom right corner of the paper to the middle point.
Step -3 Folding All Four Corners
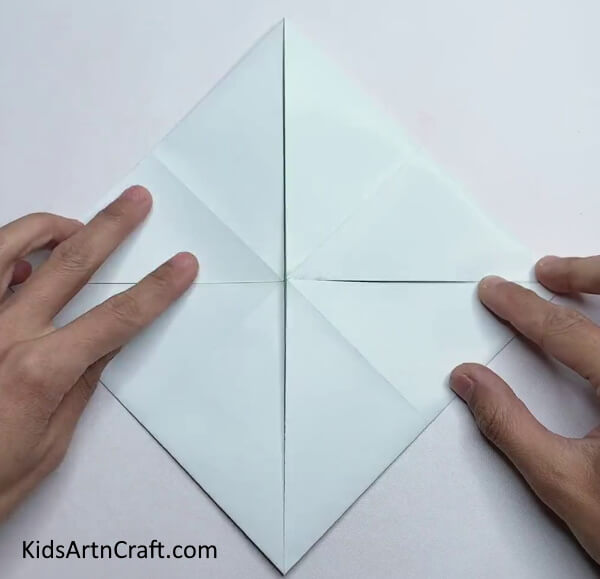
Repeat the same with the top corners of the paper. You should get a diamond shape.
Step -4 Folding Corners Of The Triangle
Now, fold the corners of the triangles to the top and bring them to the top edge of the paper.
Step -5 Folding Each Corner
Repeat the same with each corner of the triangle.
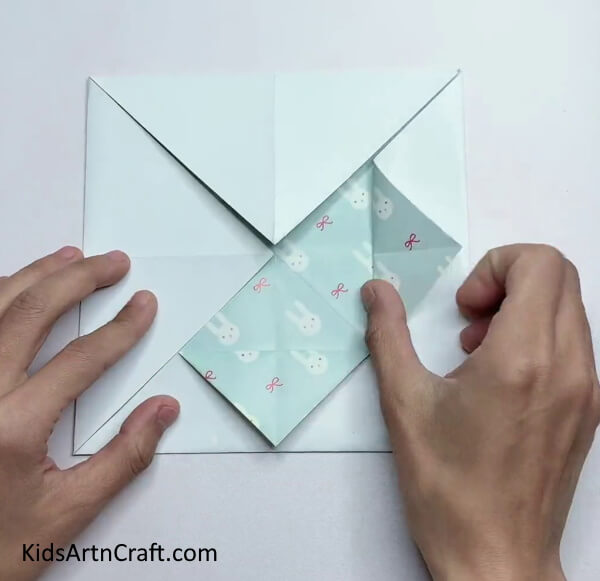
Step -6 Folding Sides Of The Paper To The Middle Crease
Now, fold each side of the square shape to the middle crease of the paper and make creases. Then, unfold.
Take one side of the paper and fold it along with the creases formed previously. gently press the corners to make the fold properly.
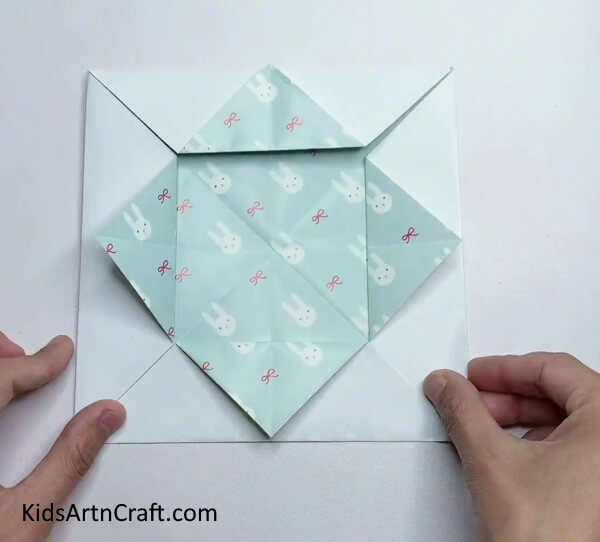
Step -7 Folding All Sides
In the same manner, fold all the sides of the paper with the help of the creases.
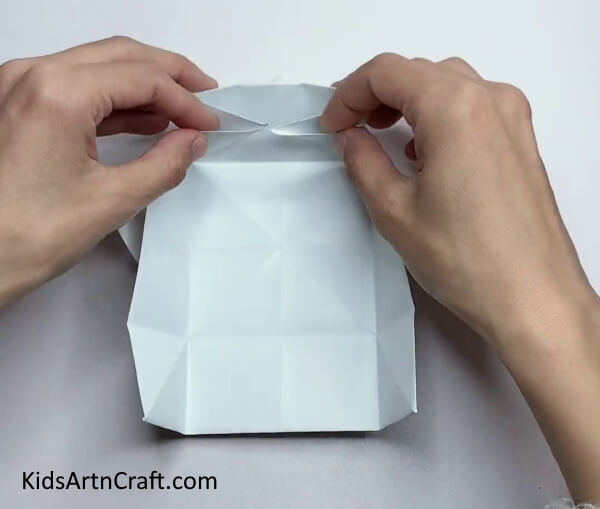
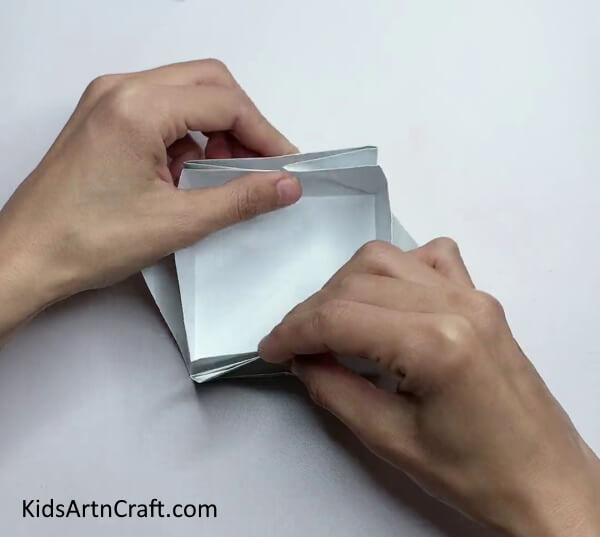
Step -8 Flipping Model And Pushing In The Sides
Flip the model upside down and push the sides to the middle. You should get a paper model as shown in the above image.
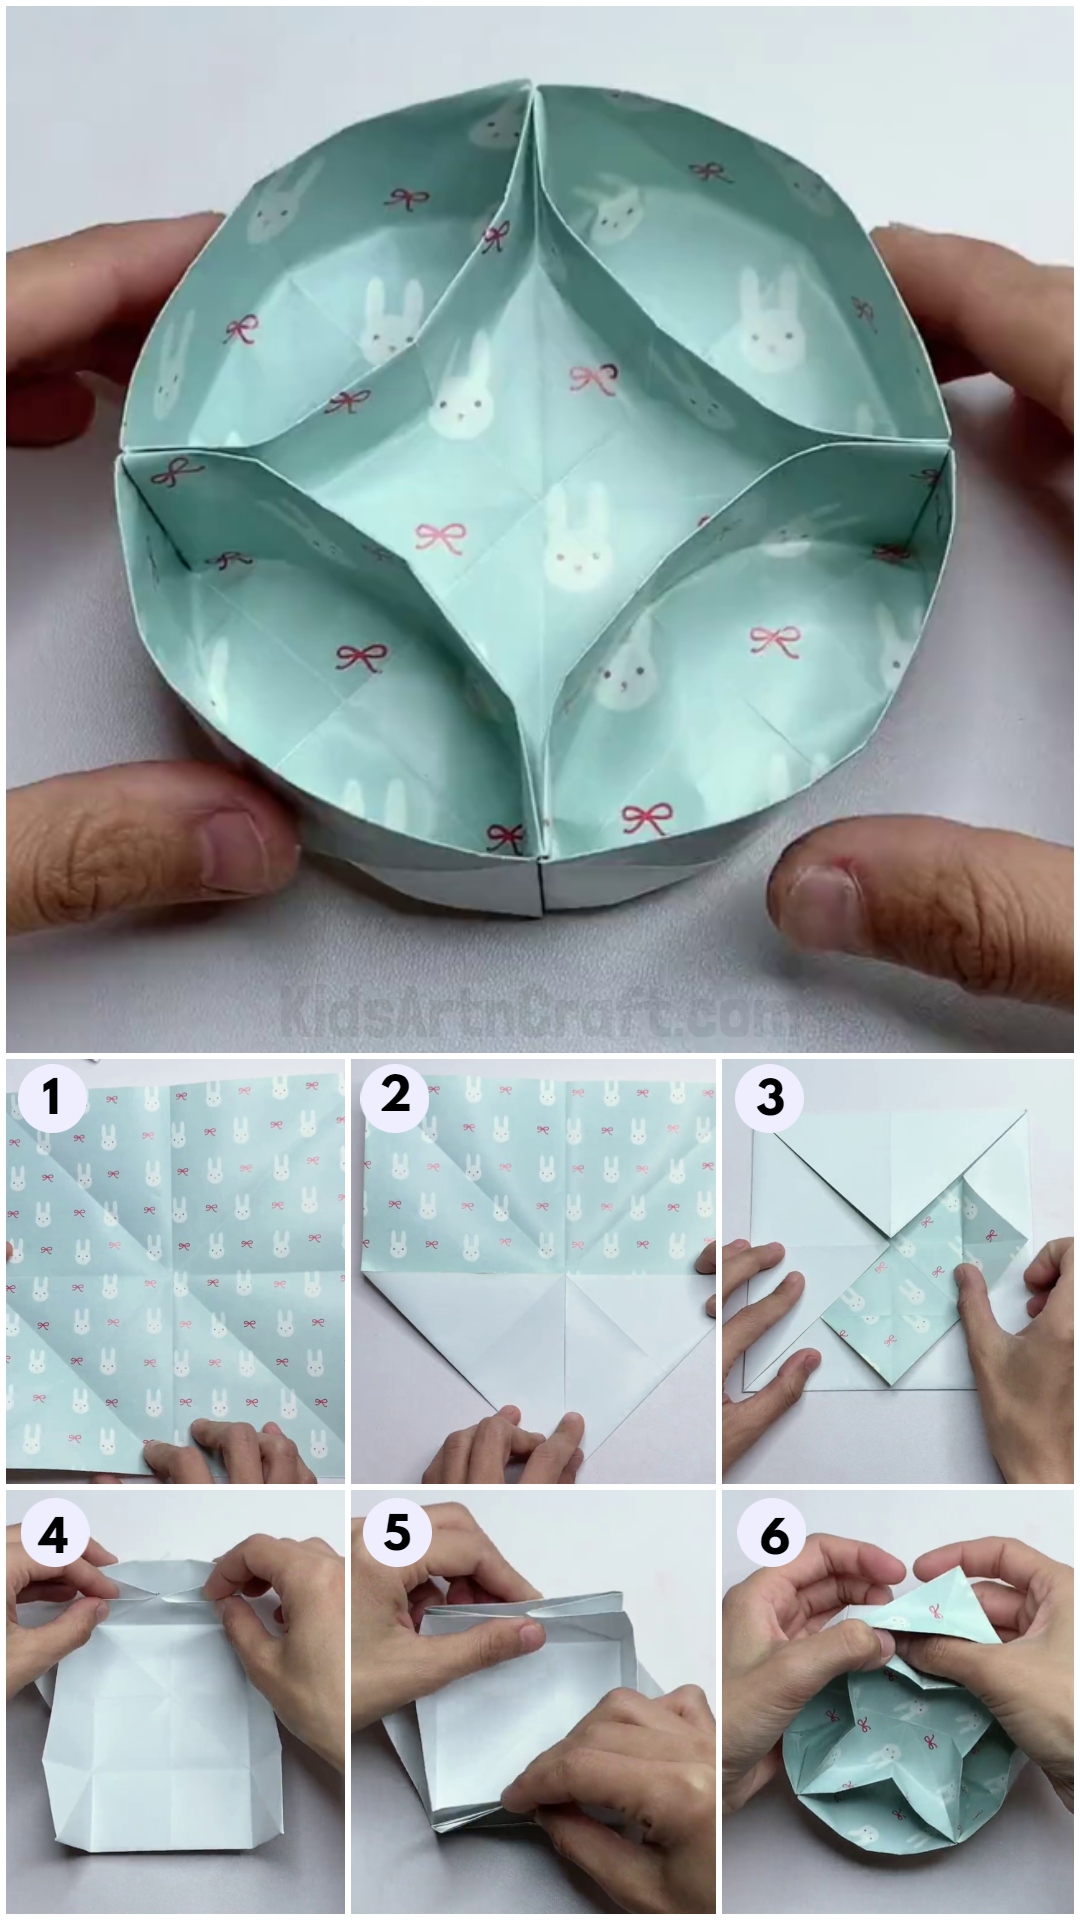
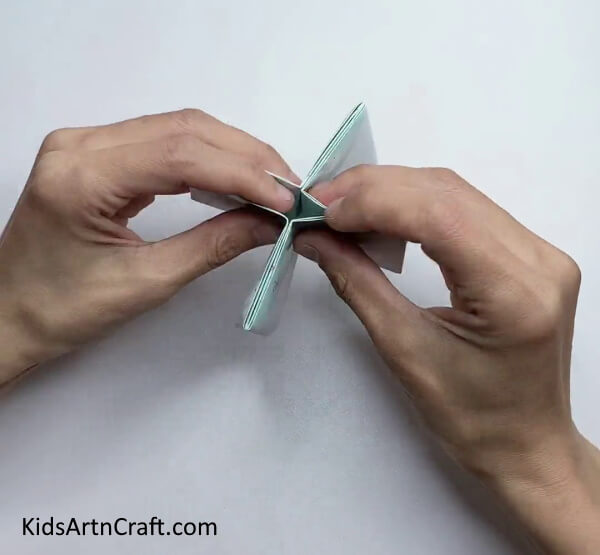
Step -9 Pulling Out the Outer Layer Of The Sides
Carefully, pull out the outer layer of the sides of the paper and give it a shape of a curve using your fingers.
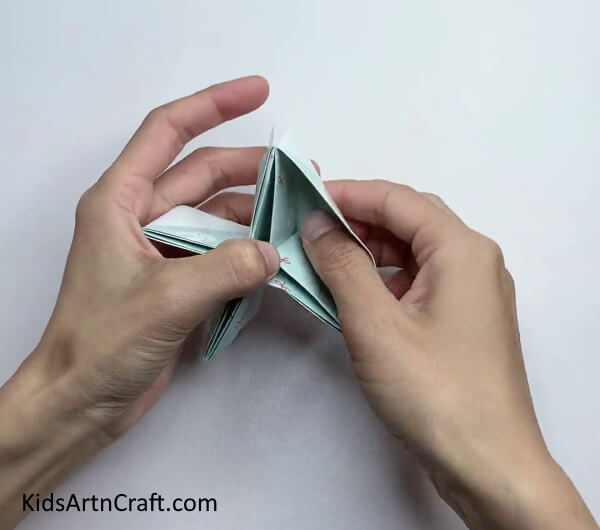
Step -10 Making Circle
Using the same pattern, make a circle by pulling out the outer layer of paper. Flip the circular model and adjust the corners in the middle and flip it again.
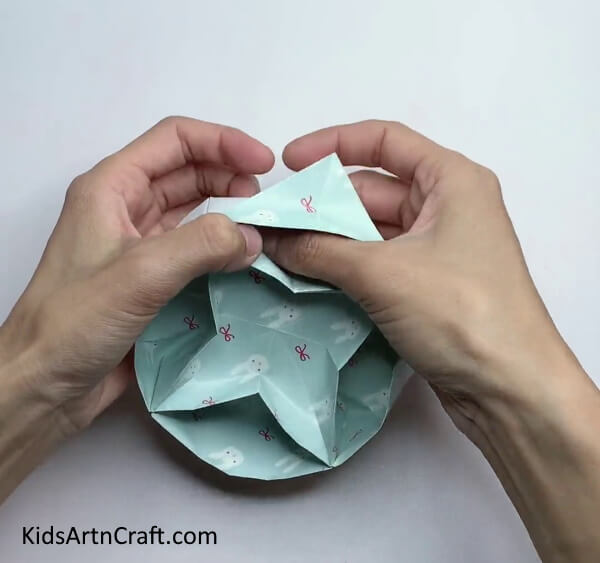
Final Image – Origami Paper Circular Box With Partitions Is Ready!
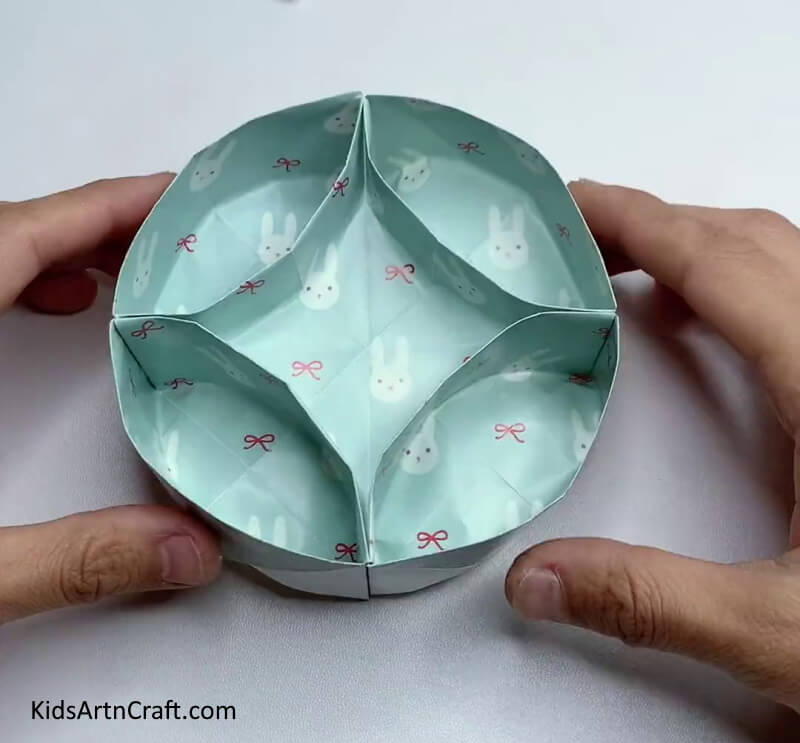
Your DIY origami paper circular box is complete! This origami paper circular box with partitions is a great way to store small items safely and in style. With the help of this easy-to-follow tutorial, you can make this beautiful box in no time. Not only is it a fun and creative way to store items, but you can also customize it with your own unique designs. So get creative and make your own DIY origami paper circular box today!
Follow us on Youtube for art and craft tutorials and much more.
FAQ’s DIY Paper Box Easy Tutorial
1. What is origami?
Origami is the traditional Japanese art of paper folding.
2. What materials do I need to make an origami paper circular box with partitions?
You will need designer origami paper only.
3. What is the purpose of making the circular box with partitions?
The circular box with partitions can be used for storage or decoration purposes.
4. Are there any variations of the circular box?
Yes, you can make other variations such as triangular, rectangular, or hexagonal boxes with partitions.
5. What other origami shapes can I make?
You can make a variety of origami shapes, such as animals, flowers, boxes, and many more.
6. How can I learn more about origami?
You can find tutorials online, or you can buy origami books to learn more about origami.
7. What other materials can I use instead of origami paper?
You can use any type of paper, such as construction paper, tissue paper, or cardstock.
More Articles from Kids Art & Craft
- Paper Woven Crafts & Designs for Kids
- Easy Paper Craft Activities At Home Video Tutorial for All
- DIY Fun Craft Activities At Home Video Tutorial
- Fun To Make Blue Paper Sunflower Craft For Kids
- Creative Craft By Things At Home Video Tutorial for All


