DIY and Crafts
Dollhouse Furniture Origami Craft For Kids To Make With Parents – Step by Step Tutorial

This helpful guide shows children and parents how to make dollhouse furniture out of origami paper. With easy-to-follow diagrams and instructions, parents and kids can work together to create miniature furniture for any dollhouse.
Are you looking for a fun and creative activity to do with your kids? Dollhouse furniture origami is a great way for both parents and children to bond and make something unique together. With just a few simple supplies and some creativity, you and your child can create beautiful origami dollhouse furniture in no time. In this article, we’ll provide some helpful tips and instructions on how to get started and create your own origami furniture for your child’s dollhouse. With a little bit of patience and creativity, you and your child can have a lot of fun creating amazing origami furniture for their dollhouse!
Fun To Make Dollhouse Furniture Origami For Kids To Make With Parents

Read More: DIY Alphabet Drawing Board Ideas
Material Used:
- Floral craft paper
- Glue
Instructions:
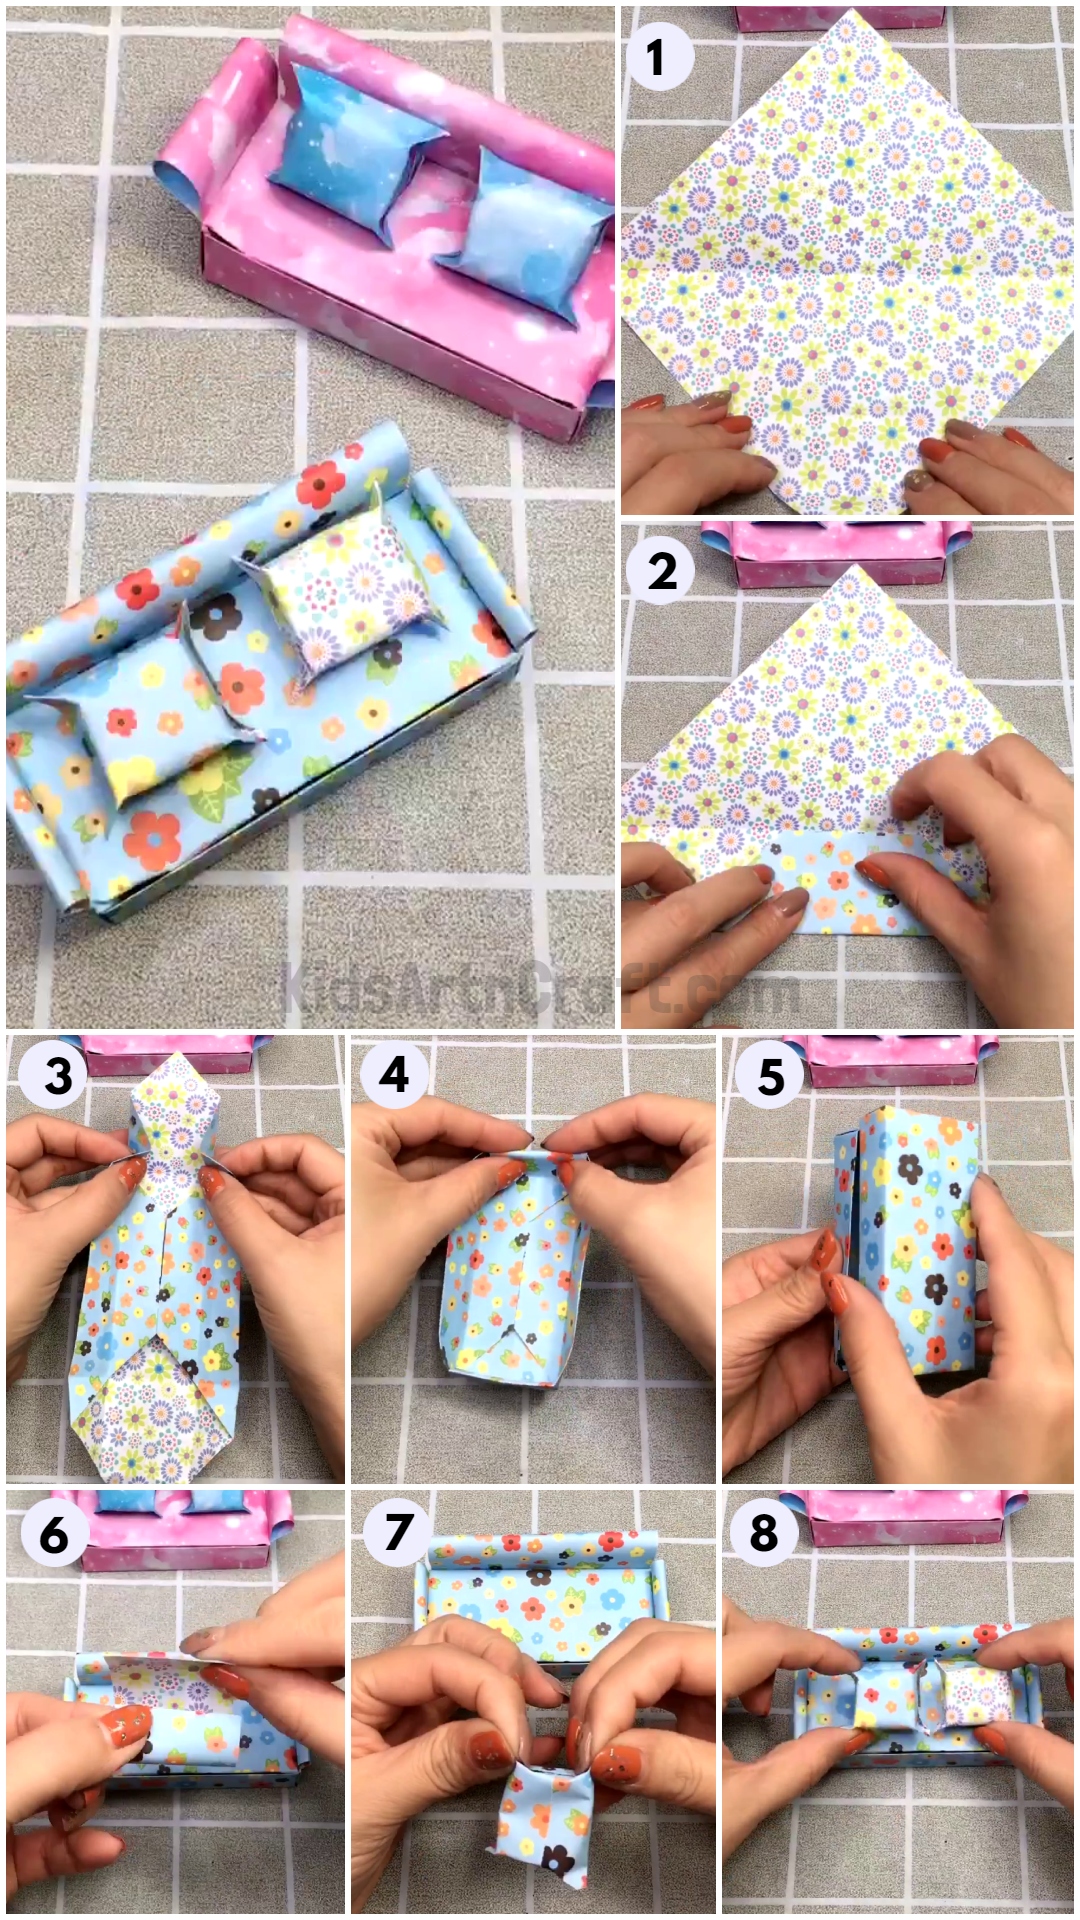
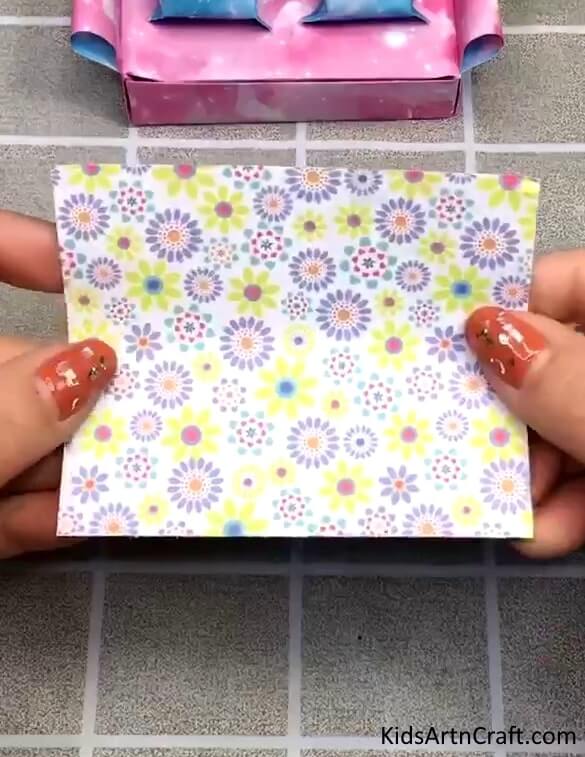
Step 1: Start With Taking A Square Floral Print Paper And Folding It Diagonally
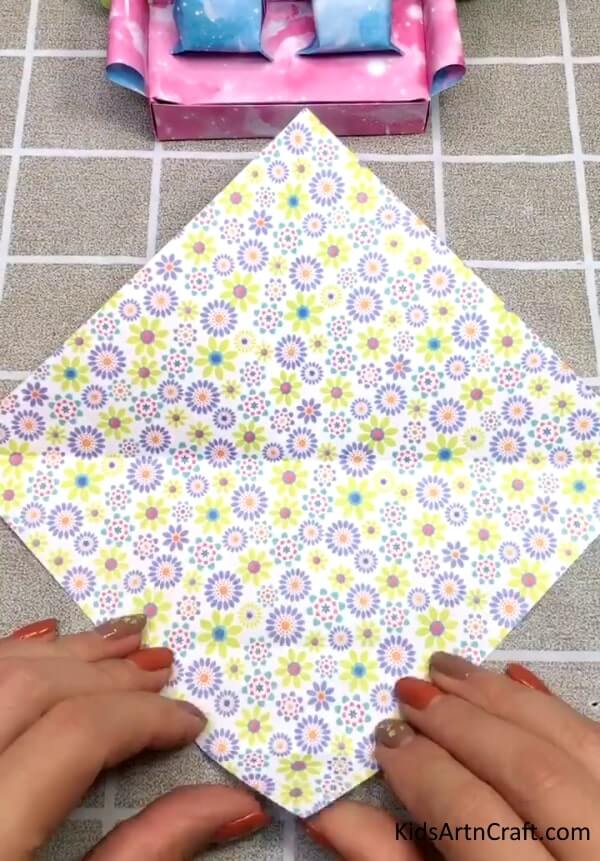

Let’s Start with a square floral print craft paper. Fold the paper in half diagonally to create a triangle and crease it well and then unfold it. You will get a crease in the middle of the paper dividing it into two triangles.
Step 2: Folding The Corners Of The Paper
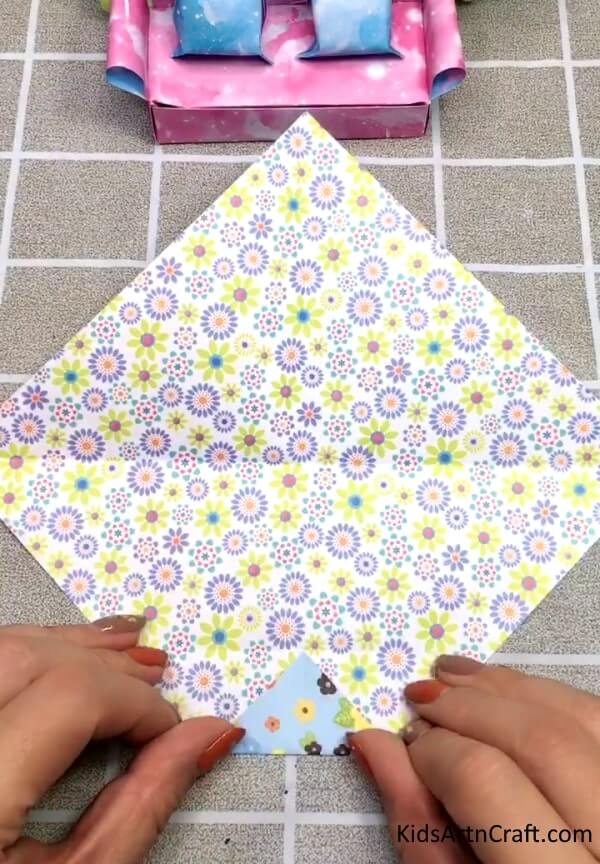

Now fold the bottom edge of the paper upwards making a small triangle and crease it.
Step 3: Folding The Paper Till The Centre Of The Paper


Now without opening the triangle, we made previously, Fold the paper again upwards up to the center of the paper making a trapezium shape and creasing it. Do the same on the opposite side to meet both the edges at the center of the paper.
Step 4: Folding Up The Corner And Creating Volume


Now after folding the sides of the paper, fold the top corner of the paper by pressing it inwards with the help of fingers as shown in the figure. Do the same on the opposite side too.
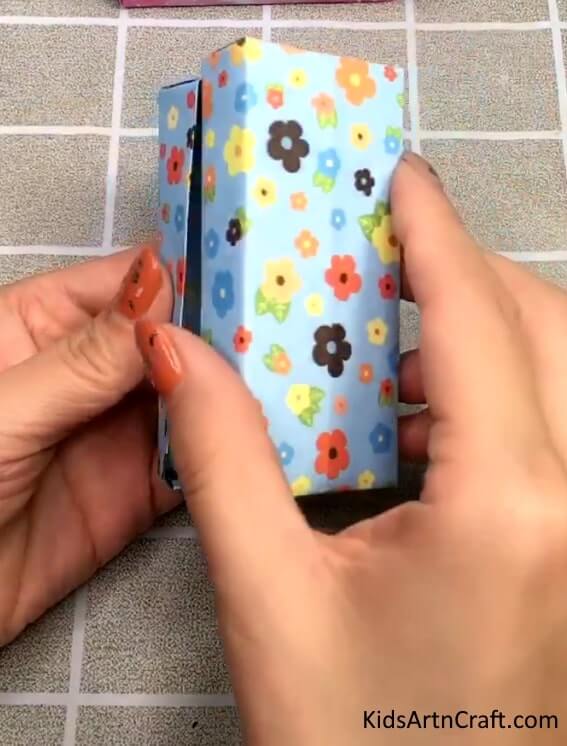
Step 5: Folding In The Corners To Make The Box For Sofa


Now fold up the corners upwards interlocking the paper and making the box shape.
Follow the same steps and make another box similar to this one.
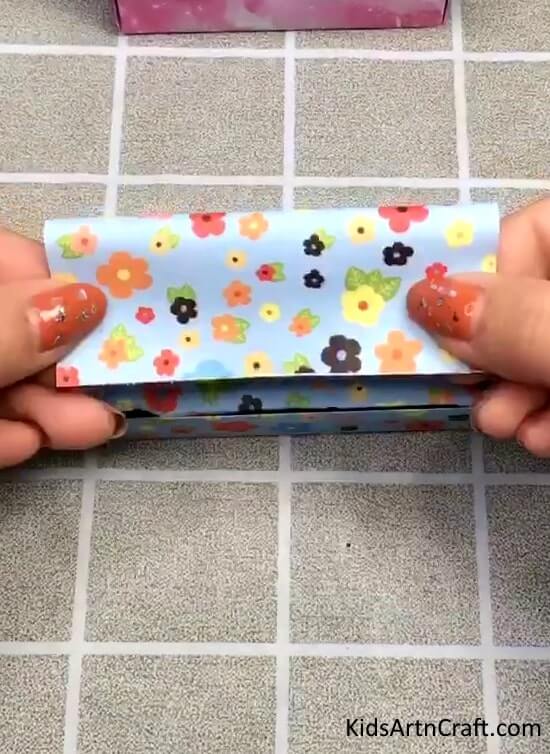
Step 6: Closing The Box Making The Sofa Bed

Now after making the other box shape put it above the previous box as a lid and close it. This will be our sofa bed.
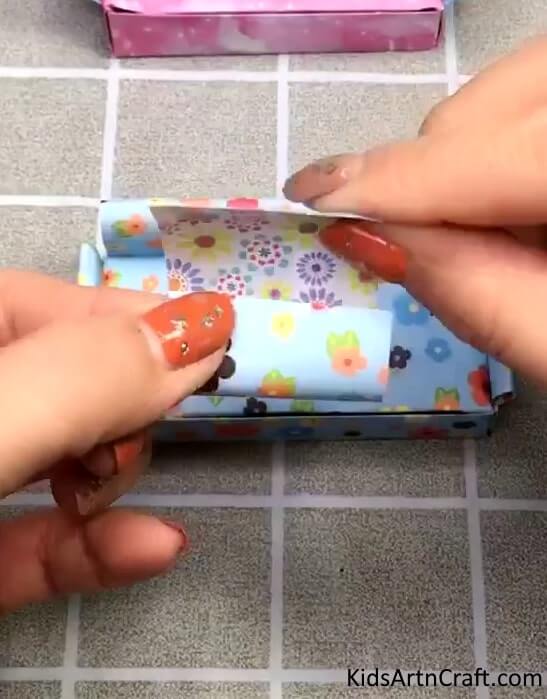
Step 7: Making The Backrest Of The Sofa With Floral Sheet

Now take another square floral sheet and fold it in half.
Step 8: Adding The Backrest And Arm Rest To The Sofa Bed

Now after folding it, don’t crease it make it a bit lose from the top, and tug in the bottom end inside the sofa bed on the back side to make the backrest.
Don’t tug on the whole paper inside. Do the same with a smaller square to make the armrests of the sofa too.
Step 9: Making The Pillows For The Sofa With Floral Paper

Now to make the pillows, take a small square of floral paper and fold it in half.
Step 10: Giving The Pillow Shape And Securing With Glue
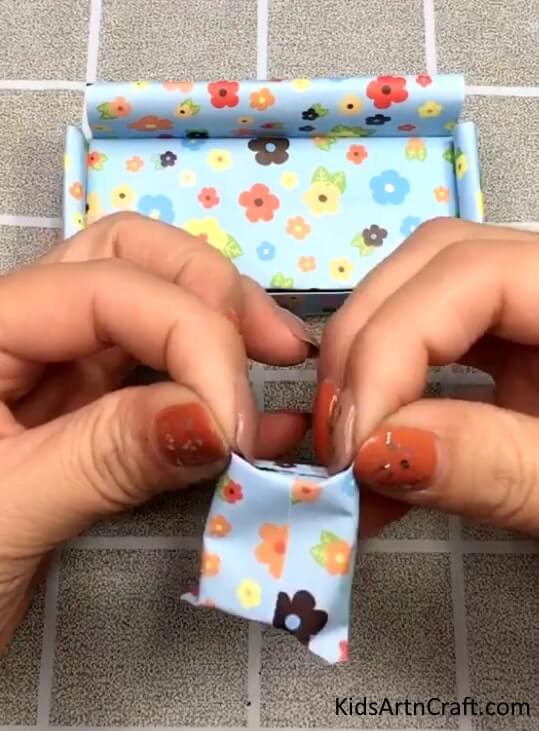

Now without flattening the paper, paste all the corners of the paper making a cube and then with figures add press the corners of the cube.
Make one more pillow following the same steps.
Step 11: Place The Pillows On The Sofa


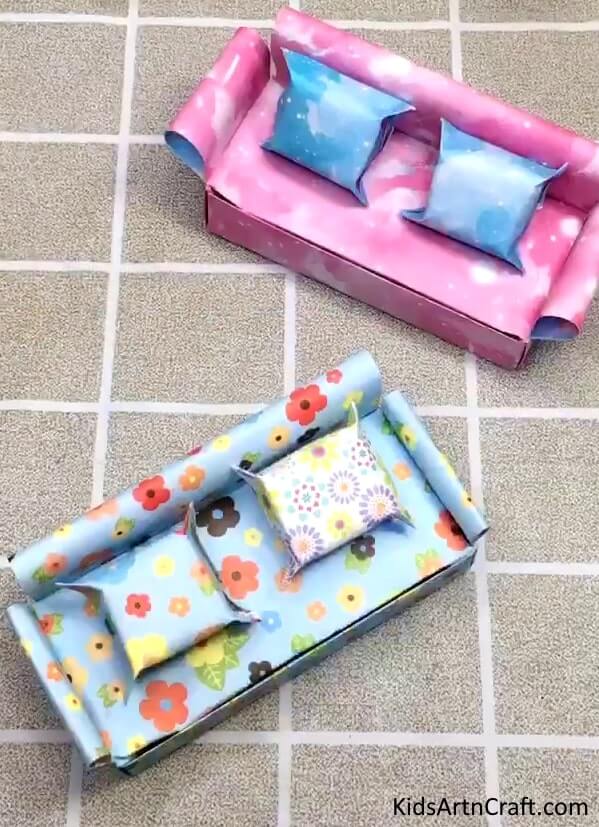
Now after making the pillow they will look something like this. Now place the two little pillows on the sofa we made. And you are done with the cute little sofa set for the dollhouse!
You can also make another sofa set with any other printed paper for the dollhouse!
Final Step: “Diy Origami Sofa For Your Dollhouse: – A Step-by-step Guide For Kids”

And there you have it – your very own origami sofa for your dollhouse! This little piece of furniture may be small in size, but it is really adorable when it comes to creativity and fun. With just a few folds and a little imagination, you’ve created something that’s both practical and playful.
Not only is origami a fun way to spend an afternoon, but it’s also a great way to exercise your brain and develop your fine motor skills. And by sharing your new creation with your dolls, you’re adding a touch of personal flair to your playtime.
So next time you’re looking for a fun and easy DIY project, grab some paper and give origami a try.
FAQs
What kind of materials are used to make dollhouse furniture origami?
Dollhouse furniture origami is usually made of lightweight paper such as origami paper, tissue paper, or printer paper.
What tools are needed to make dollhouse furniture origami?
All you need is a pair of scissors, a ruler, and a pair of tweezers.
What skills do I need to make dollhouse furniture origami?
You don’t need any special skills to make dollhouse furniture origami. All you need is patience and creativity.
How long does it take to make dollhouse furniture origami?
It usually takes about an hour to make one piece of dollhouse furniture origami.
What kind of origami designs can I make for a dollhouse?
You can make a variety of origami designs for a dollhouse, such as chairs, tables, beds, and even miniature people.
Making origami dollhouse furniture with your child can be a fun and educational activity that both of you can enjoy. It’s an easy way to bond with your little one, while teaching them an engaging craft.
Follow us on Youtube for art and craft tutorials and much more.
More Articles from Kids Art & Craft
- World Parrot Day Coloring Pages For Kids – Free Printables
- Poppy Coloring Pages For Kids – Free Printables
- Lion Drawing & Sketches for Kids
- Crumpled Paper Animal Crafts for Kids
- Meditation Coloring Pages For Kids – Free Printables