Cardboard Craft
DIY Elephant Cardboard Craft for Kindergarteners

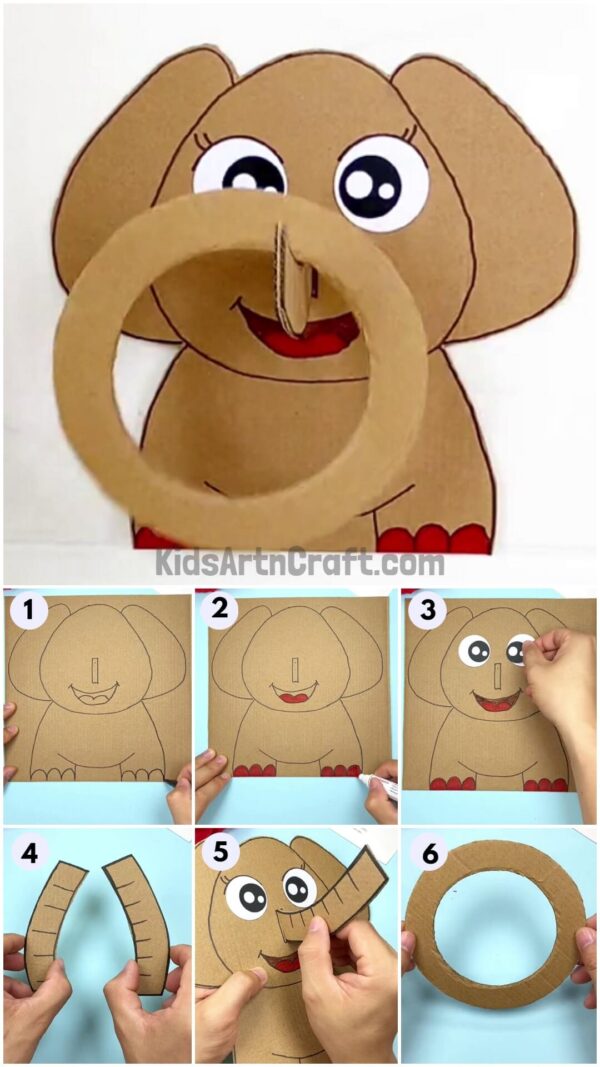
This step-by-step guide shows how to craft a fun cardboard elephant with kindergarteners. With just a few supplies and basic instructions, kids of all ages can make a unique and creative DIY project.
Elephants are loved by kids as they are cute and big which makes them attractive for kids. Why not teach kids about crafting and elephants at a time? This article is a step-by-step guide to crafting DIY Elephant Using Cardboard. This craft can be used as a decoration or a toy to play with. The materials used are easily available and affordable. This fun activity is ideal for preschoolers as it encourages their creative thinking and sharpens their hand-eye coordination. So, grab the materials and start crafting the elephant with us!
Easy To Make Cardboard Elephant Craft Tutorial For Kindergartners

Read more: DIY Cardboard Tube Owl Craft
Materials Required
- Cardboard
- Black & Red Marker
- Scissors
- Glue
Procedure
Step 1: Drawing An Elephant On Cardboard
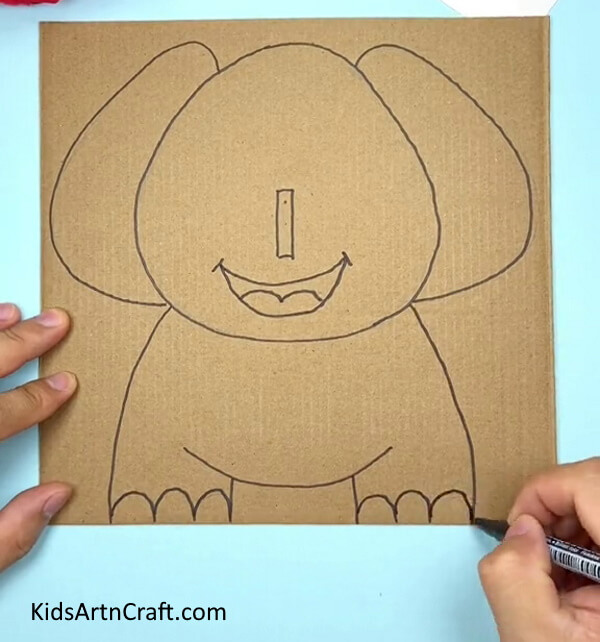

Let’s begin this craft by drawing an elephant on cardboard using a black pen.
Step 2: Coloring Tongue And Nails
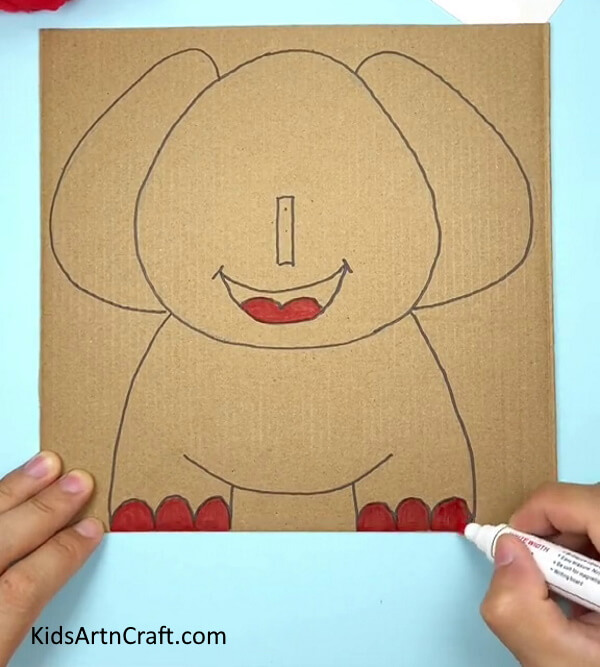

Color the tongue and nails of the elephant red using a red marker. Also, color the mouth brown.
Step 3: Pasting White Circles To Make Eyes
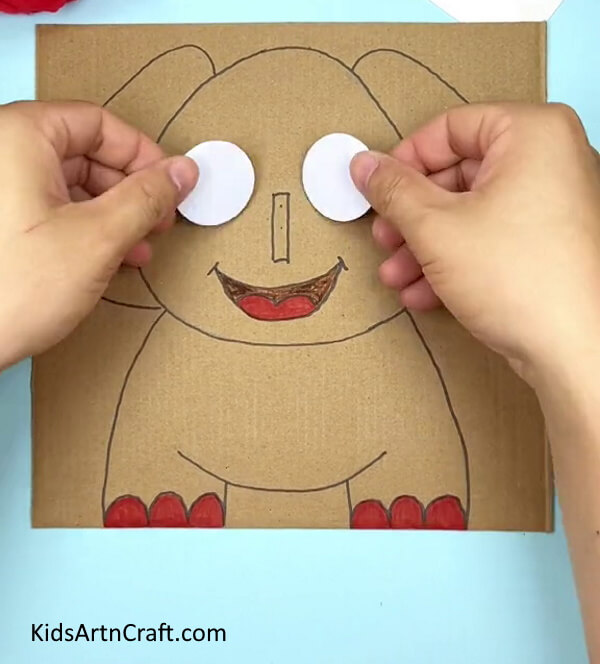

Cut two circles out of white paper and paste them on the face of the elephant to make the eyes of the elephant.
Step 4: Pasting Black Circles On Eyes
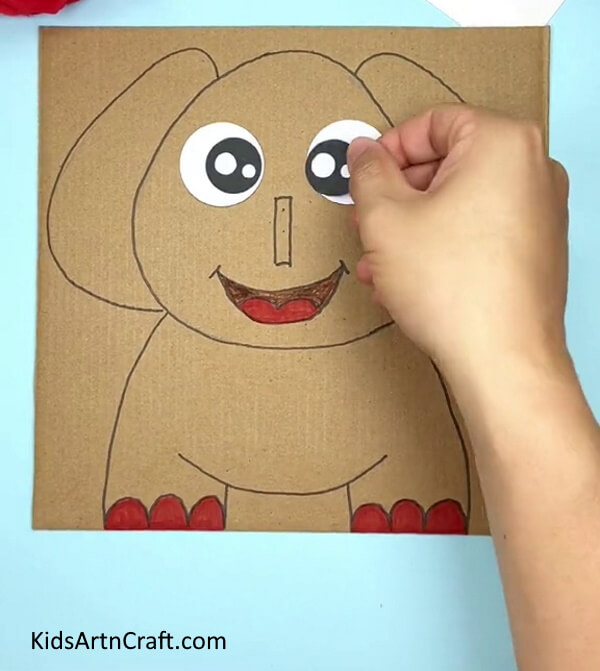

To make the googly eyes of the elephant, paste a smaller black circle on each eye and paste two small circles on each black circle as shown in the above image. Cut the elephant out of the cardboard using scissors.
Step 5: Cutting Trunk Out Of Cardboard
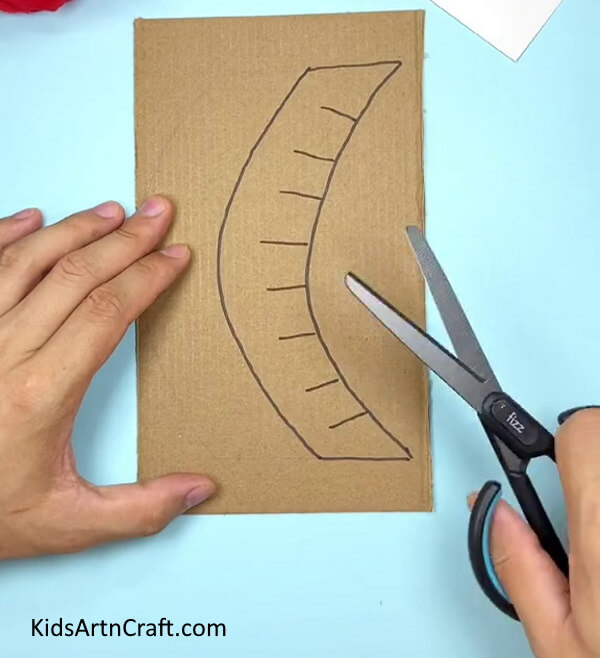

Once the elephant’s body is ready, make a trunk shape on cardboard and add details to it using a black marker. Cut the trunk out of the cardboard using a pair of scissors.
Step 6: Making Another Trunk
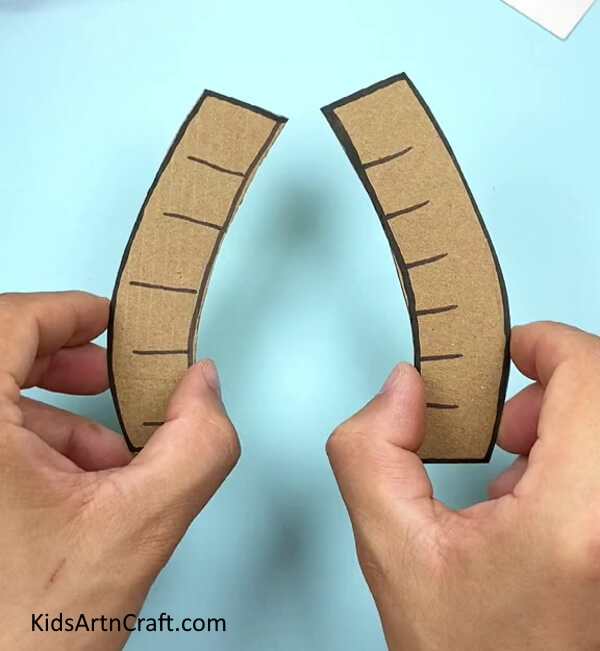

Similarly, make another trunk of the elephant.
Step 7: Pasting Both Trunks Together
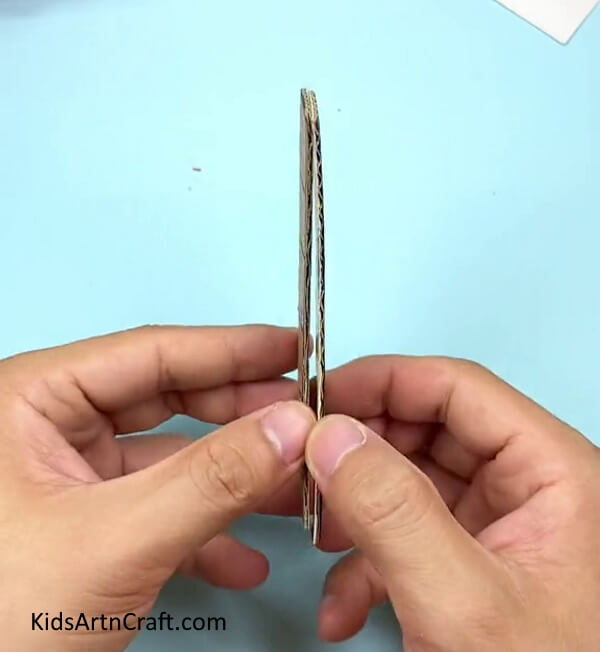

Paste both the trunks opposing the fronts using glue.
Step 8: Inserting Trunk In Rectangle Nose
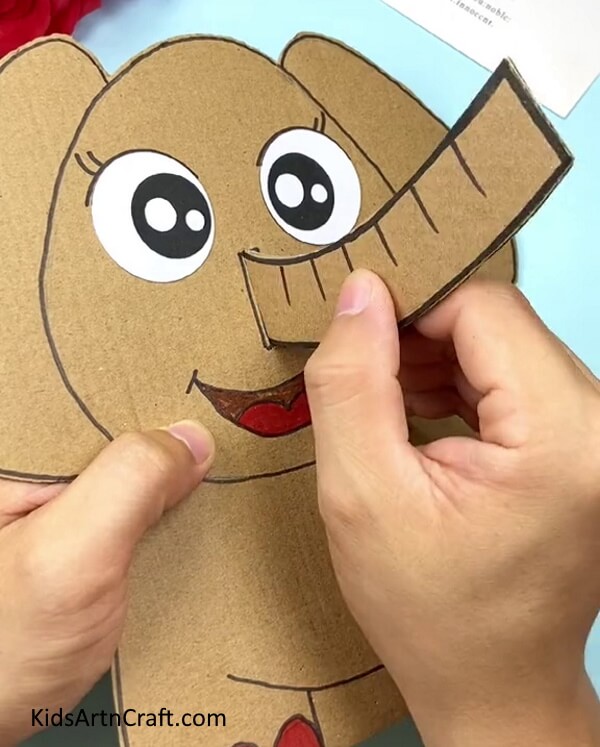

Now, cut the rectangle nose of the elephant. Insert the trunk in the rectangle nose.
Step 9: Cutting a Cardboard Ring
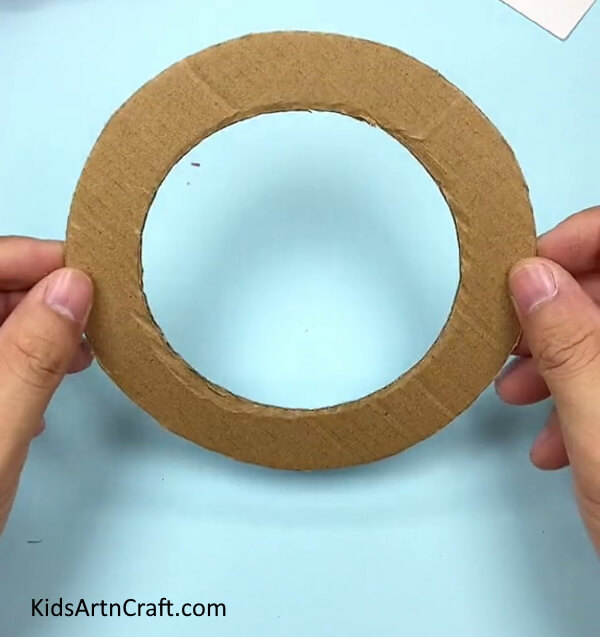

Next, cut a ring out of the cardboard.
Cardboard Elephant Ring Toss Game Is Ready To Play!
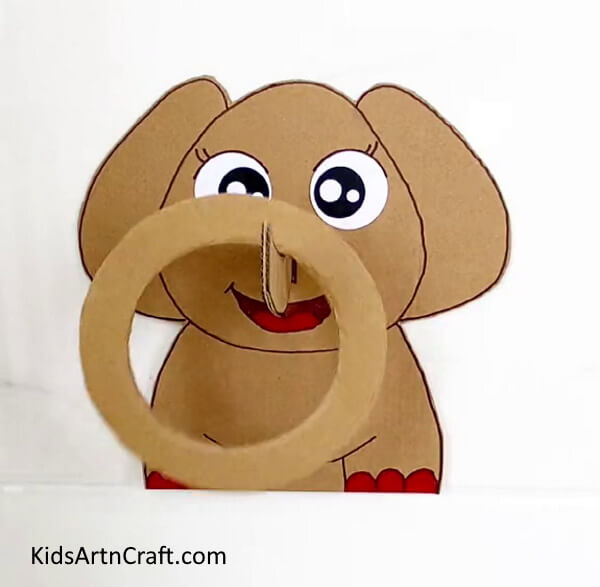

Hang the ring on the trunk of the elephant. And, that’s it you’re done with the elephant craft or cardboard elephant ring toss game!
This craft is perfect for kindergartners or young kids as this will teach them about the elephant’s anatomy and features. Also, it can be used as a ring toss game or you can hang it on a wall. Kiddos can explore their creativity and imagination while crafting this. Have Fun While Learning!
Follow us on Youtube for art and craft tutorials and much more.
More Articles from Kids Art & Craft
- How to Make Cardboard Ice Cream Craft in Easy Steps
- Easy Cardboard Tube Tiger For Kids
- DIY Cardboard Tube Owl Craft
- Easy to Make Snowman by Bottle Craft Tutorial
- How to Make Bubble Wrap Corn Craft Easy Tutorial