Recycled Crafts

How to Make Butterfly with Tissue Roll Step by Step Instructions Easy Tutorial

Published on

Beautiful things need even more beautiful minds for their stupendous interpretation. Use your amazing brain and create enhance the beauty of the creation of God by interpreting it on paper. Let us understand how to make butterflies with a tissue roll with a step-by-step, easy tutorial.

How to Make a Butterfly with a Tissue Roll

Required Materials For Making a Butterfly:-

  • An A4-sized sheet of your favorite color.
  • Pencil
  • A pair of scissors
  • Polka dots of various colors
  • Pencil
  • A tissue roll

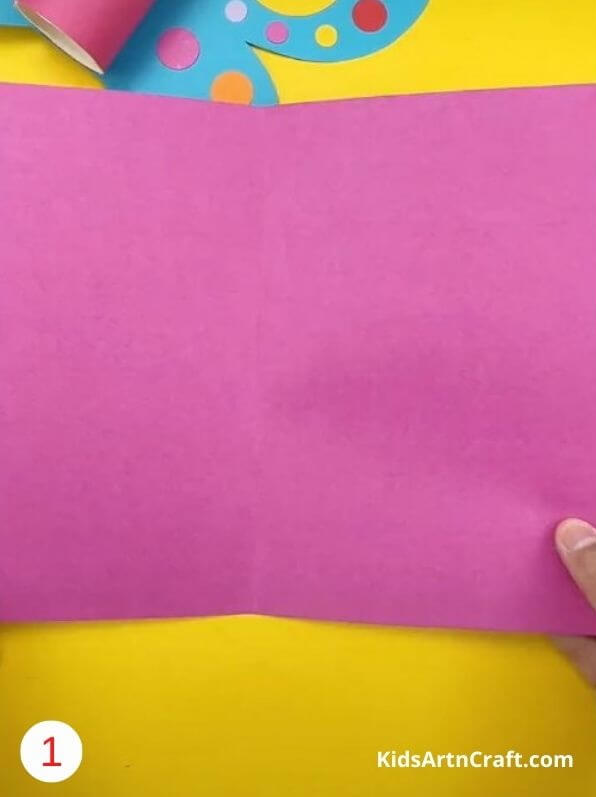
Take an A4-sized sheet of your favorite color, preferably a light and bright color. We wouldn’t want our butterfly to look dull after all!
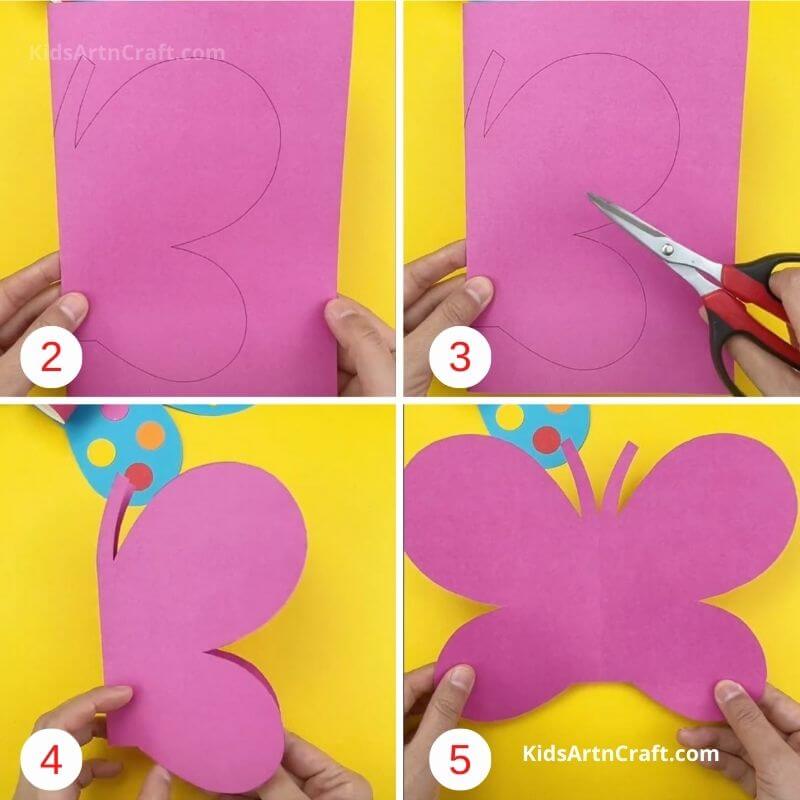
Draw the shape of a wing on the folded portion.

Take its cut out.

Remove the extra portion and open it to see a symmetrical shape formed.

Don’t forget to add its antennas.
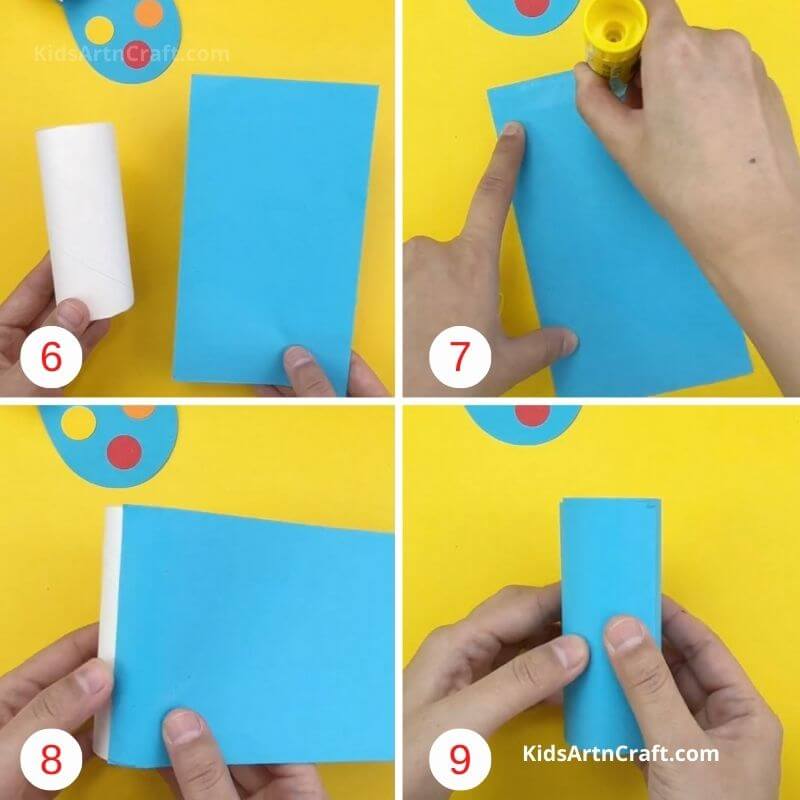
 

Bring in the chief ingredient, i.e., the tissue roll.

Wrap it with a darker color around its circumference. Make sure you cover all of it.
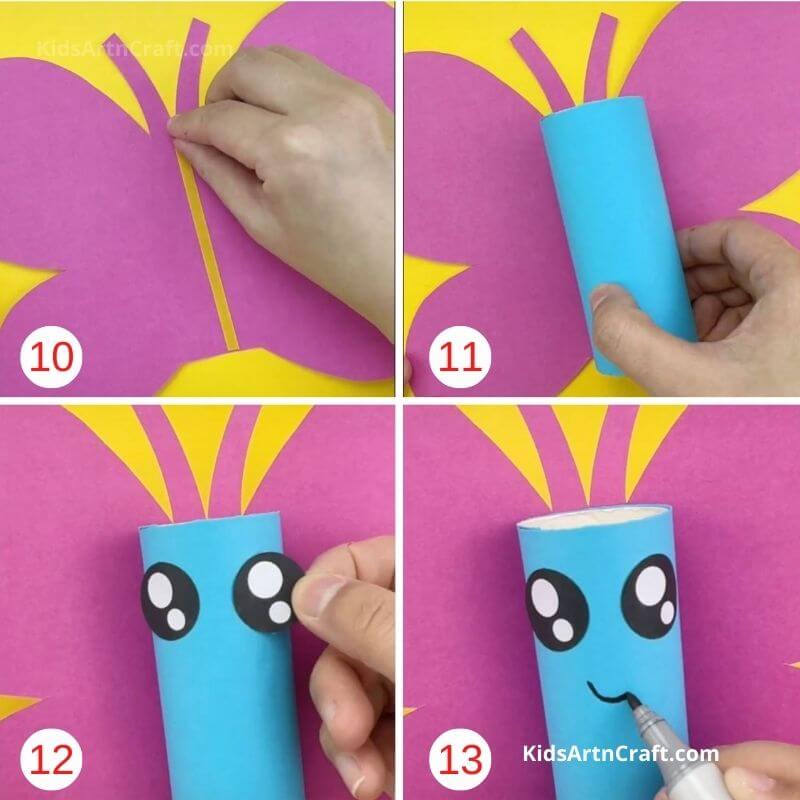
Add a thin strip of double-sided tape on the line of symmetry.

Paste the roll you just prepared carefully on it.

Paste a set of pretty eyes on plain black and white paper.

Don’t forget to draw a cute little smile adorning its face.
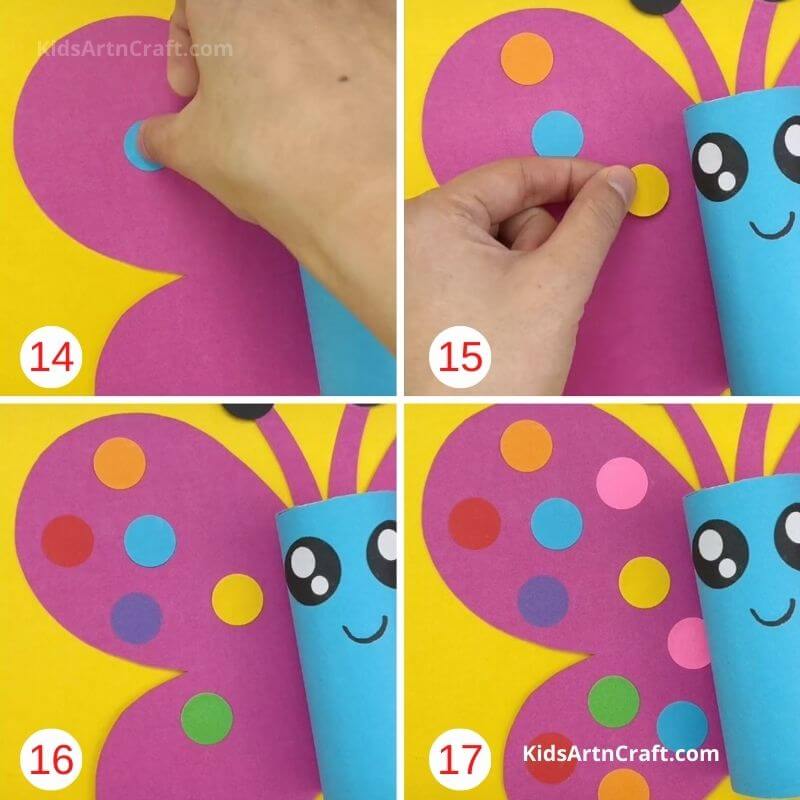
Use different colored contrasting sheets to extract polka dots.

Paste them at equal distances.

Cover the part completely with random color polkas.
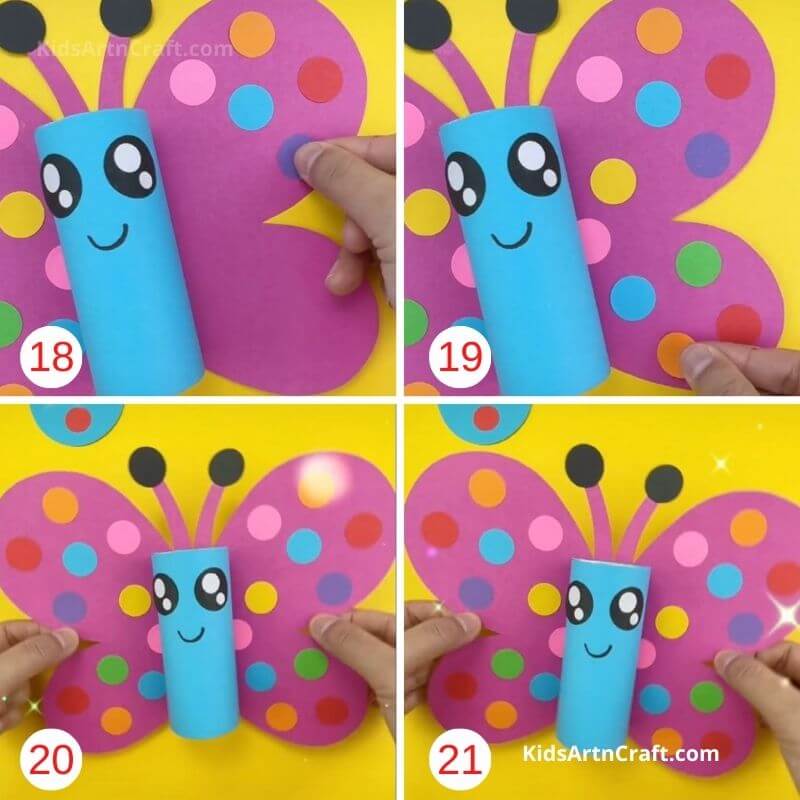
Repeat the same on the other side.

Paste the colors randomly to add vividness to it.

Paste two black polkas on top of the antennas to complete its look.
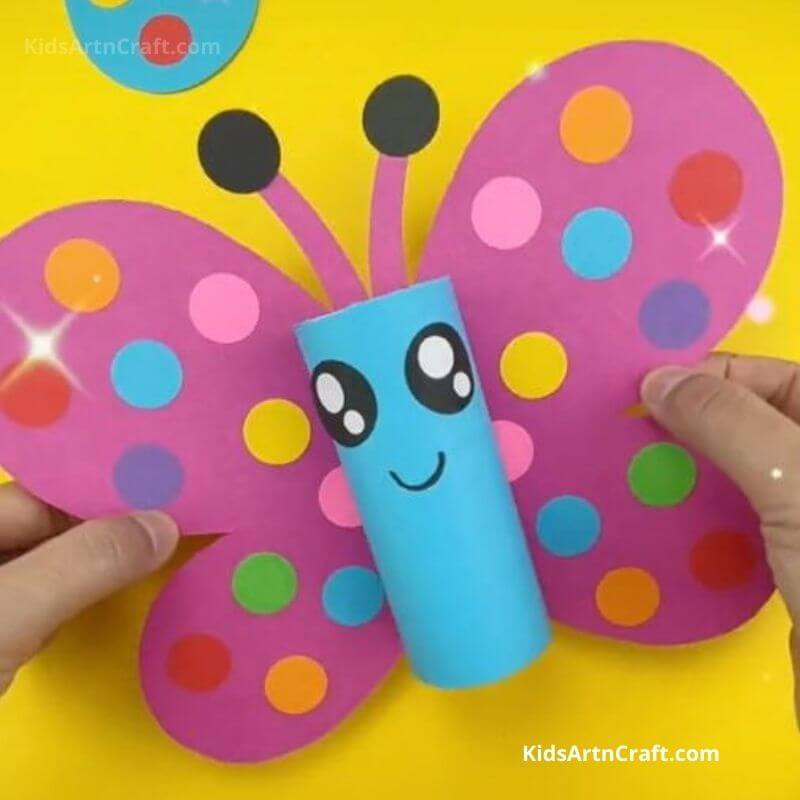
Your prettiest insect is ready to deck up your otherwise monotonous walls and interiors! You can create multiple of them of different sizes and colors, and decorate your closet and give it a delightful look. Easy as it looks, it’s even easier to make it come alive. This art piece will not only enrich the beauty of the beholder but will also make the fact right- not all easy things are ordinary.

Step-by-Step Paper Craft Tutorial for Kids

Learn how to make a cute butterfly with a tissue roll in this easy step-by-step craft tutorial. This fun DIY paper craft is perfect for kids, school projects, and recycling activities. Follow the simple instructions to create a colorful butterfly using basic craft supplies at home.

Educational Benefits of Making a Tissue Roll Butterfly Craft

Creating butterfly crafts using recycled tissue rolls is a wonderful hands-on activity for children. This simple DIY craft helps improve fine motor skills, creativity, hand-eye coordination, and concentration. Kids learn how to cut, paint, glue, and decorate while turning waste materials into something beautiful and colorful.

Butterfly crafts are also excellent for encouraging imaginative play and nature learning. Parents and teachers can use this activity to teach children about butterflies, insects, recycling, colors, and symmetry in a fun and interactive way. Preschoolers and kindergarten kids especially enjoy decorating butterfly wings with bright patterns and creative designs.

This recycled craft activity is perfect for classroom art sessions, summer camps, homeschooling, spring crafts, and weekend DIY projects. It is budget-friendly, eco-friendly, and enjoyable for children of different age groups.

Why Parents & Teachers Love This Butterfly Craft

  • Uses easy-to-find recycled materials
  • Encourages eco-friendly crafting habits
  • Improves creativity and motor development
  • Simple step-by-step process for beginners
  • Perfect for preschool and kindergarten activities
  • Fun spring and nature-themed craft idea
  • Helps children learn through hands-on play

Frequently Asked Questions (FAQs)

Q1. What age group is this butterfly tissue roll craft suitable for?

Answer: This butterfly craft is ideal for preschoolers, kindergarten kids, and young children aged 4–10 years. Younger kids may need adult supervision while cutting or gluing.

Q2. Can I use toilet paper rolls instead of tissue rolls?

Answer: Yes, toilet paper rolls and tissue paper rolls both work perfectly for this butterfly craft activity.

Q3. What can I use to decorate the butterfly wings?

Answer: Children can decorate the wings using paint, sketch pens, glitter, stickers, beads, colored paper, foam sheets, or sequins.

Q4. Is this butterfly craft good for school projects?

Answer: Yes, this is a great recycled craft idea for school assignments, classroom activities, spring decorations, and nature-themed projects.

Q5. How does this craft help children learn?

Answer: This activity improves creativity, focus, color recognition, hand coordination, and problem-solving skills while encouraging imaginative thinking.

Safety Tips for Kids’ Craft Activities

  • Use child-safe scissors and non-toxic glue
  • Adult supervision is recommended for younger children
  • Cover the table with a newspaper before painting
  • Allow painted parts to dry completely before assembling
  • Wash your hands after using paints or glue

This easy butterfly tissue roll craft is a fun and creative recycling activity for kids. With simple materials and colorful decorations, children can create beautiful butterflies while improving important learning skills. Whether used at home, in classrooms, or during craft sessions, this DIY butterfly project offers a perfect combination of creativity, learning, and eco-friendly fun. Keep exploring more exciting recycled crafts and art activities for kids for endless creative adventures.

Keep creating and learning with us! Get fun craft ideas and DIY inspiration on Telegram group, YouTube & Facebook
Reviewed By Jatin
Read More:
  1. How to Make Bubble Wrap Dinosaur – Step-by-Step Instructions
  2. How to Make a Paper Butterfly Card for Sister: Step-by-Step Instructions, Easy Tutorial
  3. How to Make a Paper Butterfly Step-by-Step Instructions Easy Tutorial
  4. How To Make An Origami Oyster With Kids
Click to comment

Exit mobile version