Drawing
Ice Cream Drawing clay Art Tutorial For Summer

Learn to make pretty and tempting ice cream craft artwork with us through this easy step-by-step tutorial we brought for you!
Well, well, hey there! It’s something frosty and sweet today! Ice creams! Yes, you heard it right! This step-by-step tutorial is all about making an ice cream artwork craft! This craft is best to make on the hot summer afternoon days to dive into the sweet and icy imagination of yours! Also, this craft is full of fun learning skills that your kiddos will love to get involved in! Unleash the creativity and grab the materials to have an icy summer afternoon with us!
Easy To Make Ice Cream Drawing Art

Read More: Amazing Tree Drawing From Hand Outline Step by Step Tutorial
Materials Required
- White Circular Paper Sheet
- Multicolor Crayon Pen
- Colored Clay
- Sketch Pens (Black, Blue, Pink, And Red)
Procedure
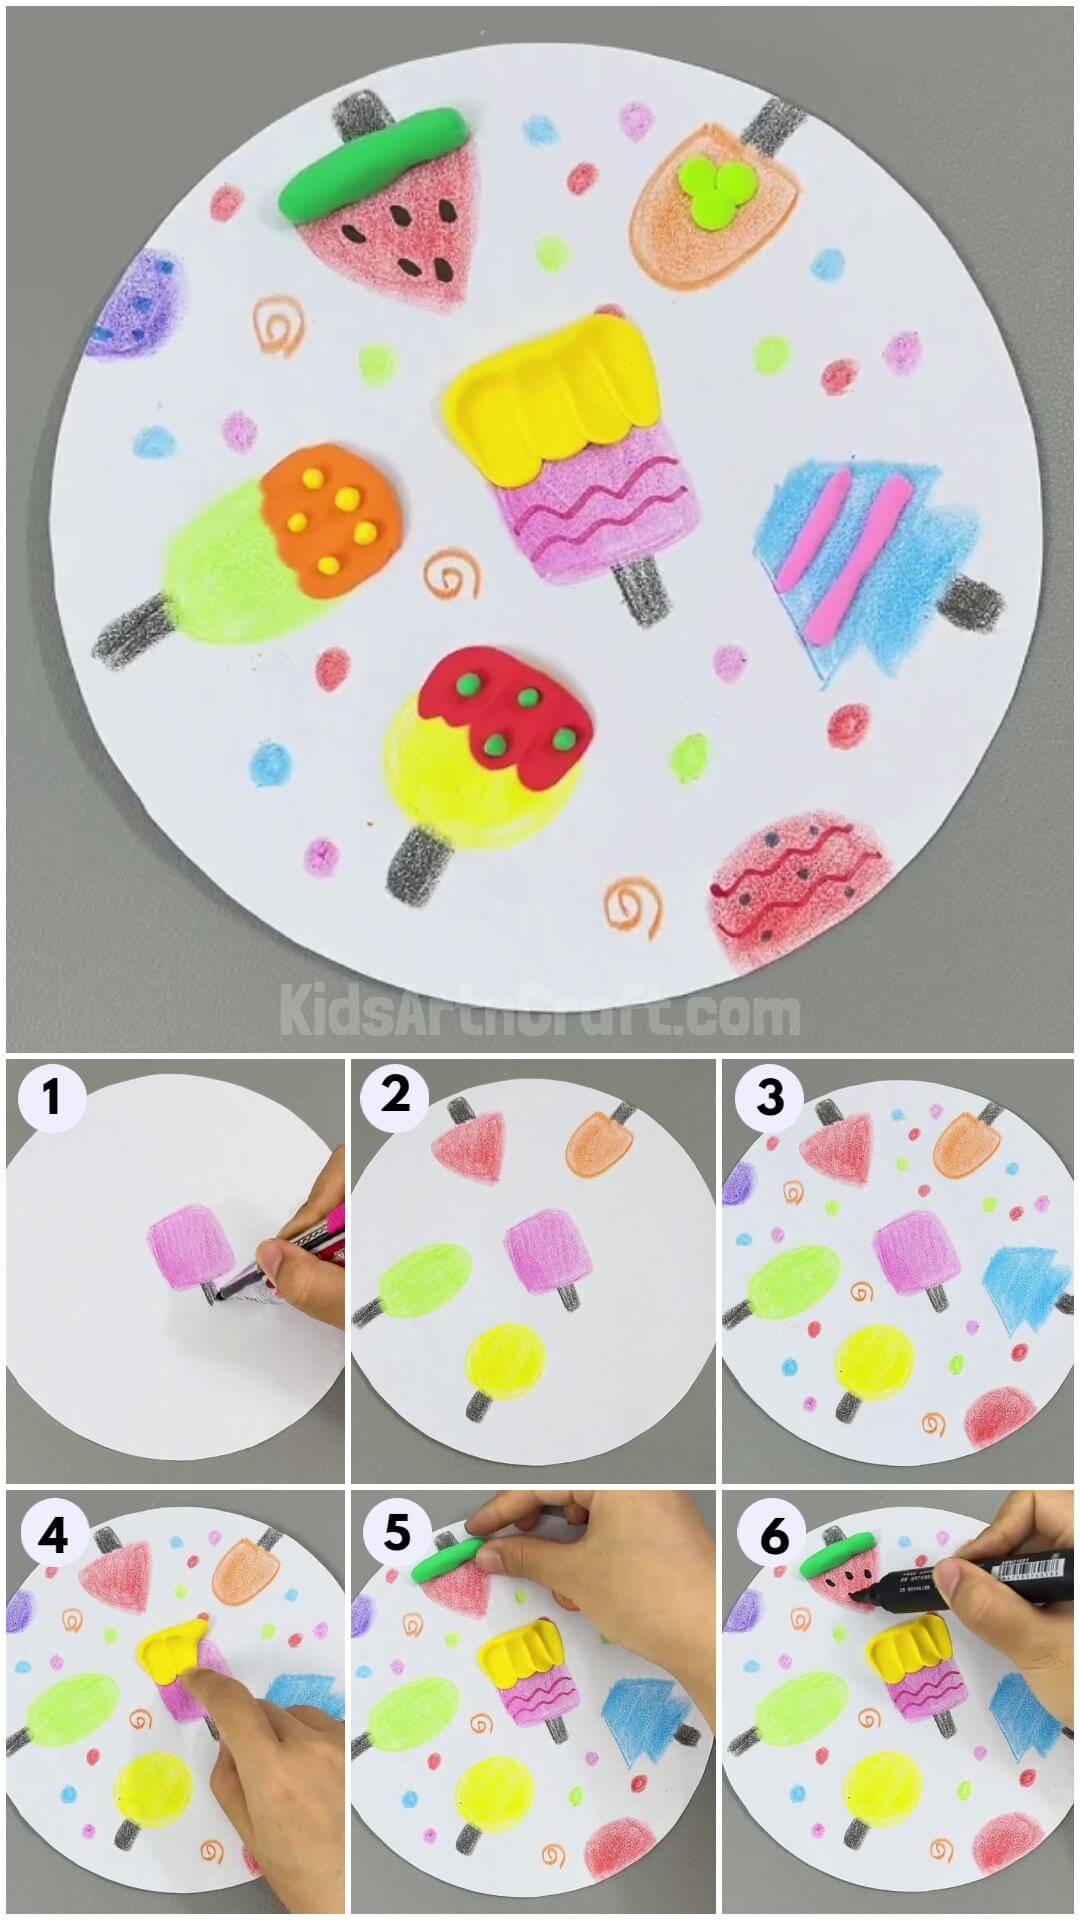
Step 1: Making A Pink Ice Cream
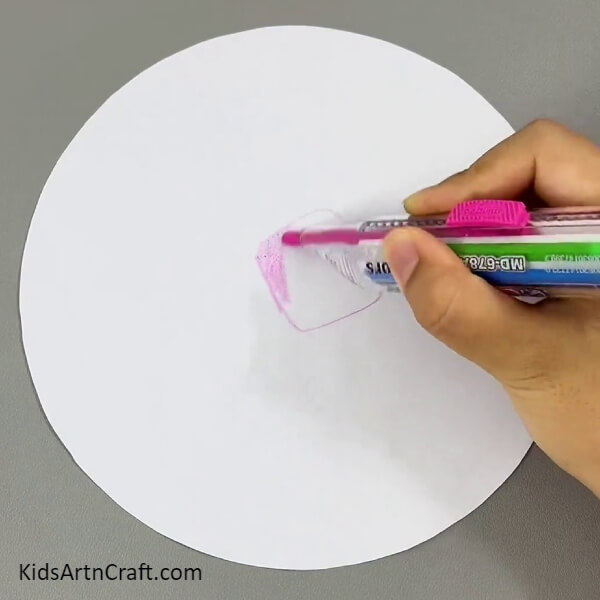

To begin this craft, take a white circular paper sheet as the base of the craft artwork and a multicolor crayon pen. Using the pink crayon in the crayon draw a rounded square ice cream a little tilted over the base and color it out with the same.
Step 2: Making The Ice Cream Stick
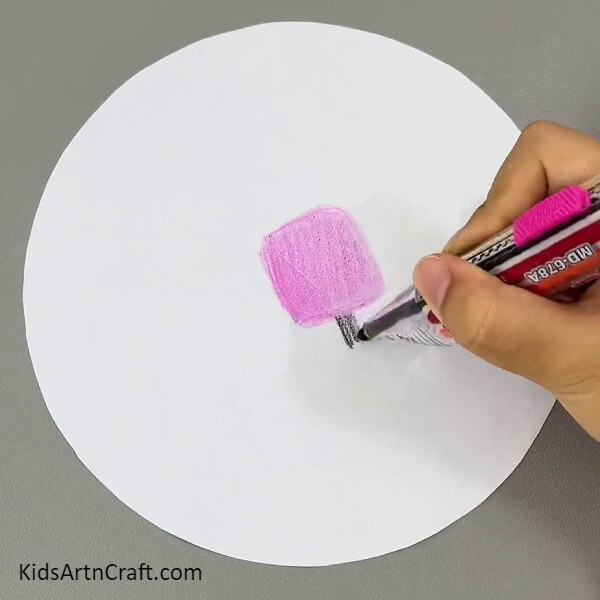
Using the black crayon, make a small black stick beneath the pink ice cream and color it out with the same.
Step 3: Making A Red Ice Cream

Using the red crayon, make a triangular ice cream over the left top of the base and color it out.
Step 4: Making More Ice Creams
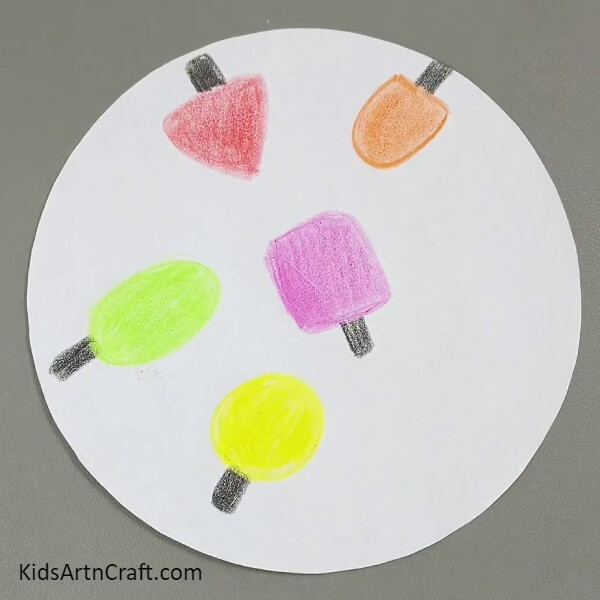
Using green, yellow, and orange crayon make oval, circle, and bar-shaped ice creams respectively as shown in the image and using the black crayon, make their sticks and color them out.
Step 5: Decorating The Base
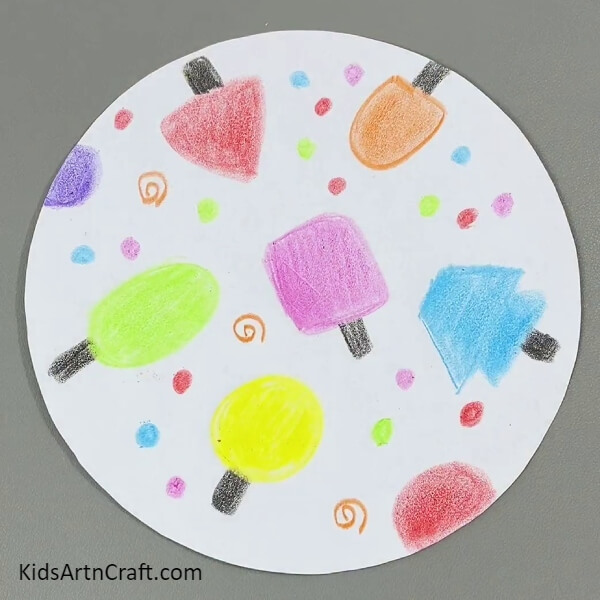
Using the red, blue, pink, green crayons make small dots randomly over the white base. Using the orange crayon make small spirals among the dots over the base. And using a purple and red crayon make half ice creams on the boundary of the base. Then, using a blue crayon, make a double trapezium-shaped ice cream on the mid-right and color it out as well. At last, make its stick from the black crayon and color it out.
Step 6: Taking Out A Piece Of Yellow Clay
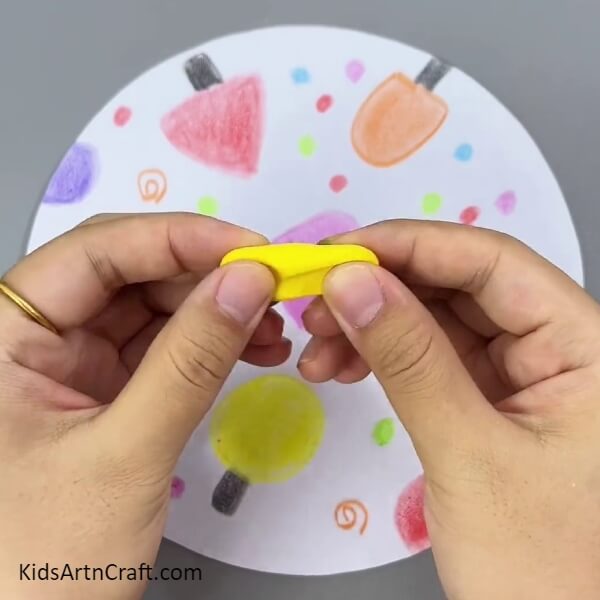
Take yellow clay and stretch it to take out a piece of it.
Step 7: Making A Clay Roll
Dough the yellow clay to make long roll of it and place it over the pink ice cream top.
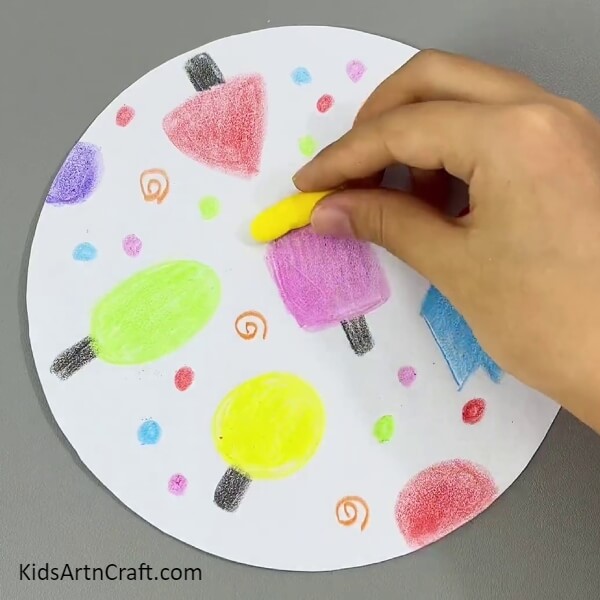
Step 8: Icing The Ice Cream
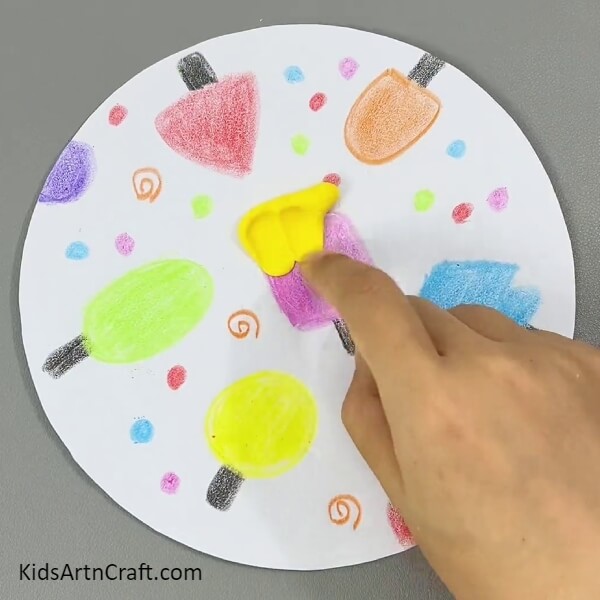
Place your finger on the clay side and drag it below to make it icing over the ice cream and do it one by one till the whole clay roll is dragged over the ice cream.
Step 9: Decorating The Pink Ice Cream
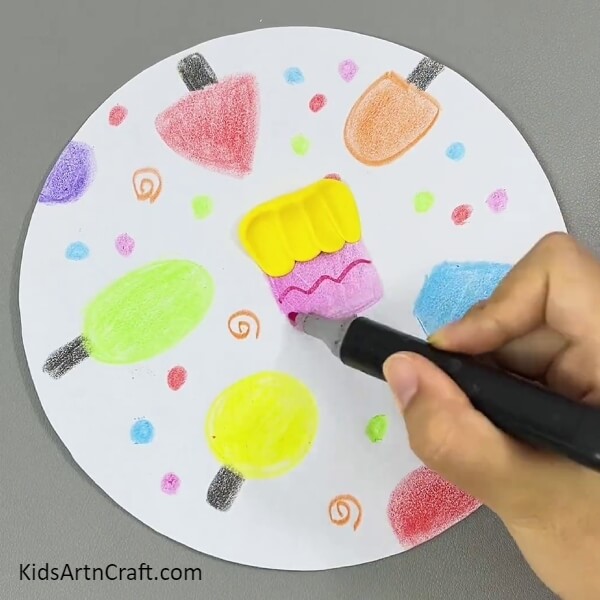
Using a pink sketch pen, make 2 wavy lines below the ice cream horizontally to decorate it.
Step 10: Making A Green Clay Roll
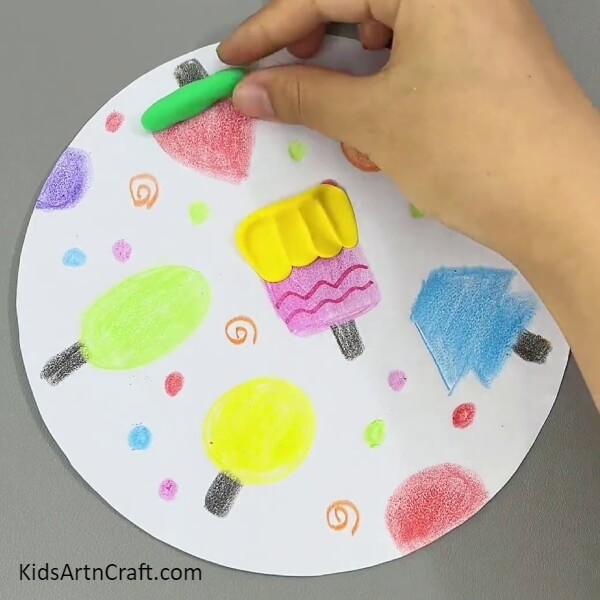
Following the same as we made the yellow clay roll, make a green one and place it over the top of red ice cream.
Step 11: Decorating The Red Ice Cream
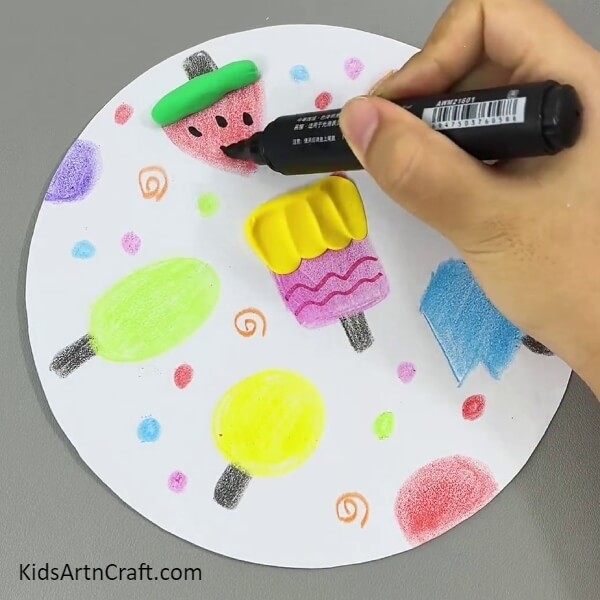
Using a black sketch pen, make the watermelon seeds over the red ice cream to make it look like watermelon ice cream.
Your Amazing Ice Cream Artwork Craft Is Ready!
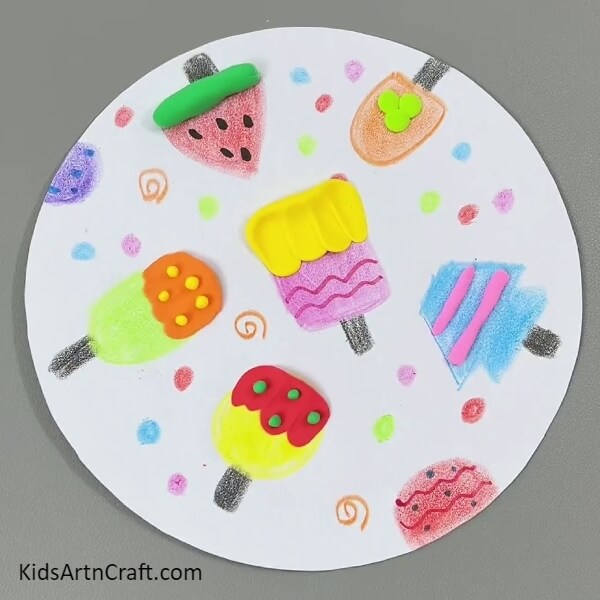
Take pink clay and make 2 thin clay rolls of it and place them over the big trapezium over blue ice cream horizontally and apply some pressure to make it stick to it. Make 3 small rounds of lime clay and place them close to each other over the orange ice cream and press to stick them.Make the icing for the green and yellow ice cream of orange and red clay respectively as you made for the pink one and make some small rounds of yellow and green clay to decorate the icing as shown in the image.
Using a red sketch pen, make wavy horizontal lines over the red ice cream at the corner and using black sketch pen make some dots over the ice cream as shown in the image. Using blue sketch pen, make dots over the purple ice cream to decorate it. And that’s it!
Woohoo! Your amazing ice cream craft artwork is ready in no time!
Ahh, makes me crave ice cream! You can look at it the whole day, it won’t melt! Haha! Hang it over your room’s wall over even in the kitchen it will thrive either place! Flaunt your crafting skills in front of your friends and family by teaching them to make it too and have an icy afternoon all together! You can even customize the ice creams of various flavors to your liking! Your imagination is the limit to it!
We hope you liked the article and the craft idea! Do give it a like and tell your crafting journey to us in the comments section! We would love to hear from you!
Follow us on Youtube for art and craft tutorials and much more.
More Articles from Kids Art & Craft
- Beautiful Tree Painting Using Leaf Impression Step-by-step Tutorial For Kids
- Easy Apple Tree Craft Using Paper Step-by-step Tutorial
- How to Make Apple Tree Craft Tutorial For Beginners
- DIY Paper Tree Crafts for Kids Easy Tutorial
- How to Make Ladybug Crafts tutorial for Kids