Paper Crafts
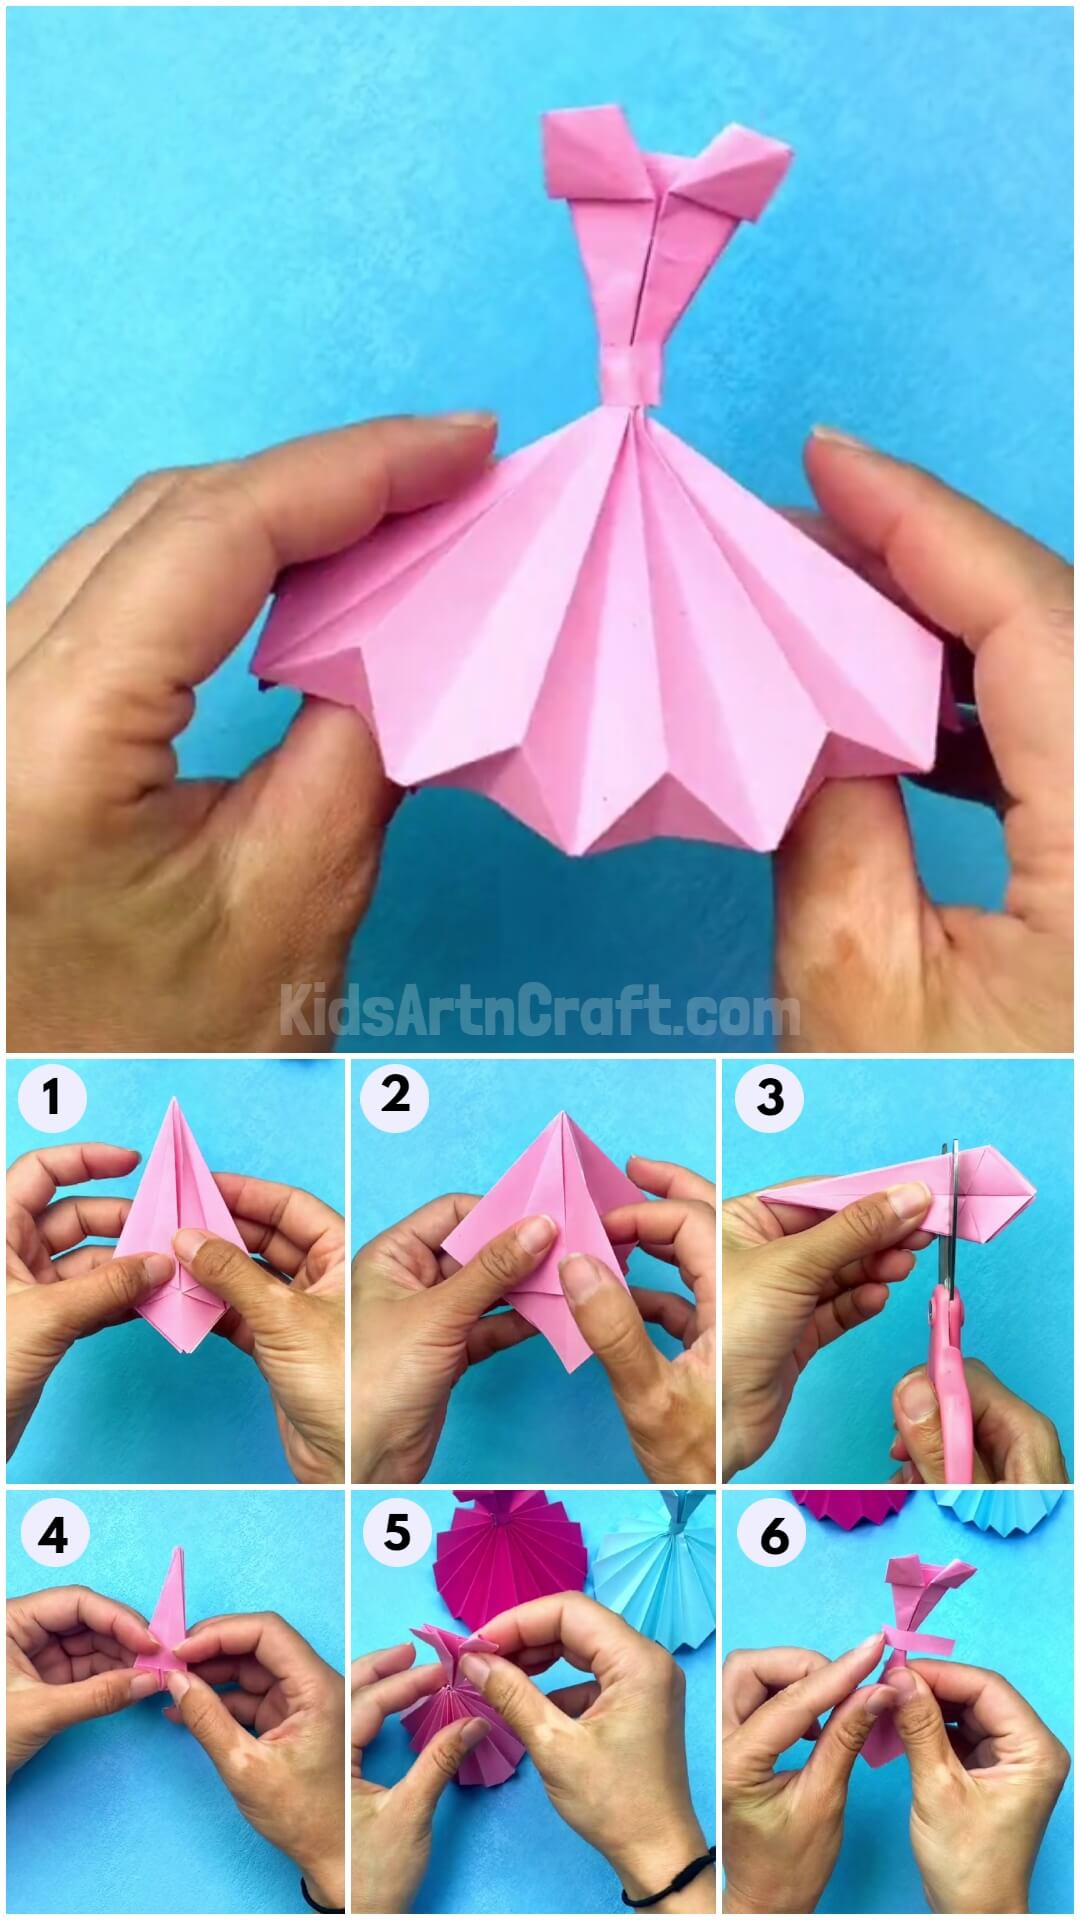
Origami Ball Gown Craft Tutorial For Kids

Dive into your fairytale world by creating the pretty ball gown of your dreams! This step-by-step tutorial is on an origami ball gown craft!
Do you dream of a pretty ball gown in your wardrobe collection? Then this might be a perfect alternative for you! Though this ball gown won’t be a part of your wardrobe collection, it can be a part of your craft collection! This step-by-step tutorial will serve as a guide on each and every step of this origami ball gown paper craft making! The results will definitely stun you! Open the doors of your imagination and creativity and grab the easiest materials for an origami craft to make this with us!
DIY Origami Ball Gown Craft

Read More: Easy Origami Shirt and Bow Paper Bag Craft At Home
Materials Required
- Pink Origami Paper Sheets (Various Sizes)
- Scissors
- Glue
Procedure
Step 1: Making Creases On A Pink Origami Paper
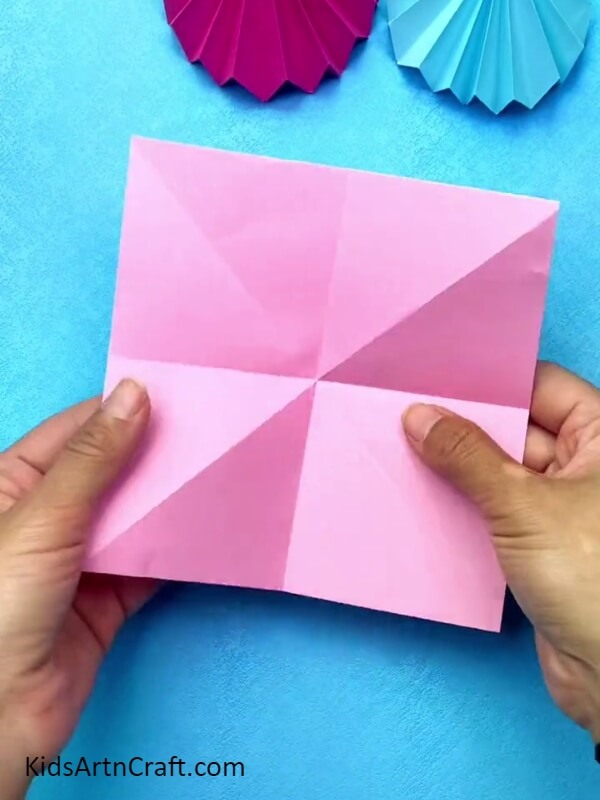

Let’s begin this craft by taking green origami paper, folding and creasing the paper in diagonal halves then turning the paper to the other side and again folding and creasing the paper into halves.
Step 2: Forming A Diamond Shape
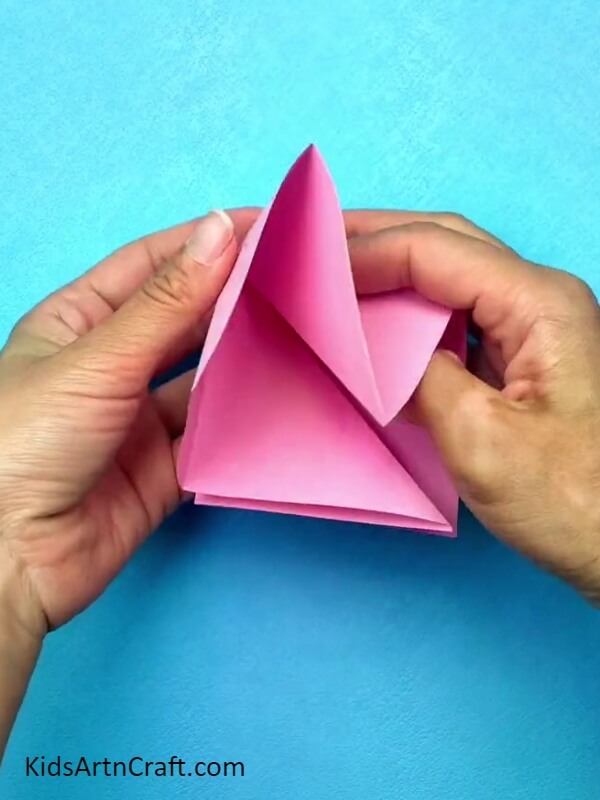
From the horizontal diagonal crease push the ends of the crease inwards to form a diamond shape and overlap the paper to the diamond.
Step 3: Making Triangle Creases
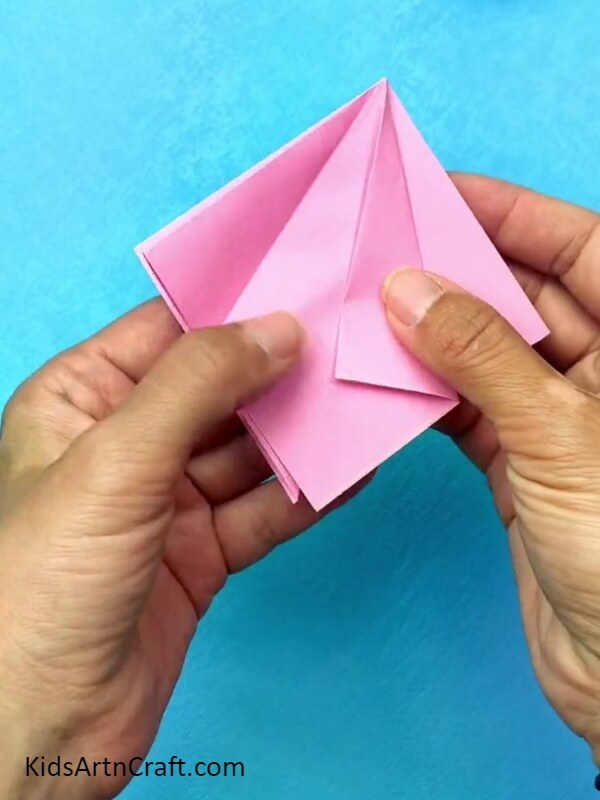
From the left and right folded sides of the diamond open fold the paper to the middle crease to form a triangle over it. Flip to the other side and make a triangle over there too. Now, unfold all 4 triangle creases to again form a diamond shape.
Step 4: Forming A Kite Shape

Open up the right side of the diamond fold and push in the paper along the triangle crease then fold the formed triangle from the side along the middle (diamond) crease. Do the same from the left side too to see a kite shape formed.
Flip the figure over and repeat this step again to form a kite shape over that side too and overlap the previous one. You will see zig-zag papers on each opening of the figure.
Step 5: Folding The Sides Of The Kite Shape
Fold the sides of the kite shape to the middle crease.
Step 6: Making Smaller Kite Shape
Unfold the recent folds and open up the sides and push in the paper from the crease of the recent folds to get a further small kite shape as shown in the image.
Now, repeat the previous 2 steps on all alternative zig-zag paper openings to make a smaller kite shape as a whole.
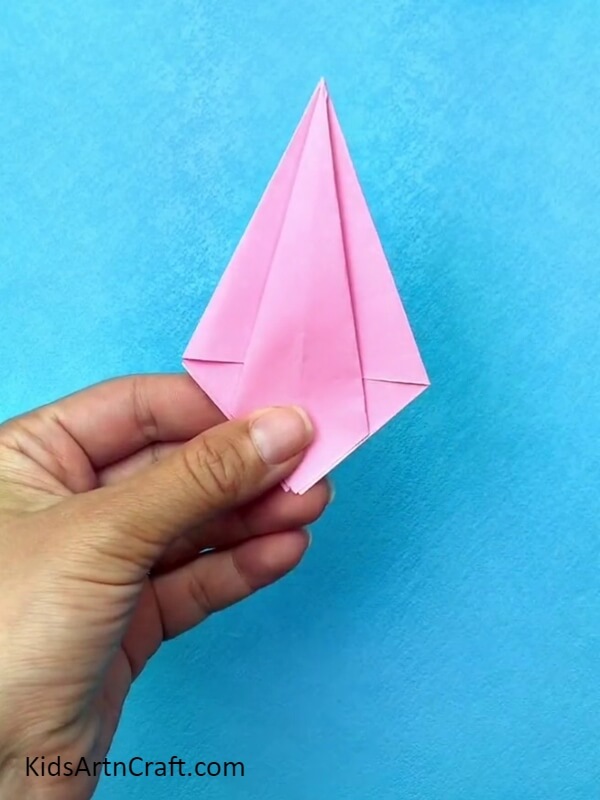
Step 8: Cutting The Kite Shape Into Triangle
Flip the openings to a kite shape with the paper partition at the bottom. Now, using scissors, cut the end-broad part of the figure to get a triangle with no folds visible on it.
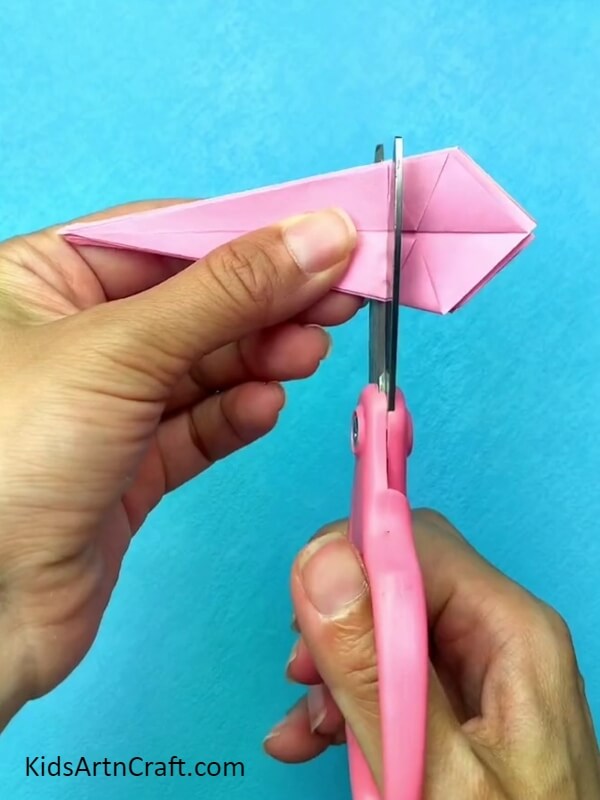
Step 9: Cutting The Triangle Top
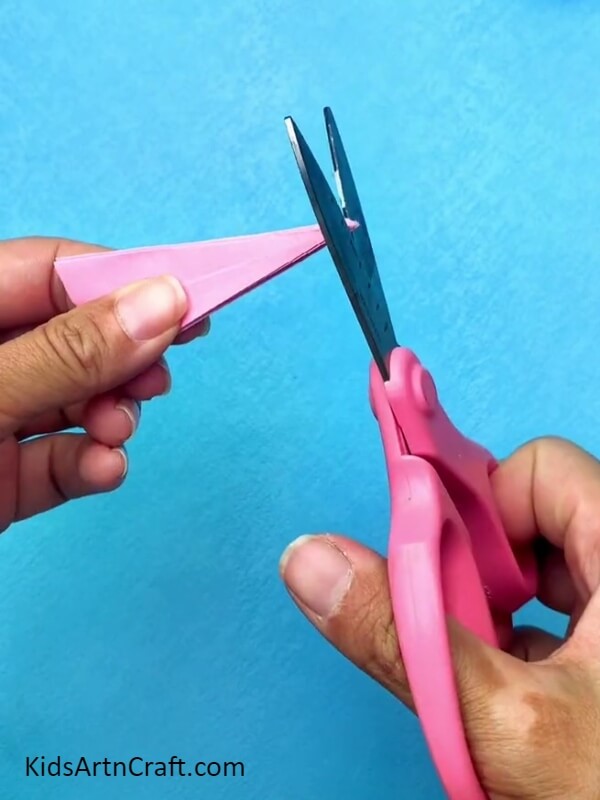
Using scissors, cut the triangle top. Make sure to only cut out a tiny little part.
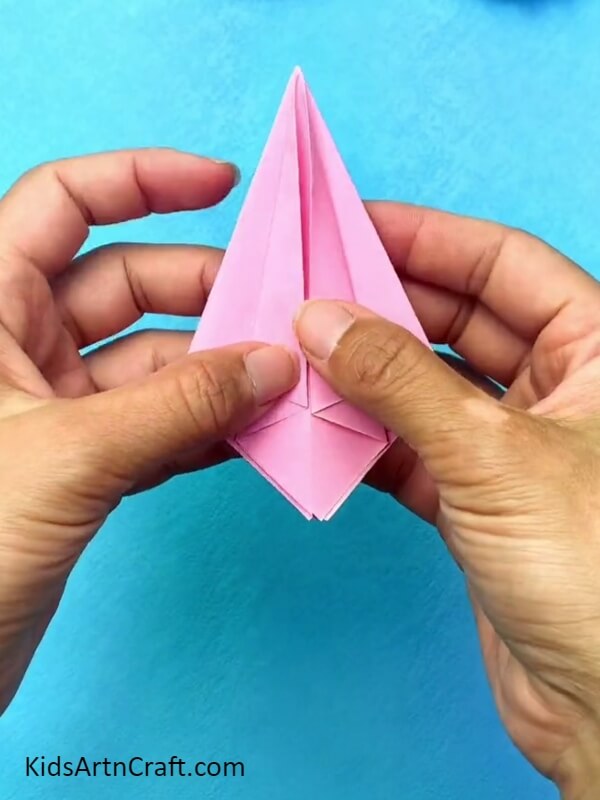
Step 10: Folding The Corners To The Middle
Fold the corners of the triangle to the middle on the alternative openings of the figure and make creases.
Step 11: Making The Gown
Now, unfold the corner folds and open them up from the middle and push in the corners along the corner creases to form an arrow shape. Do the same on each corner fold to form arrow shapes.
Stretch open the whole figure from below to see a ball gown.
Step 12: Making Creases On Another Pink Paper
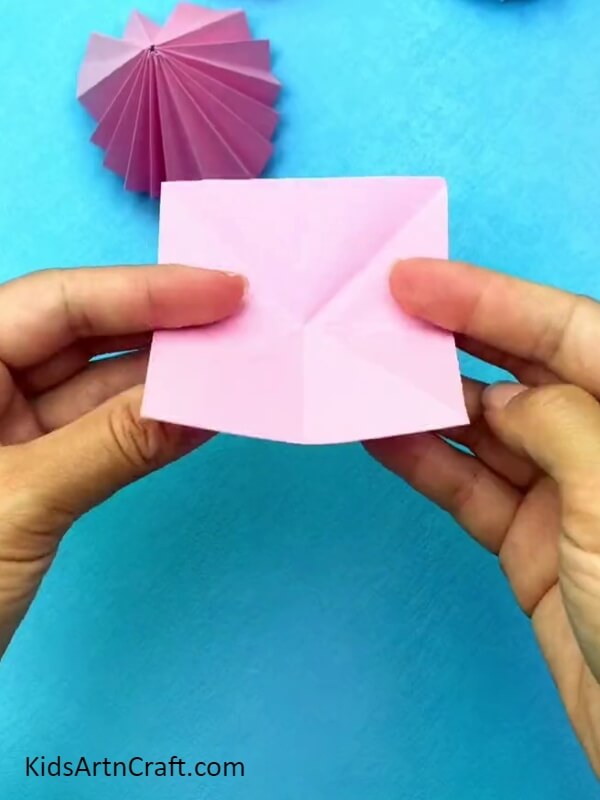
Take a small pink origami paper sheet and fold it into halves and from the corners halves as well to form diagonal and half creases over the paper and unfold again.
Step 13: Forming A Triangle
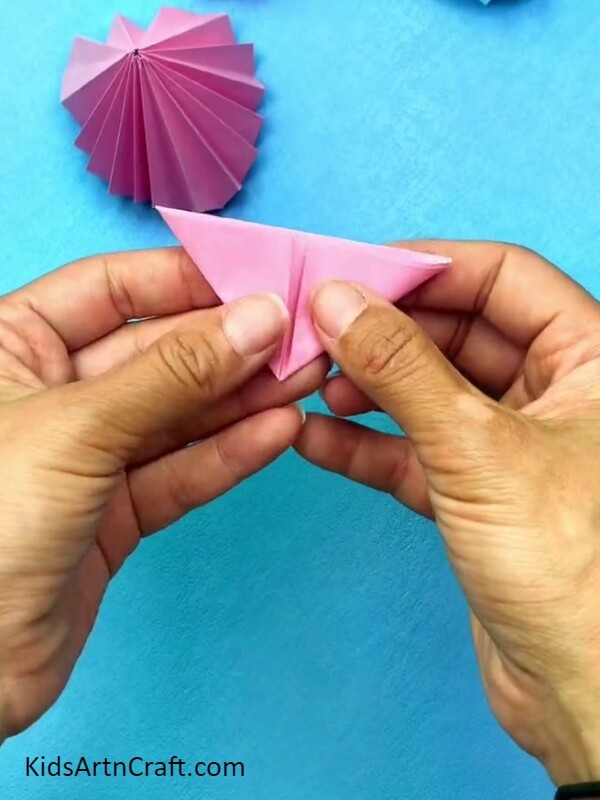
Fold the paper along the half crease and take the folded corners of it to the middle to form a triangle as shown in the image.
Step 14: Forming A Kite Shape
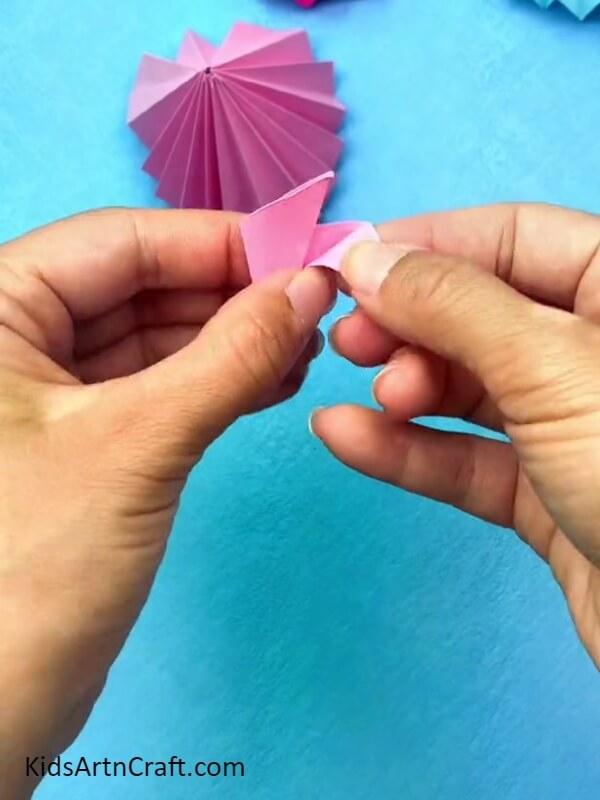
Further, fold the corners of the triangle to the middle to form a kite shape.
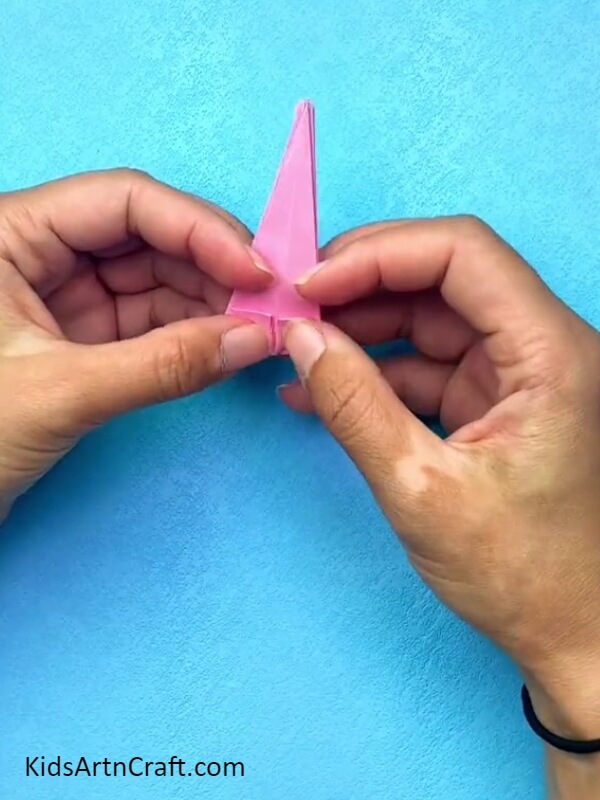
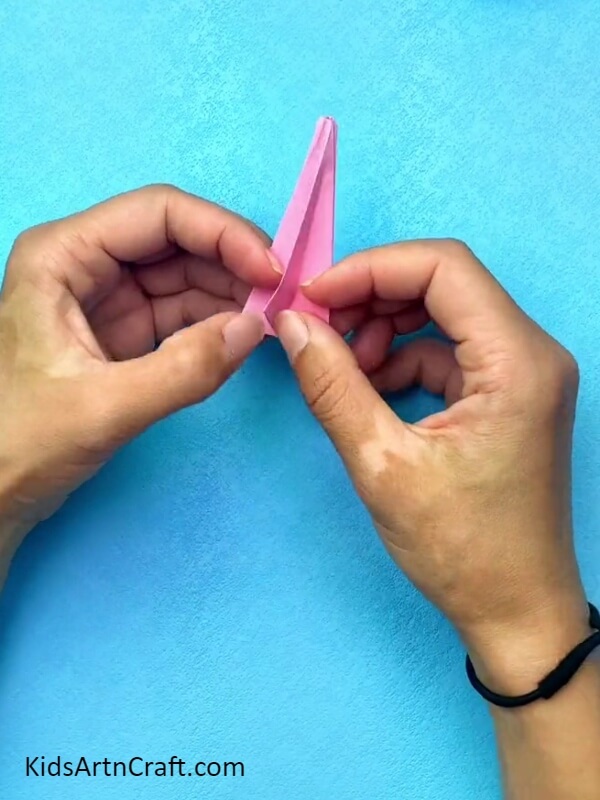
Step 15: Making The Top Of The Ball Gown
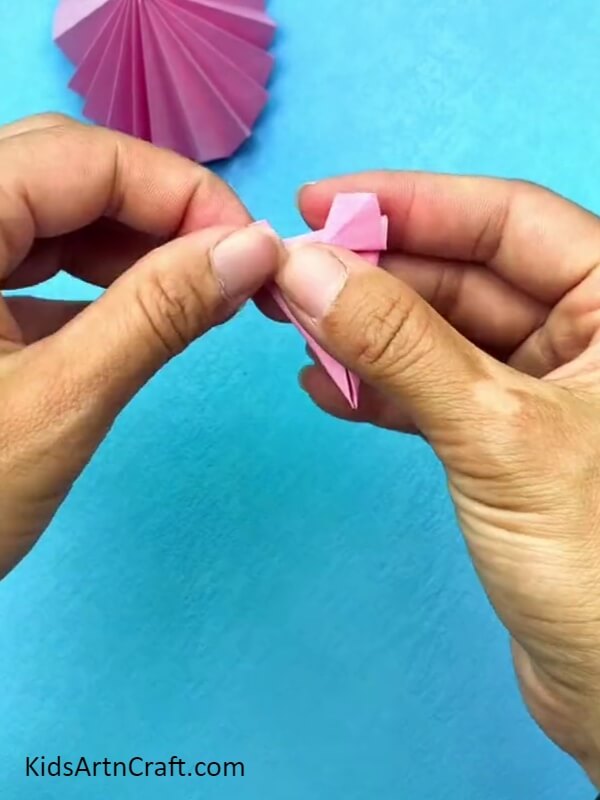
Fold open the corners of the kite shape outwards and make creases. Then, open these folds from the corners and press them up to form the top of your ball gown.
Step 16: Placing The Top In The Ball Gown Skirt
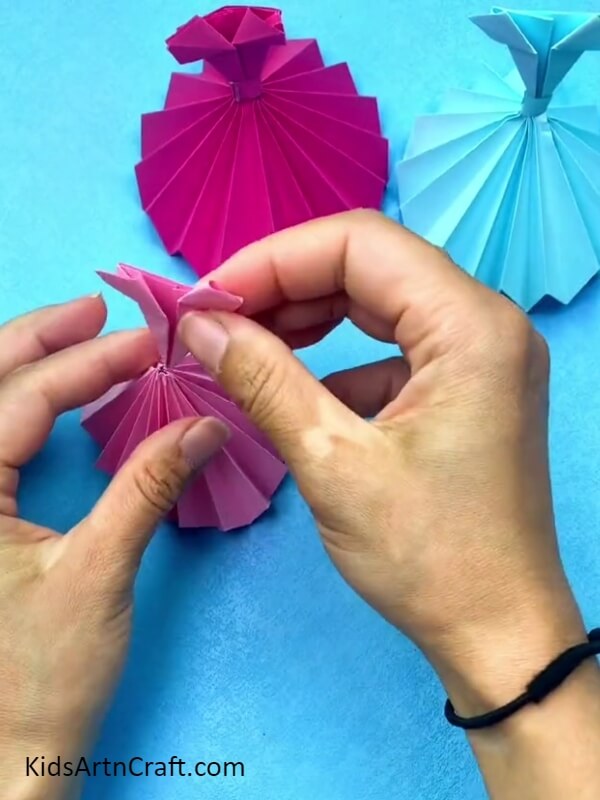
From the hole above the gown skirt put in your top as shown in the image and secure it with glue.
Step 17: Making A Waist Ribbon
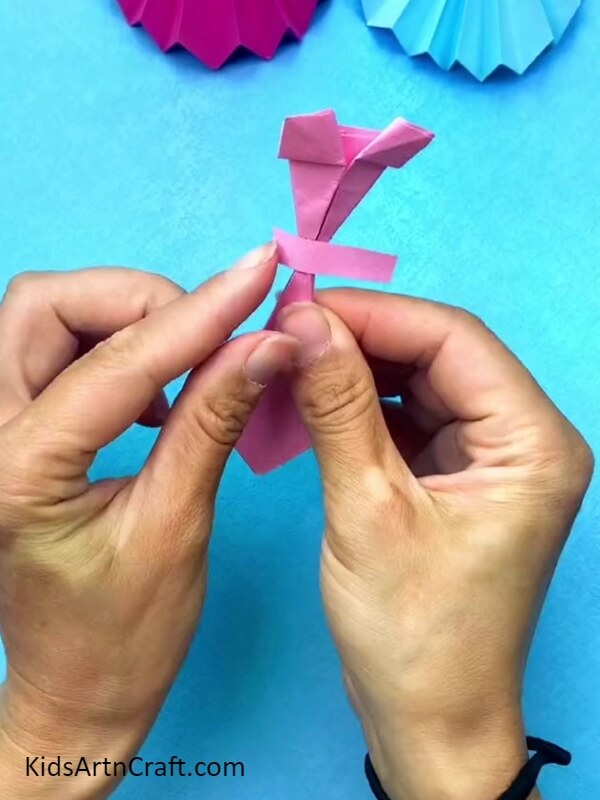
Collect to fold your ball gown into the strip again and cut out a thin pink paper strip and paste it over the joint of the top and gown skirt using glue to make the waist ribbon of the gown.
Step 18: Opening Up the Gown Skirt
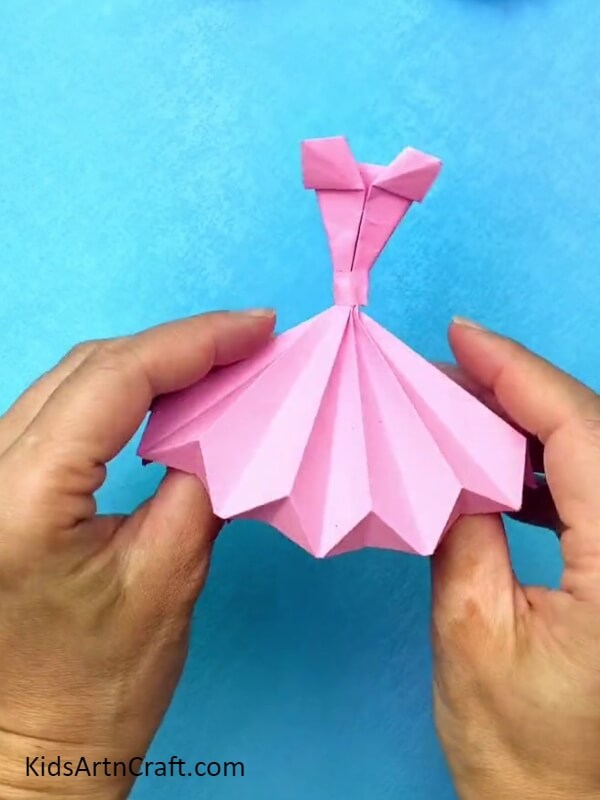
Again open up the gown skirt from below to see it with a waist ribbon at the joint of it.
This Is The Final Look Of Your Origami Ball Gown Craft!
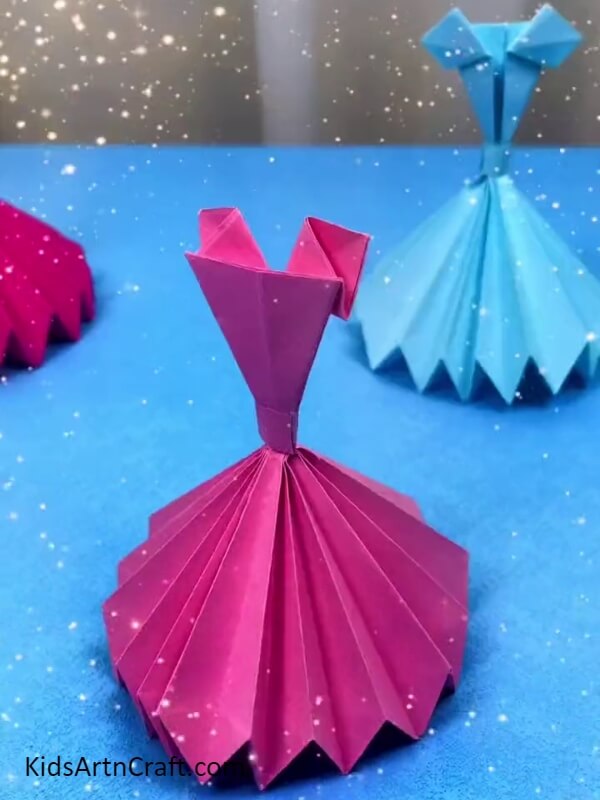
Congratulations! Take a minute to admire your amazing origami creation! Your paper origami ball gown is ready!
This ball gown origami craft will take you into your imagination of a fairytale world with you wearing a pretty gown just like the one you made! Flaunt it off in front of your friends and let them be envious of your ball gown! You can even customize your masterpiece the way you want your dream gown to be, add craft stones to make it shiny, paint it to add some shade, use different color sheets, make texture on it, anything! Your imagination is the limit!
We are hoping you loved this article and the craft idea! If so, give it a like and share it with your buddies to create it all together! Also, give your feedback in the comments section below!
Follow us on Youtube for art and craft tutorials and much more.
More Articles from Kids Art & Craft
- Easy Origami Paper Paku Paku Step by Step Tutorial for kids
- Cute Origami Mini Sofa Paper Craft For Beginners
- Easy Paper Basket Origami Craft Step by Step Tutorial For Kids
- Easy Ladybug Craft For Kids Using Leaves and Paper
- Pretty Origami Umbrella Creative Craft Tutorial For Kids