Paper Crafts
Pretty Origami Umbrella Creative Craft Tutorial For Kids

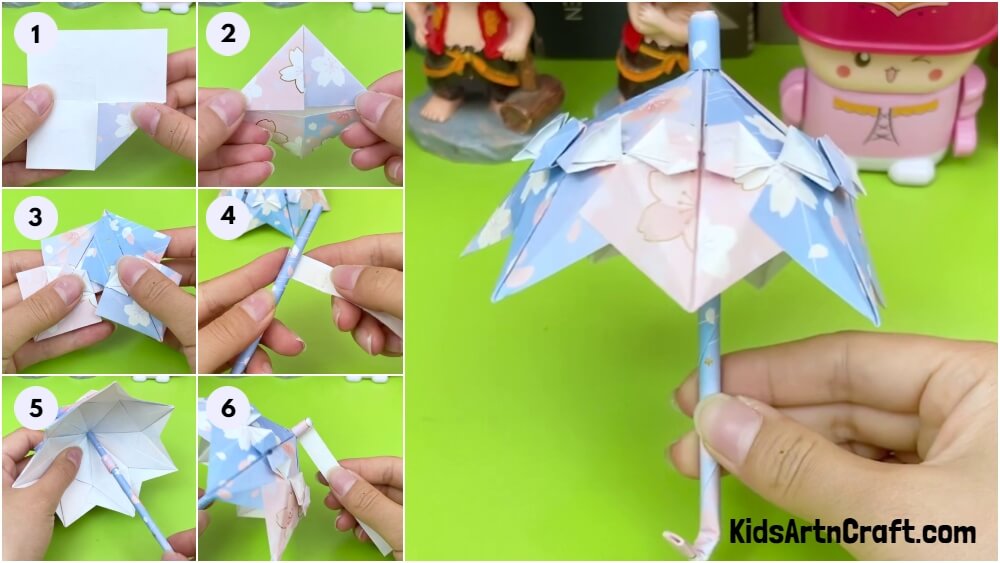
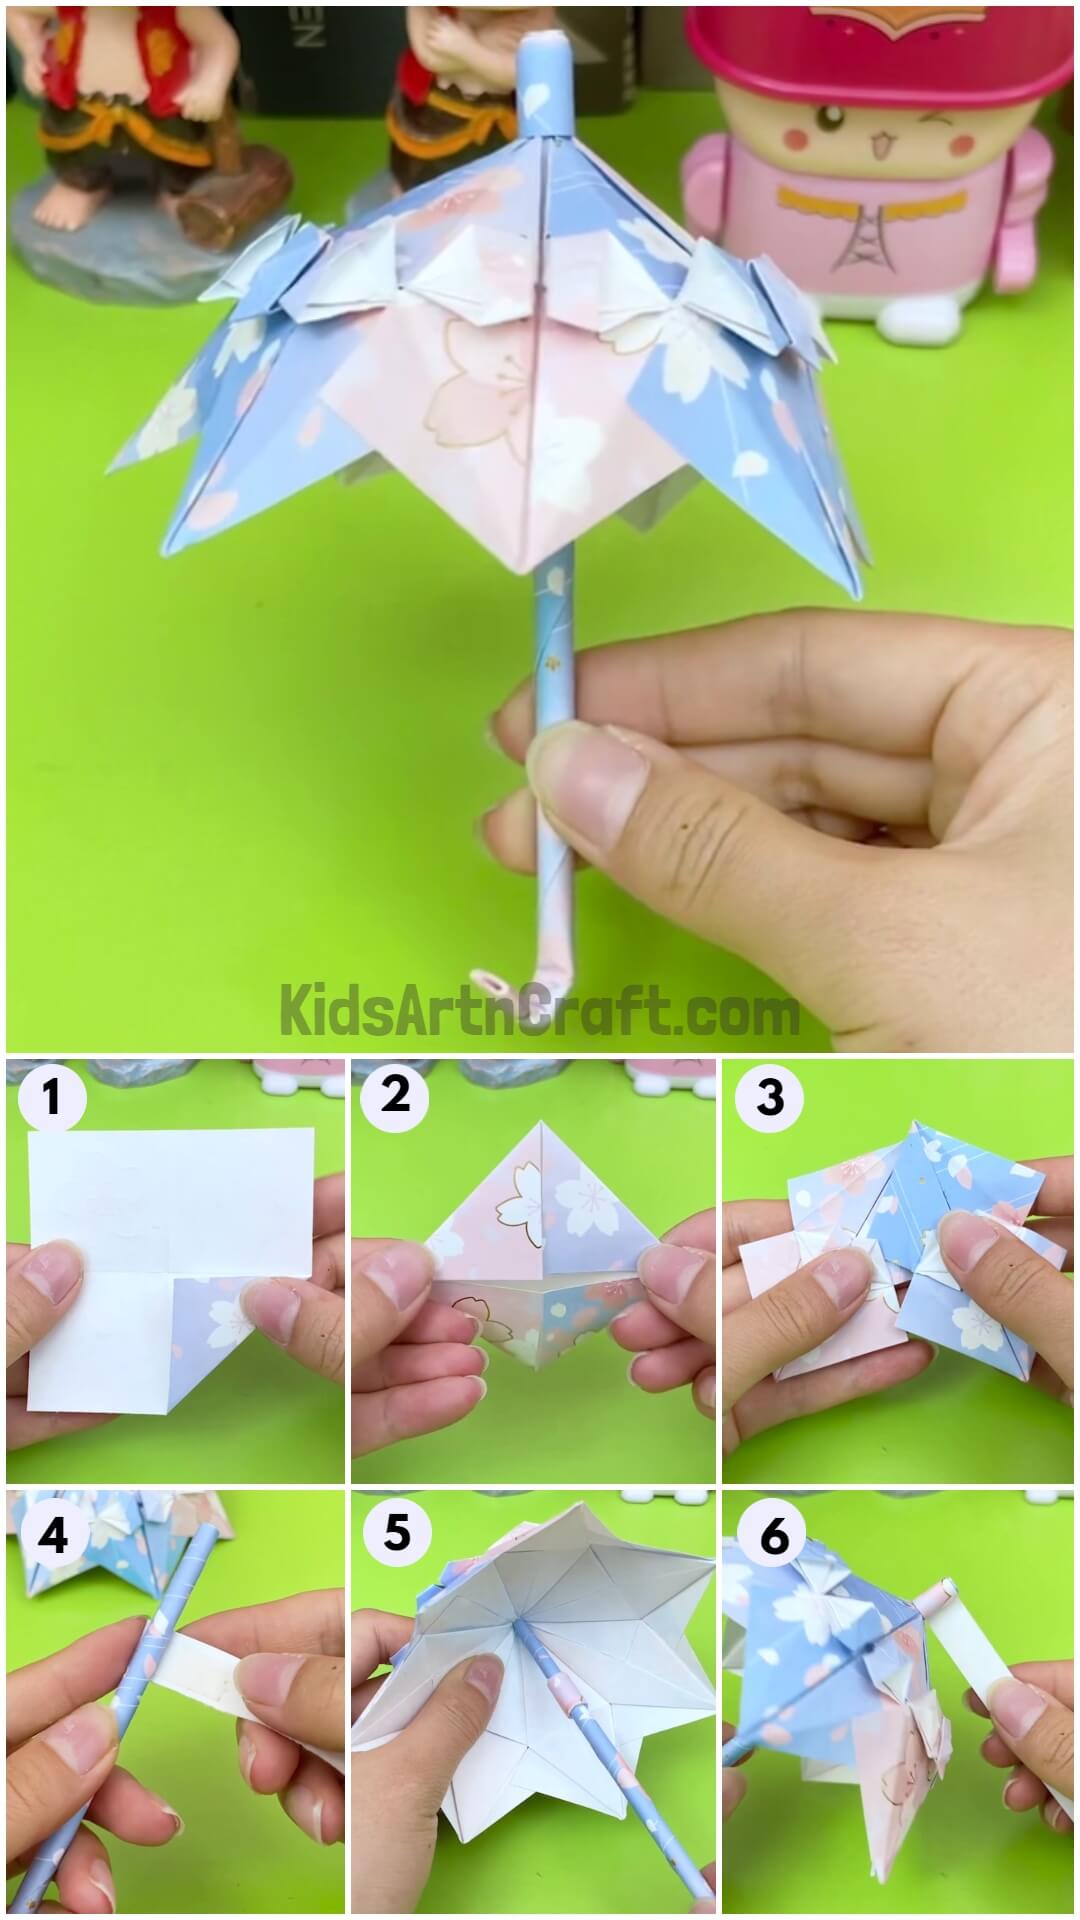
This guide will teach you how to make an attractive paper umbrella using traditional origami. It’s great for kids to get creative and have fun! Follow our instructions and you’ll be able to make your own origami umbrella.
Creativity comes from within and everyone has their creative side even if they don’t know it yet. People can be creative in many things according to their interests and passion. So, today we are going to make something creative that is going to protect us in this rainy season and it protects us from getting sick. Let’s get started!
To make your creative craft, you need the following materials and you need to follow some steps to reach your destination.
Beautiful Origami Umbrella Creative Craft Step by Step Tutorial
Read More: Easy Paper Folding Crafts Video Tutorial for Kids
Materials Required
- Similar printed craft paper
- Glue
- Your folding skills
Procedure
Step 1: Take A Printed Craft Paper
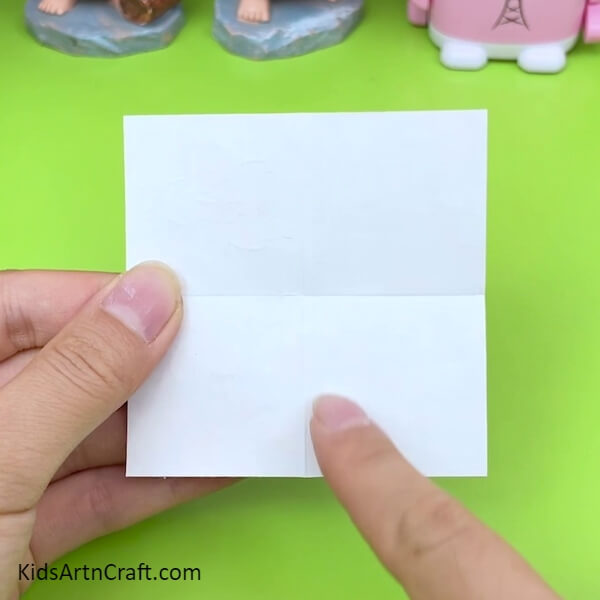
Your first step is to take a square printed craft paper. Fold the printed craft paper from both the sides (horizontally and vertically) to make a small square. Open the printed craft paper and you will get a plus line intersecting each other.
Step 2: Fold The Printed Craft Paper
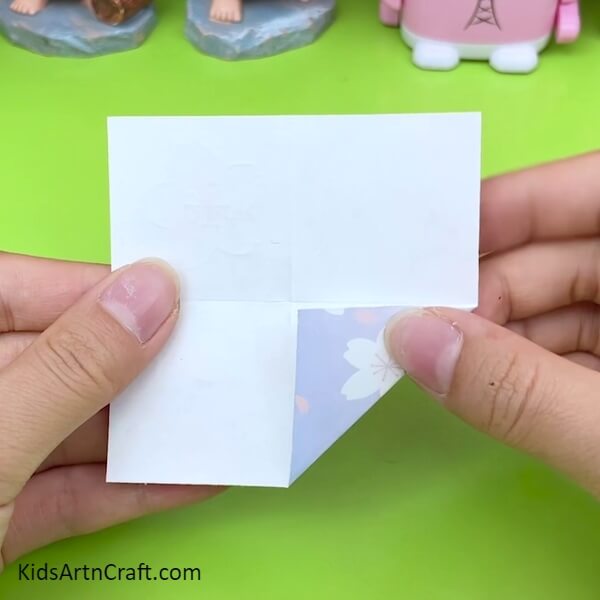
After getting the intersecting lines, fold the bottom right corner of the printed craft paper and join it to the middle.
Step 3: Fold All The Sides Of The Printed Craft Paper
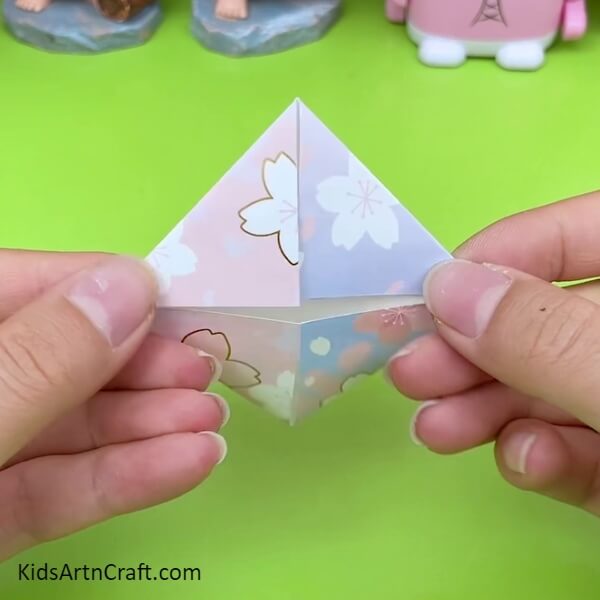
By repeating the same step as above, fold all the corners of the printed craft paper. After folding you will get a diamond shape.
Step 4: Turn Your Printed Craft Paper Upside Down
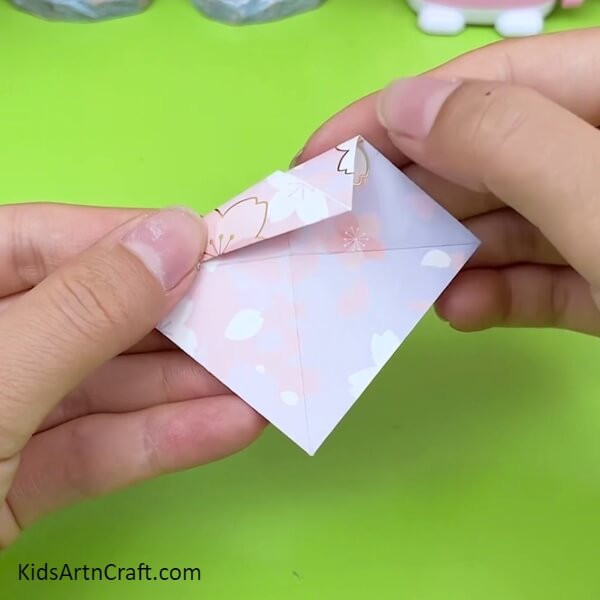
After getting a diamond shape, turn your printed craft paper upside down. Fold the top part of the printed craft paper into a triangle, then, take the end of the triangle and fold it on the triangle a shown.
Step 5: Fold The Other Side In The Same Way As Above
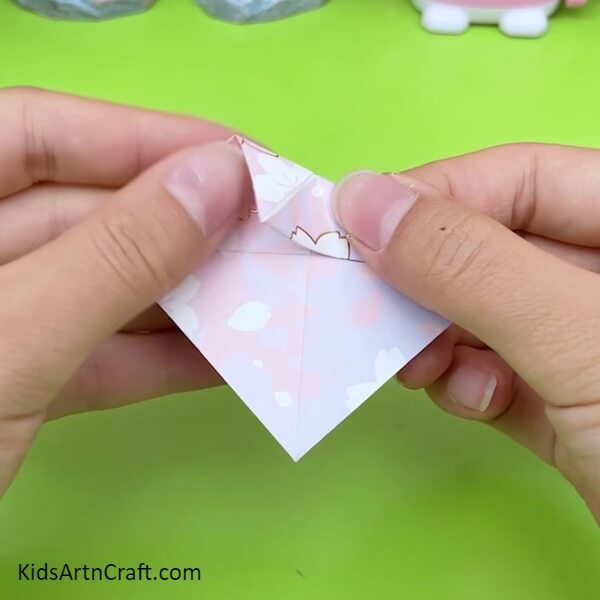
Now, fold the right side of printed craft paper in the same way as above by repeating the same step.
Step 6: Fold Both Side Of The Printed Craft Paper Together
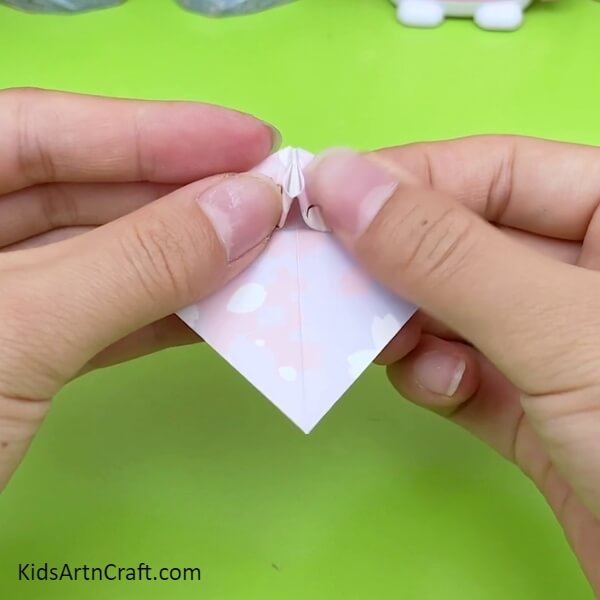
Now, this part can get a little tricky but have patience and you will get it in no time. For this part, you need to fold both side of the printed craft paper together to make a big triangle. Then, pick the middle part up to make a small mountain shape.
Step 7: Make A Diamond Shape
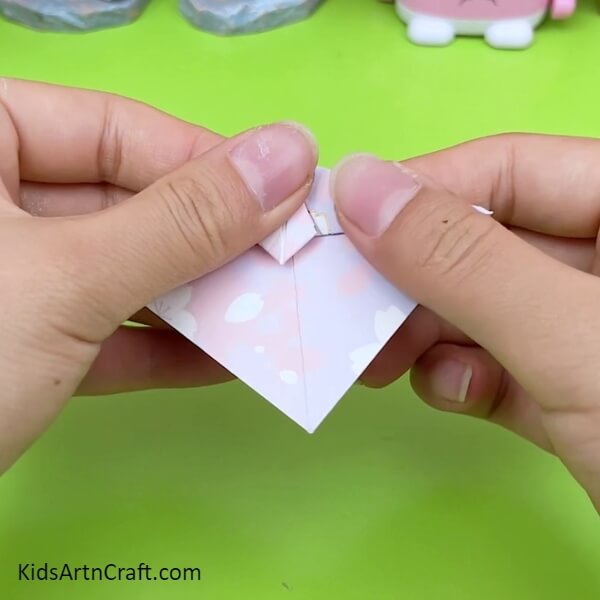
Now, the mountain which you made by picking up from the middle of the triangle, press the middle of the mountain very carefully to get a small diamond like shape. This is a little hard part, but there is nothing you cannot do.
Step 8: Open The Diamond Shape
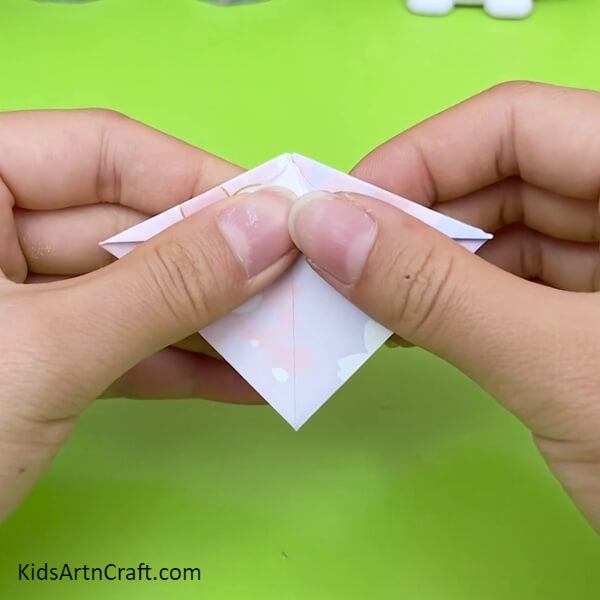
Okay this is also a little hard but just follow my lead carefully. Now, open the upper part of the diamond shape and fold the bottom part of the diamond shape inwards. By following this step you will get a small boat like shape.
Step 9: Repeat The Same Process
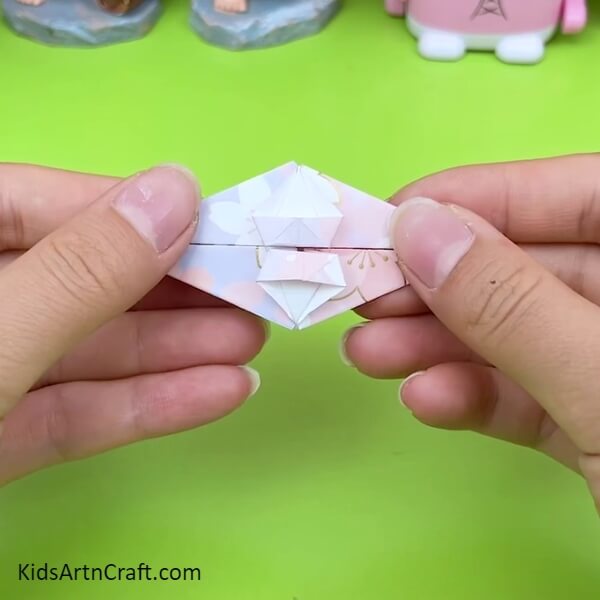
If you got all the steps correctly, you can easily make the other side similar by repeating the same above steps. Like first you have to fold the triangle together and make a small mountain. Then, press the mountain downwards from the middle to make a diamond like shape. Then, open the diamond shape from above and press the bottom shape of the diamond inwards. Follow these steps religiously to make the other side similarly and you will conquer all the hard part of this craft very easily. You need to make the same whole shape, six more times now by repeating the above steps carefully.
Step 10: Unfold All The Sides From Behind
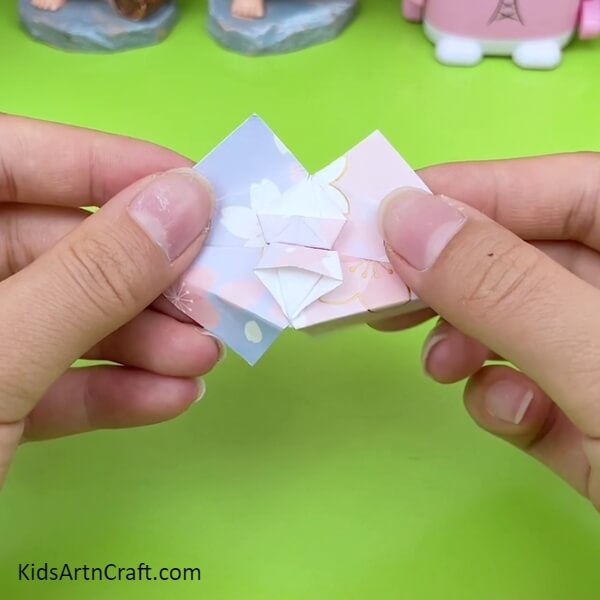
Now, the corners which you had folded behind the printed craft paper earlier, unfold them and you will get a similar shape as shown in the picture.
Step 11: Put Glue On The Opened Side Of The Printed Craft Paper
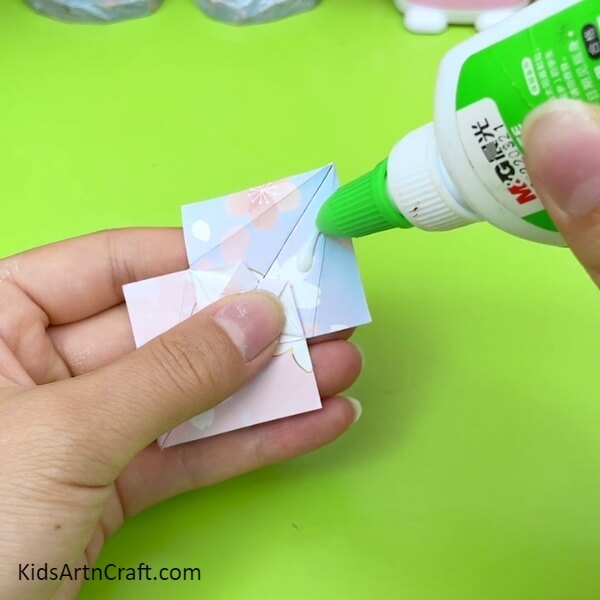
Use the glue to apply it on the opened corners and the side of the opened corners of the printed craft paper as shown in the image. Remember to put the glue on the right corners otherwise the whole craft will get messed up.
Step 12: Stick The Same Other Shape On The Glue
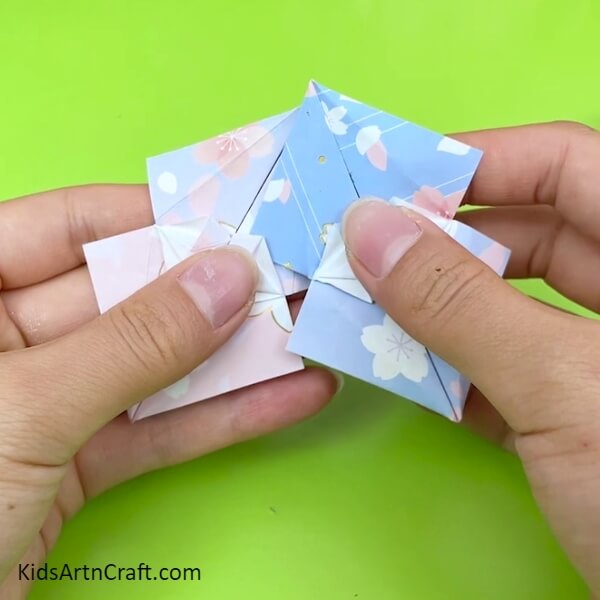
Now, the same shape which I’m sure you have made and I think you must have become pro by now, stick the same other shape where you have applied glue in the above step. Repeat the same step and apply glue and stick all the other shape in the same way. Remember there should be total seven same shapes.
Step 13: Make stick for the umbrella
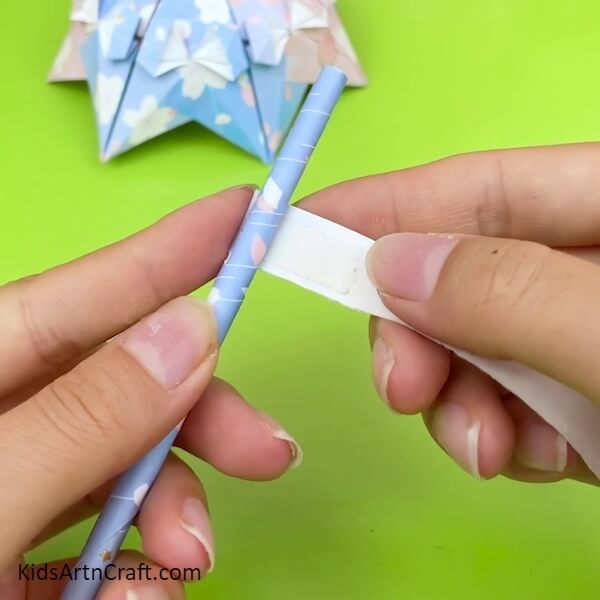
Now, roll another printed craft paper to make the stick for the umbrella or where we hold the umbrella from.
Step 14: Stick Another Printed Paper On The Umbrella Stick
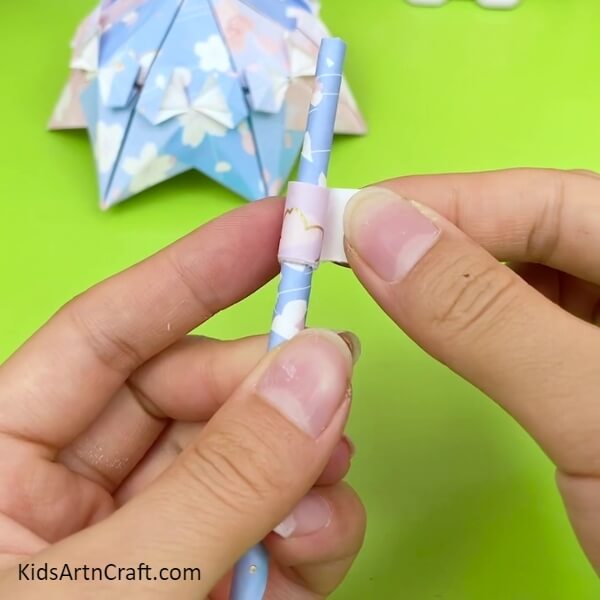
To make you umbrella look more fancy or creative, roll another printed craft paper against the stick which you have made. Roll it little down from the top of the umbrella stick as shown in the picture.
Step 15: Insert The Stick Into The Umbrella Hole
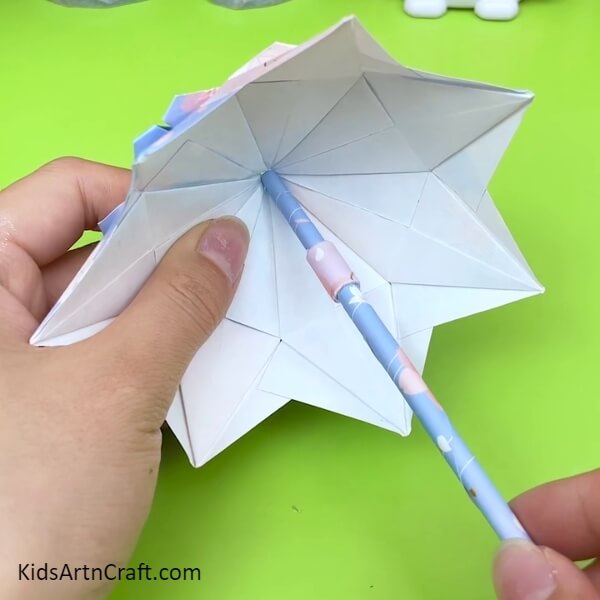
Now, insert the stick which you have made into the hole of the umbrella. Do this carefully and slowly, so that your umbrella doesn’t get messed up.
Step 16: Roll Another Printed Craft Paper On The Top Of The Stick
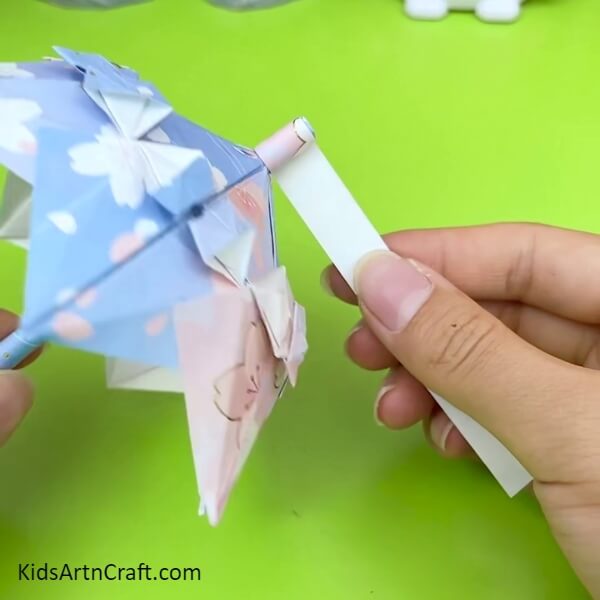
Roll another printed craft paper on the top part of the stick of the umbrella. This will make your umbrella look outstanding and pretty, you can try if you want to.
Step 17: Make A ‘J’ Shape From The Bottom Of The Stick
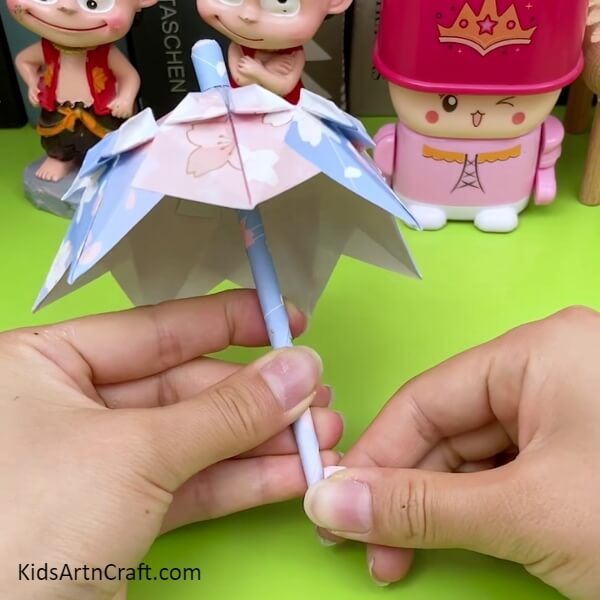
Now, to hold your umbrella properly, make a curve from the bottom of the umbrella stick. You will get a ‘J’ shape.
Your Cute little umbrella is ready to protect you
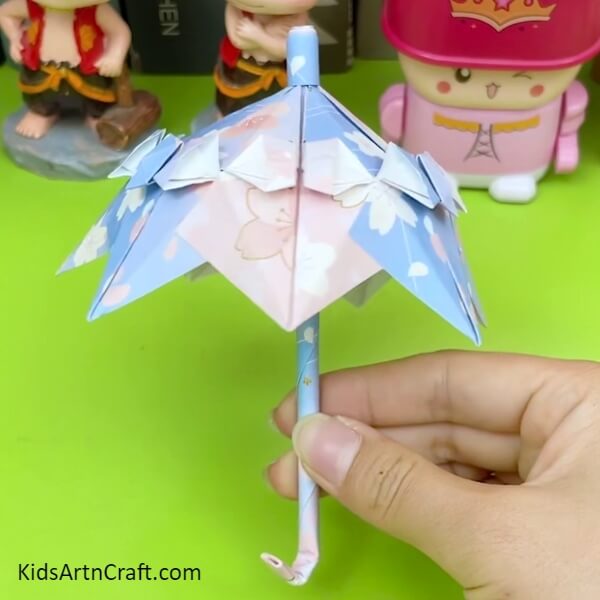
your cute little umbrella is ready to protect you from rain and protect you from getting sick. This is literally the cutest umbrella ever. I know to reach here was hard, but hey, you did it! Kudos to you and your hardwork. Without hardwork you would not have gotten the sweet taste of this victory and this cutest umbrella ever. If you have reach till here, I want you to know I see you and I appreciate you for your hardwork.
Some More Umbrella Craft Tutorials
Handmade Paper Umbrella Frog Craft For Children
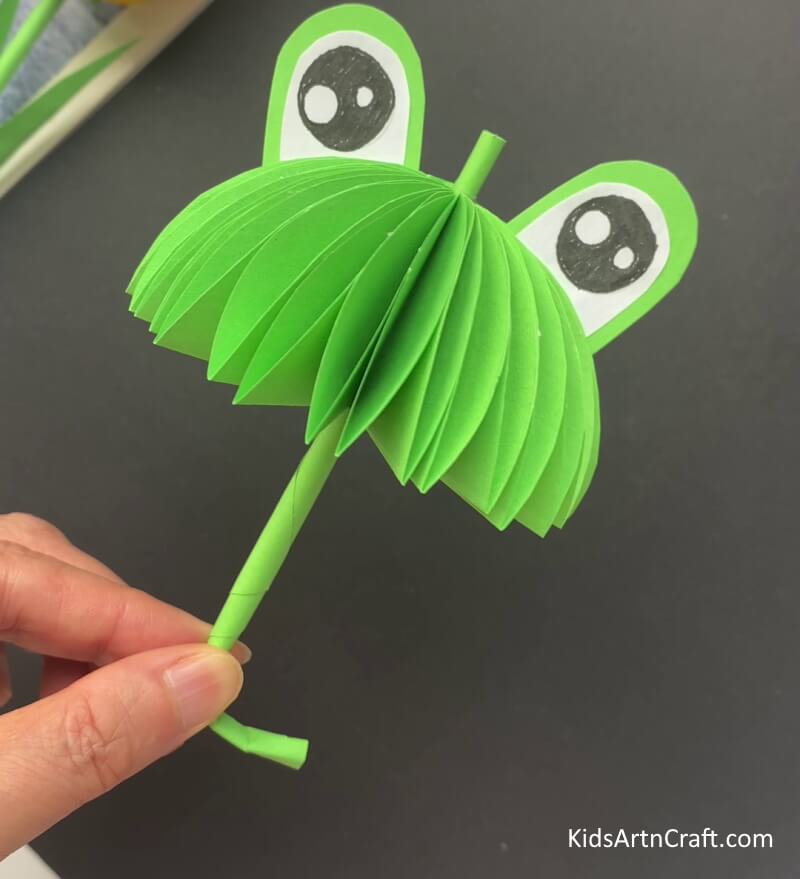
Image Source/Tutorial: Kids Art & Craft
This fun and creative craft is perfect for children. They can make their own paper umbrella frog with just a few materials. It’s a great way to keep their minds and hands busy while having fun. Plus, it’s a great way to teach them about recycling and upcycling!
From this craft, kids can learn the folding technique which is very important for them to learn as it can be used in real life too. This craft can also be used for decoration purposes.
Want some protection from rain? Then, what are you waiting for, go and make these cute and pretty umbrella right now. Enjoy!
Follow us on Youtube for art and craft tutorials and much more.
More Articles from Kids Art & Craft
- Easy Ladybug Craft For Kids Using Leaves and Paper
- Origami Crab Making Easy Tutorial For Kids
- How to Make Origami Flower Easy Tutorial For Kids
- DIY Easy Origami Paper Shark Toy Tutorial For Kids
- Easy to Make Paper Crafts Video Tutorial for Kids


