


Home Decor
Easy To Make Paper Lantern Home Decor Craft Tutorial

Make a beautiful decoration for your home quickly with this paper lantern craft tutorial! You only need paper, glue and some craft materials to create a unique and colourful lantern. It will be a great way to add a bit of character to any room.
This tutorial brings to you a very unique and useful home decor craft. You can use is as home decor for your room. The object in question is a paper lantern or a lamp shade. Its extremely simple to make and requires just a simple white sheet of paper to complete. You will be just needing some folding techniques to make it. This tutorial will test the dexterity of your hands at the same time increase it as well. So, collect the only material required and let’s start folding.
Easy To Make Paper Lantern Home Decor Craft Tutorial
Read More: Learn to Make Diwali Lantern Paper Crafts
Material Required
- An A4-sized white sheet of plain paper
Procedure
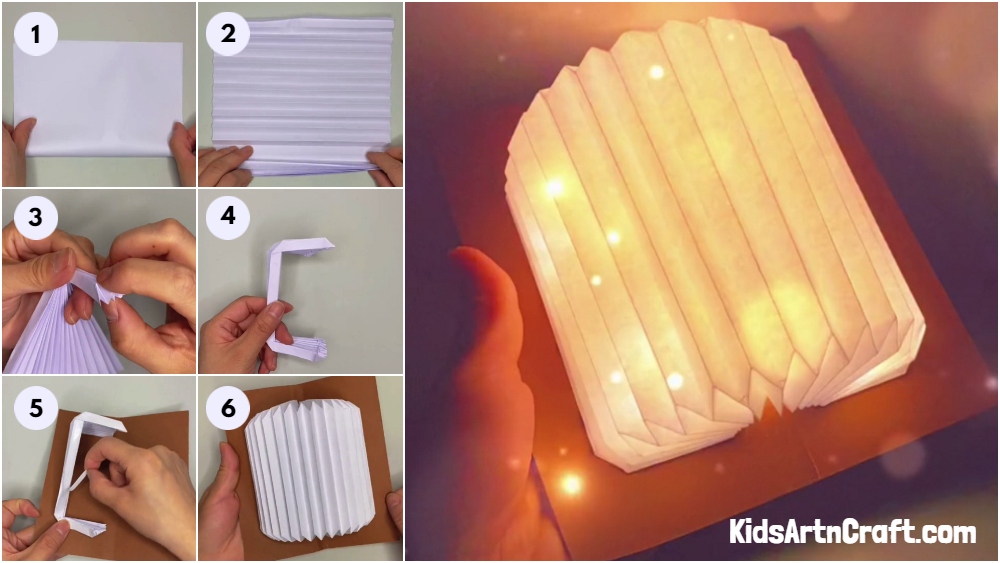
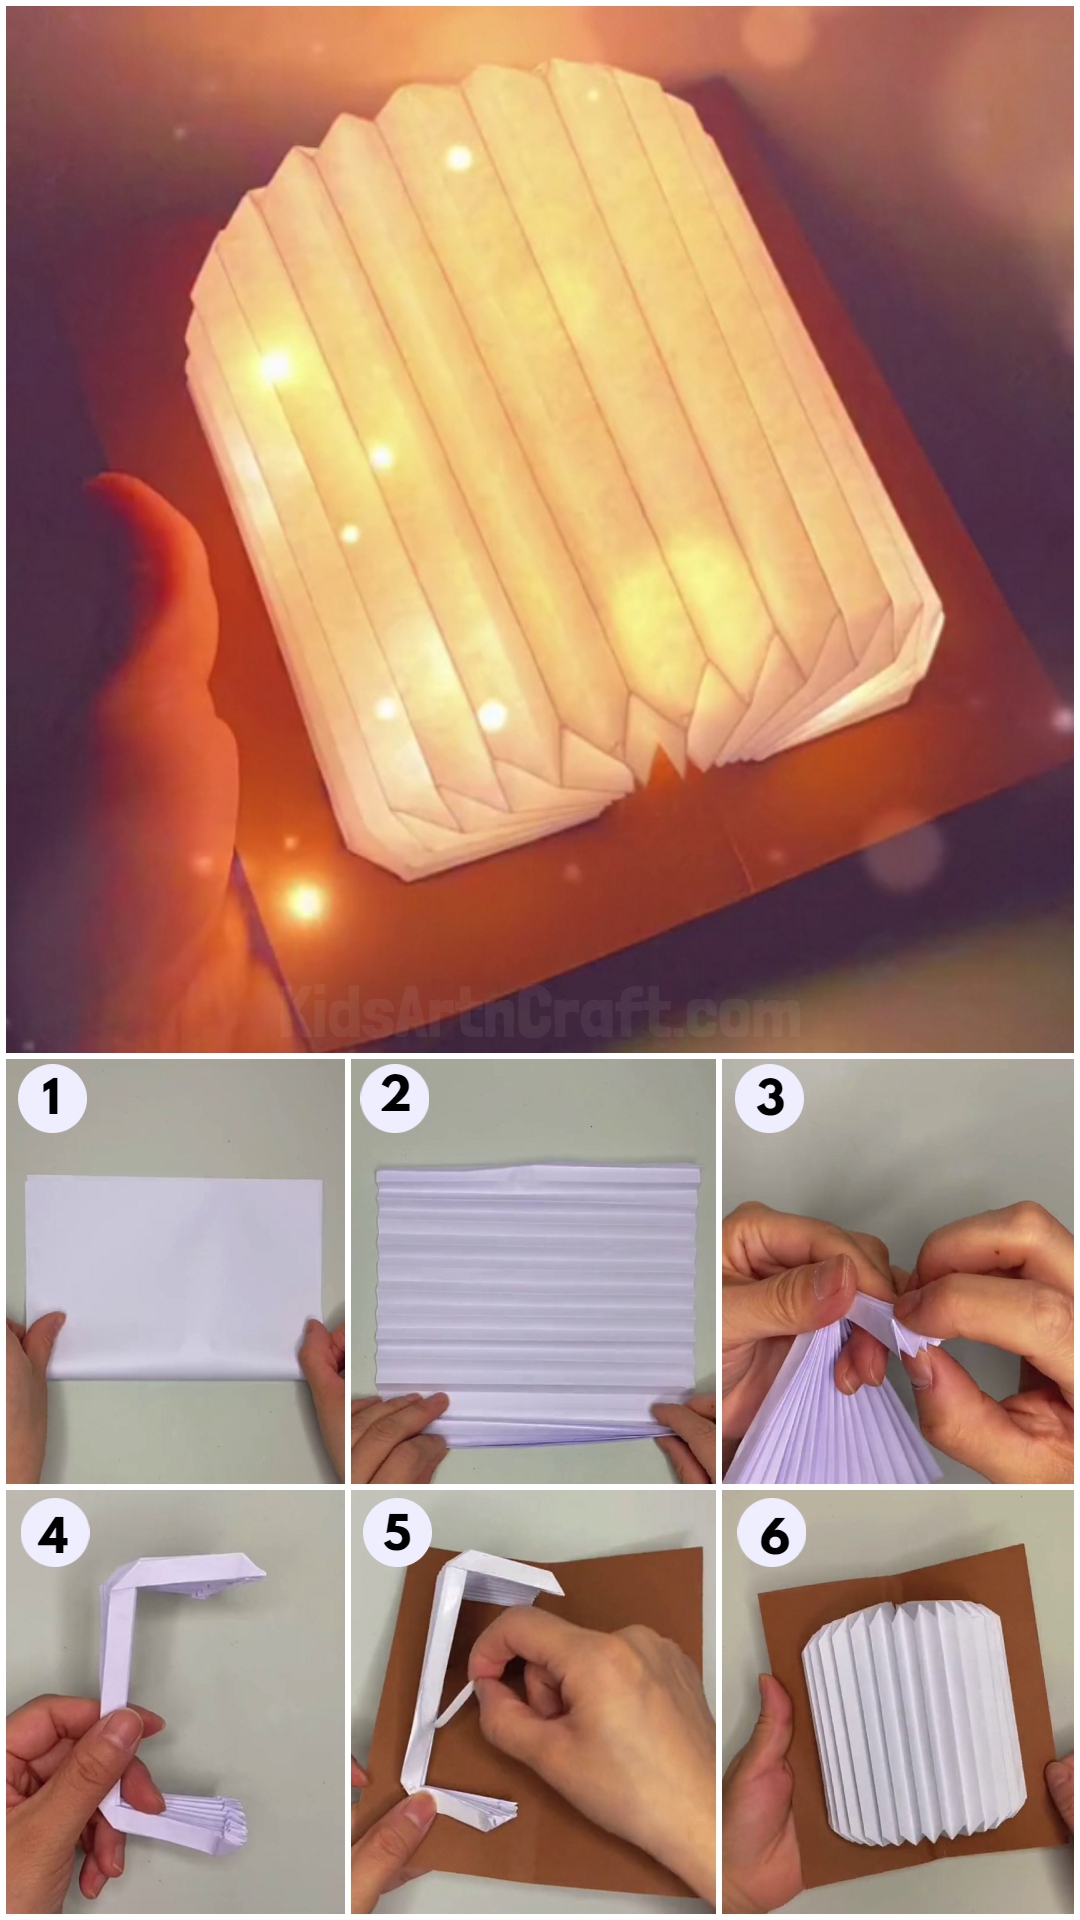
Step 1: Folding The Sheet Of Paper
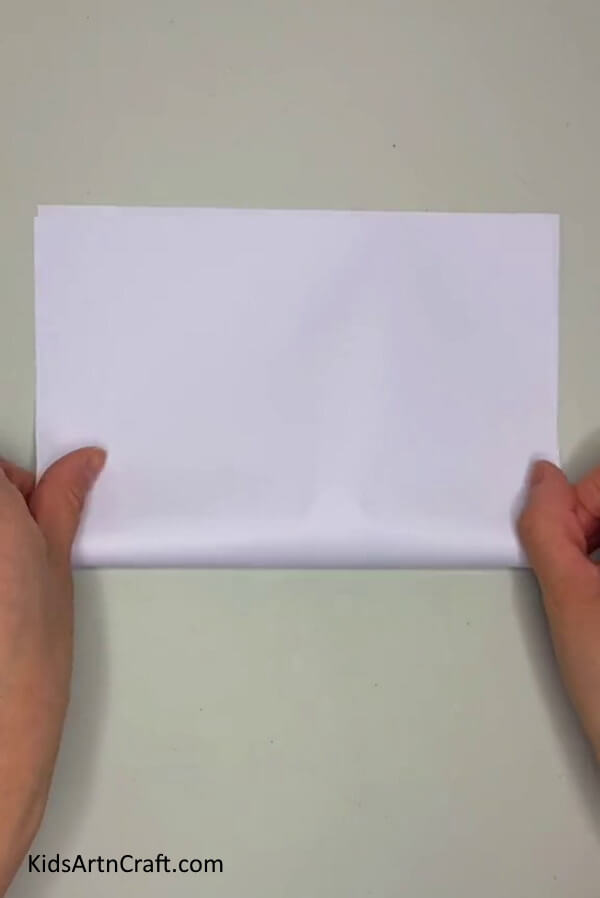
Take the sheet of paper and place it vertically on the table. Fold the sheet in the middle, making the sheet half in size. See the picture below for reference.
Step 2: Making Small Folds On This Sheet
Make a small fold across the top side of the folded sheet. Pick the sheet beneath as well while making the fold. Now, make another fold of the same size to this fold, this time in the opposite direction. Repeat the process on the entire folded sheet making folds in the opposite direction from the previous one, each time you make a fold. Then, open all the folds including the basic fold you made in the first step. You now have a wrinkled sheet in zig zag pattern as shown in the picture below. Finally, the sides of the folds making the joined together, starting from the bottom of the sheet. See the picture below for reference.
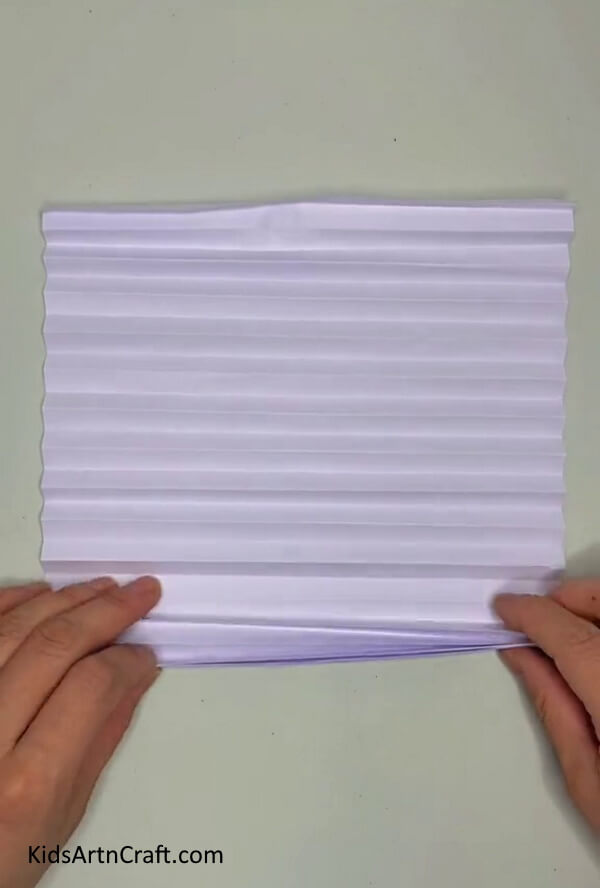
Step 3: Joining All The Folds Together
Repeat the process on all the small folds making a the sheet compressed, vertically. Press it down completely to seal the folds inside as shown in the picture below.
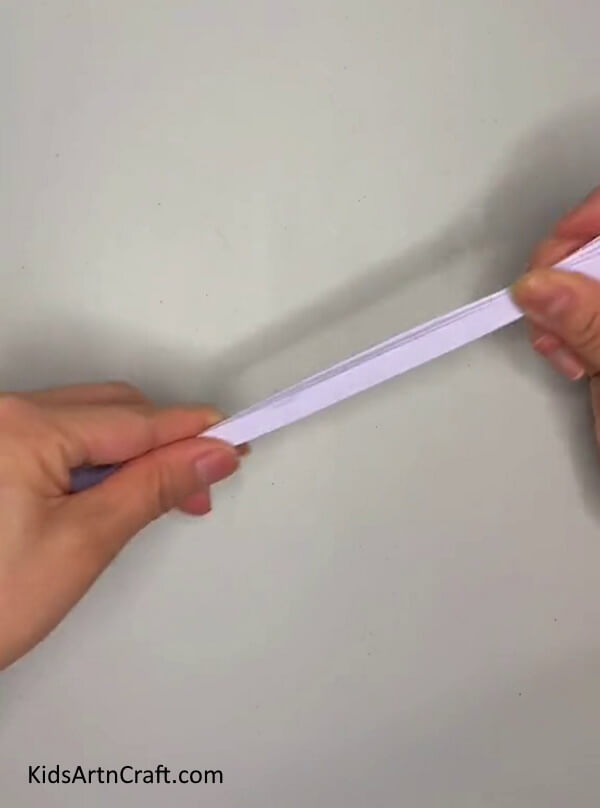
Step 4: Making A Fold To The Compressed Sheet
Take a quarter of this compressed sheet from top and folds it sideways. Press hard to seal the fold. See the picture below for reference. Finally, open the fold you just made.
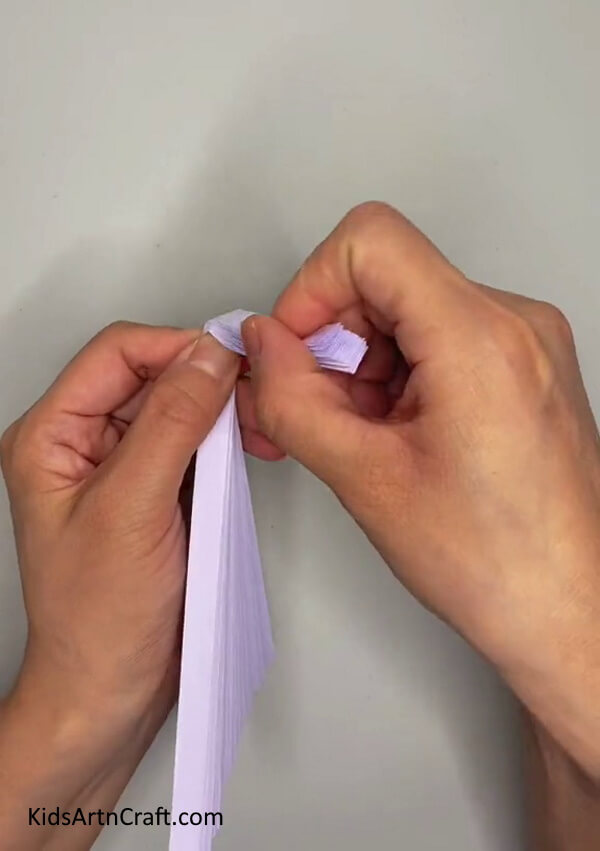
Step 5: Working On Each Fold
Working on this sideways fold mark, take the first fold of the compressed sheet and fold it sideways in the similar way, you did to the compressed sheet in the previous step. Remember, it should be done to the individual fold at a time.
Step 6: Repeating The Side Folds On All The Wrinkles
Repeat the process on all the compressed folds taking an individual fold at a time and turning it sideways. Remember to fold the final wrinkled piece on the outward direction as the fold should be visible on both the first and the last compressed sheet. Now, compress these folded sheets to create the shape desired as shown in the picture below.
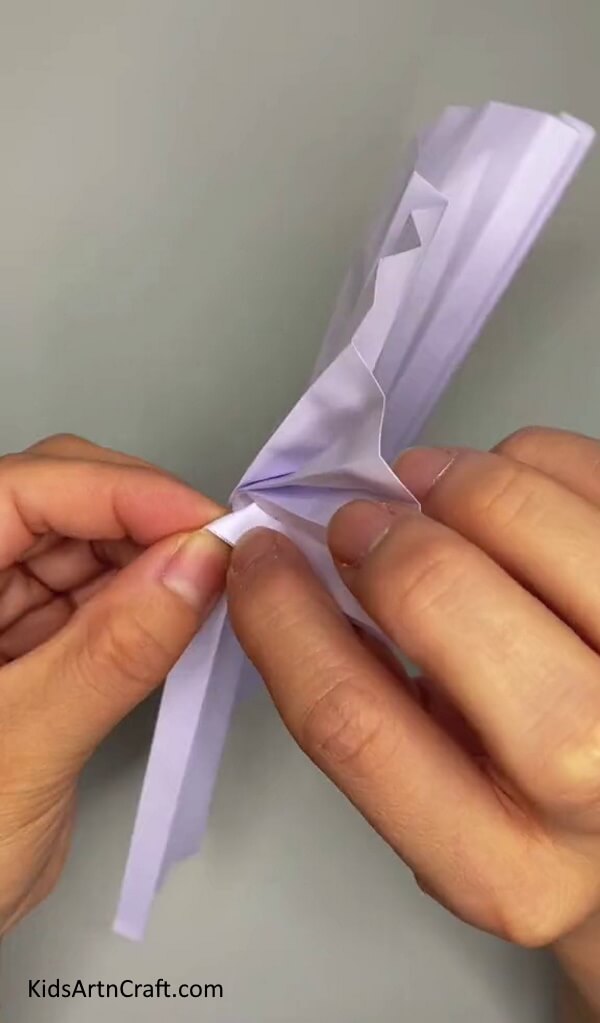
Step 7: Folding The Wrinkles Further

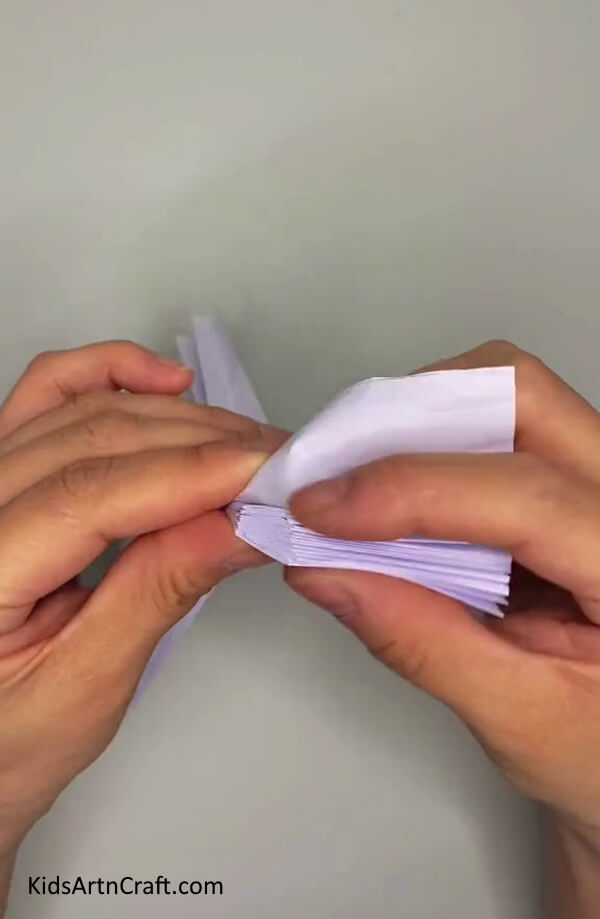
Focusing on the same side of the sheet, take the ends of this freshly compressed side and make a small triangular fold at the corner of the last wrinkle of this compression. Repeat the process on all the compressed folds in between and finally, covering the first piece in the compression as well. See the picture in the eight step to understand the procedure.
Step 8: Repeating The Process On The Other Side Of The Sheet

All these steps were being conducted on just one of the two ends of the entire compressed sheet. You need to repeat the process on the other end of the sheet as well, working on just the quarter of the sheet at the end as you did with the other end earlier. See the picture below for complete reference. The sheet now looks like letter ‘C’.
Step 9: Using Some Masking Tape
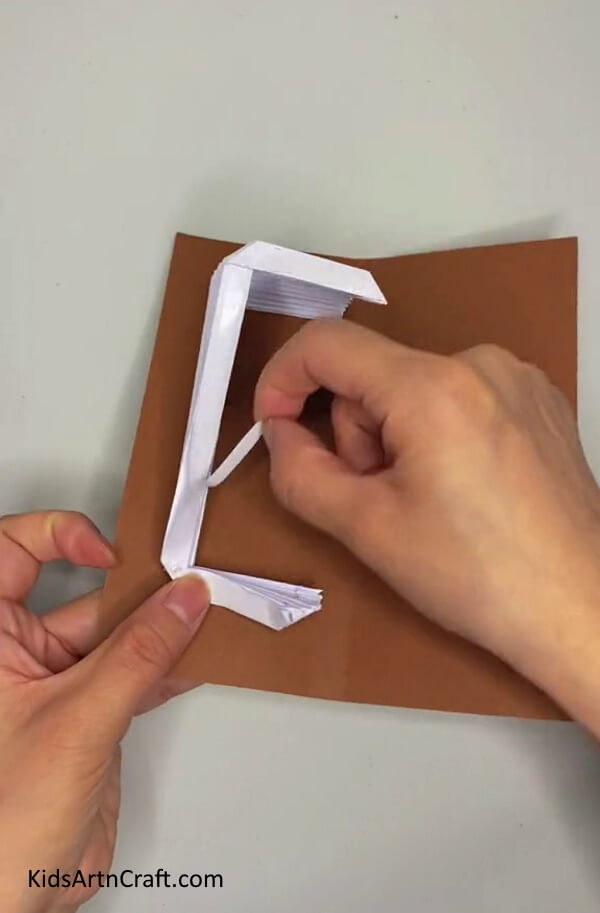
Take a brown sheet of paper fold it in the middle like a book. Open the fold and place it on the table. Cut a big strip out of a masking tape and stick it on of the two thin sides of the ‘C’, shape. Peel the tape off and paste this side on the left hand side of the brown sheet. Repeat the taping process on the other thin side of the ’C’, shape, from sticking the masking tape to peeling it off. See the picture below for reference.
Step 10: Pasting The Other Side As Well

Lift this side up to expand the compressed sheet revealing the wrinkled white sheet , spreading like a veil over the brown sheet. Stick the side you just tapped on the right hand side of the sheet. See the picture below for reference.
Seeing The Magic Work
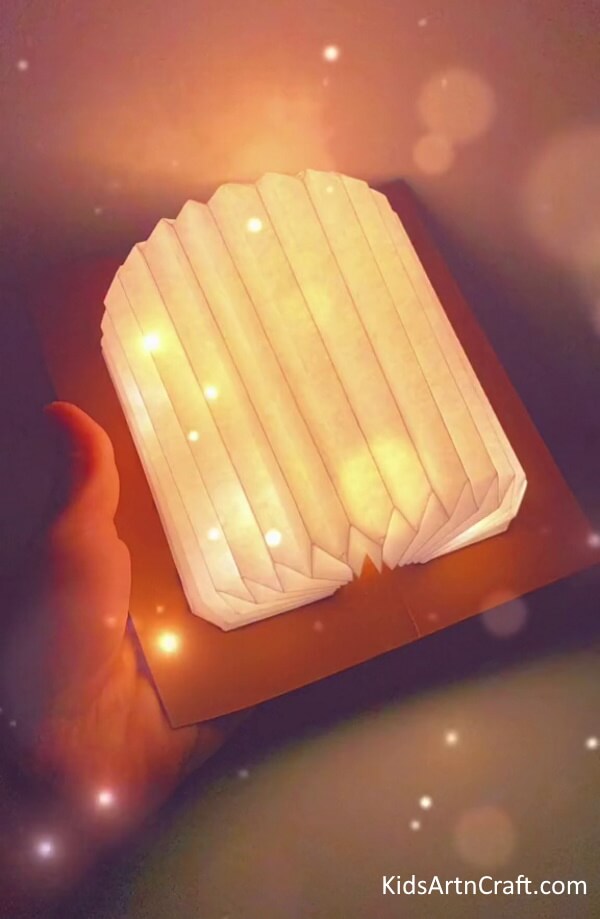
You just need to place it on a bulb or some luminous object to see it glow like a lamp shade and give the effect of a lantern. It looks exactly like the light produced by a lantern.
This completes today’s tutorial and you learned some seminal folding techniques to amp up your game of crafting. These techniques can prove quite beneficial for you and your art. You can use this lantern as home decor or gift it to someone on an occasion. Keep following the tutorials for more such techniques and keep inventing new ideas through your own imagination. See you in many more tutorials to come. Till then, good luck and good bye.
Follow us on Youtube for art and craft tutorials and much more.
More Articles from Kids Art & Craft
- Easy to Make Handmade Bee Craft Tutorial for Kids
- DIY Easy Paper Chick Craft For Kids
- DIY Bird Nest Paper Craft For Kids
- DIY Christmas Ornament Craft For Home Decorations
- DIY Paper Flower Hanging Craft Step-by-Step Tutorials