


Paper Crafts
Easy Paper Basket Origami Craft Step by Step Tutorial For Kids

This easy origami paper basket is perfect for kids to make! Follow the step-by-step tutorial to make a simple paper basket with just a few folds. Great for a rainy day activity or a fun craft project.
Welcome everyone! Origami is one of the tricky but easy ways to create useful and cute crafts. In this tutorial, we are going to learn how to make small cute origami paper baskets using designed origami craft paper. Let’s get started!
DIY Paper Basket Origami Craft
Read More: Easy Origami Shirt and Bow Paper Bag Craft At Home
Materials Required
- Designed Origami Craft Paper
- Scissors
- Glue Stick
Procedure
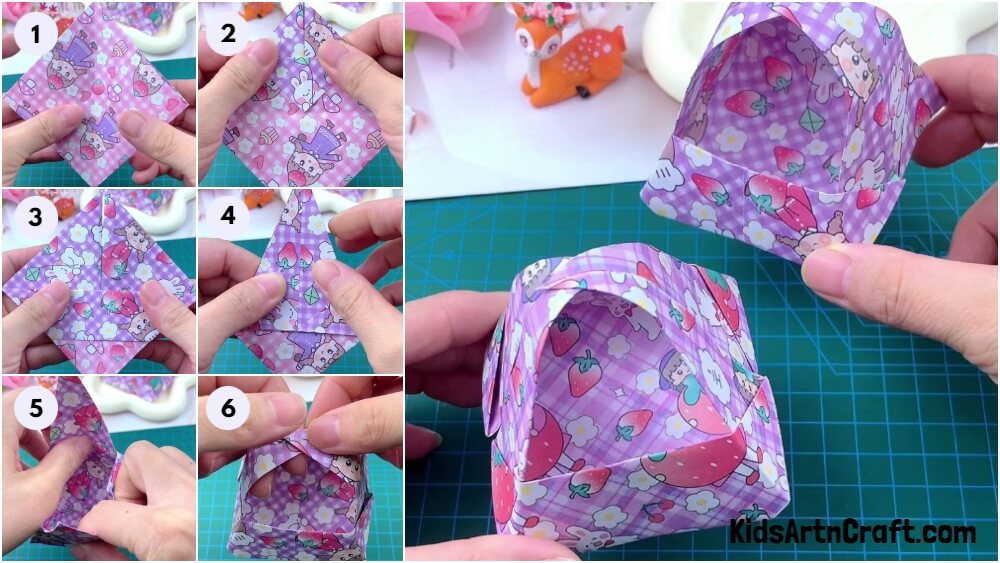
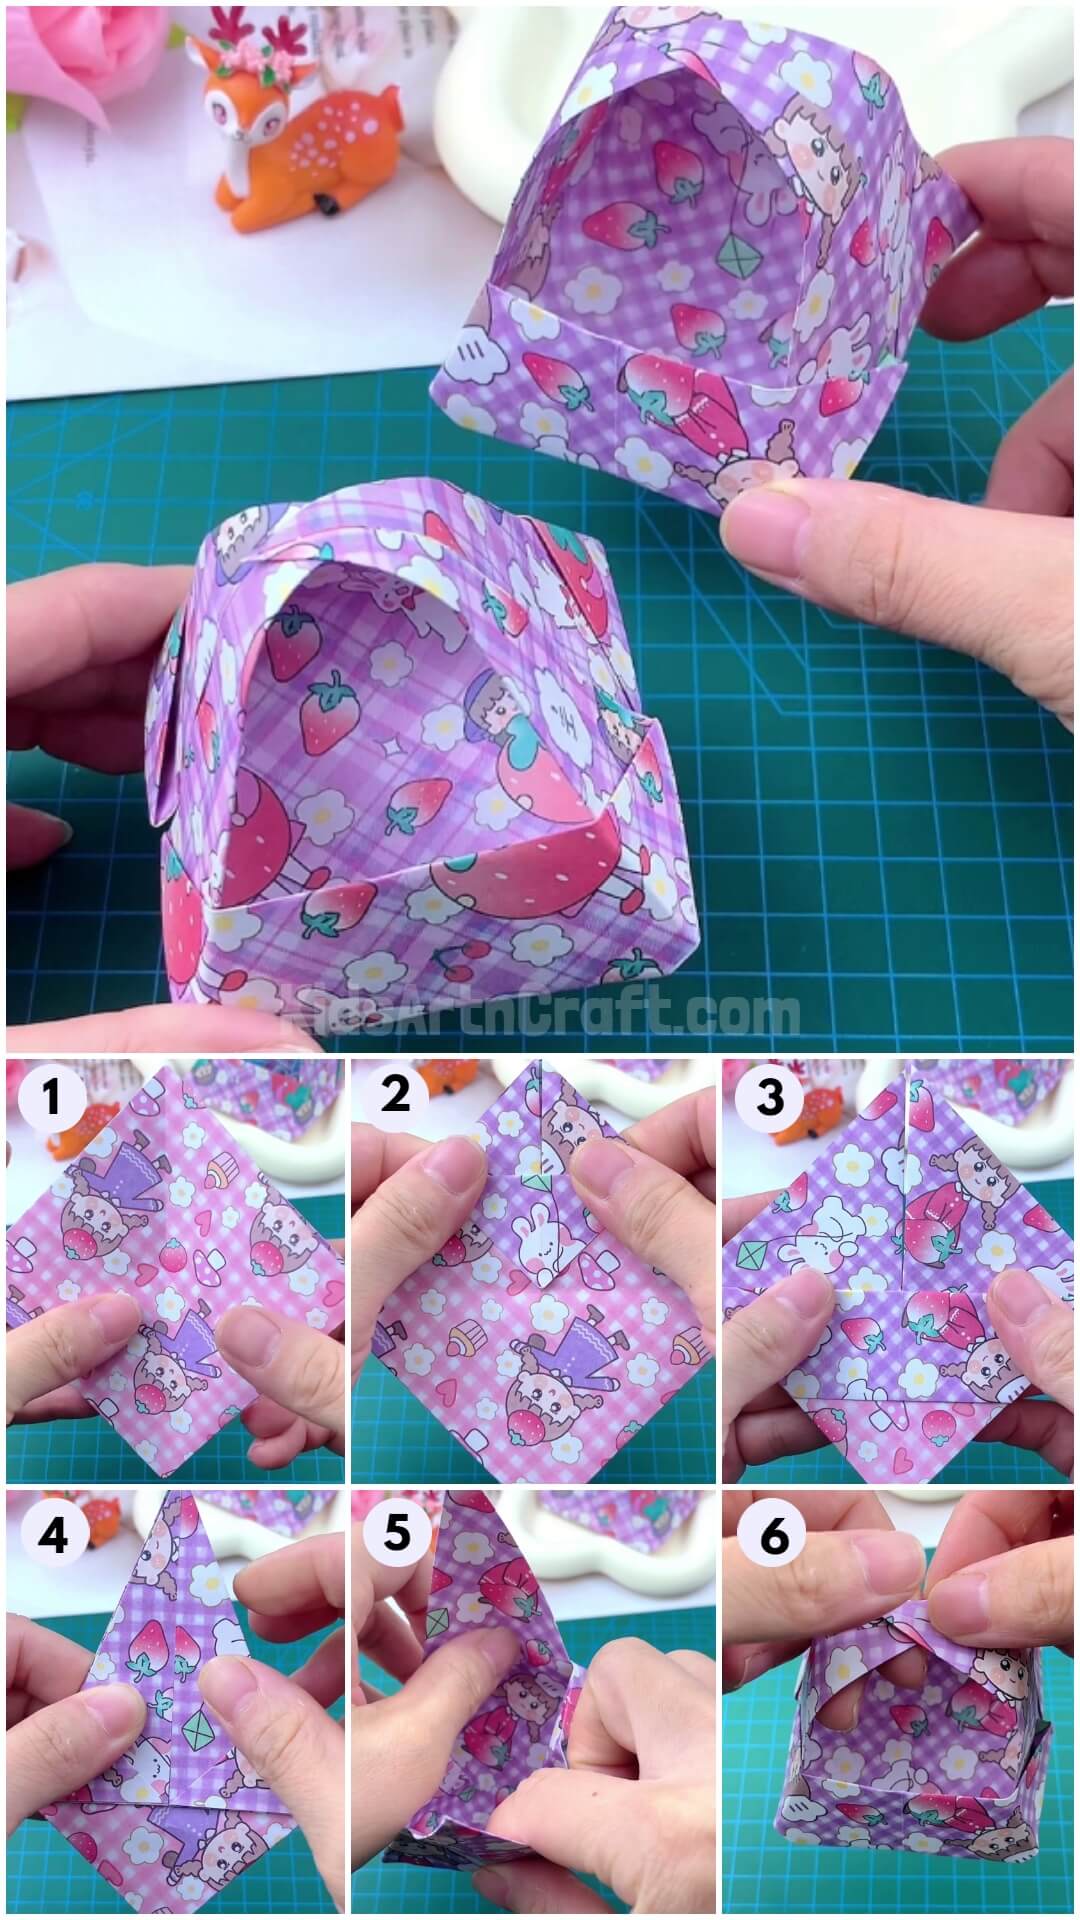
Step 1: Folding and unfolding the designed craft paper

Cut 20*20 cm square from your designed craft paper. Fold your craft paper into half and then again once fold it into half to make a small square shape. Then completely unfold your craft paper and after that diagonally fold your craft paper, then unfold it.
Step 2: Folding craft paper into a square shape
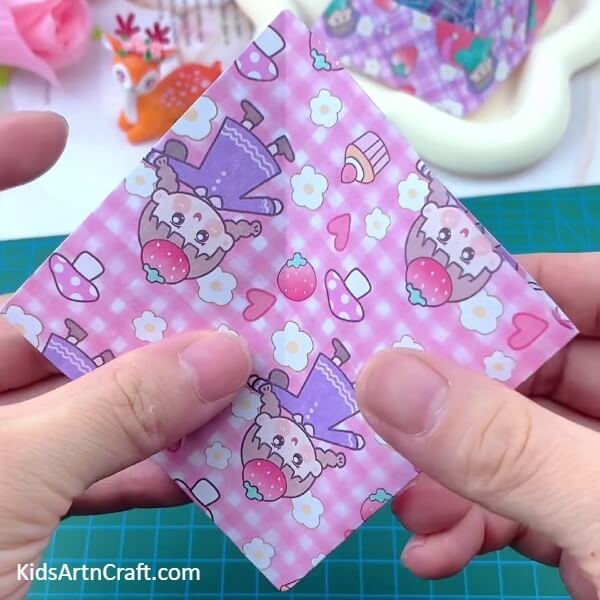
You can see the ‘+’ like fold mark in the center of your craft paper. Grab the left and right edges of that plus fold, then push both edges into the center of the paper and give little pressure with your hands on the front of your craft paper to fold it into a square shape.
Step 3: Folding the front piece of craft paper
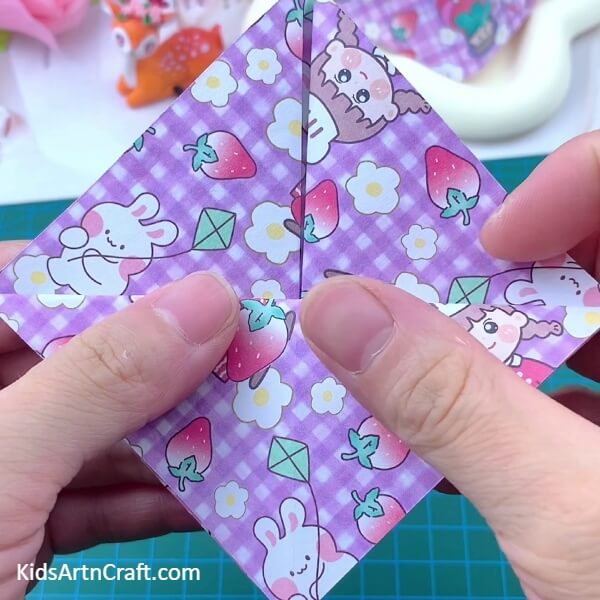
If you look at the top view of your craft paper, you can see three pieces of paper. Fold the first piece of paper into half as shown in the image, then unfold it.
Step 4: Folding a front piece of craft paper some inches
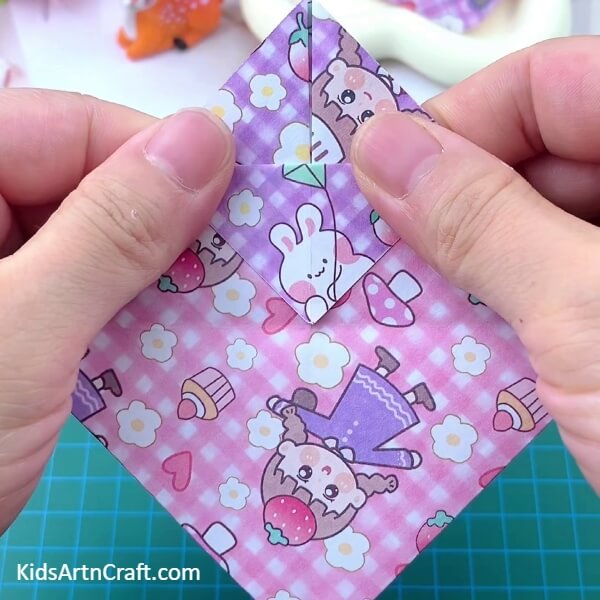
Fold 1/4th of the front piece of paper as shown in the image.
Step 5: Folding front piece one more time
Then fold the front piece of your craft paper one more time into half.
Step 6: Folding another side of the craft paper
Turn your craft paper and as same as the other side make two folds on this side of the paper too as shown in the image.
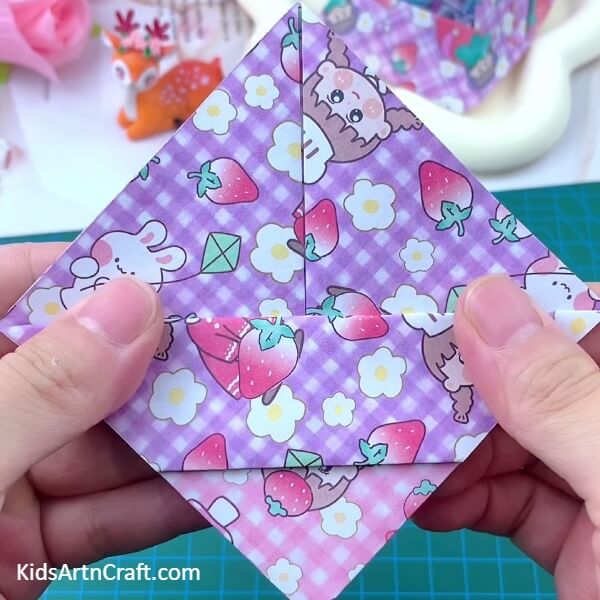
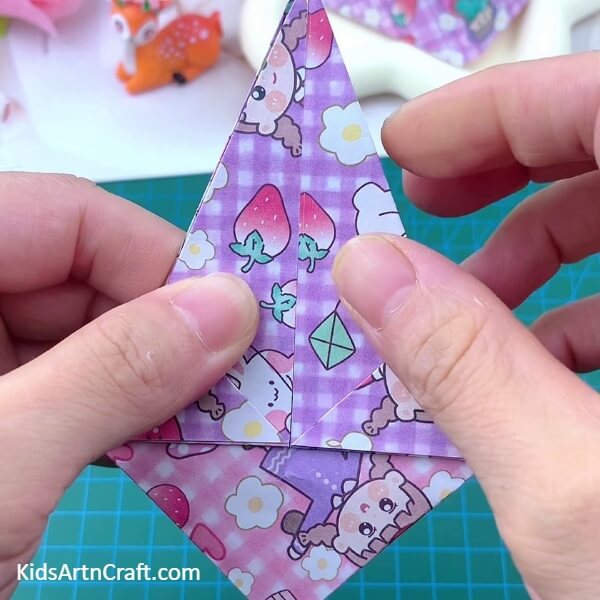
Step 7: Opening both sides of the paper
You can open both the left and right sides of the craft paper, after opening it, join both sides together and fold it.
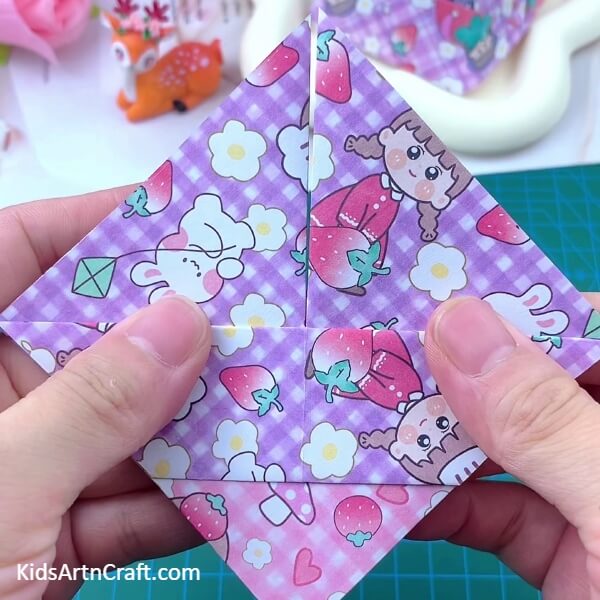
Step 8: Folding both sides of the paper into the middle of the craft paper
Now apply some glue in the middle of the paper, grab both sides of the paper, and diagonally fold both sides into the middle of your paper and paste it.
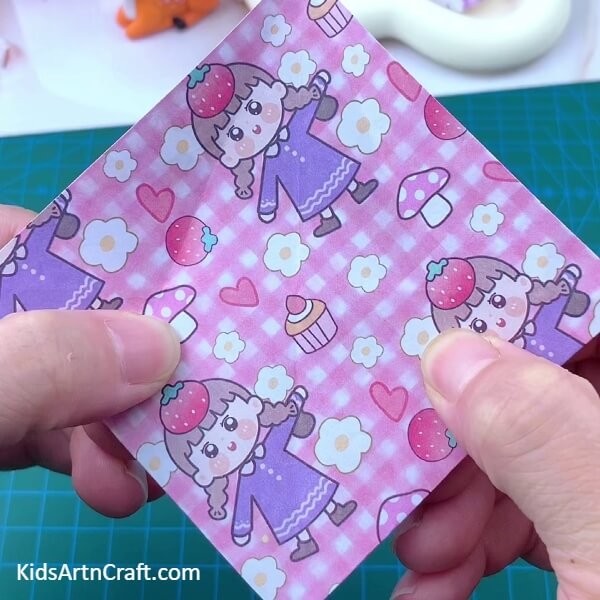
Step 9: Folding the other side of the paper into the middle
Turn your paper and as before, diagonally fold both sides of the paper into the center of your paper as shown in the image and paste it.
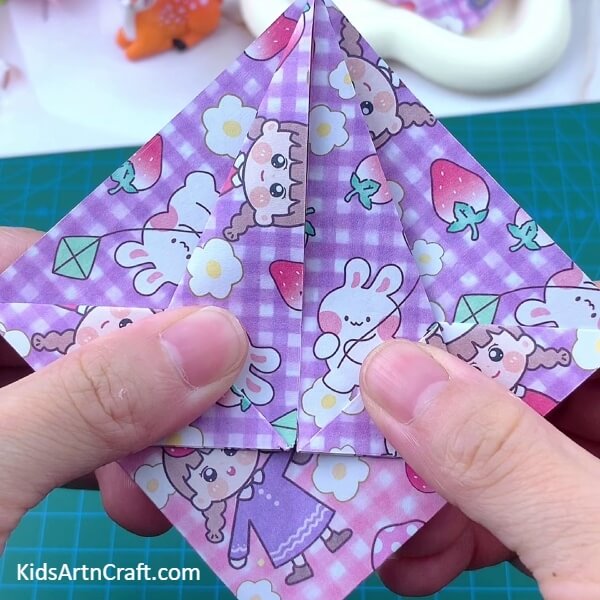
Step 10: Opening your paper basket
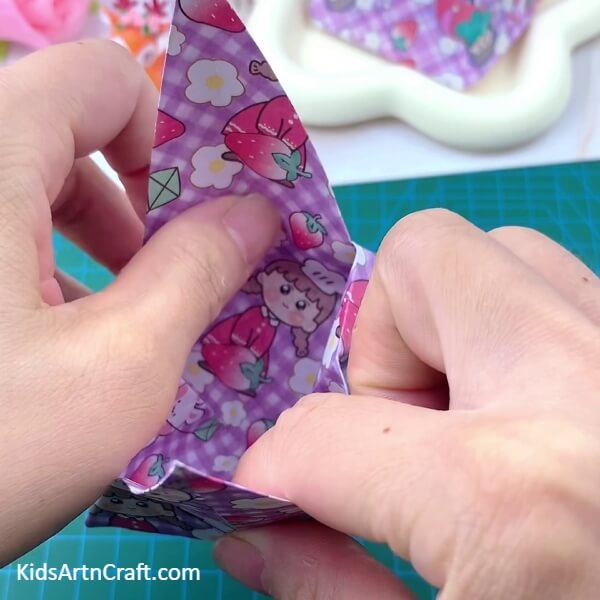
Now, split the cone on top of your paper and open it to make a basket as shown.
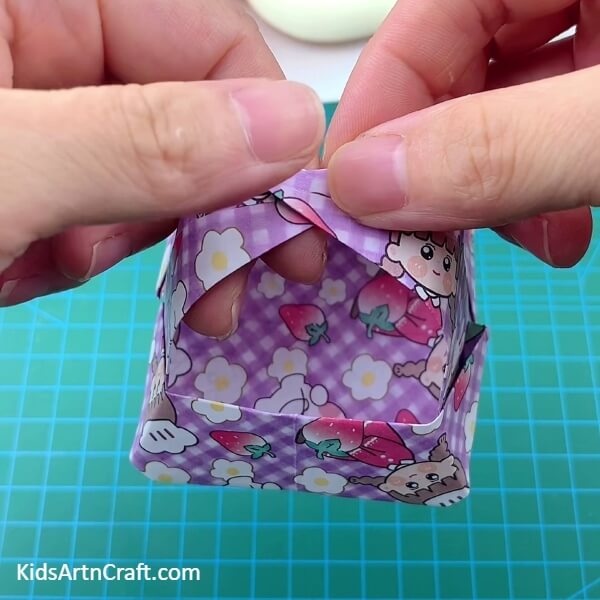
Step 11: Applying glue on top of craft paper

Take your glue stick and apply some glue on top of the craft paper.
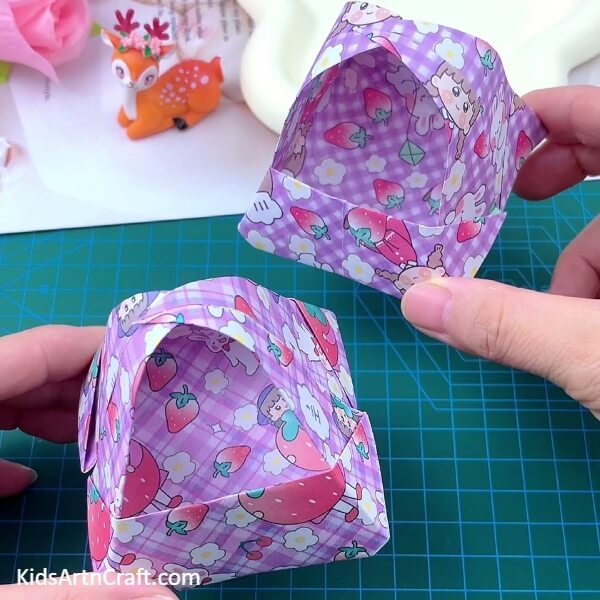
Step 12: Pasting both pieces of paper together
After applying glue, paste two top edges of your craft paper to make a basket handle.
The cute origami paper basket is ready!
We have finished our origami paper basket craft, you can paste a small little bow on top of the handle to make it even more cute.
Hope you all like this origami paper basket craft step-by-step tutorial. Share your comments in the comment section below. If you want to learn more about crafts and arts, visit other tutorials on our website.
Thank you for visiting our website.
Follow us on Youtube for art and craft tutorials and much more.
More Articles from Kids Art & Craft
- Pretty Origami Umbrella Creative Craft Tutorial For Kids
- Easy Ladybug Craft For Kids Using Leaves and Paper
- DIY Origami Fruit Using Craft Paper For Kids
- Easy Paper Folding Crafts Video Tutorial for Kids
- Easy Origami Paper Paku Paku Step by Step Tutorial for kids


