


DIY and Crafts
Creative Sea Rock Landscape Craft Tutorial For Kids

This craft tutorial for kids is filled with creative ideas to make beautiful sea-rock landscapes. Learn how to upcycle common materials to create unique works of art perfect for home decor.
Crafting enhances your brain productivity and it boosts your self-confidence as well. It has innumerable benefits and is a good source of utilizing your free time. So, it’s your time to slay with these crafting ideas along with your kids. If you’re one of those who thinks crafting is not your cup of tea then trust me you have to try this super easy artistry. Without any further delay let’s begin making our amazing sea rock landscape.
Sea Rock Landscape Craft For Kids
Read More: DIY Foam Net Home Craft For Kids
Materials Required
- Brown and Green Leaves
- Plain Sheet
- Pair Of Scissors
- Glue
- Sketch Pens
Procedure
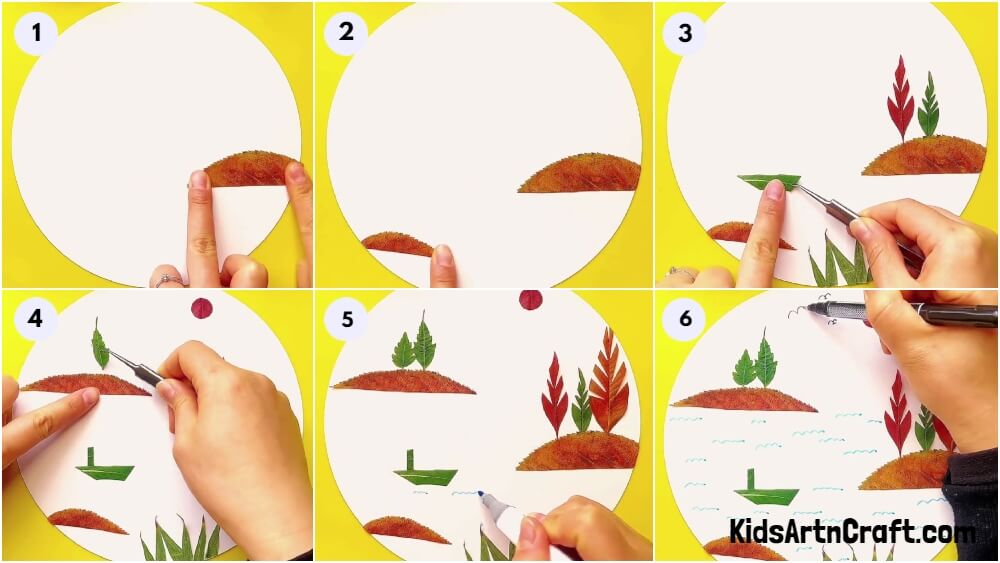
Step 1: Take A Brown Leaf And Cut It To Give It The Shape Of A Shell
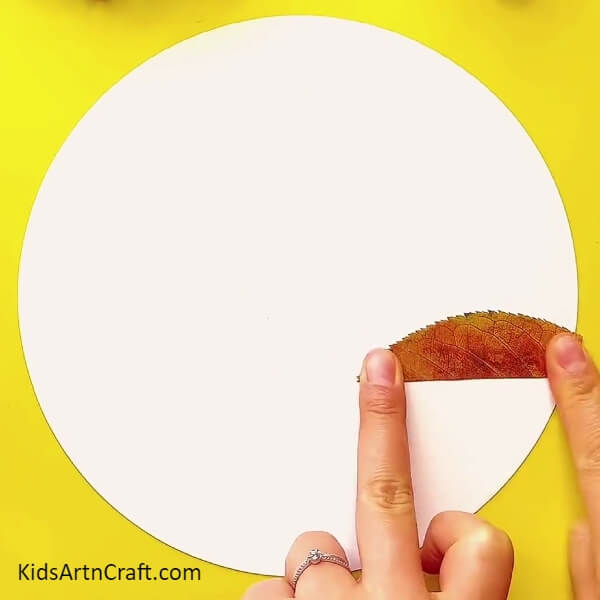
For the first step, take a brown leaf and cut it into the shape of a shell. Place it on a white sheet and secure it with the help of glue as displayed in the image above.
Step 2: Cut A Small Shell From The Brown Leaf And Paste It On The Sheet
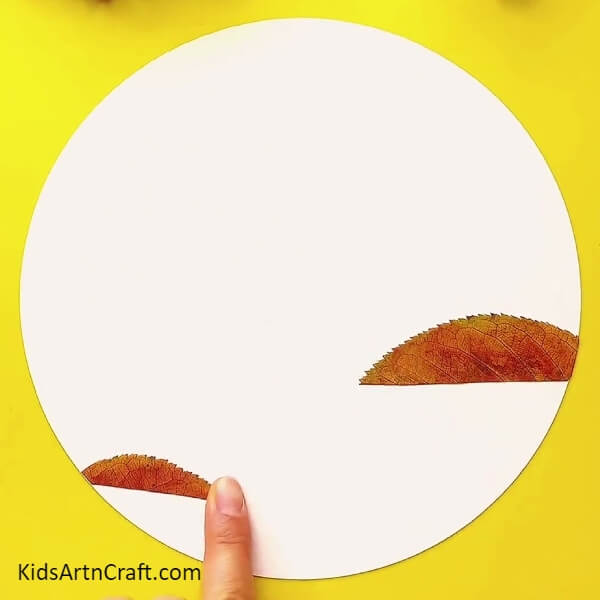
Take another leaf cut a small shell out of it and stick it on the white sheet at the place shown in the image. Hold it for a few seconds until the glue dries up.
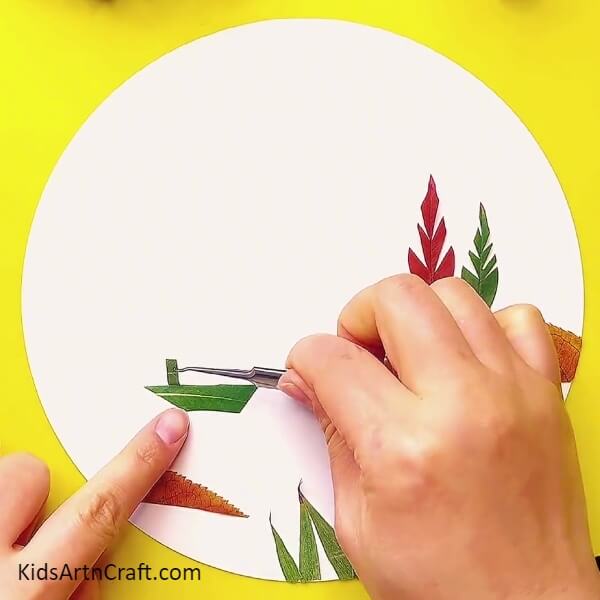
Step 3: Take A Green Leaf And Cut Small Pieces From It To Make Grasses
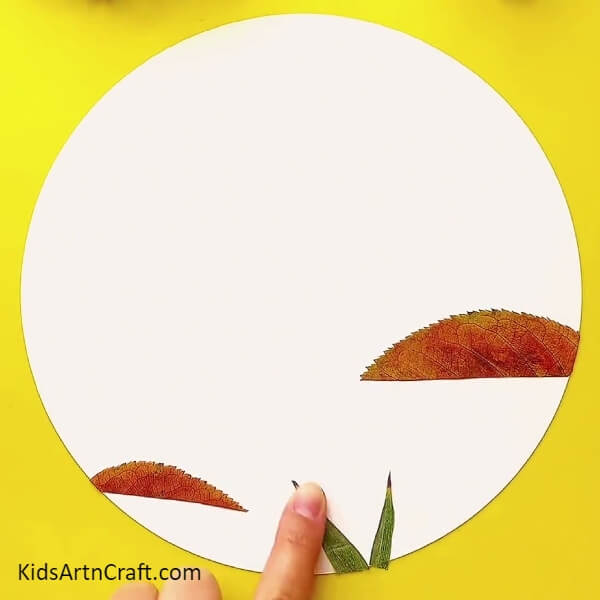
Take a green leaf and cut it into small pieces to make green lush grasses. Paste the pieces in the lower portion of the white sheet with the help of glue.
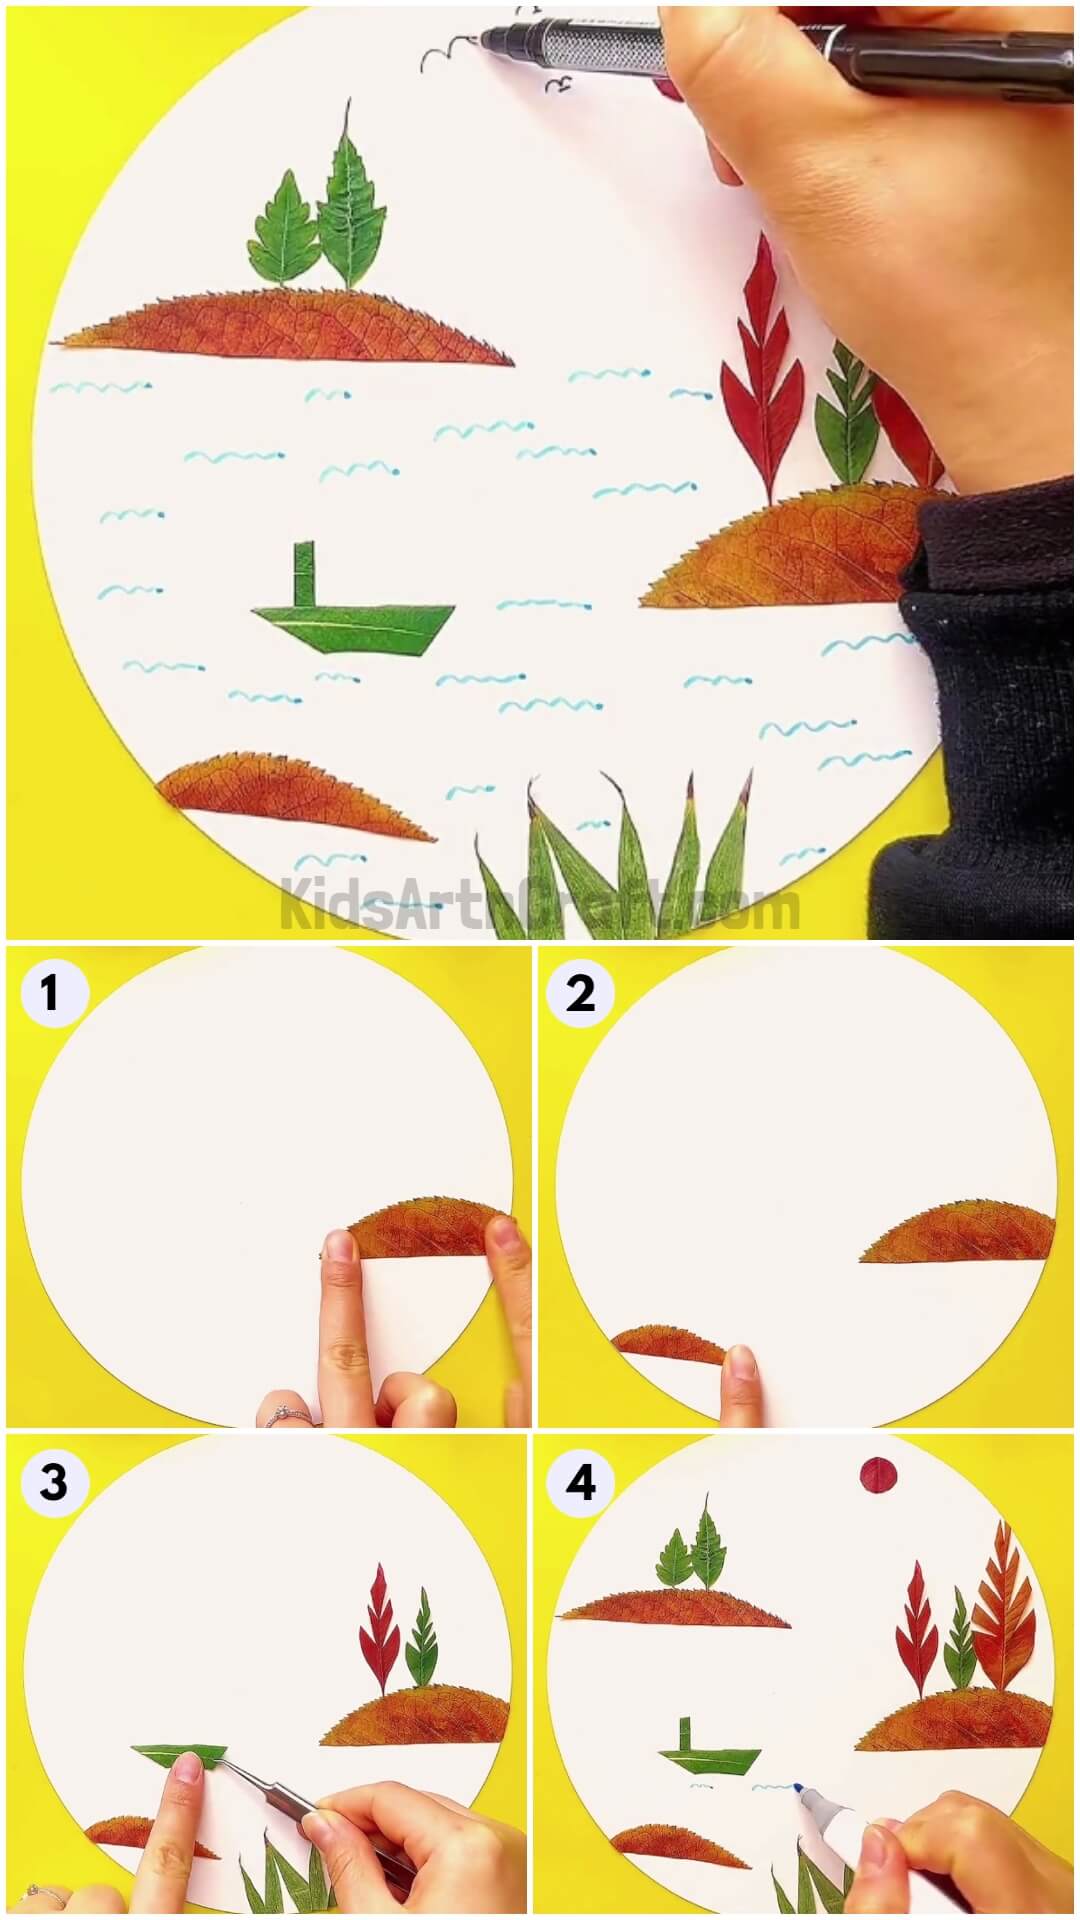
Step 4: Take A Red Leaf, Shape It And Stick It Over The Shell
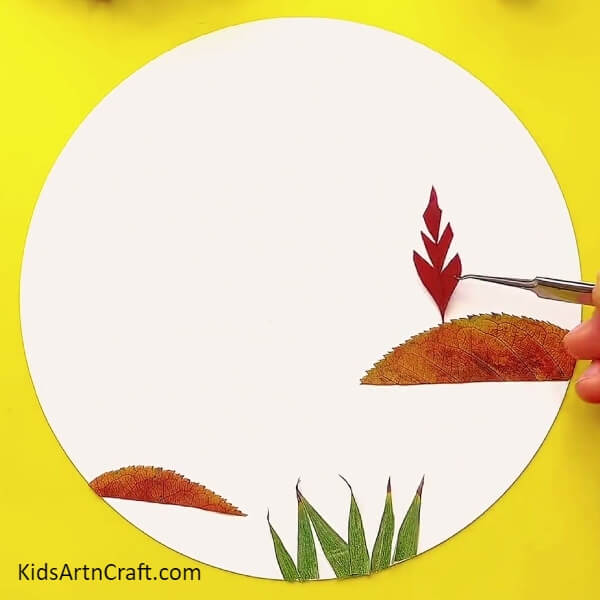
Take a red leaf, shape it like a sapling, and stick it over the shell with the help of glue. Hold it for a few seconds until the glue dries up completely.
Step 5: Take A Green Leaf, Shape It Into A Sapling, And Place It Behind The Red One
Take a green leaf and shape it into a sapling and a small boat. Paste the sapling behind the red one above the shell and stick the boat on the left side of the paper. Hold the two structures softly for a few seconds until the glue dries up completely.
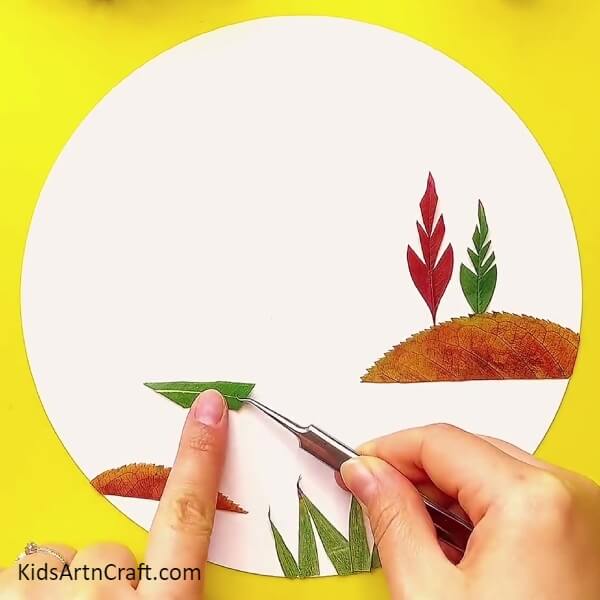
Step 6: Cut A Small Rectangle And Stick It Above The Left Side Of The Boat
Take a green leaf and cut a small rectangle from it. Stick the rectangle on the left side of the boat with the help of glue. Hold it for a few seconds until the glue dries up.
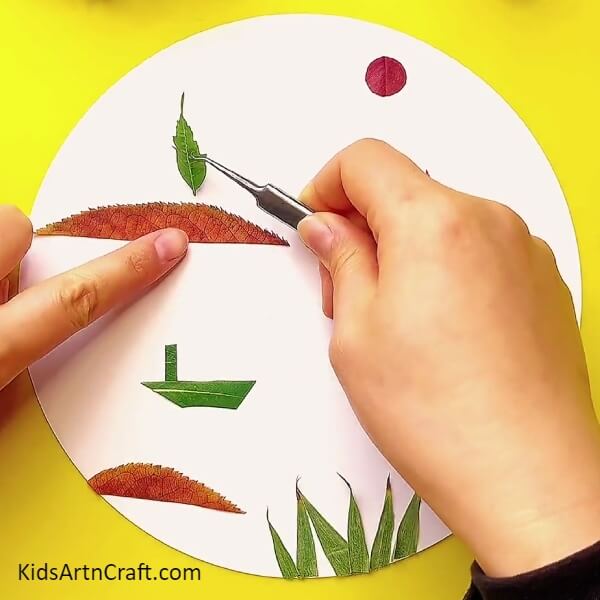
Step 7: Take A Brown Leaf Carve Shell Out Of It And Stick It Above The Boat

Take a brown leaf and carve a shell out of it. Stick the shell with the help of glue above the boat as shown in the image.
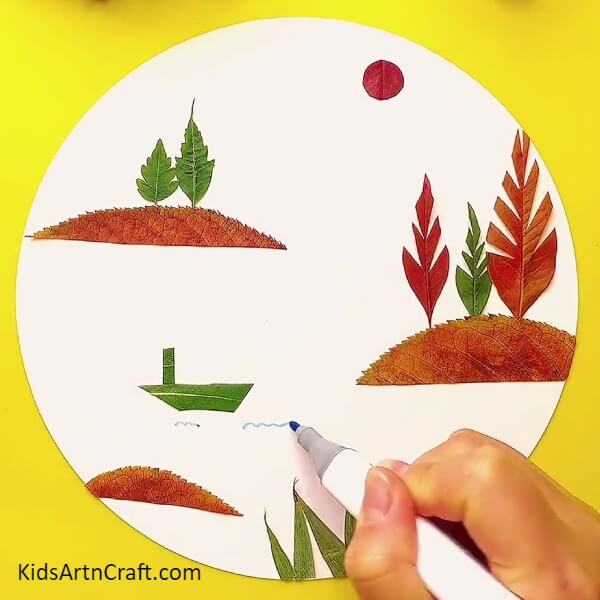
Step 8: Draw The Sun With A Red Leaf And Stick The Green Leaves Above The Shell
Take a small green leaf and stick it above the shell. Next, take a red leaf and cut a circular structure from it to make the sun. Stick the sun with the help of glue above the shells.
Step 9: Draw Waves Of Water With A Blue Sketch Pen
Take a blue sketch pen and draw waves of water with it.
Finally, Draw Tiny Birds With The Black Sketch Pen
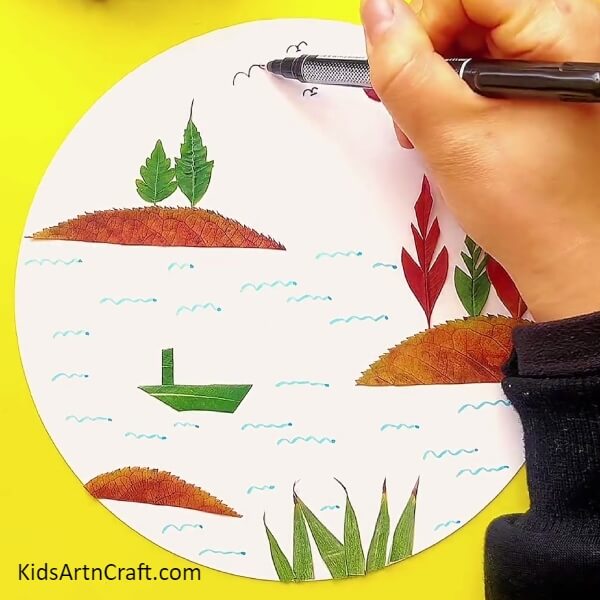
For the last step, make tiny birds from the black sketch pen. With some hard work and patience, we have successfully completed our art.
I hope you have had super fun and have created some long-lasting memories while creating this artistry. Share your experience and opinions with us in the comments section. For more such no-prep basic arts and crafts tutorials check out our website.
Have A Great Day Ahead!
Follow us on Youtube for art and craft tutorials and much more.
More Articles from Kids Art & Craft
- DIY Step by Step Finger Puppet Craft for Kids
- DIY Surgical Mask pouch easy tutorial
- Creative Art & Craft Activities Video Tutorial for All
- Easy Craft Activities that Make Everyone Video Tutorial for All
- Pineapple Pine Cone Step-by-Step Tutorial for Kids