Drawing
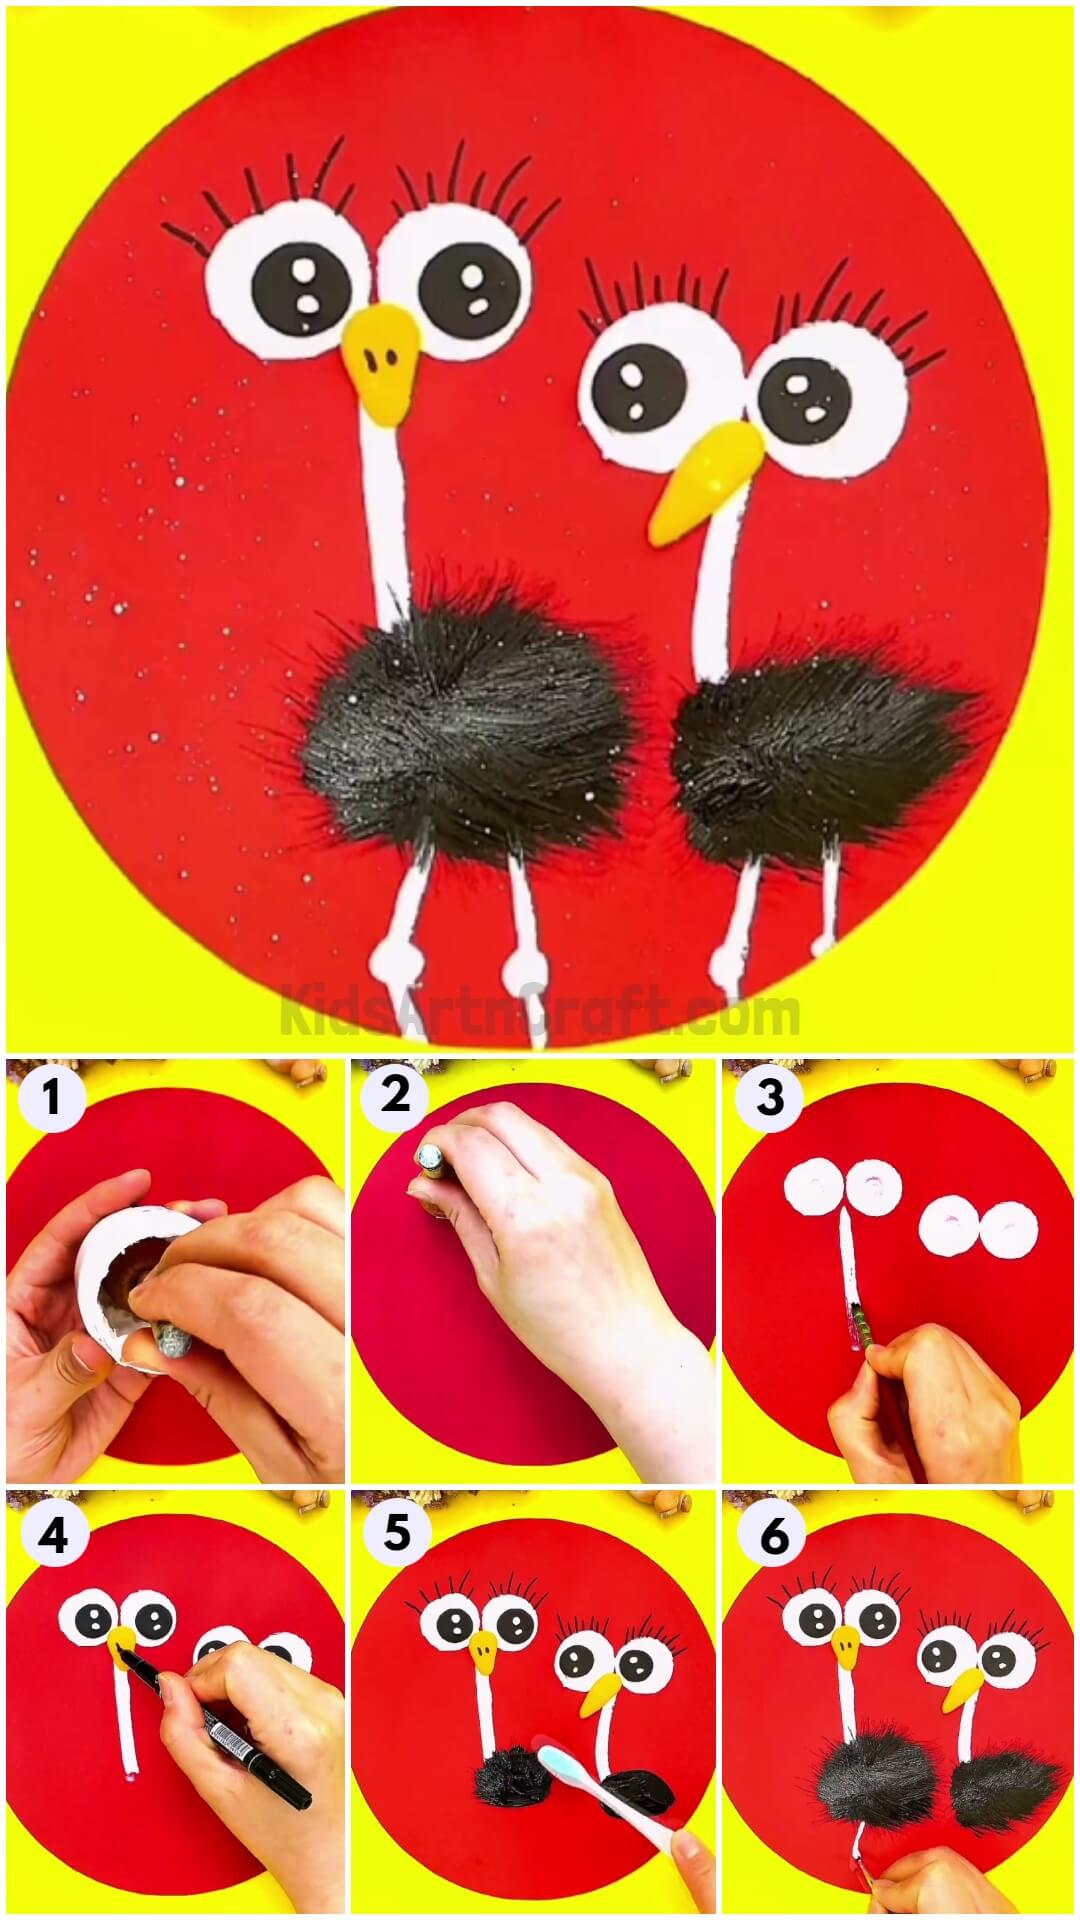
Cute Ostrich Painting Hacks for Kids

Follow this guide to make lovely ostrich-related crafts. The steps are easy to follow so you can make something special with these fun projects.
Welcome to this step-by-step tutorial on how to make a cute ostrich craft. This craft is very simple yet pretty enjoyable at the same time. This craft will require very simple drawing skills. This will require very basic materials which will be available easily in any art and craft store. So without any further ado, let’s get started and come let us make it together.
Simple Ostrich Painting Hacks For Kids

Read More: Paper Butterfly Craft Easy Tutorial for Kids
Materials Required
- White Paint
- Big mop brush
- Small brush
- Black paint
- Yellow modeling clay
- Black sketch pen
- Red craft paper
- Toothbrush
- Fan brush
Procedure
Step 1: Take White Pain In A Big Mop Brush
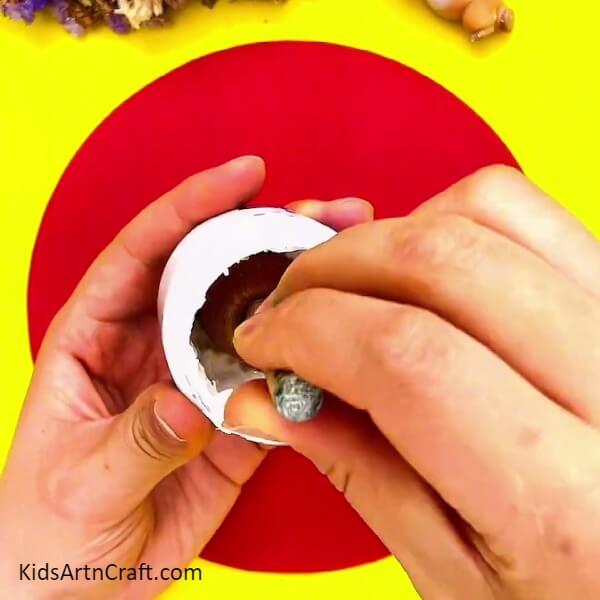

For this craft, start by taking white paint in a big mop brush.
Step 2: Making Circles With White Paint
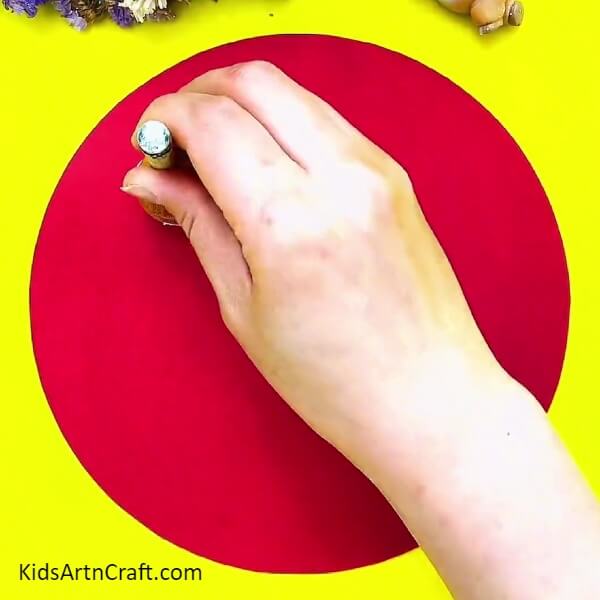
After taking white paint with in a big mop brush, start by tapping it on the red craft paper to make a circle as shown in the photo above.
Step 3: Making Two Circles With White Paint
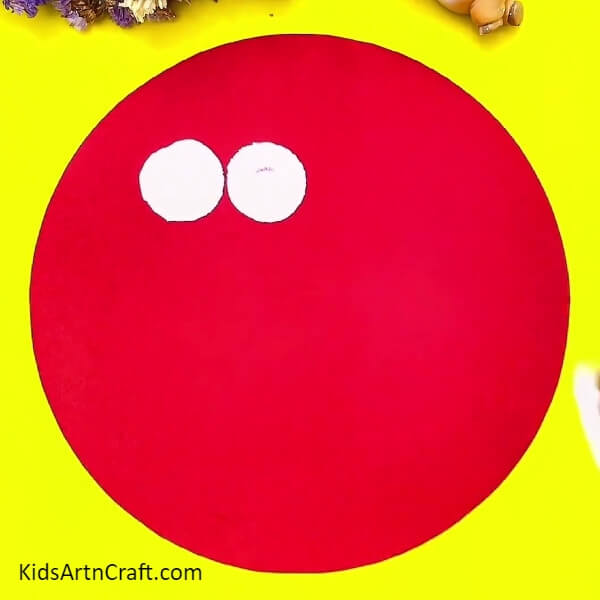
Making one more circle for making the eyes of the ostrich. For this too make in the similar way one more circle by tapping with the mop brush as we did it earlier.
Step 4: Making The Neck Of The Ostrich With White Paint
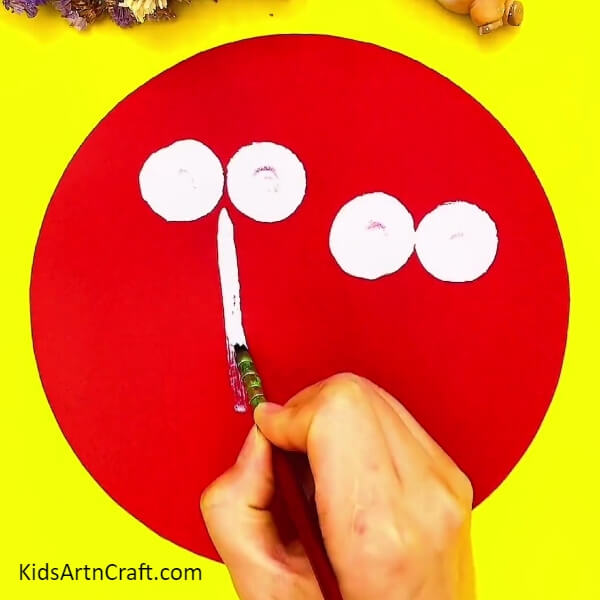
Now make eyes of the ostrich, make eyes of the other ostrich in a similar way as we did earlier. After that make the neck of the ostrich with white paint in a thin mop brush and draw a straight line from the middle of the eyes of both the ostrich.
Step 5: Making Pupil With Black Modeling Clay
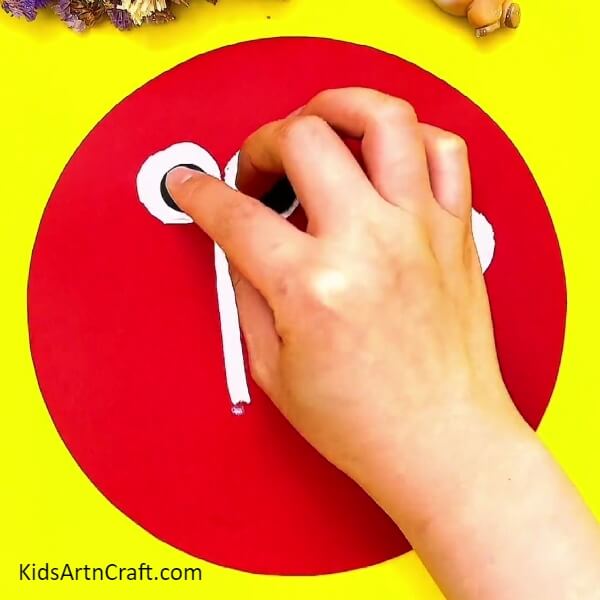
Now take black modeling clay. Take small portions out of it and make four balls to make pupils for the eyes. Shape it in the form of a circle and stick in the middle of the white circle. After it press them to flatten them with your fingers as shown in the photo above.
Step 6: Making A Nose With The Orange Color Clay
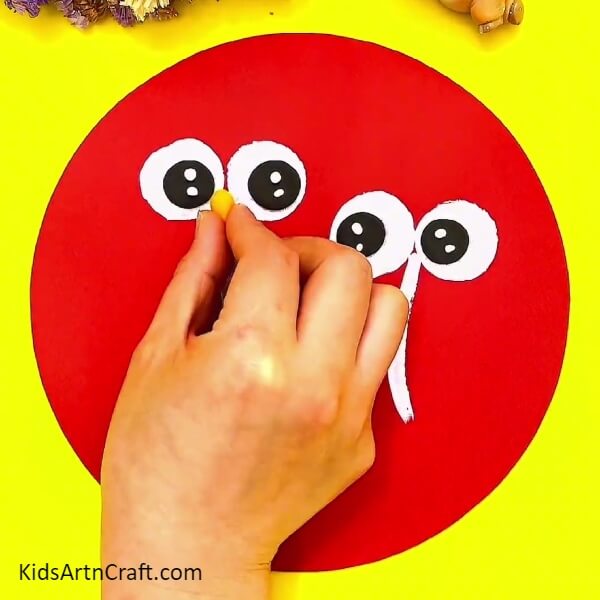
Now after making eyes, its turn to make the nose of the ostrich. For this take orange modeling clay and give it a shape like a nose as shown in the image above.
Step 7: Making Details Of The Nose
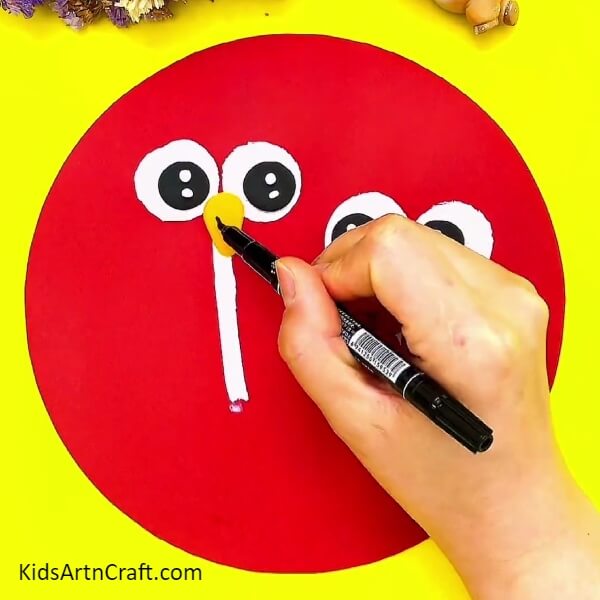
Making details of the nose for this take a black sketch pen and make small dots as shown in the photo above.
Step 8: Making Lashes Of The Eyes With A Black Sketch Pen
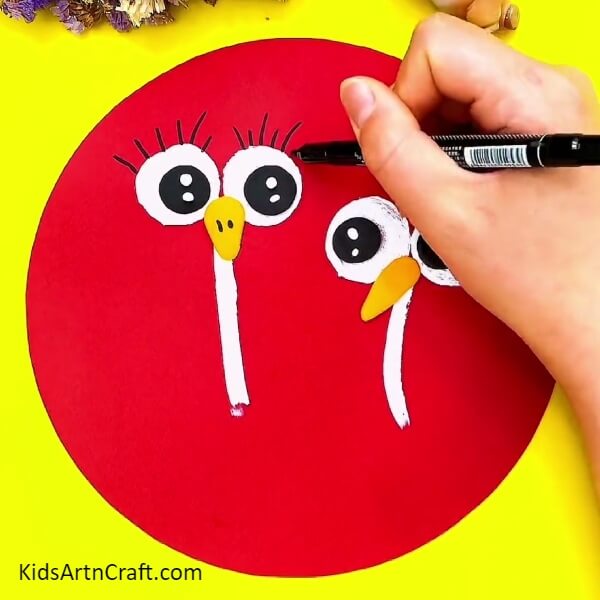
Now take a black sketch pen and start making eyelashes above the eyes of the ostrich as shown in the photo above.
Step 9: Making The Body Of The Ostrich With Black Paint Color
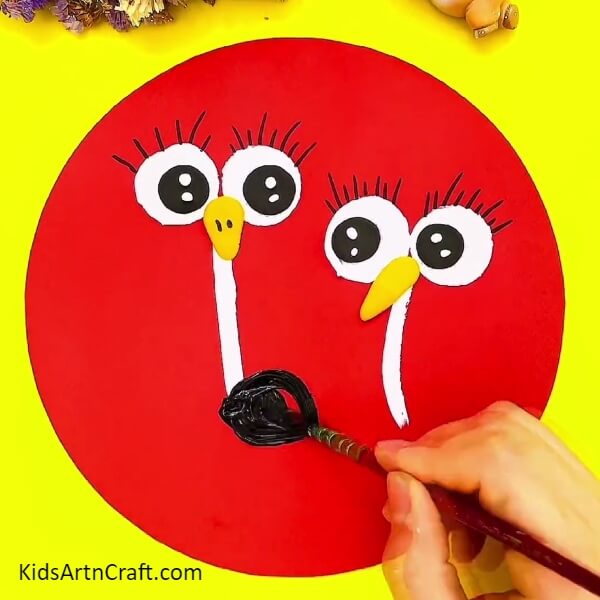
For this step, take black paint color in the brush. Then start making the body by painting with a brush in an oval shape for the ostrich as shown in the photo above.
Step 10: Making Feathers Of The Ostrich With A Brush

Now take a toothbrush and start brushing over the body of the ostrich to make the feathers, spread the brush outside as shown in the photo above.
Step 11: Making The Legs Of The Ostrich With White Paint
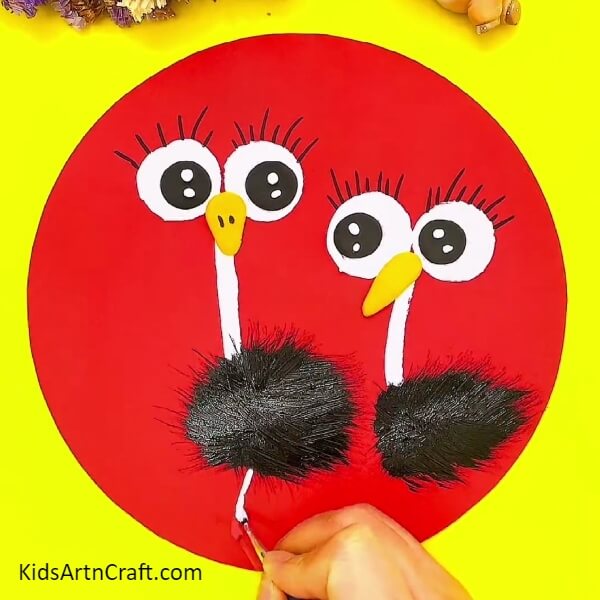
Now after making the body and feathers of the ostrich, it’s time to make the legs with thin brush. Take white paint with a thin brush and draw lines below the body to make legs as shown in the photo above.
Step 12: Decorating The Background With Fan Brush And Sketch Pen
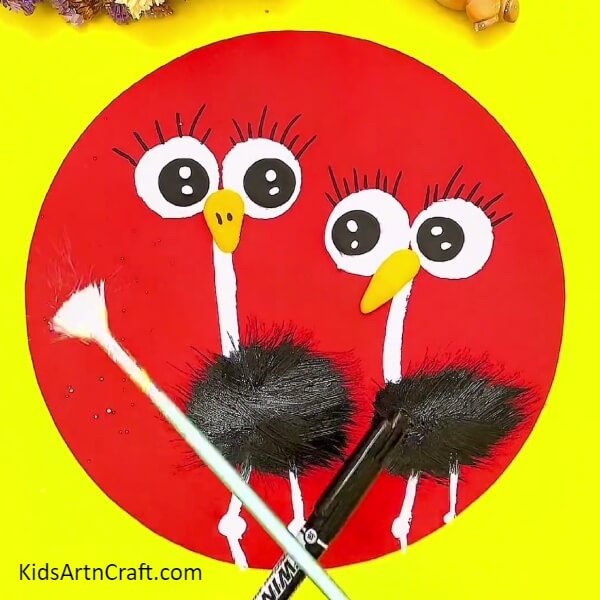
Now for decorating the background, take white paint in the fan brush. Then take a sketch pen and spread it by taking and spreading the white paint with the fan brush.
After Completing The Ostrich And Decorating The Background As Shown In The Below
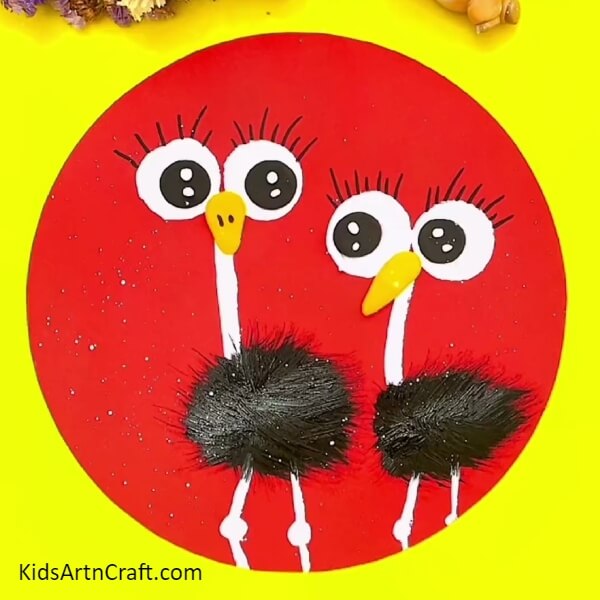
Tada! Our beautiful and cute ostrich is ready. This is the ostrich that can be made with a little bit of effort and yet simple and basic. Make it in various colors and give them for details with a sketch pen like making more feathers. Don’t forget to make changes as per your imagination. Also don’t forget to enjoy the process all along the way. Now it’s time for you to try them out and let us know in the comment section. This craft is very useful for all the kids who are beginners and don’t enjoy drawing, but it is so simple that they will love creating. Also, let us know much you enjoy the process and how helpful you find the tutorial. We would love to read your comments.
Thank you for visiting our website!
Also, make sure to visit other articles as well.
Follow us on Youtube for art and craft tutorials and much more.
More Articles from Kids Art & Craft
- DIY Easy Paper Chick Craft For Kids
- DIY Heart Shape Cat Craft for Valentine’s Day
- Heart Shaped Paper Mouse Craft Step by Step Tutorial
- How to Make Easy Paper Snowflakes Tutorial
- DIY Paper Tree Crafts for Kids Easy Tutorial