Recycled Crafts
Paper Cup Helicopter Fan Propeller Craft Step by Step Tutorial

This tutorial will show you how to make a cool paper cup helicopter fan! All you need are some simple materials and you can easily put together this fun and creative craft for kids. It’s easy enough for both kids and parents to make!
Today, we bring to you a very exclusive and fun craft tutorial. It will teach you to make a helicopter fan propeller. You can take liberty in choosing the colour you want the propeller to have and we will be colouring its centre as well. This craft is also going to be an enjoyable game which doesn’t need any partners to play with. A simple toothpick and a strong spin will make it rotate like a shaft. So, collect all the material required to make this craft and let’s begin with the tutorial.
Easy Paper Cup Helicopter Fan Propeller Craft


Read More: Fun To Make Paper Chick Craft
Materials Required
- A paper cup
- A pair of scissors
- Sketch pens
- A pencil and a scale
- A toothpick
Procedure
Step 1: Starting With A Paper Cup
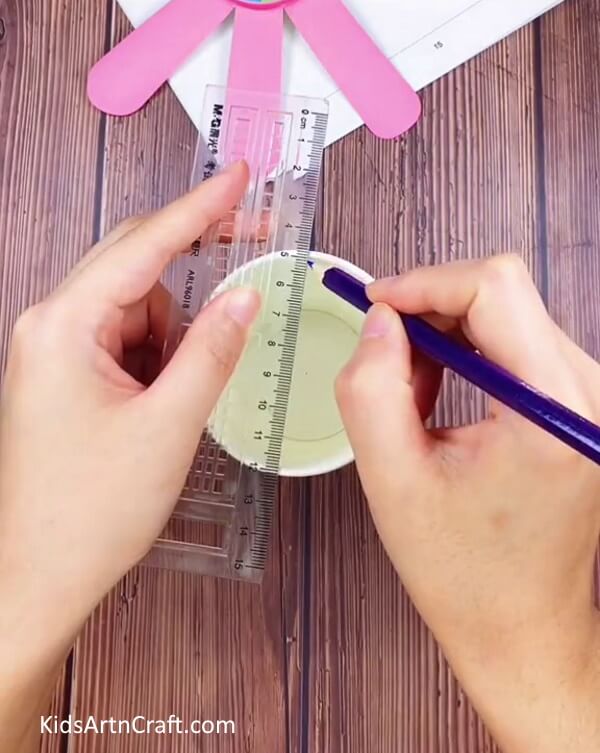

Take a paper cup and place it on the table. Now, with the help of a scale, start measuring the cup around the top ends. Make seven equal marks on the rim of this cup with a pencil.
Step 2: Cutting The Cup Into Strips


With the help of scissors, cut the cup into eight strips, following the marks made on the rim. The strips should stay connected to the round base of the cup.
Step 3: Flattening The Strips
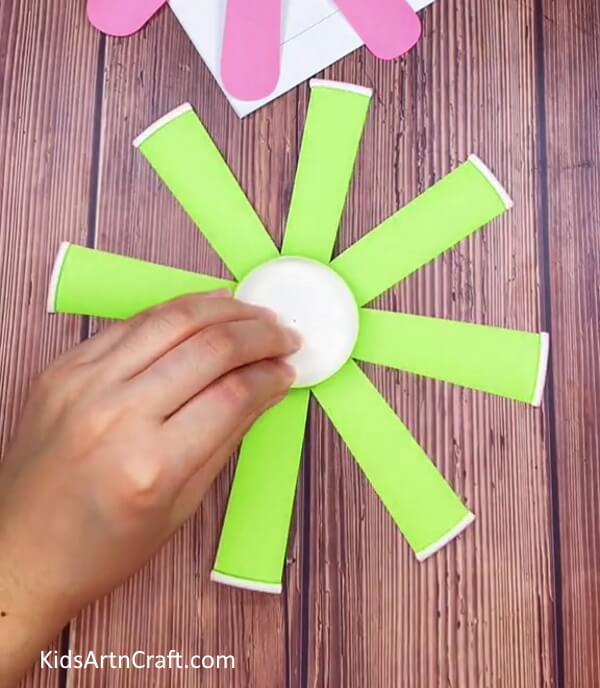

Stretch out the strips and flatten them on the table making them equal to the base of the cup as shown in the picture below.
Step 4: Cutting The Edges Off
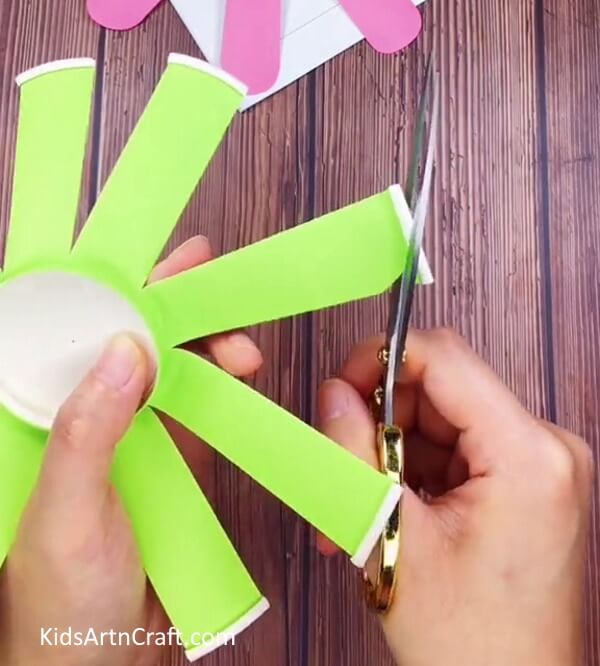

Cut off the thick ends of these strips by making their edges curved. Follow the picture below for reference.
Step 5: Measuring The Base
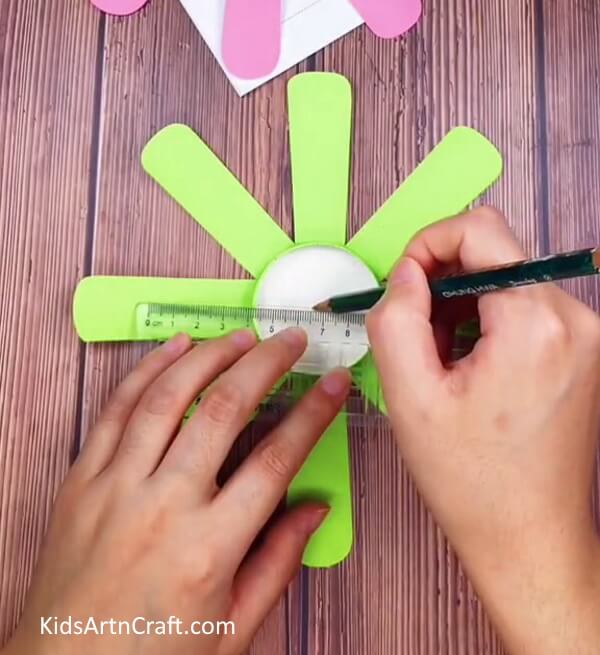

Take a scale and start measuring the round base in the middle. Make seven equal marks on the edge of this base with a pencil and connect these marks by first drawing a horizontal and a vertical line straight in the middle making a cross and a slanting line on both sides of the vertical line crossing the intersection in the middle This leaves us with a total of seven lines across the circular base as shown in the picture of the sixth step.
Step 6: Colouring The Sections On The Base
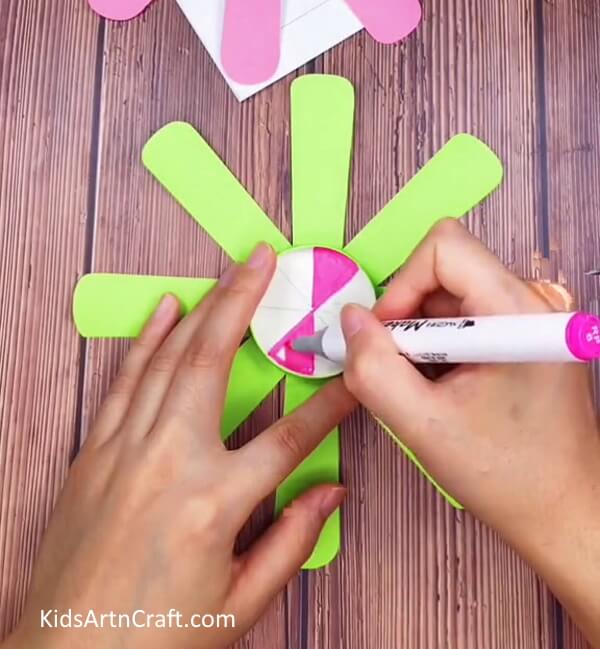

The lines we drew in the previous step left us with eight sections across the base. Now, take a pink sketch pen and colour two of the sections opposite to each other placed on the top right side of the vertical line in the middle and the bottom left side of the same as shown in the picture below.
Step 7: Colouring The Entire Base
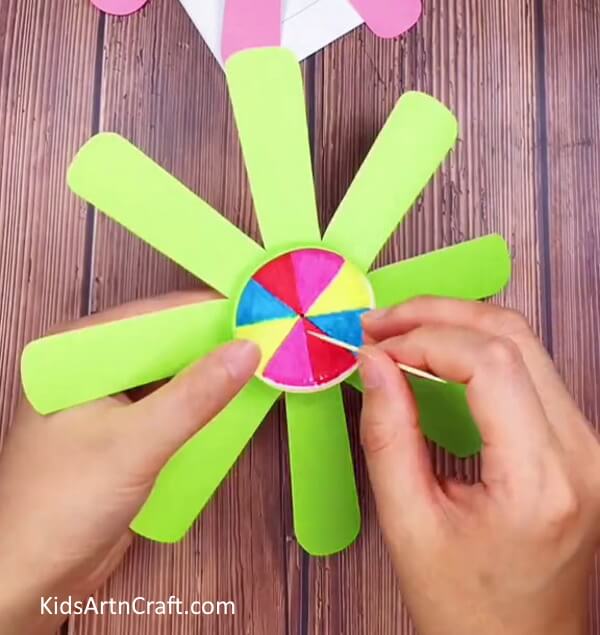

Take a red sketch pen and colour another set of opposite sections placed at the top left side of the vertical line in the middle and the bottom right side of the same, then colour yet another set of opposite sections placed at the right side of the pink section at the top and the left section of the pink section at the bottom, with blue sketch pen and finally, colour the remaining set of opposite sections using yellow sketch pen. See the picture below for reference.
Step 8: Fixing the ToothPick In The Base
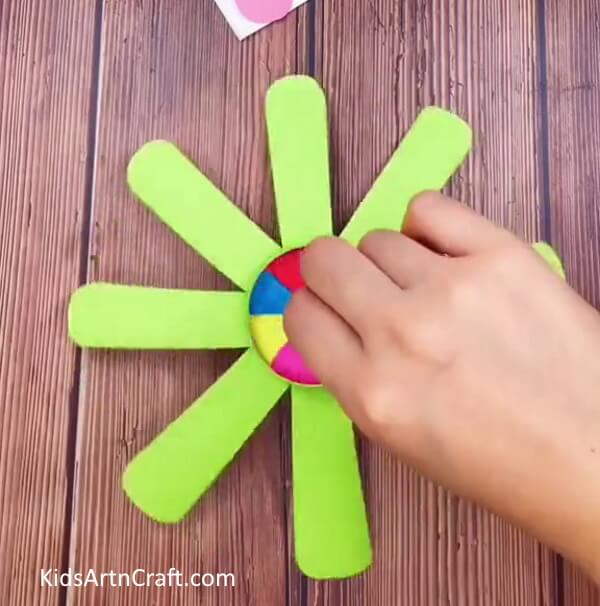

Take a toothpick and poke a hole with it in the middle of the multi-coloured base. Now, fit the toothpick in this hole properly so that the base holds it properly, as shown in the picture below.
Enjoyable Spinning Propeller!!
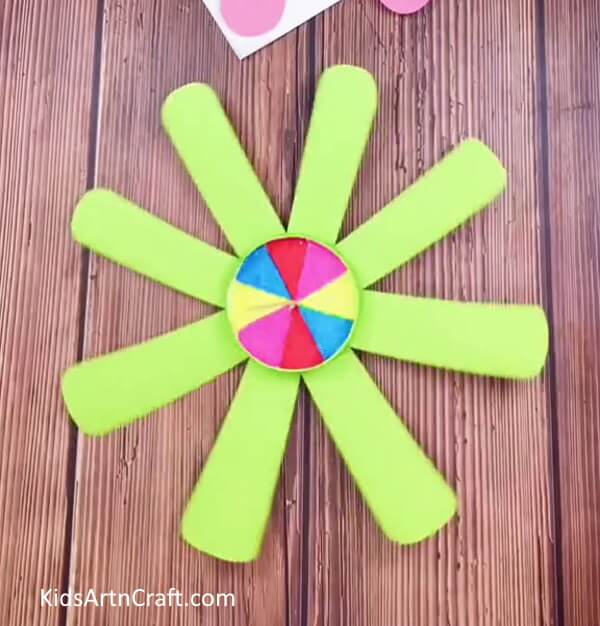

There you have it, our very own, spinning helicopter propeller with eight blades and a colourful centre. Spin it to see the magic happen.
This tutorial taught you good cutting and colouring skills. You also learned great measuring skills which can come very handy while making art and craft. You can play with this propeller or gift it to your friends or siblings as a toy. You can also use it as a decoration in your home. Keep practising the techniques you learn in these tutorials and start exercising your own ideas as well. See you in plenty more tutorials to come. Good luck and goodbye.
Follow us on Youtube for art and craft tutorials and much more.
More Articles from Kids Art & Craft
- Origami Paper Plane Craft Tutorial For Kids
- Make DIY Origami Paper Envelop Craft For Kids
- Fun To Make Paper Flower Bucket Craft – Step-by-Step Tutorial
- Easy Paper Bird Toy Craft To Play For Kids
- Easy Origami Shirt and Bow Paper Bag Craft At Home