Kids Activities
DIY Easy Paper Pig Craft Tutorial For Kids

This tutorial is inspired by cute little snorting piggies. They have beautiful pink-colored skin and unique noses. We will be making a craft involving these creatures with just a sheet of paper. We will use such a technique in this tutorial so that the craft will retain its shape and newness for a longer period of time so, you can preserve it and cherish it later even in your adulthood as a wonderful memory. Start collecting all the material and let’s get started with making this pig craft.
Simple Paper Pig Craft Idea For Kids To Make

Read More: How to Make Paper Sheep With Step-By-Step Tutorial
Materials Required
- Pink And White Paper Sheet
- Scissors
- Black and Pink Marker/sketch pen
- Pink Balloon
- Cello Tape
- Pencil
Procedure
Step 1: Folding A Pink Paper

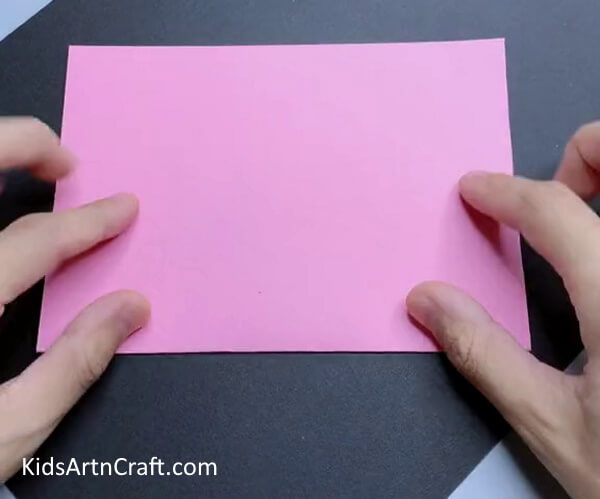
Begin this craft by taking a pink-colored sheet of paper, and folding it in half.
Step 2: Drawing Pig’s Body
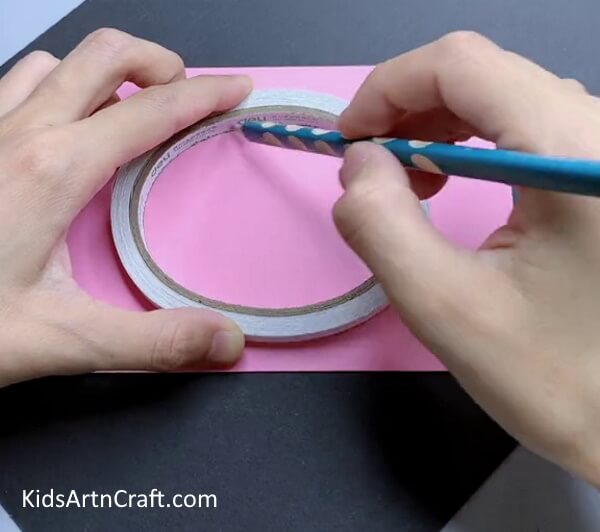

Using tape as a stencil, draw an oval shape for your piggy and make its conical ears, dotted eyes, a circular nose with 2 dotted nostrils, twisted tail, and V-shaped hands and legs from a pencil.
Step 3: Overdrawing Over Pencil With Marker
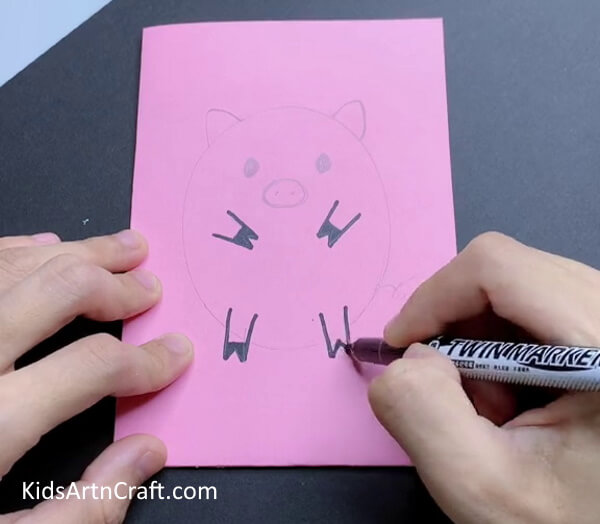

Use a black marker to overdraw over the pencil.
Step 4: Pasting Eyes
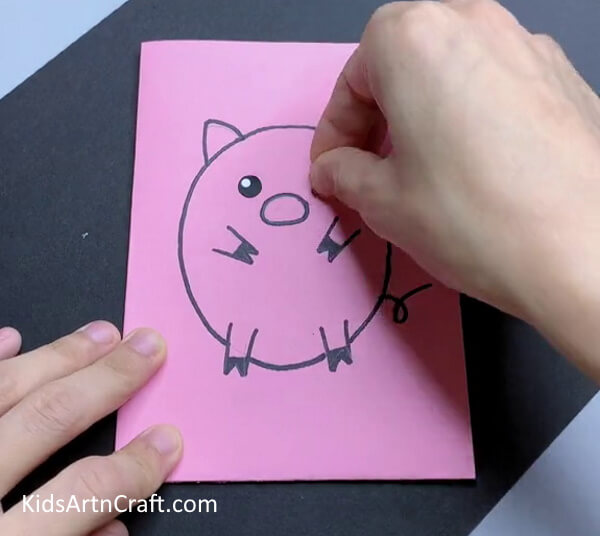

Using a white sheet cut out 2 eyes and detail them with a black marker, then paste them over the penciled eyes. Now, with a pink sketch pen make Piggy blush over the cheeks.
Step 5: Applying Tape Over The Drawing
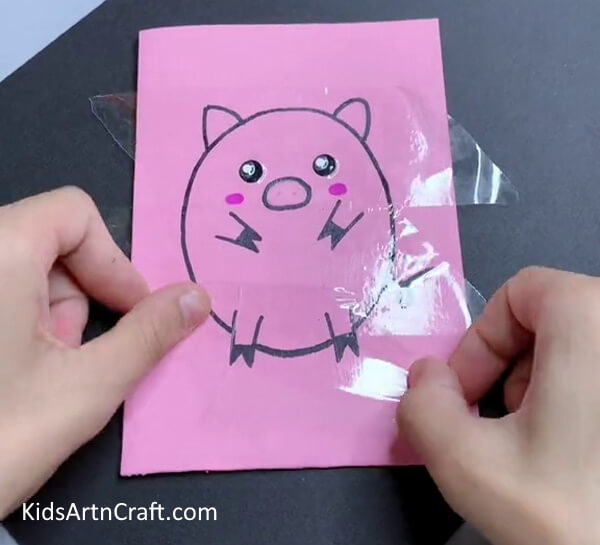

Using cello tape, apply tape over the whole piggy. Make sure to cover it wholely.
Step 6: Cutting Out The Piggy

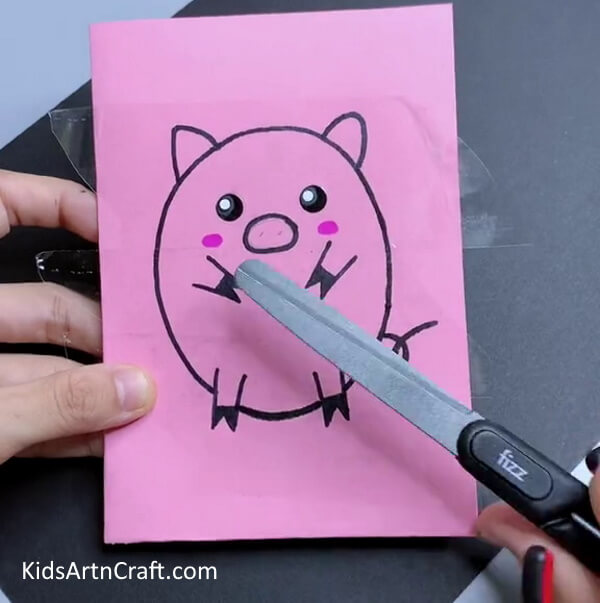
Using scissors, cut out the piggy shape from the folded sheet altogether.
Step 7: Cutting Out the Nose
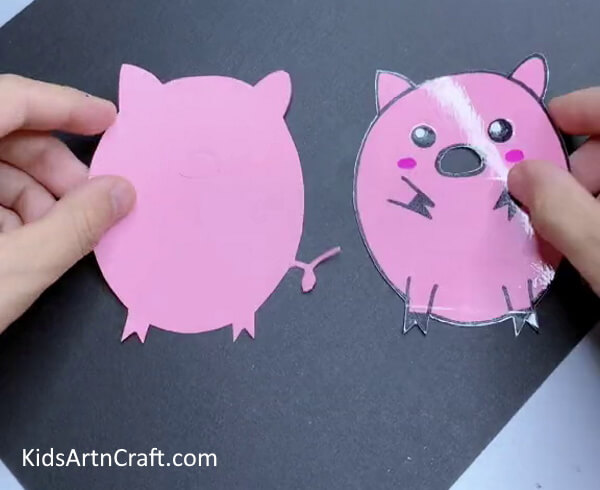

Cut out the nose from the drawn piggy and leave the second one untouched.
Step 8: Pasting A Balloon
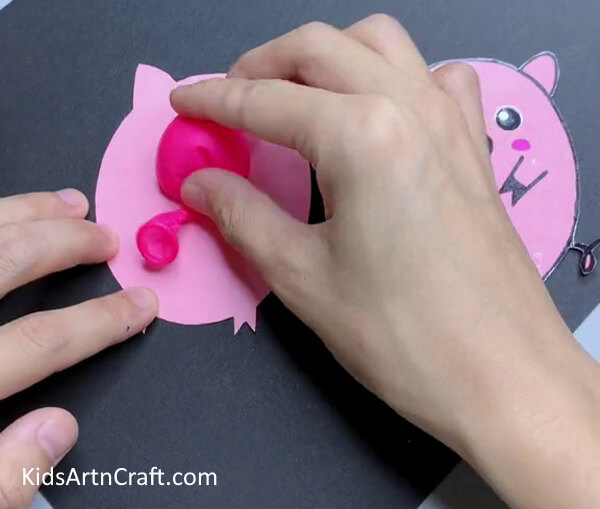

Blow a pink balloon just a tiny bit, and secure it with a knot. Paste it over the middle of the untouched pig shape.
Step 9: Joining The Two Shapes Together
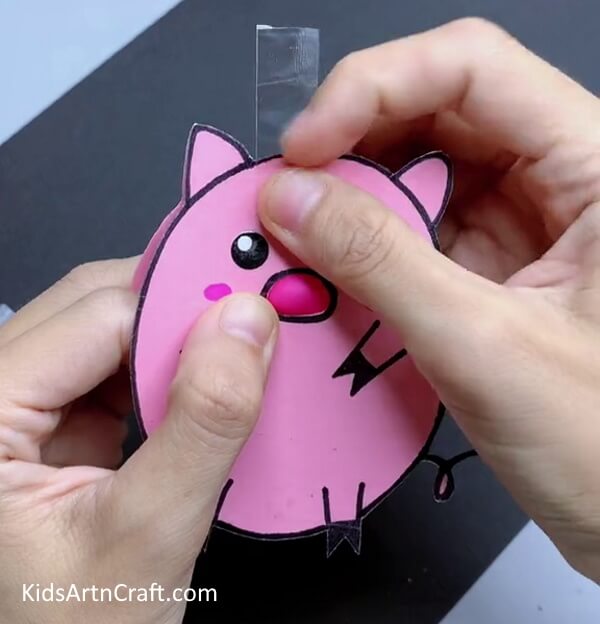

Overlap the drawn pig shape over the other and secure them with tape from the top.
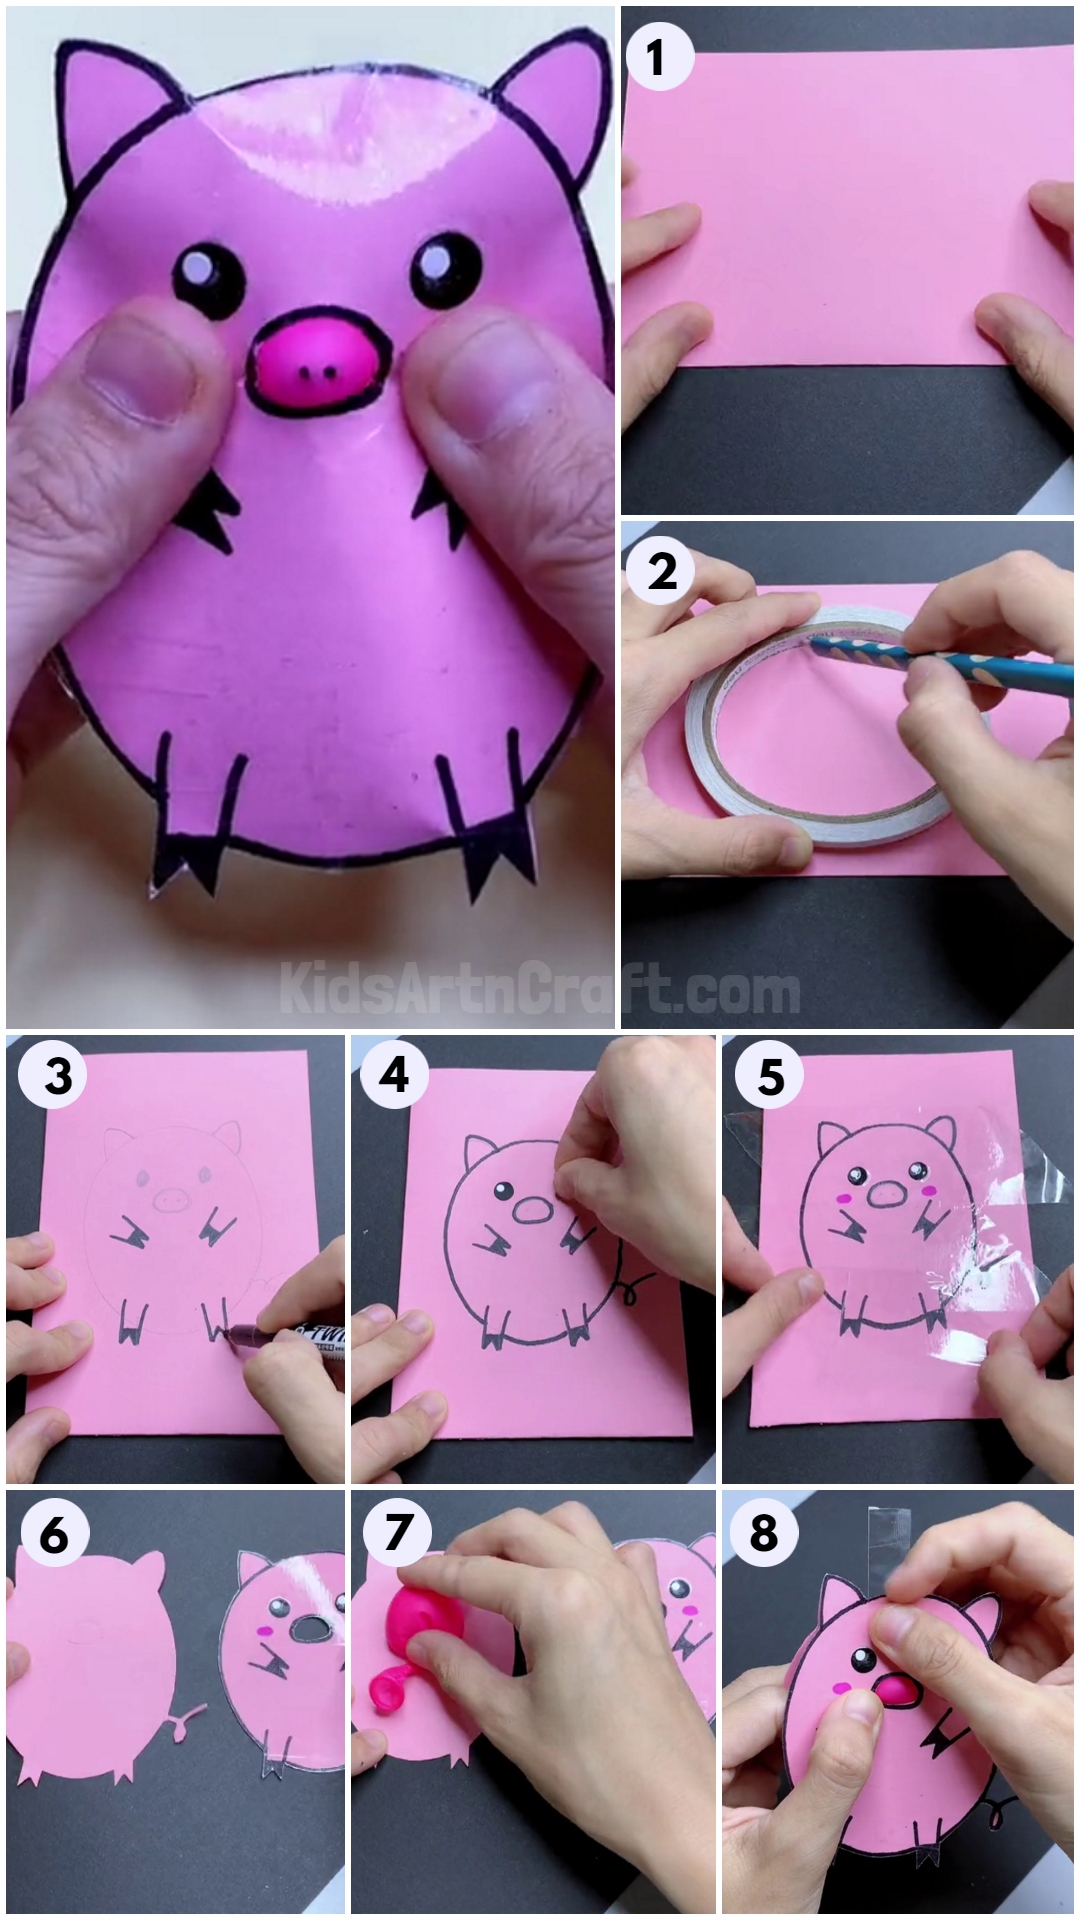
Your Paper Piggy Is Ready!
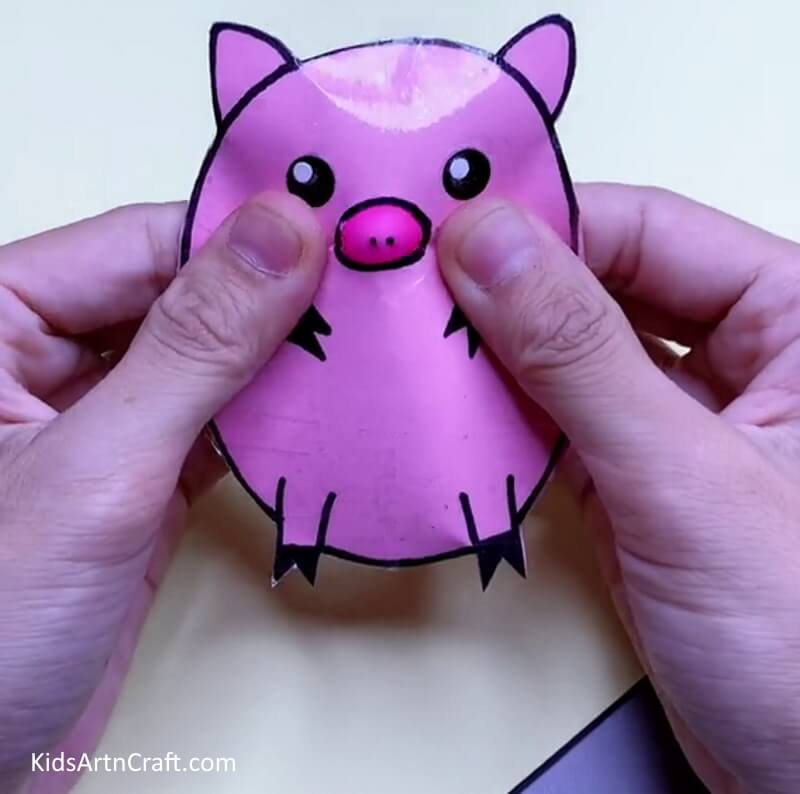

Seal all the ends of both shapes together using glue. Draw two dots next to each other in the middle of the balloon. Press your piggy to blow the nose! Haha! Funny!
This completes today’s pig craft. We are left with a beautiful and fun pink little piggy with a bouncy nose. The tapping with make the craft survive for decades to come so, this tutorial taught you a very effective way of preserving the craft. You also learned good cutting and drawing skills. You learned to join two similar shapes together to add a new dimension to the craft. You can hang it on the walls of your room, in your car, or even play with its nose. Use these techniques on your own ideas to diversify your art and craft. Keep practicing and keep experimenting. Good luck.
Some More Pig Craft Tutorial
How To Make Pig Craft With Egg Carton

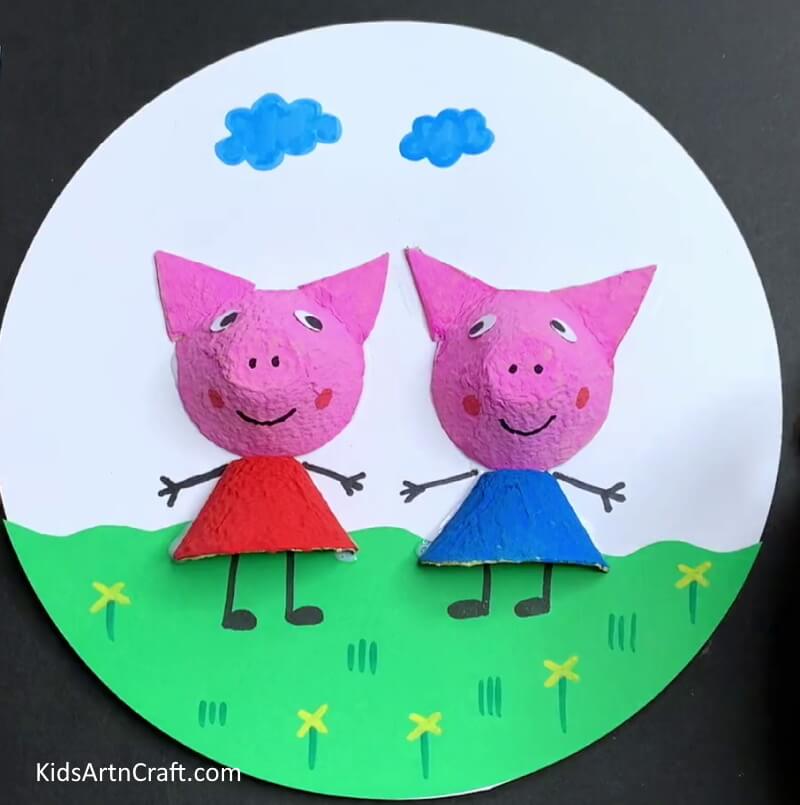
Image Source/Tutorial: Kids Art & Craft
Making a Pigg craft with an egg carton is a fun and easy activity for kids. It requires minimal materials and can be completed in a matter of minutes. With just a few simple steps, you can create a cute and creative Pigg craft that your child can proudly display!
Follow us on Youtube for art and craft tutorials and much more.
More Articles from Kids Art & Craft
- Easy to Make Paper Crafts Video Tutorial for Kids
- Recycled Plastic Bottle Dragon Craft Tutorial for Kids
- Paper Rainbow Cloud Craft Step-by-step Tutorial
- Easy Frog Paper Craft For Kids Easy Tutorial
- DIY Easy Paper Strawberry Tutorial For Kids