DIY and Crafts
Easy Rabbit Cotton Stuffed Toy Craft Tutorial For Beginners

Have an adorable rabbit with you all the time by making it on your own! This step-by-step tutorial will guide you in making a stuffed rabbit!
Rabbits are literally the most adorable animals we can find near us! If you want them 24 hours by your side, then this craft is for you! This rabbit craft stuffed toy will serve you the same! Although this is not a real rabbit, I’m sure it’ll do the work! This step-by-step tutorial will guide you on each and every step of this craft-making and the results will be like those made by a pro! You can make this craft in the boring afternoon hours to engage yourself in a fun craft activity and have a blast! Let’s begin!
DIY Rabbit Cotton Stuffed Toy

Read More: Handmade Metal Bike Toy Craft Step-by-Step Instructions
Materials Required
- Polythene
- Cotton
- Thread
- Scissors
- Colored Sheets (Black, White, Light, And Dark Pink )
- Glue
Procedure
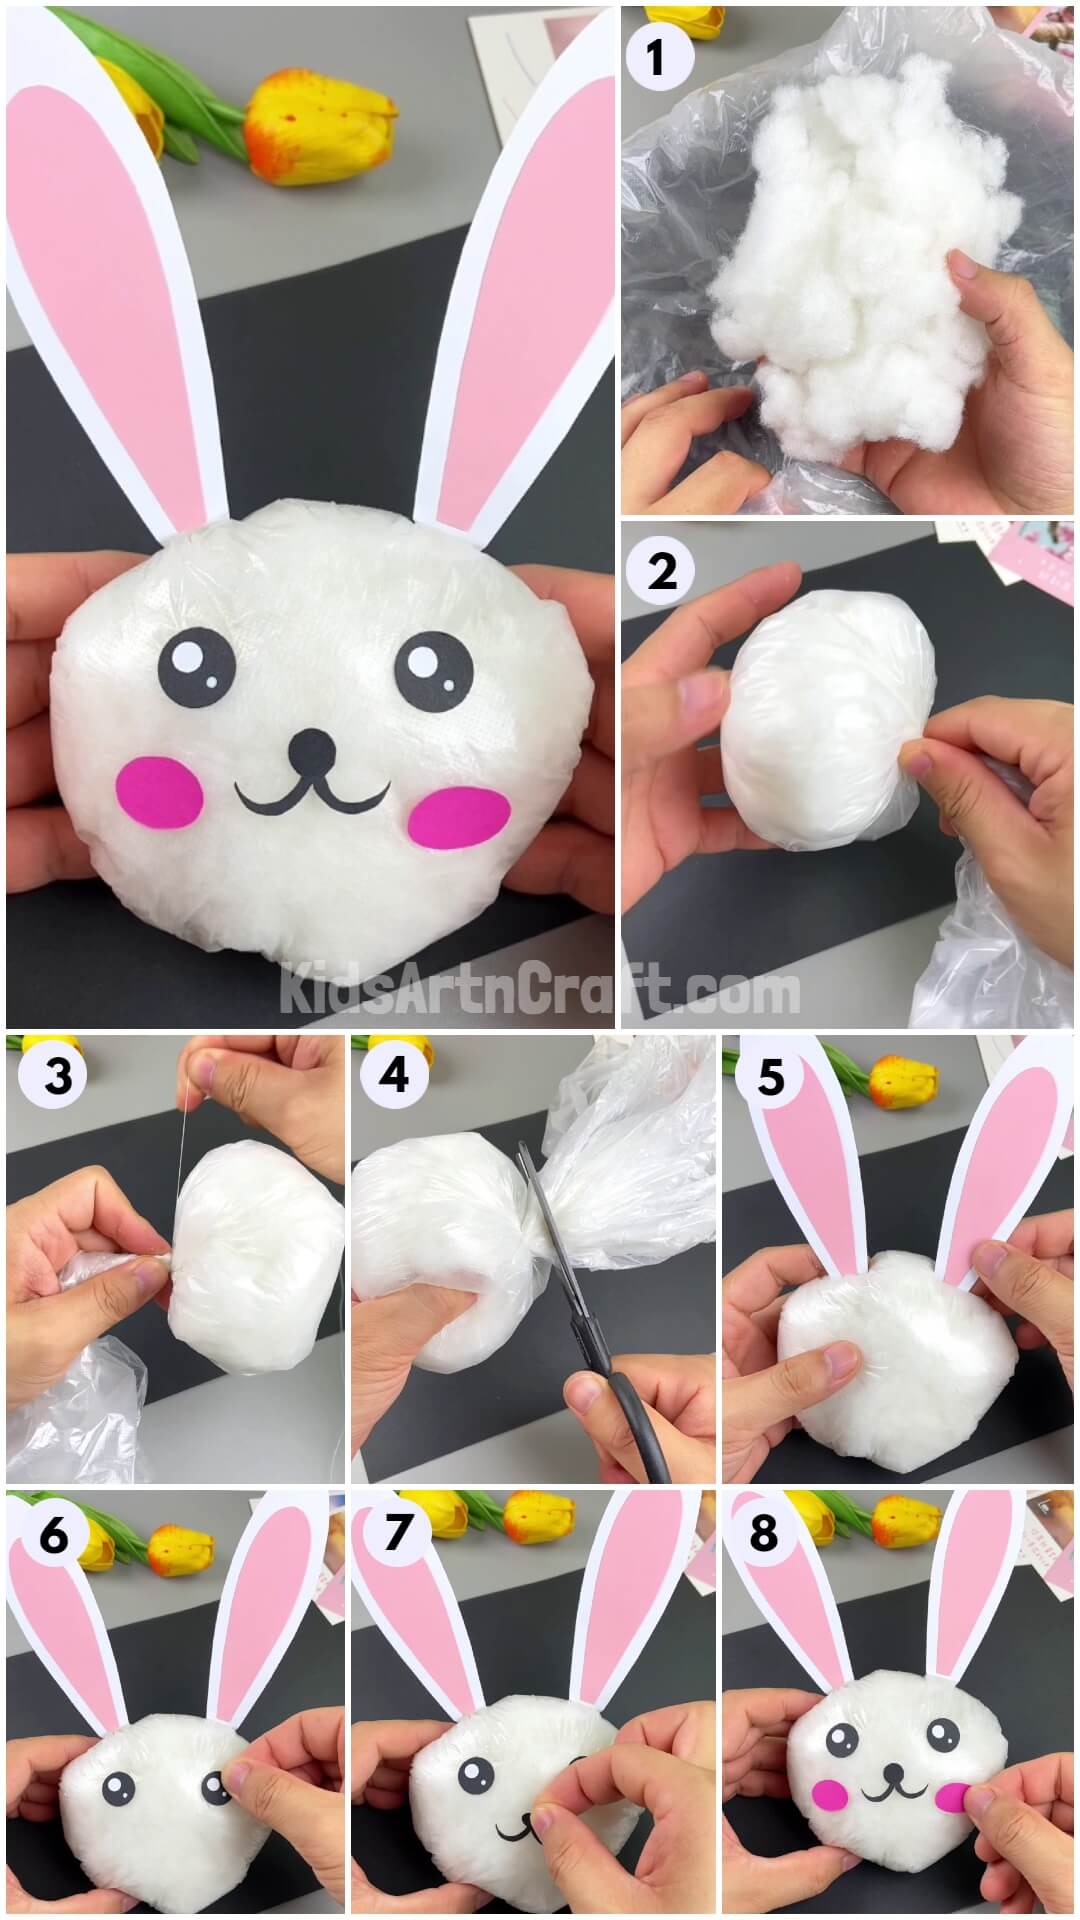
Step 1: Taking Cotton And Polythene
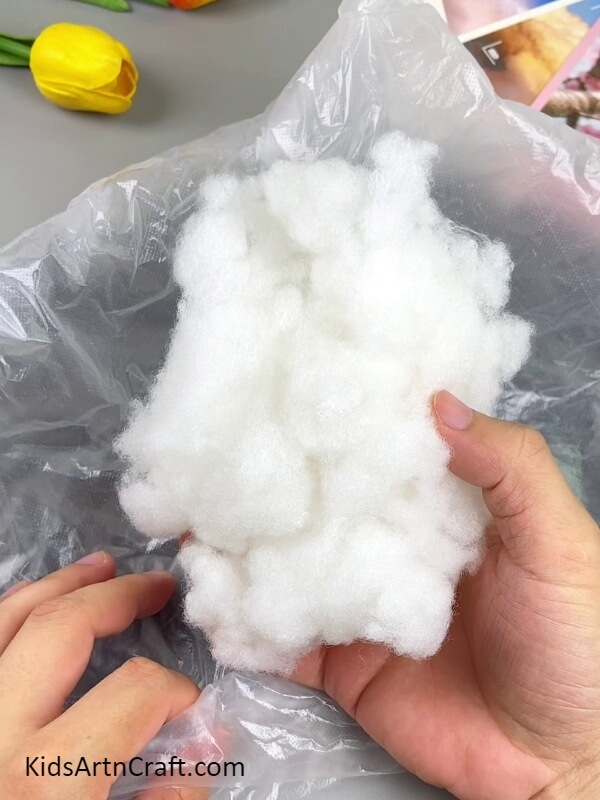

Begin this craft by taking a cotton bunch and polythene.
Step 2: Putting The Cotton Into Polythene
Put the cotton bunch into the polythene.
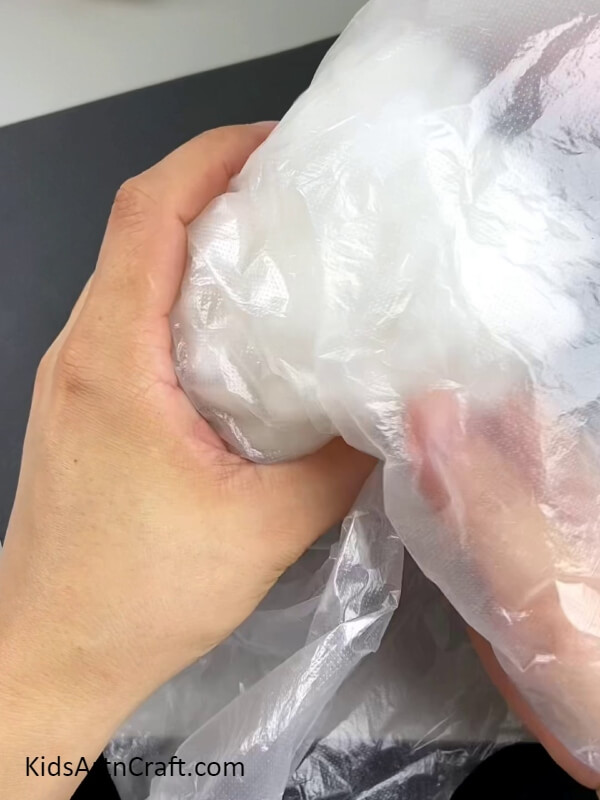
Step 3: Twisting The Polythene End
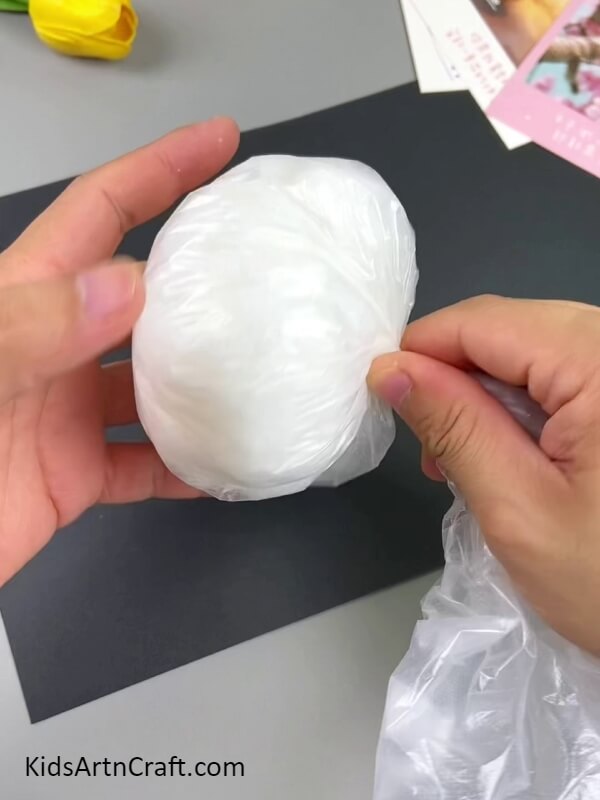
After putting in the cotton, twist the end of the polythene to make a spherical bunch of it and secure the cotton in it.
Step 4: Tying Thread Over The Twists
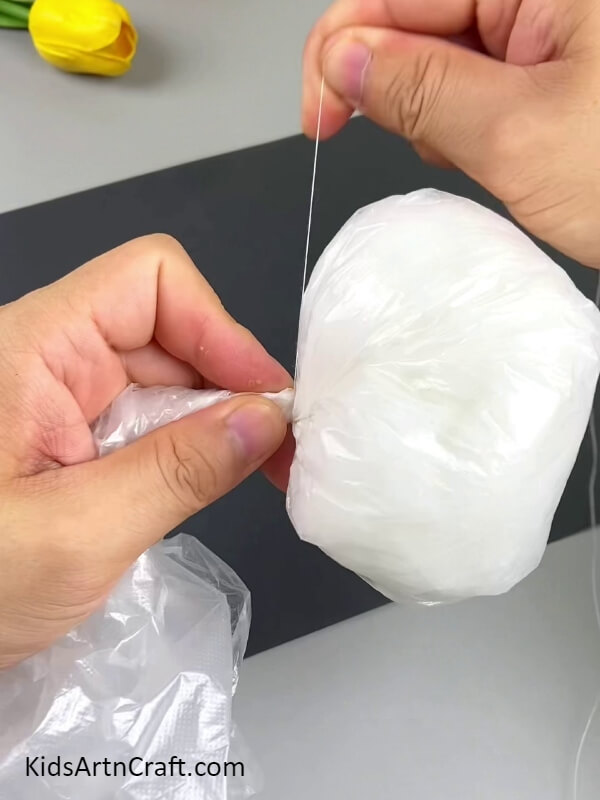
Tie a thread over the twists of the polythene to secure it.
Step 5: Cutting Out The Extra Polythene
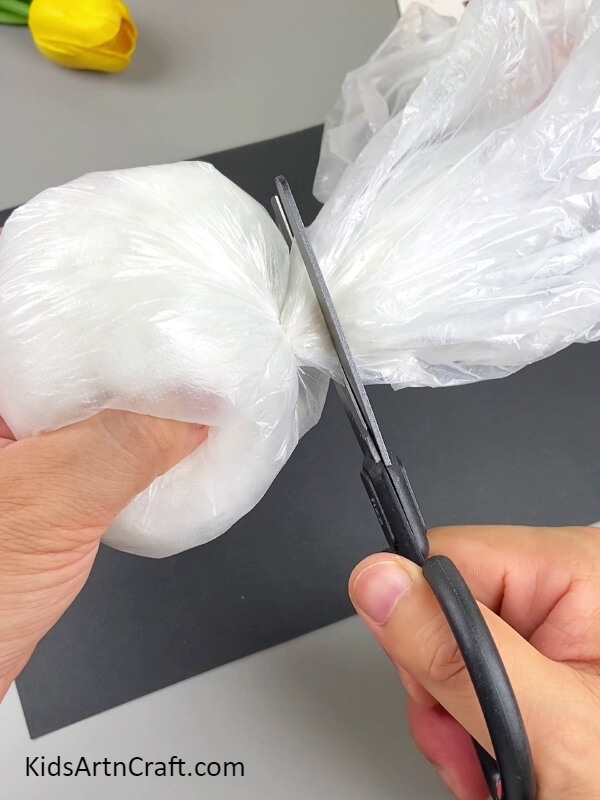
Using scissors, cut out the extra polythene after the thread. Make sure to keep only that much polythene so that it can be secured in the thread. This will be the face of the rabbit.
Step 6: Pasting Ears Of The Rabbit
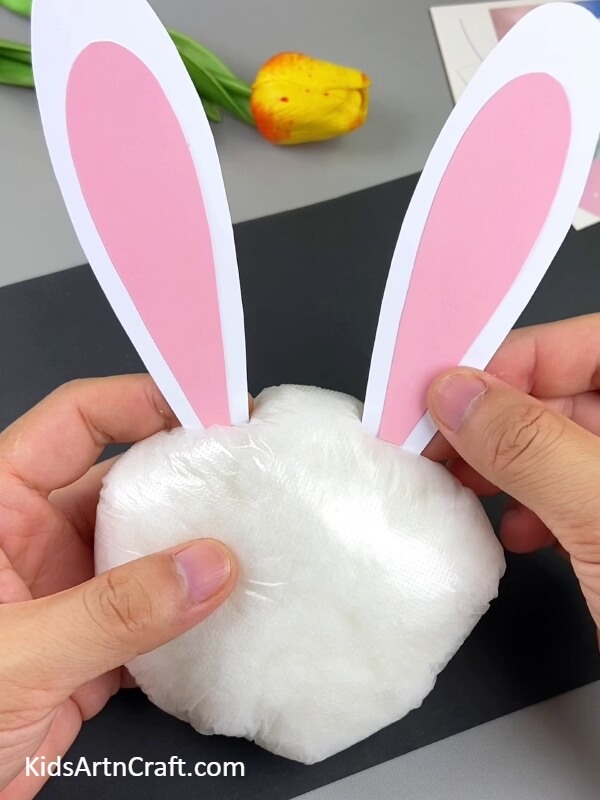
Using scissors, cut out the bunny ears from the white paper sheet and the same pink ones a little smaller than the whites. Paste the pink ones over the white ones using glue. Fold the ends of these ears to the other side and stick ears on the top of the face of the bunny from the folds using glue.
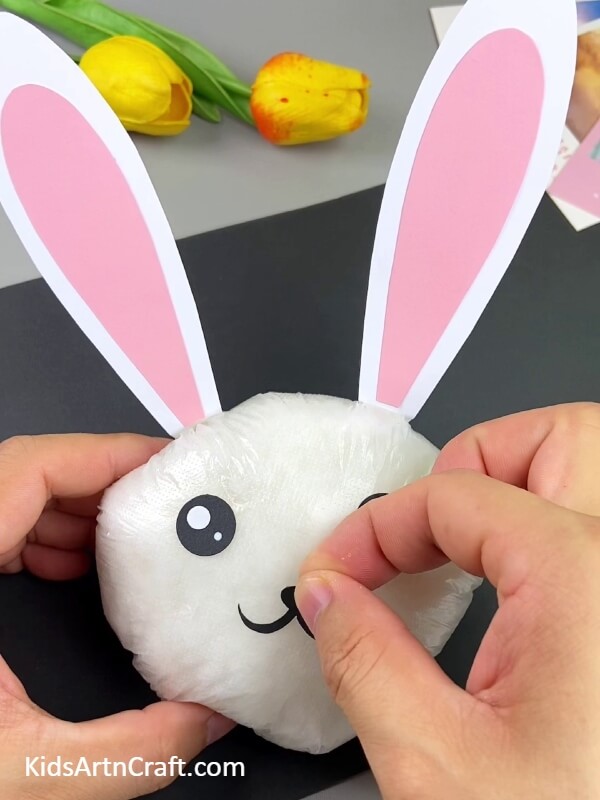
Step 7: Making Eyes Of The Rabbit
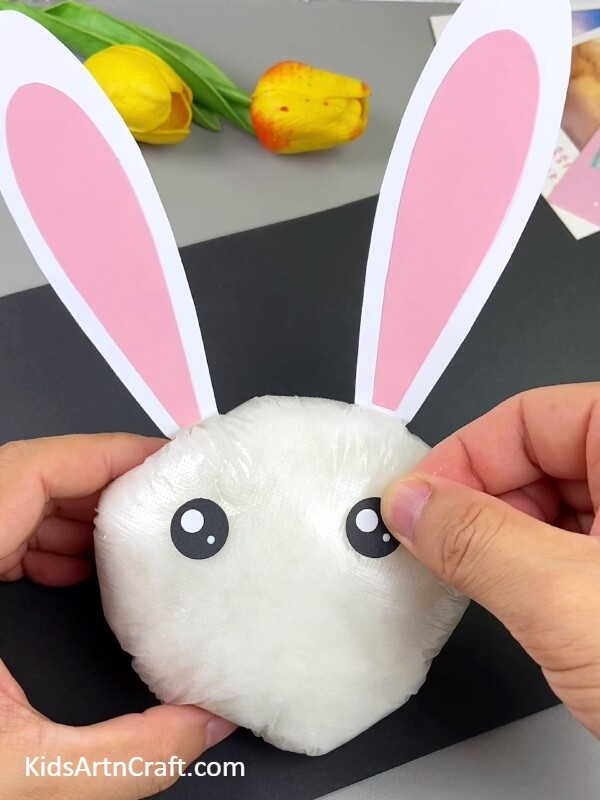
Cut out 2 circles from the black sheet to make the eyes of the bunny using scissors. Also, cut out 2 smaller and further 2 smaller white circles and paste them onto the black ones to add shine to the eyes. Paste the eyes over the bunny’s face below the ears, side by side using glue.
Step 8: Making Nose And Smile Of The Bunny
Using scissors, cut out a round nose with a curved and pointed-end mouth from the black paper sheet. Paste it onto the face of the bunny below and between the eyes using glue.
Step 9: Adding Blush To The Face
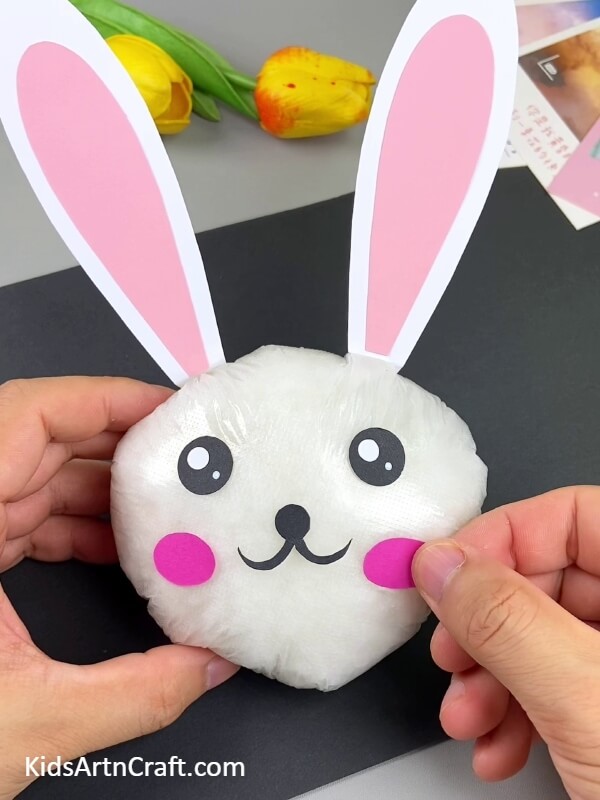
Cut out 2 pink ovals from the dark pink-colored sheet and paste them on both the sides of the mouth, and on the face of the bunny using glue.
Step 10: Squishing The Bunny
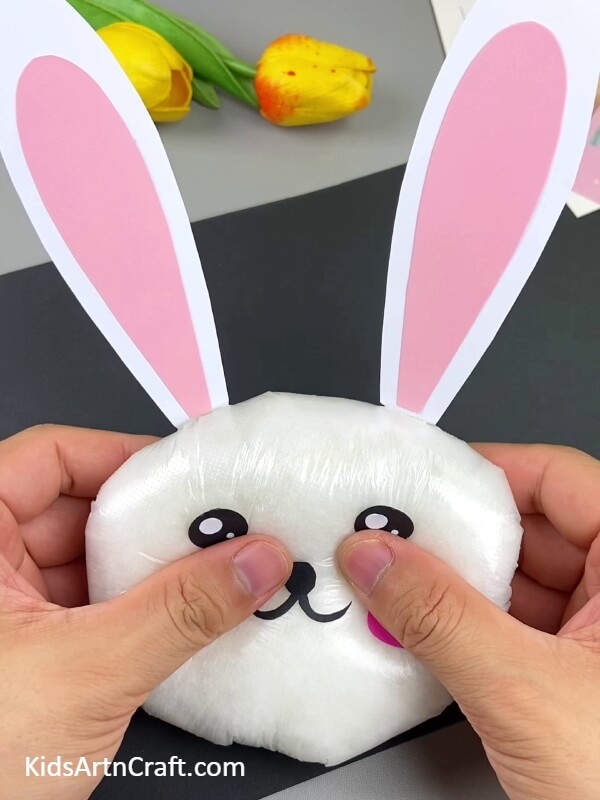
Squish your bunny face to let out the extra air and make the cotton spread all over.
This Is The Final Look Of Your Bunny Face Toy Craft!
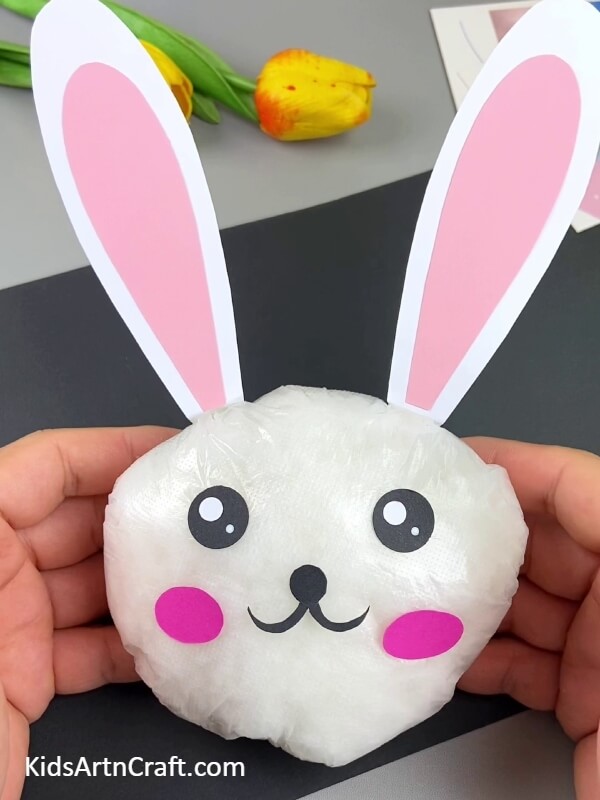
Voila! Your cutest bunny stuffed toy craft is ready in no time! Sqiush and play with it anytime you want!
You can now take a minute to admire your creation! This craft is perfect as a budget-friendly craft to make, and what better if the craft is pretty and cute even! You can even customize the color of your bunny by either coloring the polybag or taking another color polybag or cotton! Let your bunny match your room! Decorate it in your room to have the cutest craft addition to it! This bunny will be a perfect alternative to the expensive stuffed toy you can find in the market!
We hope you liked the article! Encourage us to bring more such crafts for you by sharing them and giving your feedback in the comments section! We would love to hear from you!
Follow us on YouTube for art and craft tutorials and much more.
More Articles from Kids Art & Craft
- Easy Paper Gun Toy Craft For Kids Tutorial
- How to Make Cardboard Ice Cream Craft in Easy Steps
- DIY Flying House Using Leaves–Up Movie Inspo
- DIY Easy Origami Paper Shark Toy Tutorial For Kids
- Handprint Bunny Craft With Step By Step Instructions