


Recycled Crafts
Cute Rabbit Balloon Hanging Craft Step-by-step Tutorial

This tutorial will teach you how to create a fun rabbit balloon hanging craft with a few simple materials. It is easy and quick to make, and you will have a special homemade decoration for your home in no time!
Is your child also bored playing with the balloons ? Are you also looking for newer and better ways to utilize the heaps of balloons at your home after a long party ? Do not worry! Because just like always, we have got you covered! Today we are here with a craft idea the end result of which would simply make you go “aww”, this cute and adorable rabbit hanging craft is surely a fun and engaging craft activity which allows your little artists give a whole new makeover! So, artists assemble , as we take you to this fun journey with adorable results. Grab the materials and follow the step by step guide !
DIY Cute Rabbit Balloon Hanging Craft
Read More: Easy Frog Puppet Toy Craft Using Paper Cup For Kids
Materials Required
- A balloon
- A marble ball
- A pair of scissors
- A rubber band or thread for tying
- A Colorful sheet of paper
- A red coloured marker
- A black coloured marker
- Any adhesive or glue
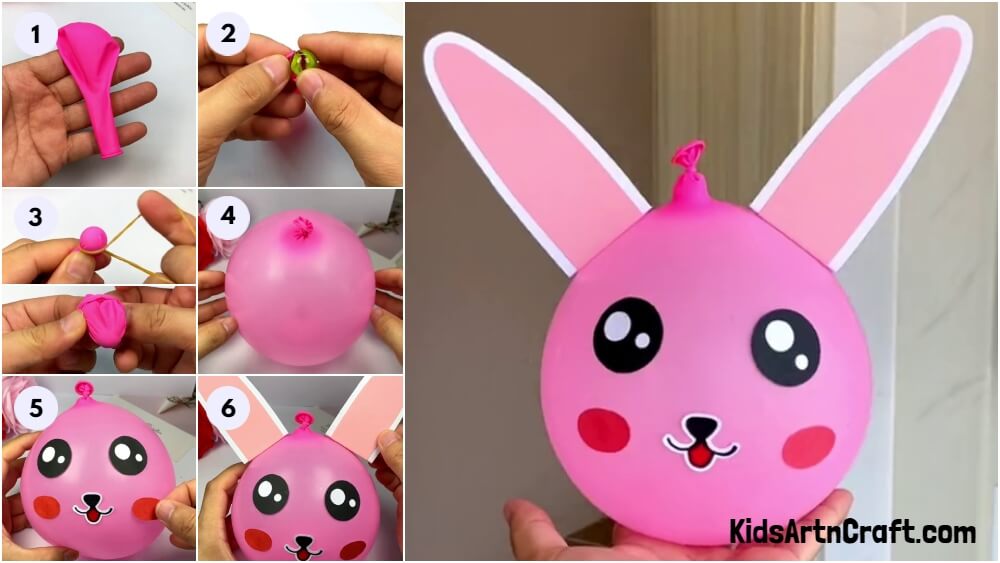
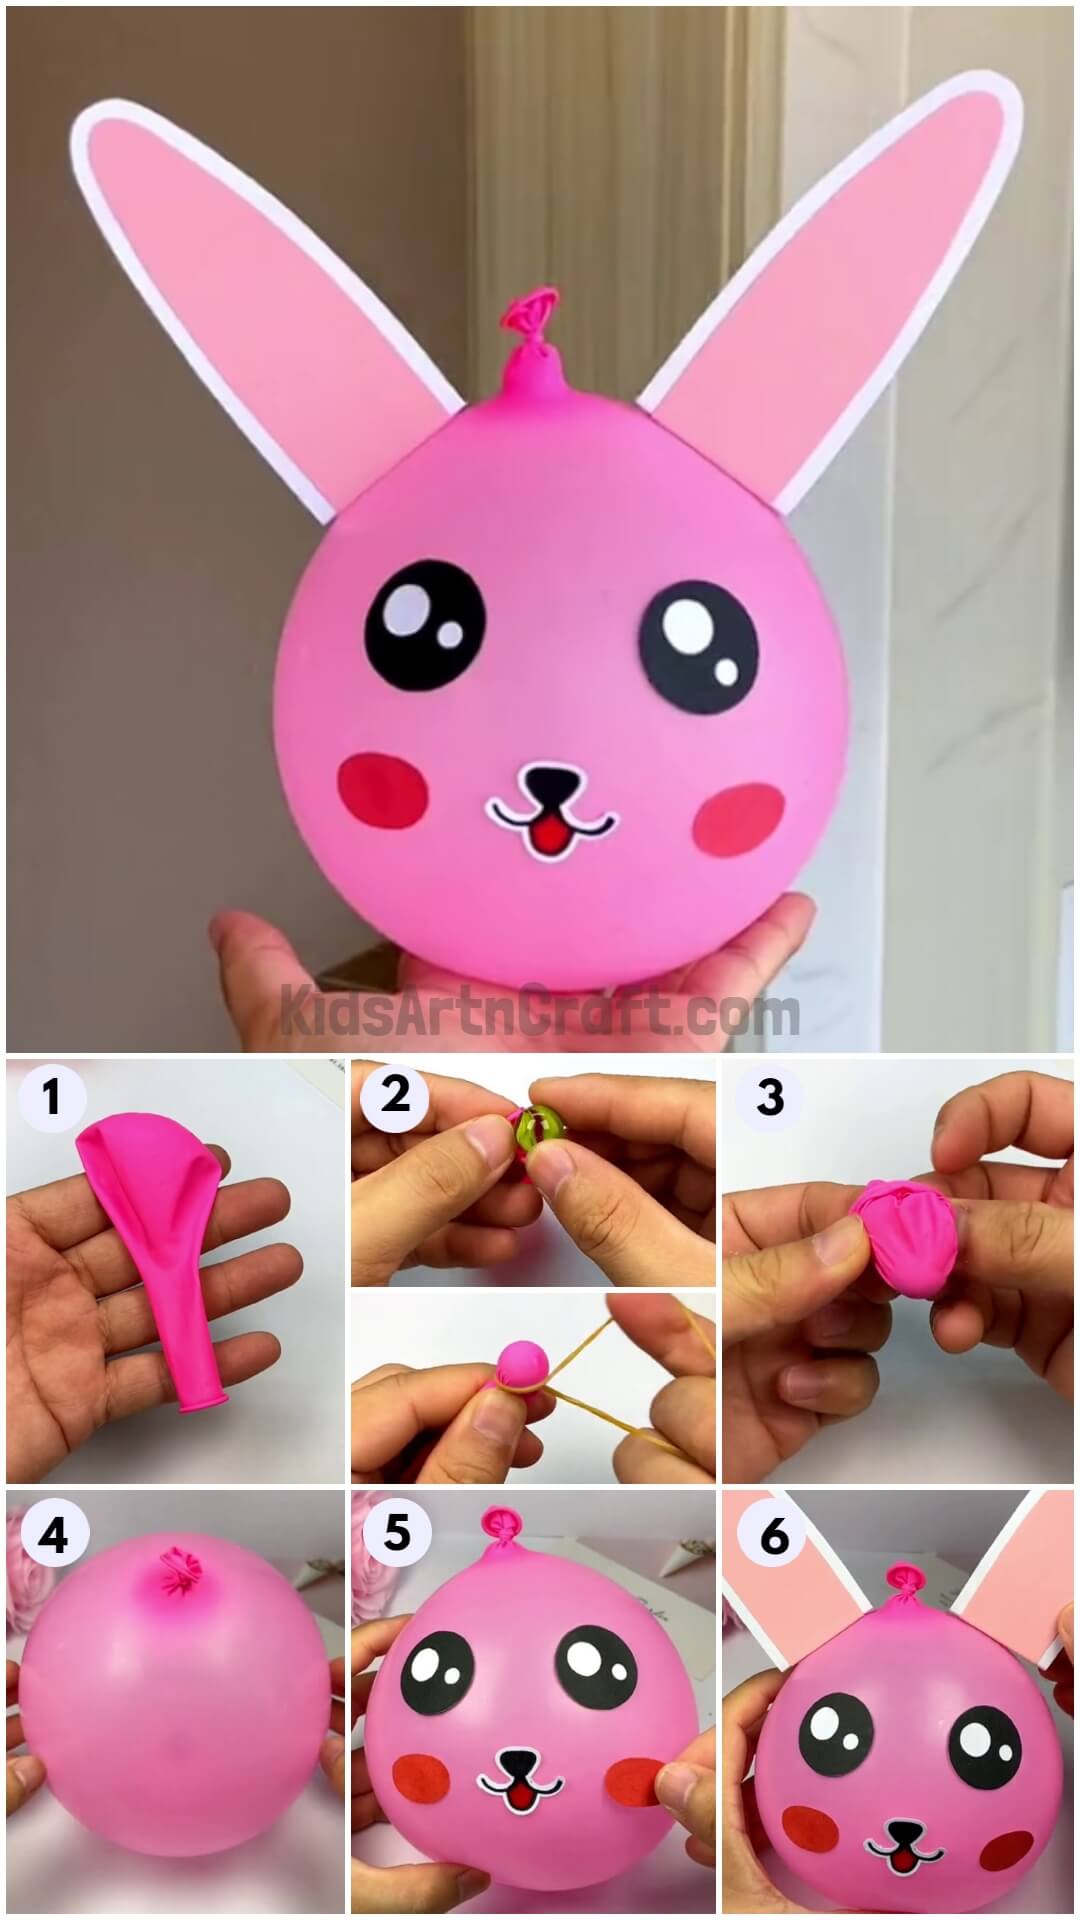
Step 1: Take A Balloon
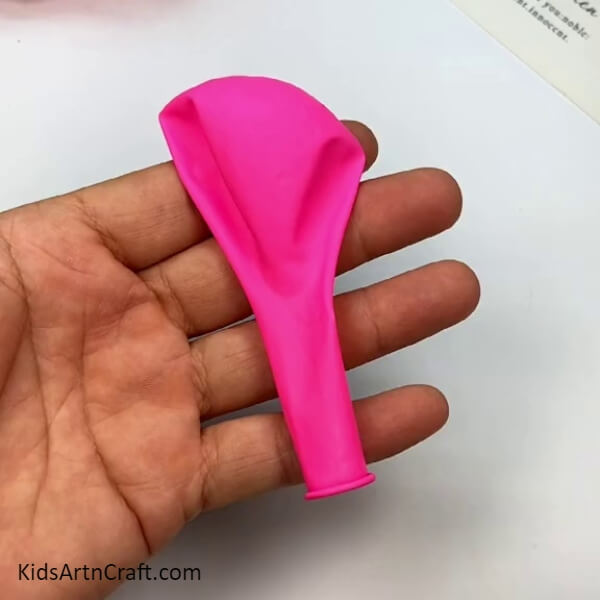
Firstly take a balloon.
Step 2: Insert A Marble Ball
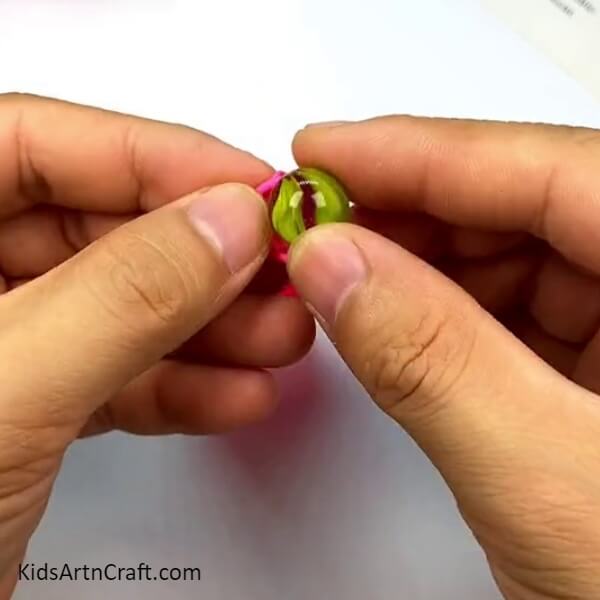
Next, insert a marble ball into it .
Step 3: Tie The Marble Ball
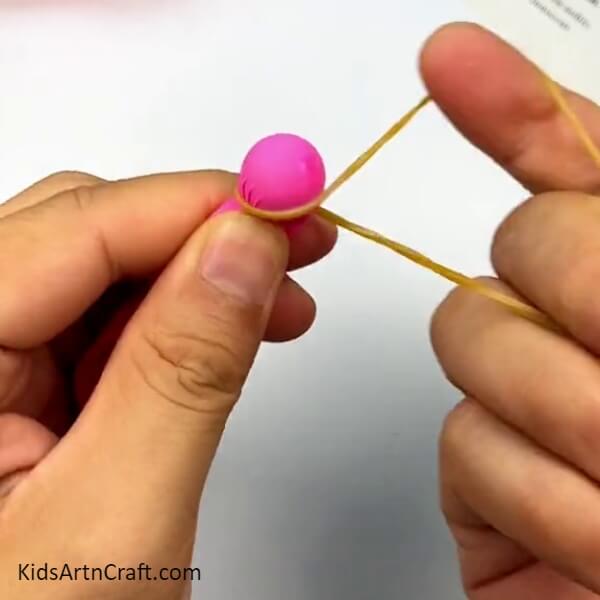
Now, tie the marble ball while it is inside the balloon using a rubber band or a thread .
Step 4: Fold The Balloon Inside Out
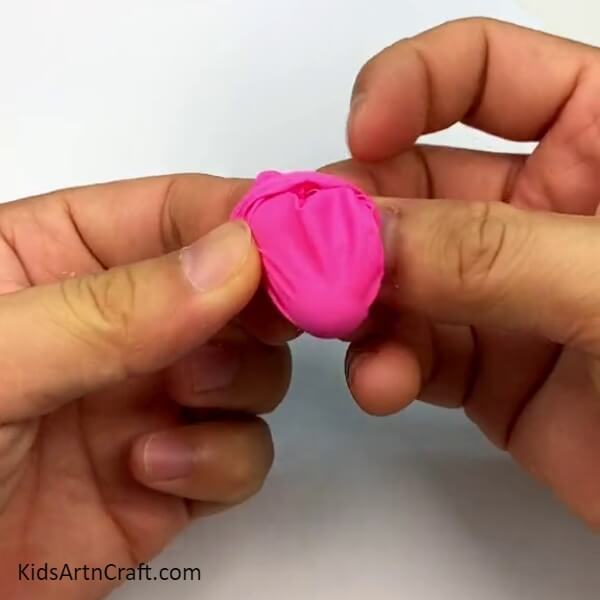
Now, flip the balloon inside out as shown in the image below.
Step 5: Blow The Balloon
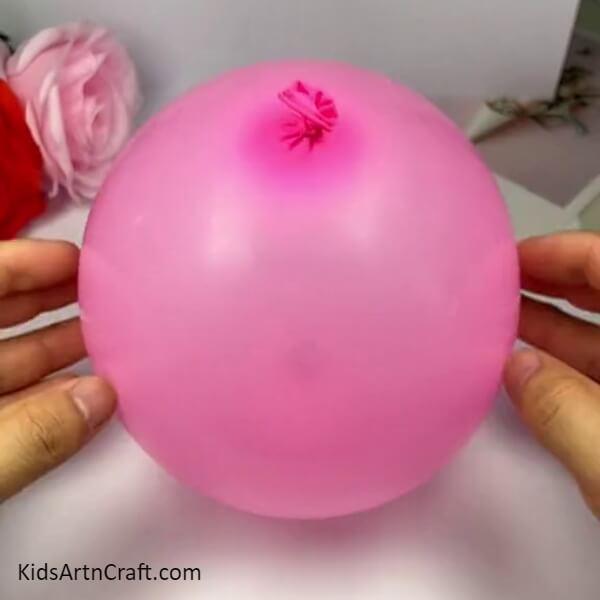
Next, blow the balloon up .
Step 6: Paste The Eyes
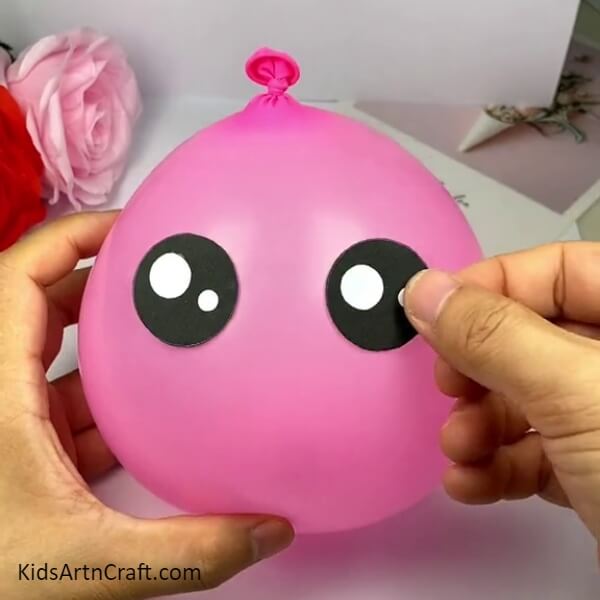
Now, take the black coloured sheet of paper and cut out two large circles out of it. Next take the white coloured sheet of paper and cut out two circles of medium and smaller sizes each. Now paste the white ones on the black circles using the adhesive. Now, paste these two eyes cutouts on the balloon.
Step 7: Add Blush, Nose And Yes, A Smile
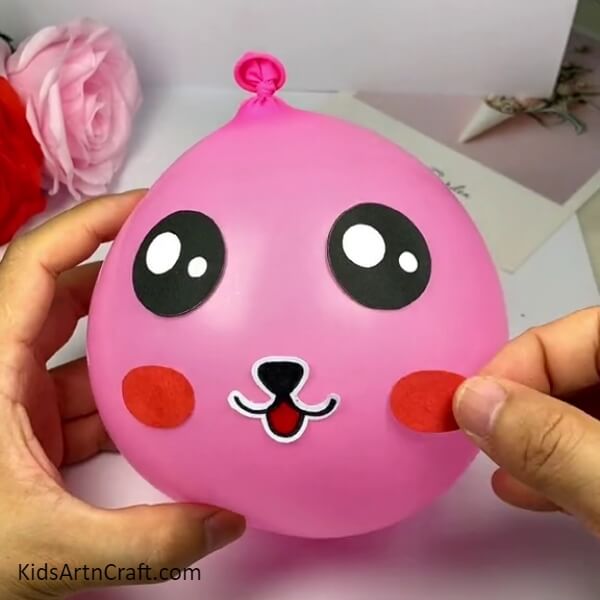
Now cut two circles out of the red coloured sheet of paper , that would act as the blush for our bunny. Then create another cutout and draw the shape of nose and smile using the black markers, while use the red marker to draw the tongue. Paste this whole cutout on the balloon as well .
Step 8: Paste The Ears
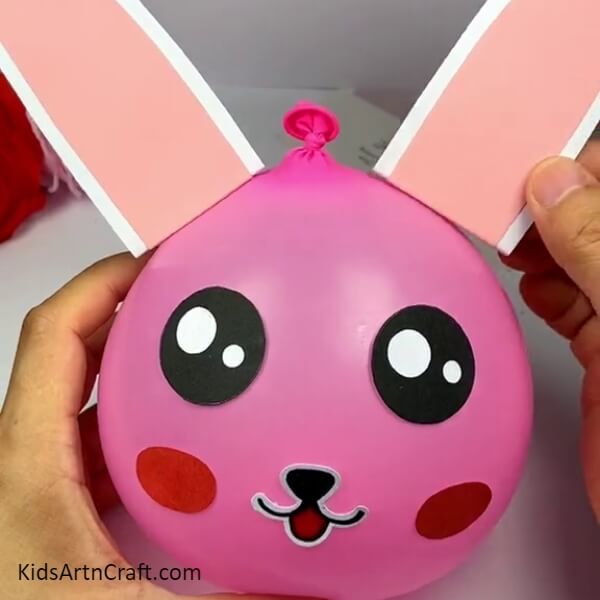
now, you are supposed to take the white coloured sheet of paper and cut out the shape of two bunny ears using the pair of scissors. Next, take the pink coloured sheet of paper and create a similar cutouts of smaller size. Now, paste the pink cutouts on the white one using the adhesive. Now give a small fold to the cutout at the base and paste the base on the balloon using the adhesive.
Hurray !!your adorable rabbit is ready!!
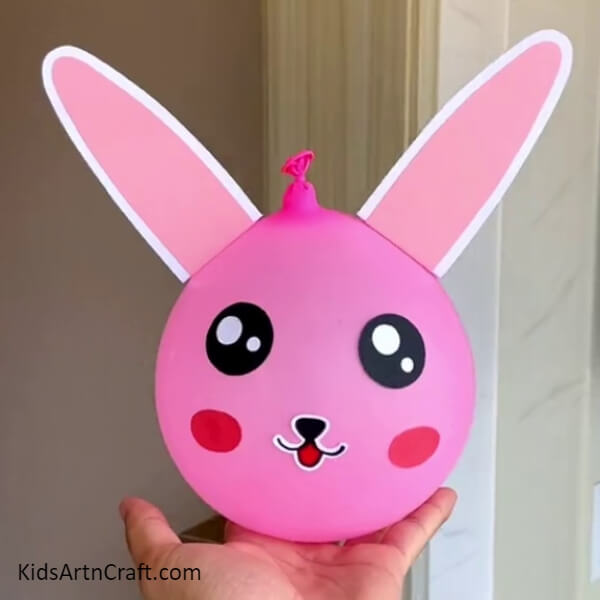
only two words for this one, ” cuteness overloaded”! This craft idea is definitely must try for kids between the ages of four to six years as it allows them to explore craft and creativity at a deeper level. It would also allow them to hone their paper cutting skills as well as teach and encourage them to find creativity in simple everyday objects such as a balloon. Other than developing their motor skills, it also shows the uniqueness and individuality of every young artist as they embark on this artistic journey of creating this adorable bunny !
Some More Bunny Craft Tutorial
Kids Transform Tissue Paper Into Bunny Craft For Kids
Image Source/Tutorial: Kids Art & Craft
This fun craft is perfect for kids to make during springtime. With just a few simple materials, like tissue paper and pipe cleaners, kids can create a cute bunny craft. It’s easy enough for toddlers and great for school projects too!
Do let us know what you think about this idea in the comment section below and do not forget to check out our other posts for more such fun, easy and amazing art and craft ideas for kids, until then , Have fun crafting artists !
Follow us on Youtube for art and craft tutorials and much more.
More Articles from Kids Art & Craft
- Cute Fish Underwater Artwork By Fall Leaves and Bushes Craft Tutorial
- Cute Fruit Foam Pear Craft Step by Step Tutorial For Kids
- Cute Paper Cup Doll Craft – Step By Step Toy Making Tutorial
- How To Make A Mushroom Out Of Egg Carton?
- DIY Car With Balloon and Straw Easy Tutorial


