


Recycled Crafts
Recycled Rabbit Shaped Pen Holder Craft Tutorial For Kids

This guide will teach you and your children how to make a cute bunny-shaped pen holder. It can be used to decorate your house and is a great and easy activity for everyone!
Today, we will be making a small and adorable pen holder using an empty, small fancy medicine or any other packaging bottle. Remove the brand covers from the bottle before using it. It will be a rabbit shaped holder which we will be creating through sheets of paper. So, collect all the material required and let’s get started.
Best Out of Waste Rabbit Shaped Pen Holder Craft
Read More: How to Make Pineapple Hanging Lamp from Plastic Bottle
Material Required
- An empty fancy packaging bottle
- A pink and a white sheet of paper
- Orange and a black sketch pen
- A pair of scissors
- A pink sketch pen
Procedure
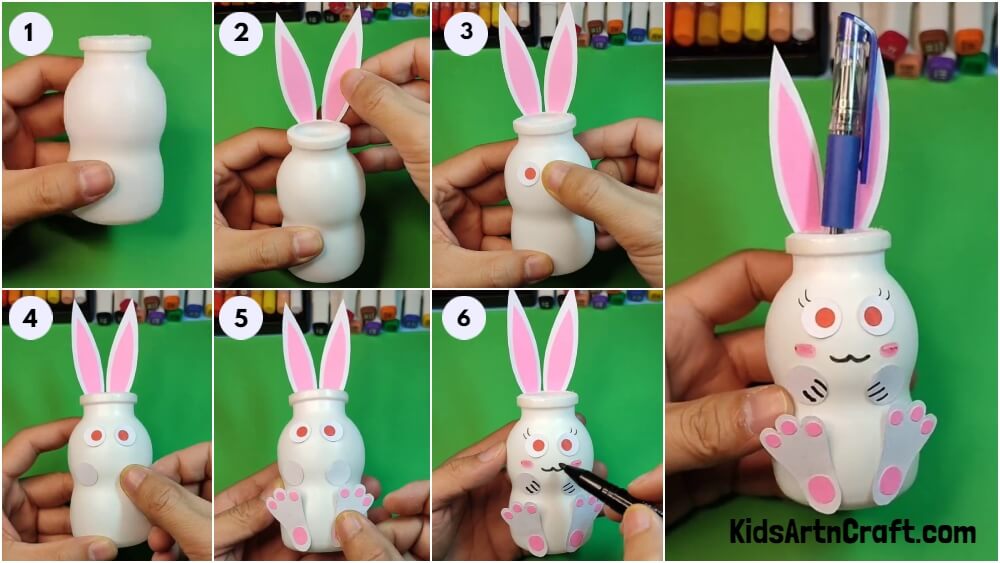
Step 1: Working On The Bottle
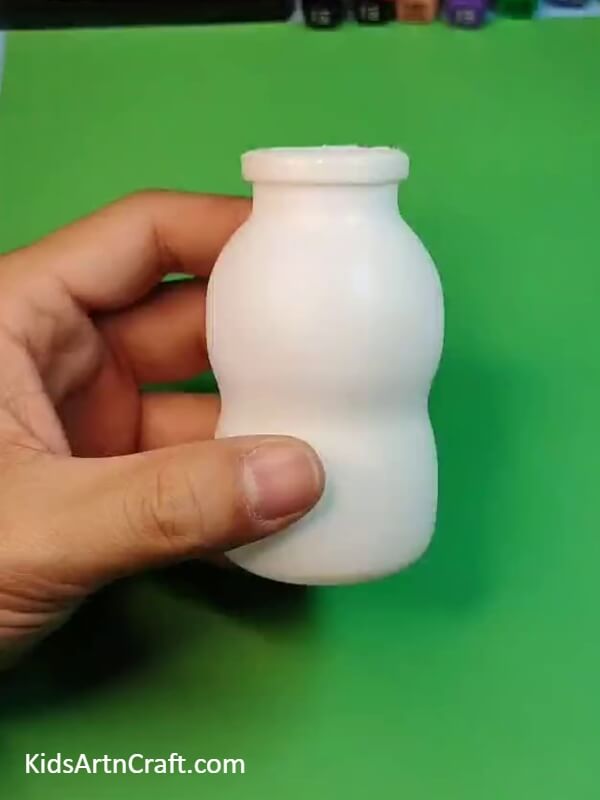
Take the bottle and clean it thoroughly until has an even colour and texture throughout.
Step 2: Making The Ears Of The Bunny
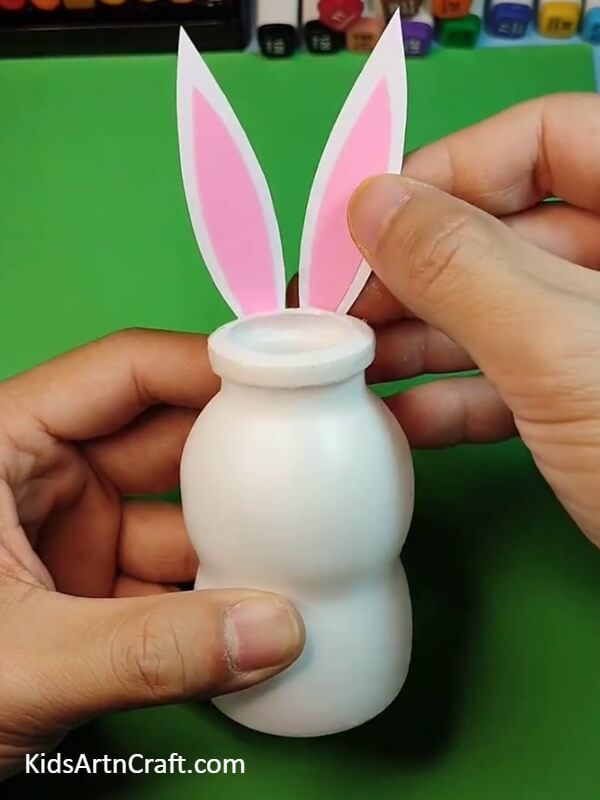
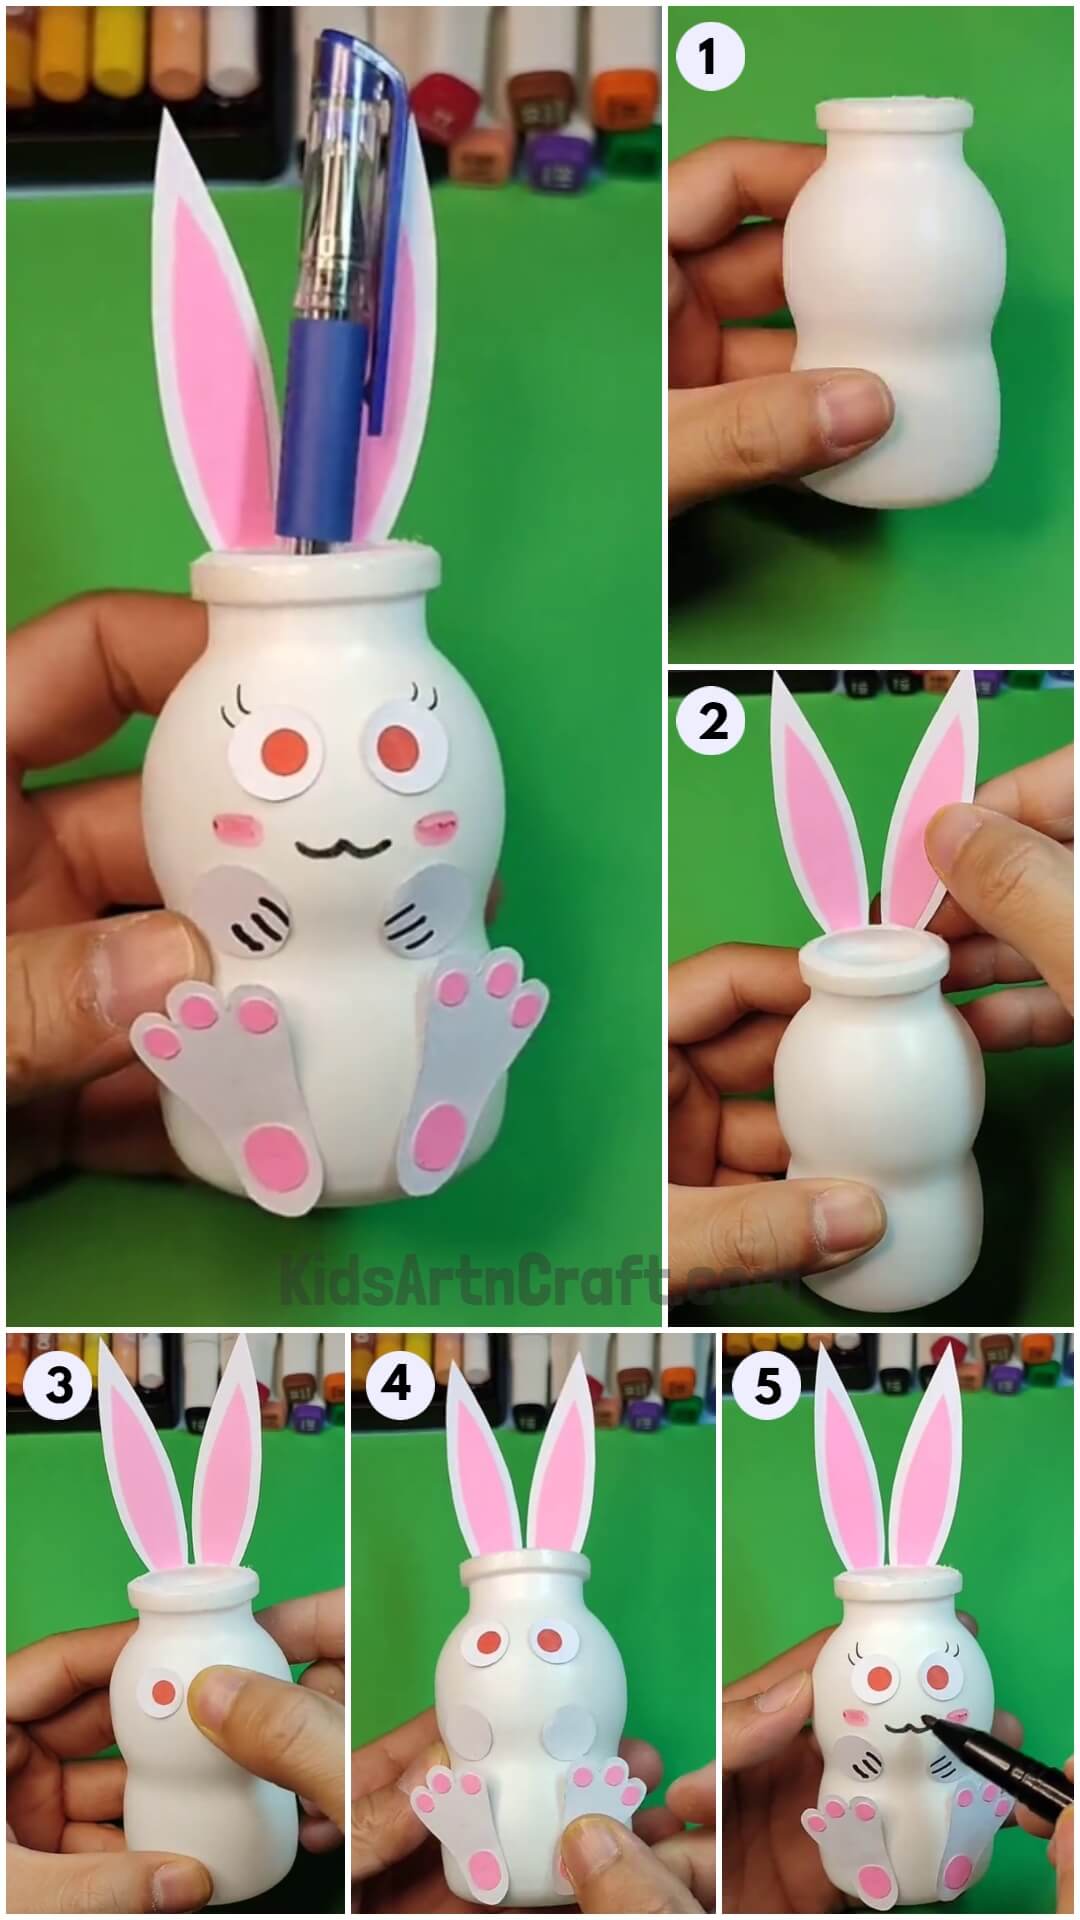
Take a white sheet of paper and cut it into two long bunny ears with one of the ends being pointed and the other flat. Now, take a pink sheet of paper and cut it into two similar ears a slightly smaller in size. Paste the pink ears in the middle of the big white ears. Finally, paste them at the back of the neck of the bottle, next to each other. See the picture below for reference.
Step 3: Making The Eyes Of The Bunny
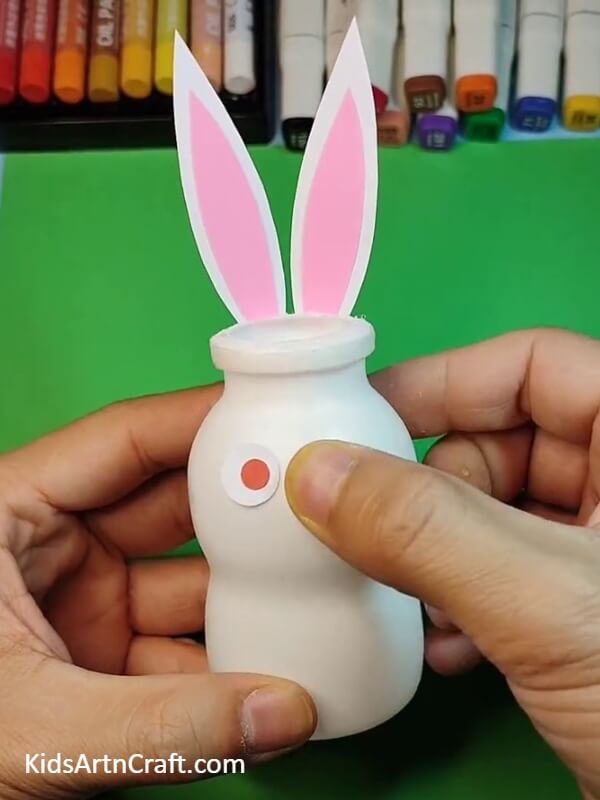
Take a white sheet of paper and cut two small circles out of it. Now, make a small circle in the middle of both the eyes using an orange sketch pen. Colour the orange circle using the same sketch pen. Finally, paste them next to each other at the top section of the bottle as shown in the picture below.
Step 4: Pasting The Forelimbs
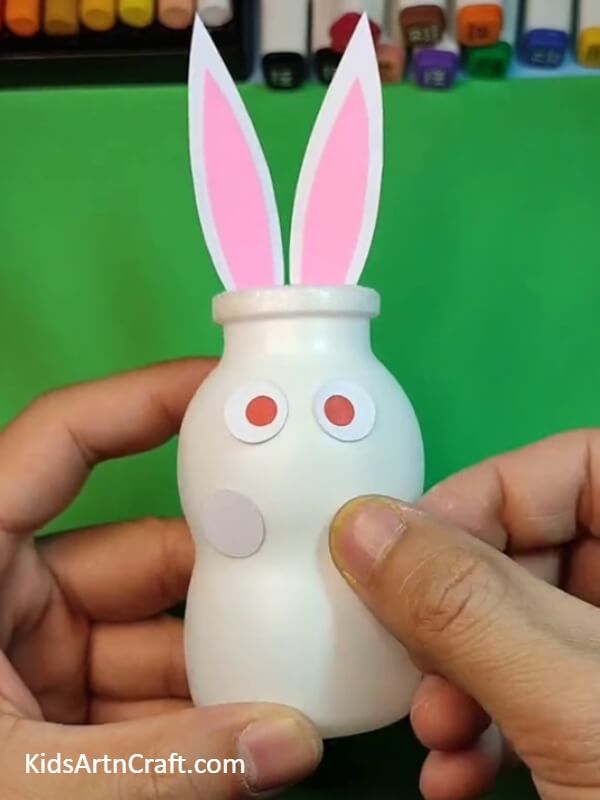
Take a white sheet of paper cut out two circles bigger than the eyes. Now, paste them on the bottle a little below the eyes. See the picture below for reference.
Step 5: Pasting The Hind Limbs
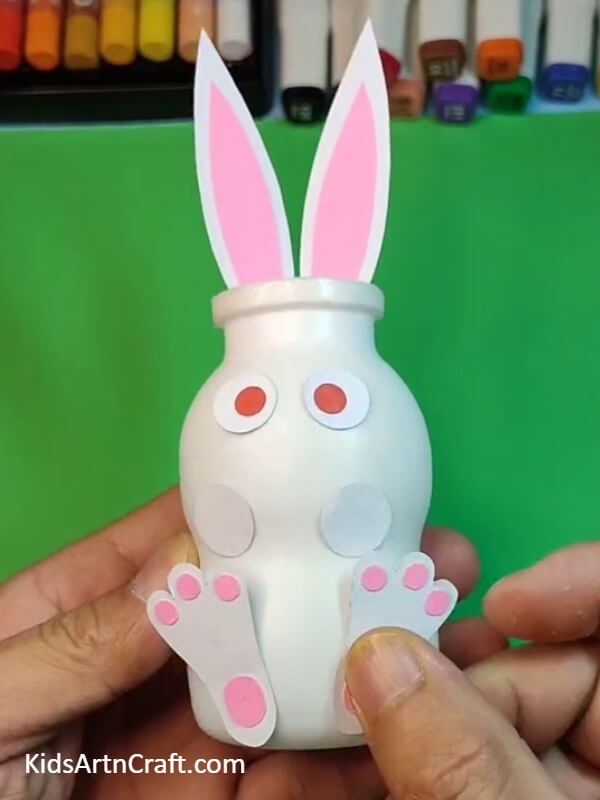
Take a white sheet of paper and cut it into two big paws with three small claws. Now, cut two small circles and six even smaller circles out of a pink sheet of paper. Paste three smaller pink circles on the claws of each paw and the bigger two circles at the ends of each paw. Finally, paste them at the bottom of the bottle at a distance from each other. See the picture below for reference.
Step 6: Making Drawings On The Bottle
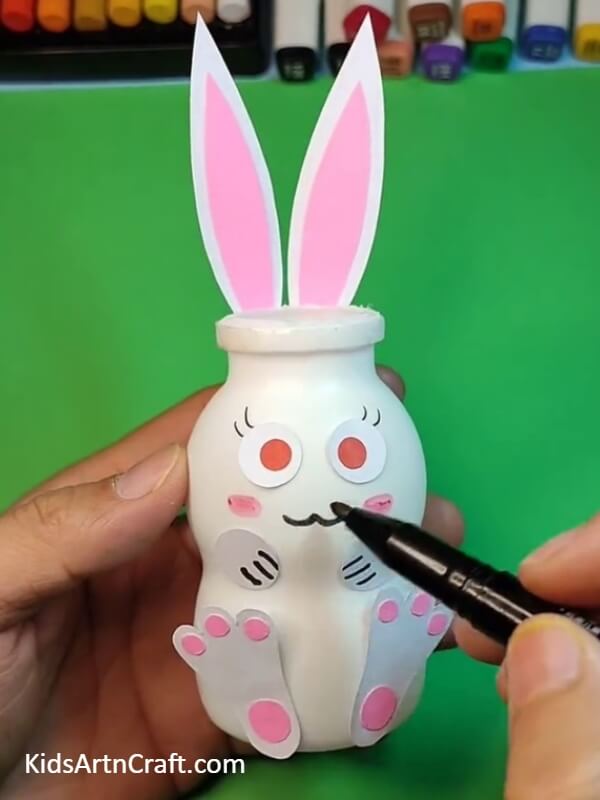
Take a black sketch pen and draw three lines on the ends of each fore limbs. Draw two small connected, curved lines below the eyes right in the middle. This shall act as the nose of the bunny. Add some eyelashes on top of both the eyes. Finally, using a pink sketch pen make two dots on sides of its nose. This shall act as the blushed cheeks of the bunny. See the picture below for reference.
Hurray !Your Cute Rabbit Holder Is Ready!
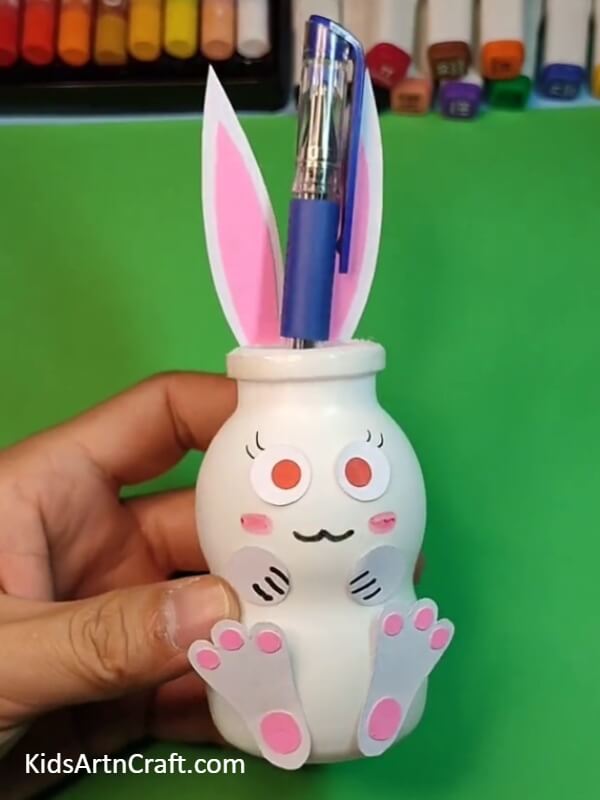
Place a pen inside the bottle to complete the holder. See the picture below for reference.
Some More Bunny Craft Tutorial
Easy paper cup bunny craft for youngsters
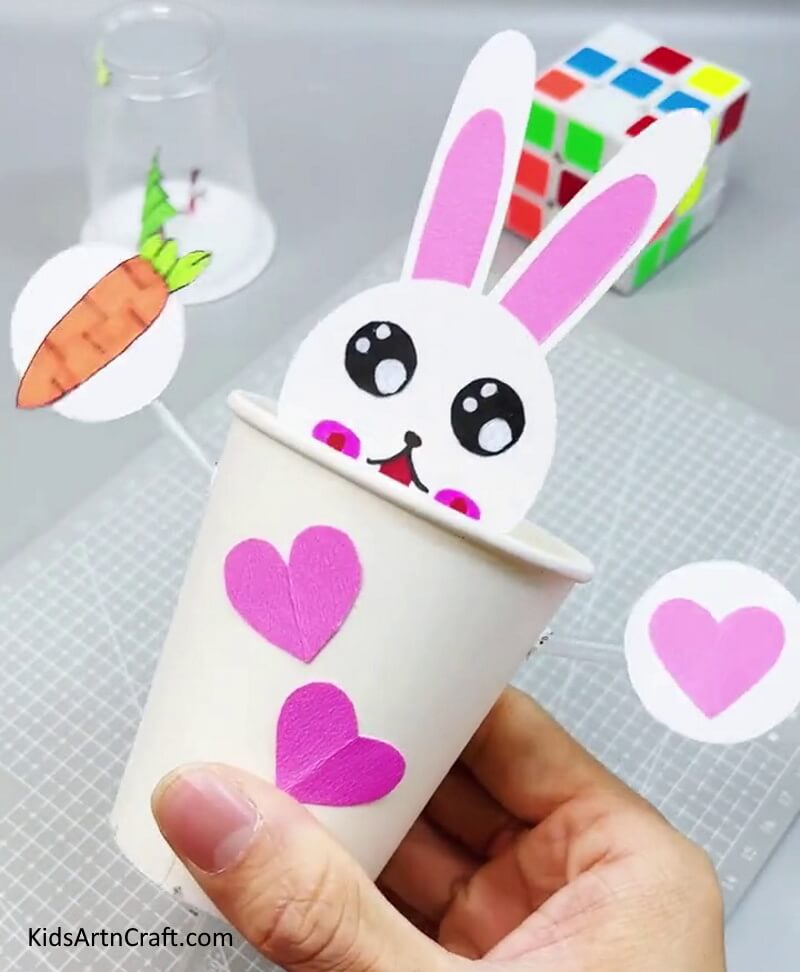
Image Source/Tutorial: Kids Art & Craft
This simple paper cup bunny craft is a great way to keep youngsters entertained on a rainy day! All that is needed is paper cups, paint, and some other craft material to create a cute bunny.
This completes today’s tutorial and we are left with an amazing pen holder. You can place it on your study table and use it as a holder. You learned to convert a simple item into a useful craft in this tutorial. Keep working hard and keep practicing these techniques to make your art grow. Good luck.
Follow us on Youtube for art and craft tutorials and much more.
More Articles from Kids Art & Craft
- Cute Fish Underwater Artwork By Fall Leaves and Bushes Craft Tutorial
- Cute Fruit Foam Pear Craft Step by Step Tutorial For Kids
- Simple Paper Crab Craft – Step By Step Tutorial
- Easy Lion Craft From orange peel for kids
- How To Make A Snowman Craft Using Fruit Foam And Earbuds


