Painting
Red Turnip Painting Artwork Step by Step Tutorial

This step-by-step procedure will guide you to paint beautiful Red Turnips – perfect for all age groups. Creativity has no age limit!
Welcome to this easy step-by-step tutorial on how to paint red turnips as beautiful artwork! This fun and interesting artwork can be done by all age groups. In this tutorial, we will show you how to paint vibrant red turnips using some basic colors and materials. You will need some basic colors, paper, and a paintbrush. With the most basic art skills and a stroke of your paintbrush, you’ll be able to paint the red turnips in no time. Let’s begin!
Simple Red Turnip Painting Artwork

Read More: Awesome Canvas Painting Video Tutorial for Beginners
Materials Required
- Blank Round Shaped White Paper
- Fabric Colors – Red, Green, White
- Paintbrush
- Round-Mouthed Stamper Stick
- Sketch Pens
Procedure
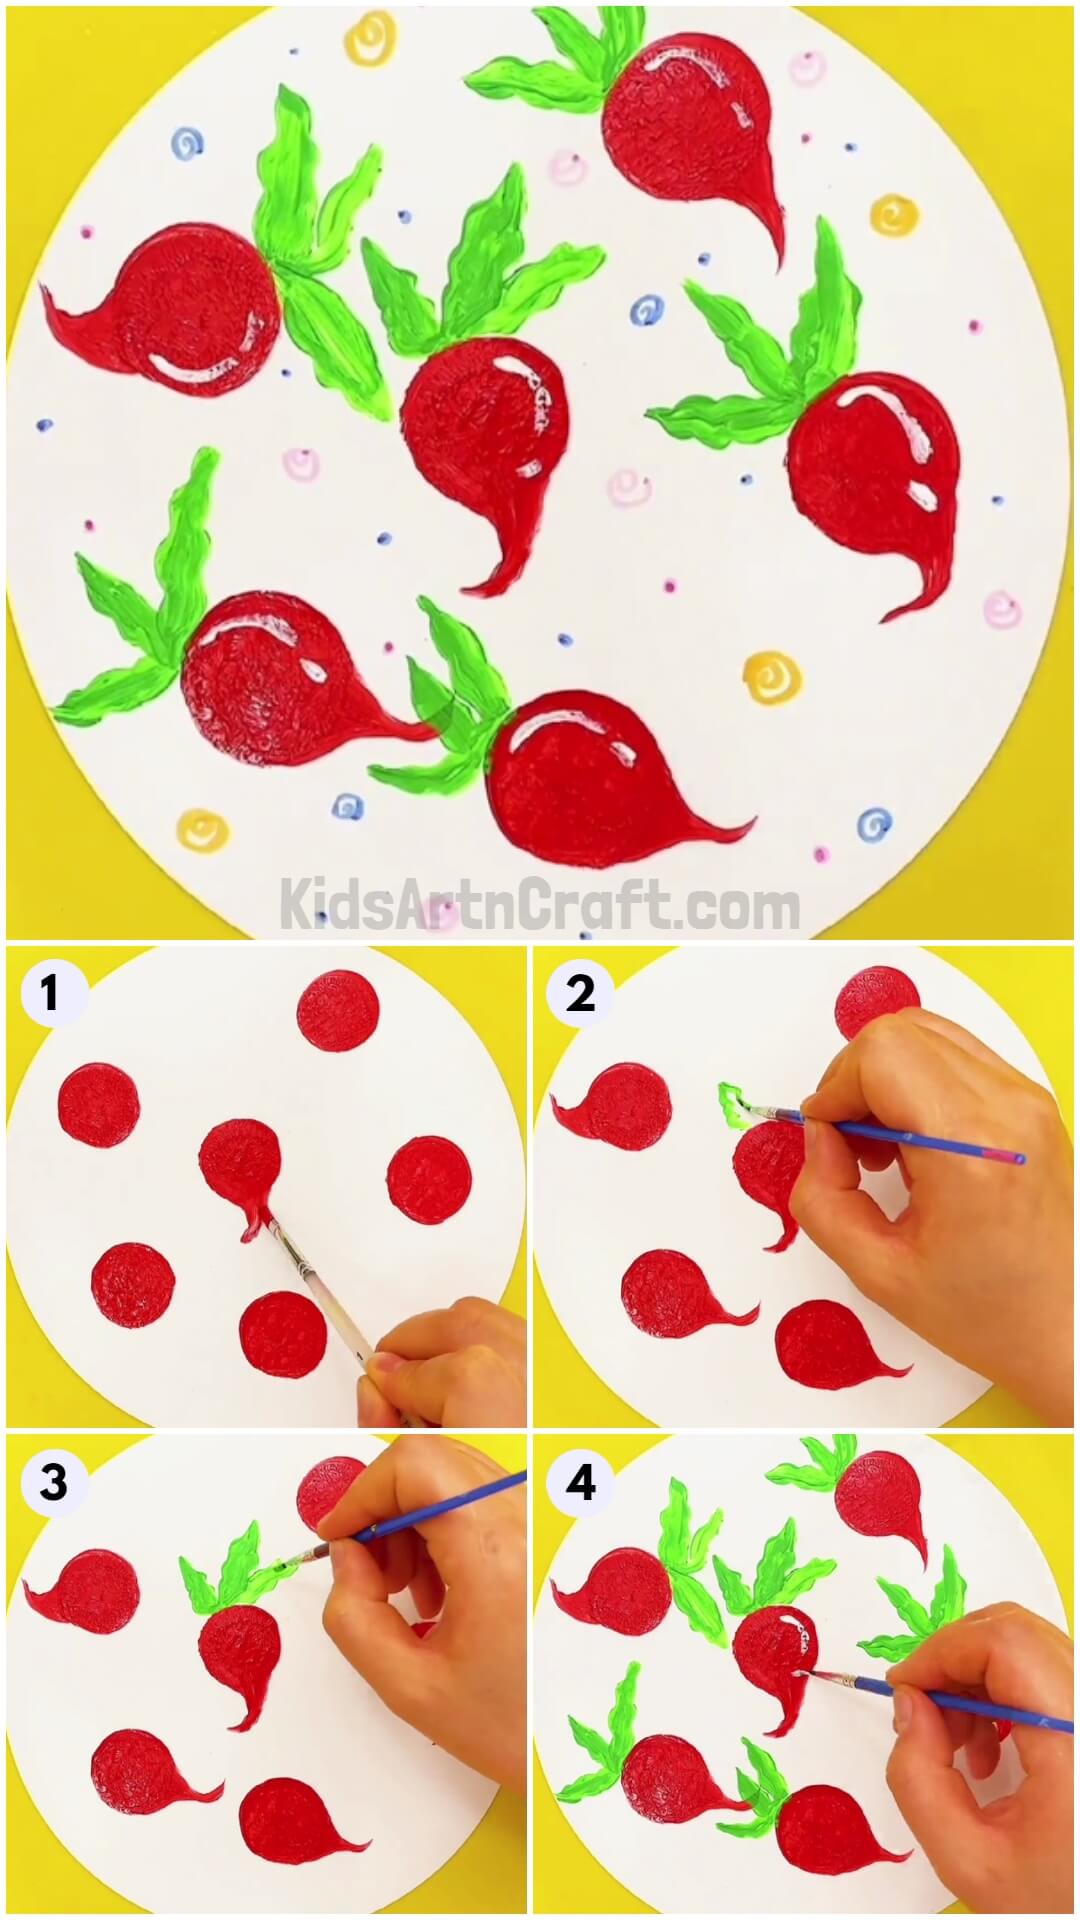
Step 1: Painting Red Turnips

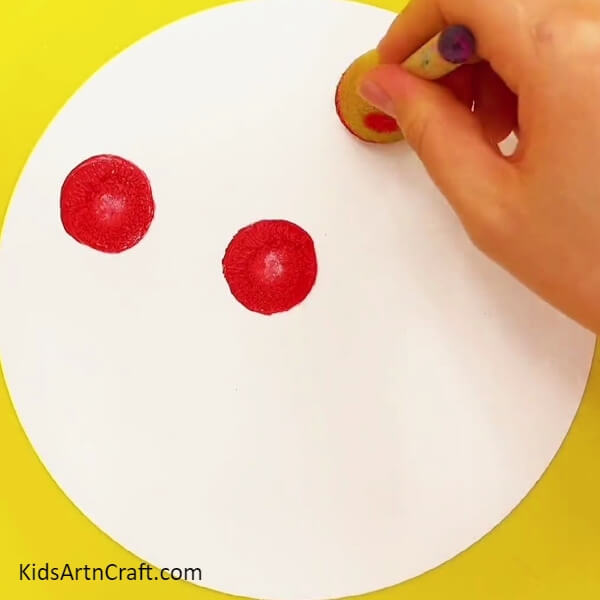
Let us start by dipping the stamper’s mouth in red paint and stamping red circles on the white paper maintaining gaps in between the circles.
Step 2: Painting the Heads for Red Turnip
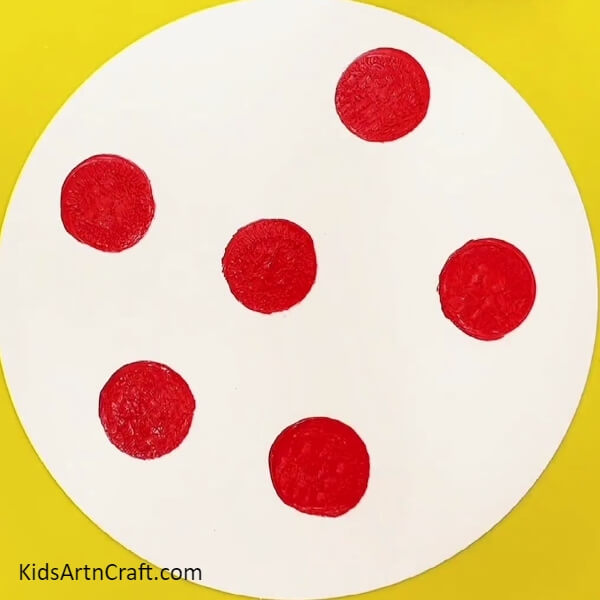
We have completed painting the red turnip heads with the help of the stamper.
Step 3: Bringing the Shape of the Red Turnips
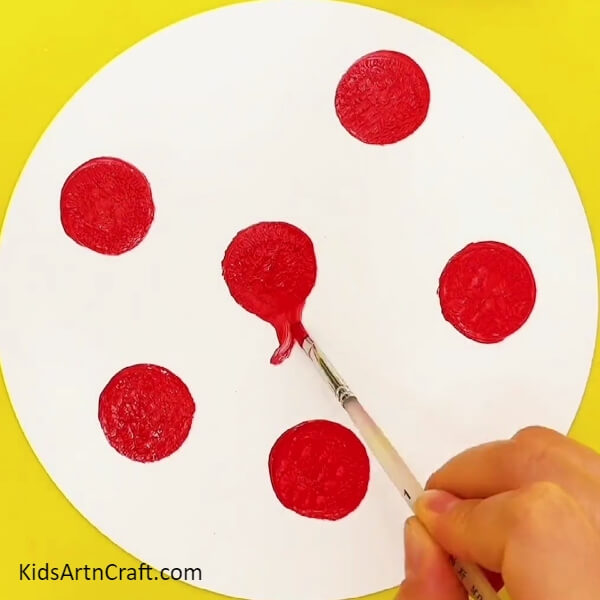
Take a paintbrush with red paint. Use it to draw the roots of the red turnip by drawing curved lines on the tip of the circles.
Step 4: Completing the Shape of the Red Turnips
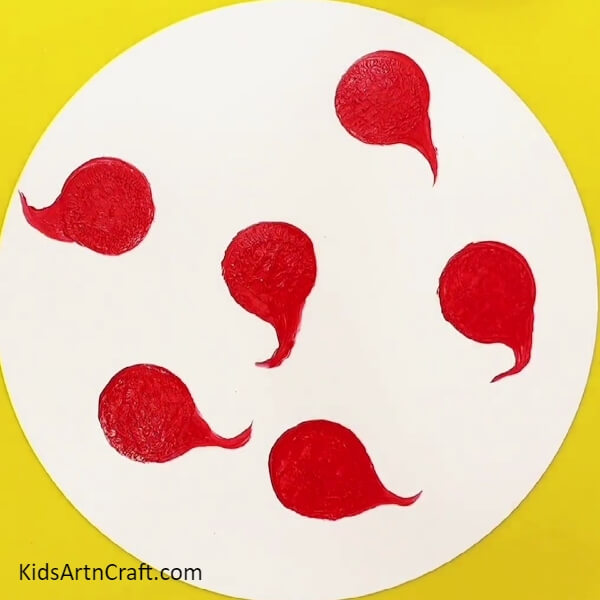
After drawing the curved lines on every circle, we are successful in forming the shape of the red turnips.
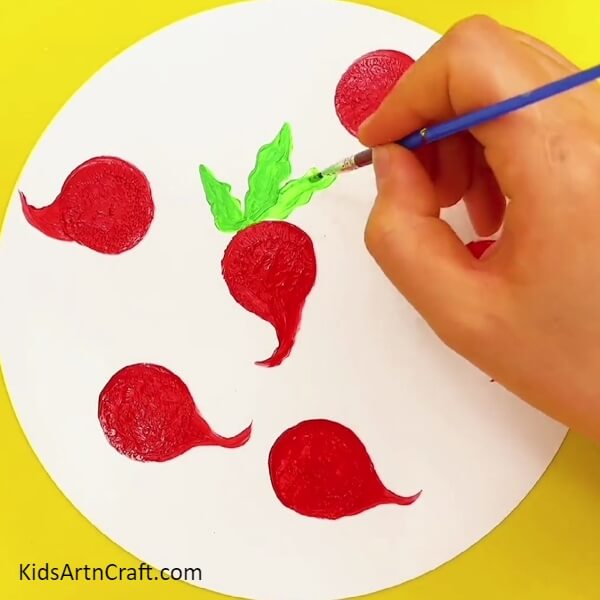
Step 5: Painting the Leaves in the Red Turnips

Take light green color in your brush and draw curved lines to form a leaf on top of the red turnip head.
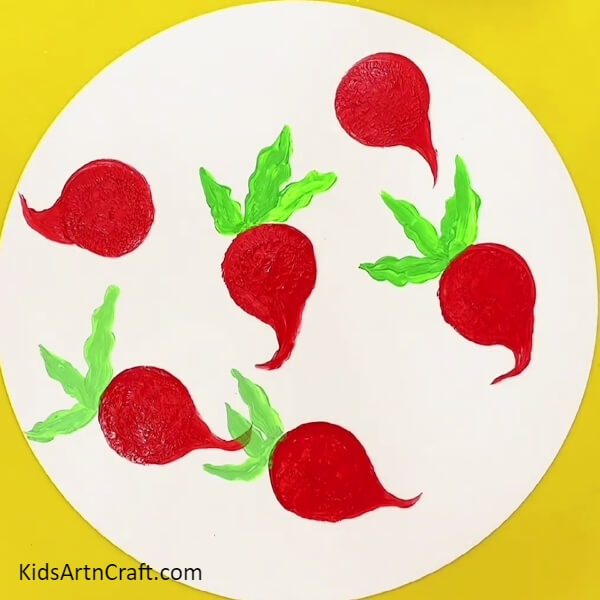
Step 6: Painting Multiple Leaves in the Red Turnips
Continue to use green color with the brush to paint complete leaves on the head of the red turnip.
Step 7: Painting Leaves on the other Red Turnip Heads
Using the same method, paint leaves on the heads of the other red turnips.
Step 8: Completing the Leaves in Red Turnips
Good job! We have completed painting the leaves. The turnips are looking great.
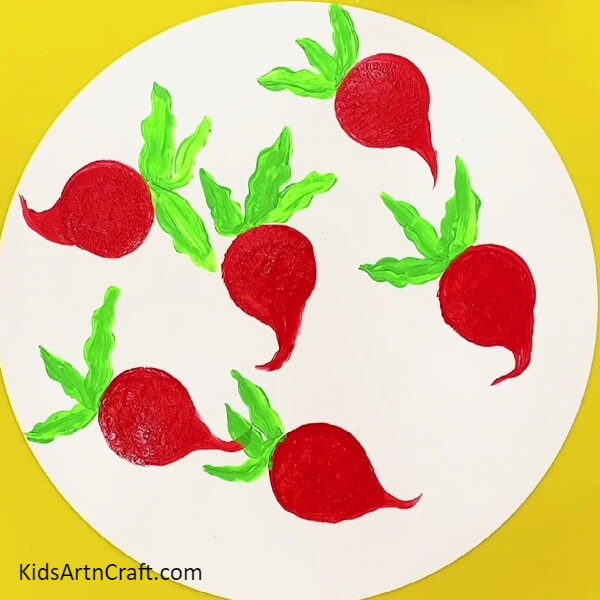
Step 9: A Touch of White to the Red Turnips for Prominence
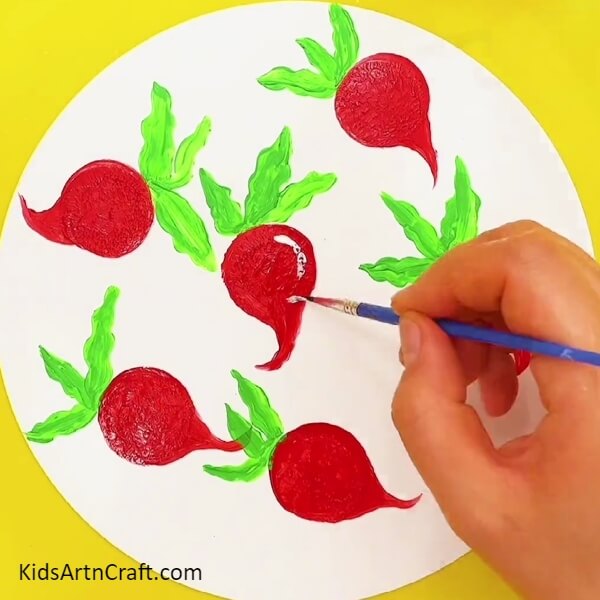
Using white paint, draw a curved line and a dot on the body of the red turnip.
Step 10: The Red Turnips are Almost Ready

The red turnips look so shiny and fresh!
Step 11: Painting a Presentable Background
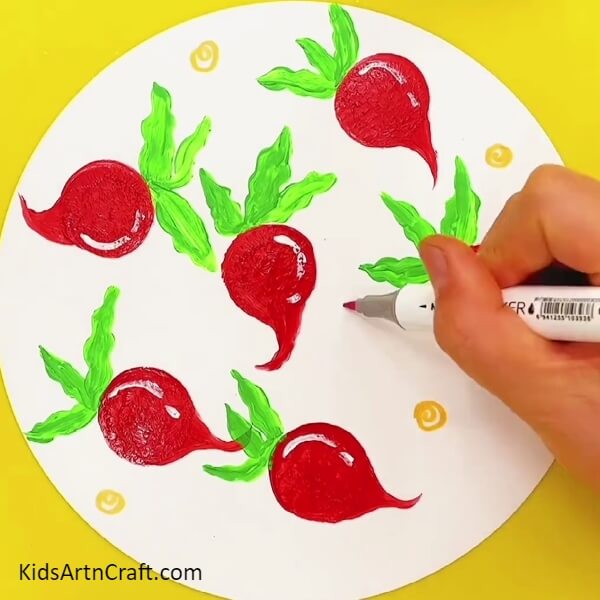
Using your sketch pens, draw colorful spiral-shaped circles in empty spaces.
The Red Turnips – An Easy Art Work for All!

And your Red Turnips are ready! This was such a fun artwork for any age group. You can add more detailing using sketch pens to give a more creative background. This work of art will be loved by all. So, give it a try and share it with others as well. Be creative together. Have fun!
Hope you like this step-by-step artwork of painting red turnips. We would love to hear your views on this tutorial in the comment section below. Don’t forget to visit our other articles for more creative ideas!
Thank you for visiting our website.
Follow us on Youtube for art and craft tutorials and much more.
More Articles from Kids Art & Craft
- Silhouette Painting with Watercolors
- Okra Stamping Art Ideas for Kids
- Easy Flower Stump Painting Art Tutorial for Kids
- Amazing Sunflower Painting Art For Kids
- Beautiful Way To Make Tree & Bird Paste Painting With Peanut Sells