Christmas
Santa Drawing From Hand Outline Step by Step Tutorial

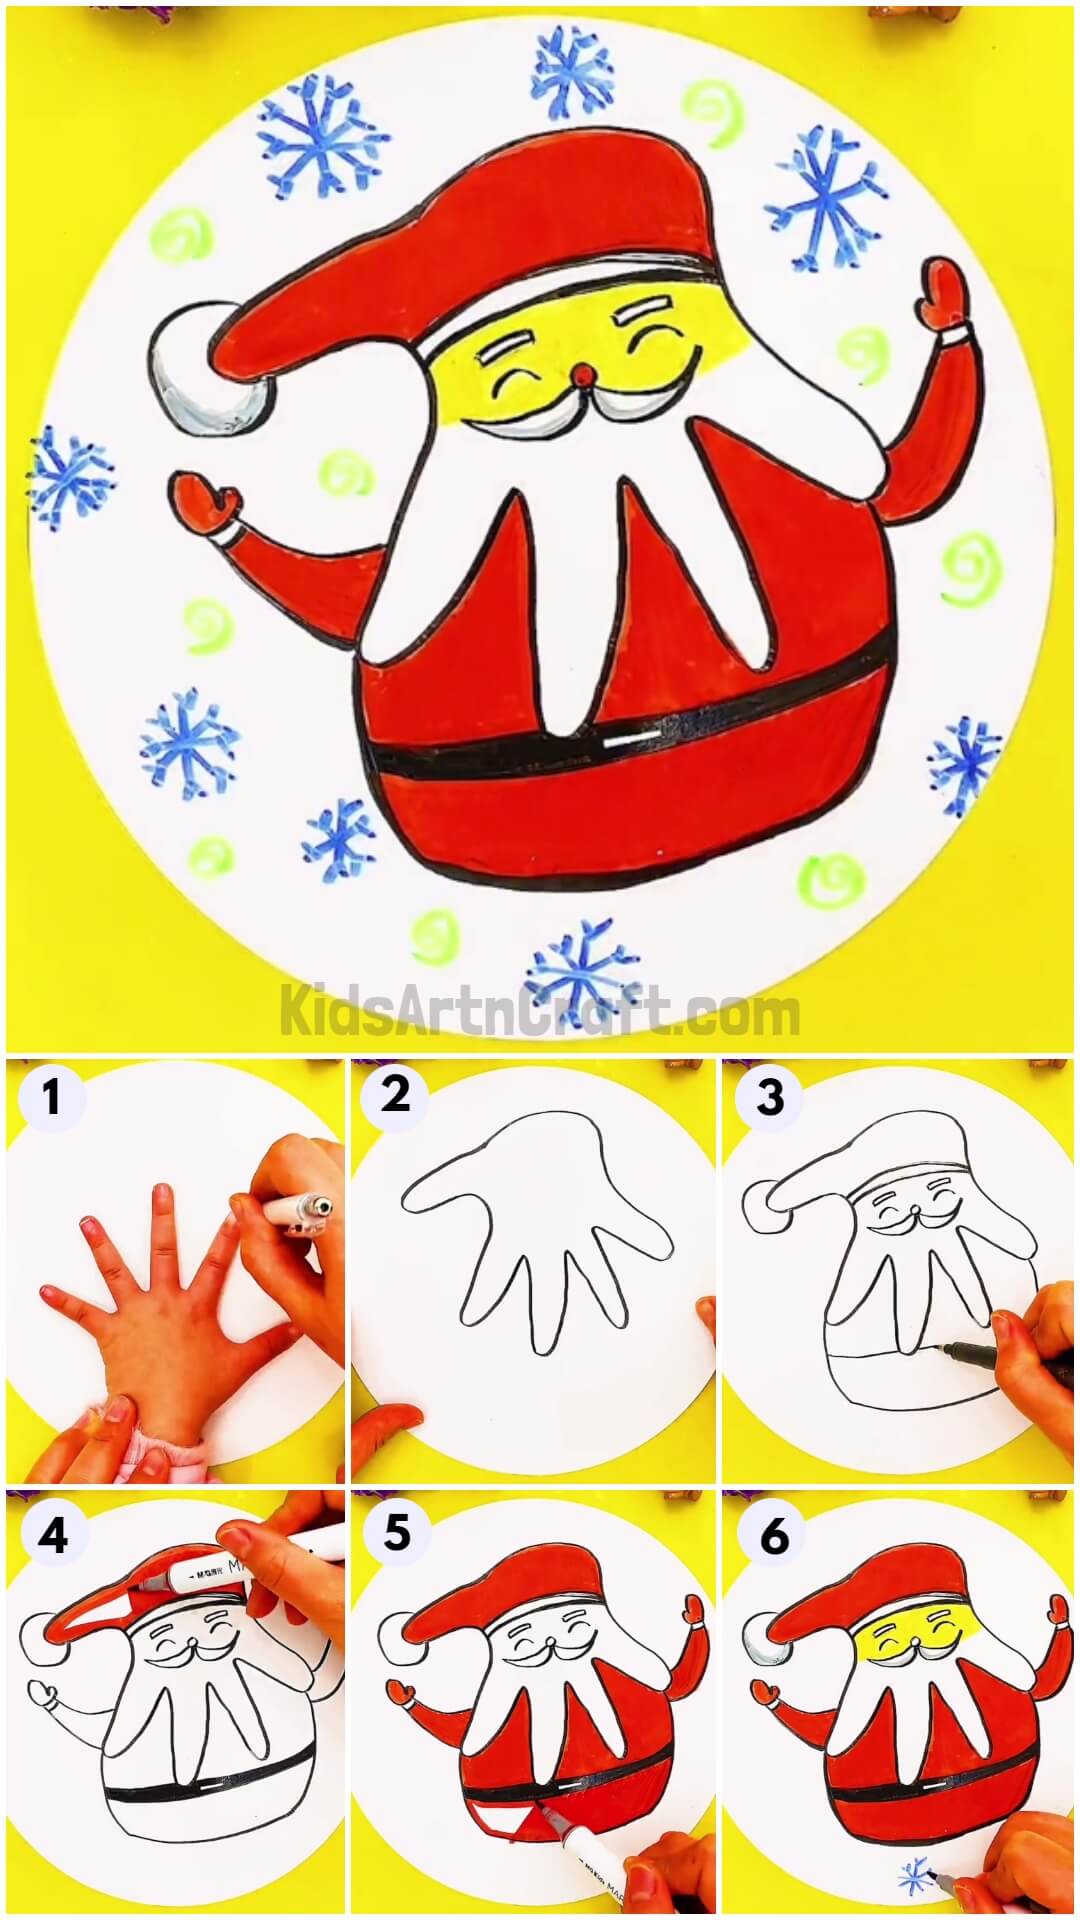
Get the Christmas spirit high by drawing this Santa drawing with the help of this step-by-step tutorial in minutes with an easy technique!
Knock knock, who’s there? Hohoho! It’s Santa! Create a Santa drawing today with a technique that will make your artwork very easy, from your hand outline! This step-by-step tutorial will guide you to make this artwork drawing in no time using up those basic art and drawing supplies that you already have at your home! This can be the perfect Christmas activity for the little ones as a classroom activity or even homeschooling! Get the spirit of Christmas up and create this drawing with us now! Read on to roll on!
Easy To Make Santa Drawing From Hand Outline

Read More: Easy-to-make Christmas Tree Craft For Beginners
Materials Required
- White Circular Paper Sheet
- Pencil
- Colored Markers (Red, Black, Yellow, And Blue)
Procedure
Step 1: Outlining The Hand

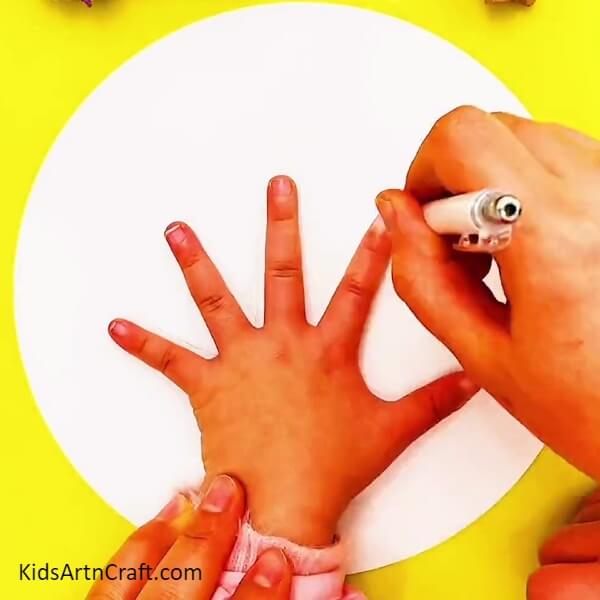
Begin this artwork by taking a white circular paper sheet as the base for your artwork and a pencil. Place your hand over the base wide open in the center and using the pencil outline the hand.
Step 2: Overdrawing The Pencil With Marker
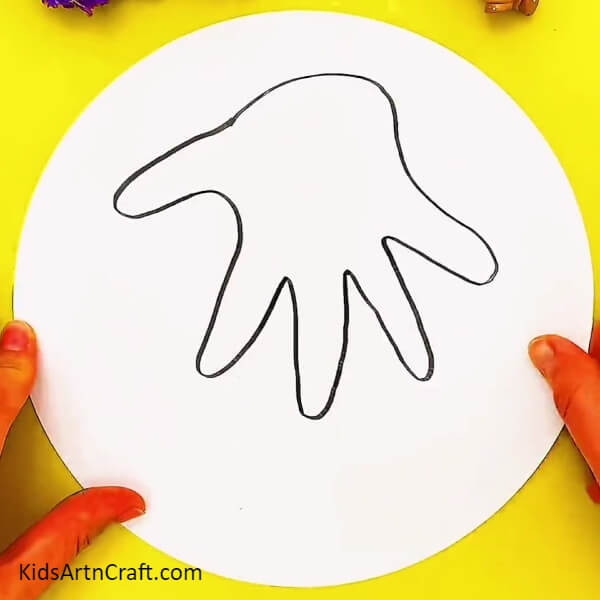
Take a black marker and overdraw the pencil hand outline using it. Now, rotate your base to keep the fingers outline below.
Step 3: Drawing A Santa
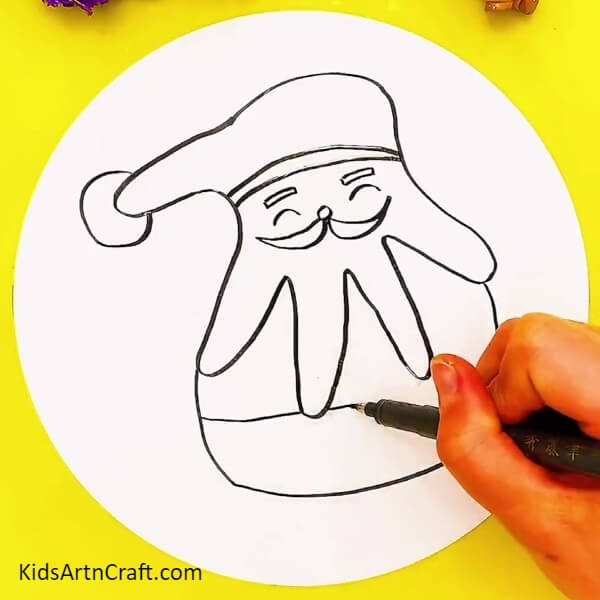
Using the black marker, draw a circle over the end of the thumb outline and 2 curvy horizontal lines on the end of the hand to make the cap of Santa. Now, draw bushy eyebrows, curvy closed eyes, a round nose, and a curvy mustache below the cap, this will be Santa’s face and the finger outlines will be the beard of Santa. Also, make a rounded figure below the mustache to make the body.
Step 4: Drawing Santa’s Hands And Belt
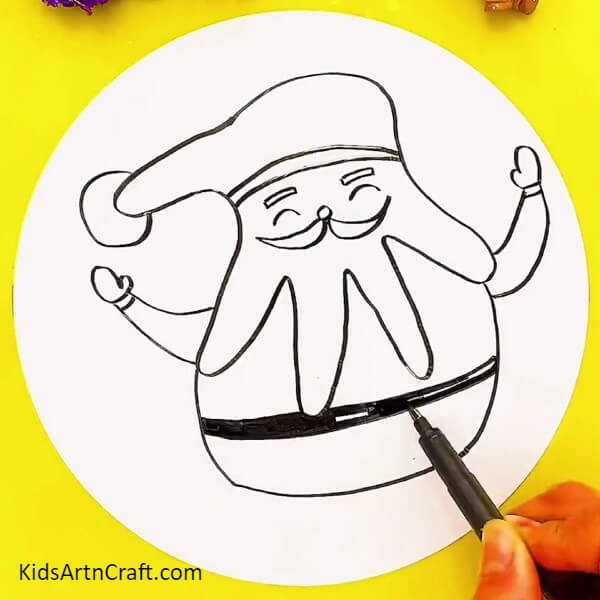
Make 2 curvy hands on each side of the mustache and make sure to make the gloves over the hands as shown in the image. Now, make a belt on the bottom of the body, the belt should be a little above the body outline and should be along the body outline. Color out the belt from the marker just leave a rectangle in the middle.
Step 5: Coloring The Santa’s Cap
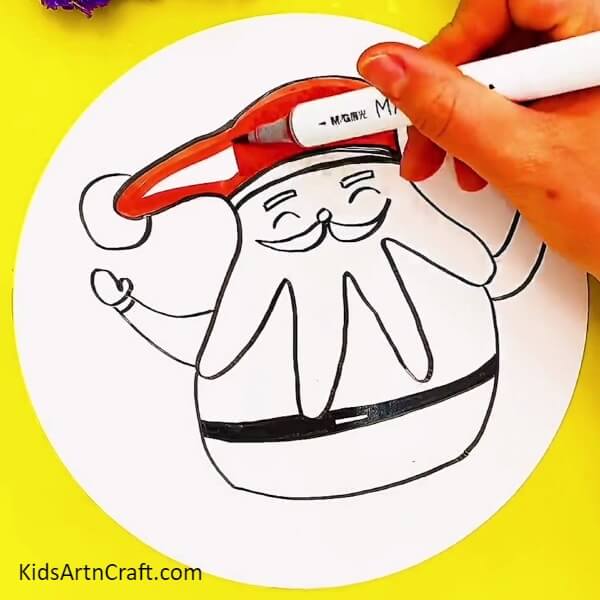
Using a red marker color out the cap of the Santa.
Step 6: Coloring The Dress

Color the body below the mustache and above the belt to make the clothes of Santa over the body.
Step 7: Coloring The Whole Dress
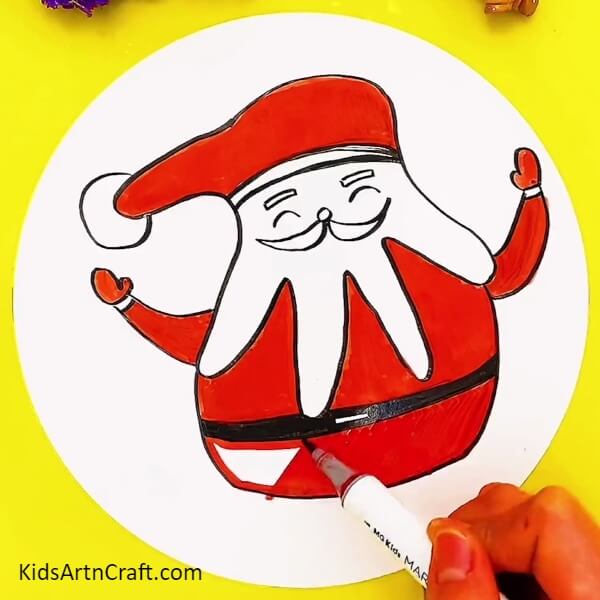
Color the body below the belt and also color the hands and the gloves using the red marker.
Step 8: Coloring The Face Of The Santa
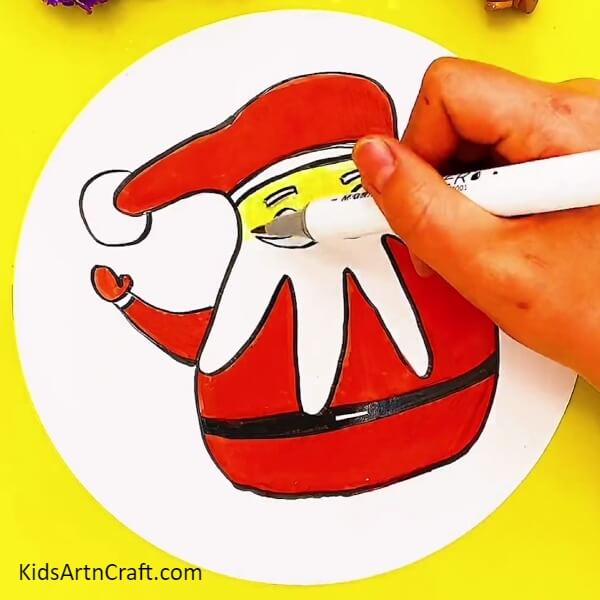
Using a yellow marker, color the face of Santa by making a curvy line from the mustache. Also using the pencil, shade the mustache and the cap ball from the lower end to make it more realistic.
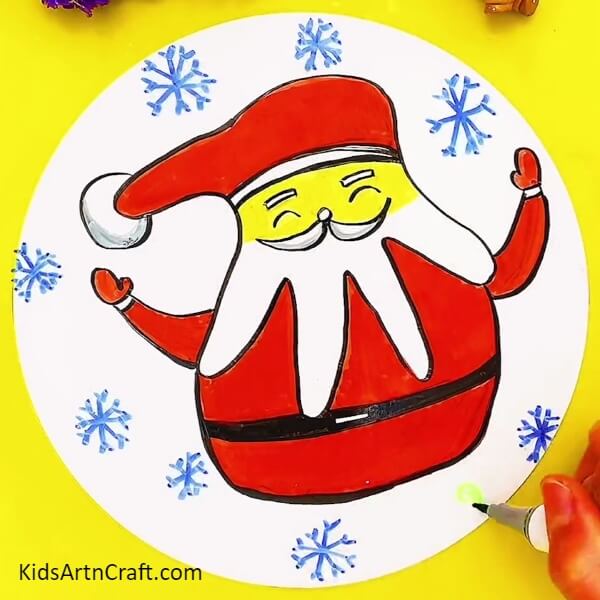
Step 9: Making Snowflakes
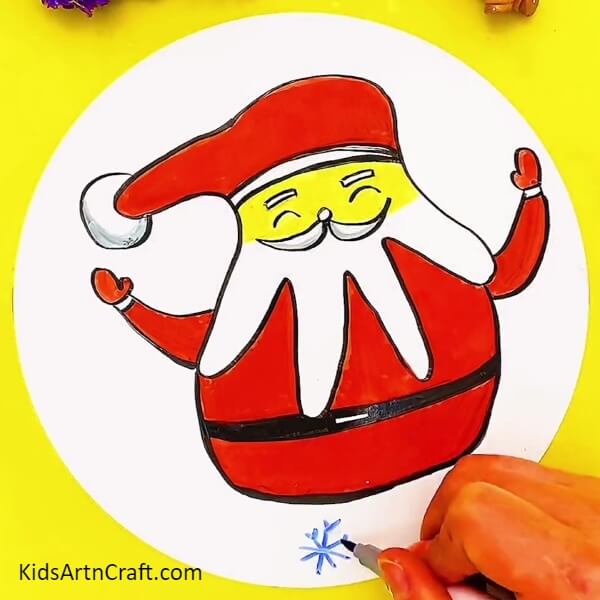
Using a blue marker, make the snowflakes randomly over the base of the artwork.
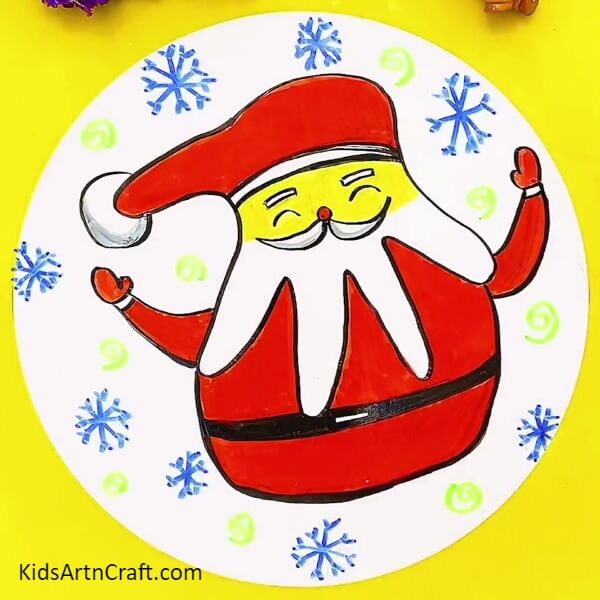
Step 10: Making Spirals Over The Base
Using the yellow marker, make random small spirals over the base between the snowflakes. Also, color the nose red from the marker.
This Is The Final Look Of Your Santa Artwork!
Woohoo! Look at your Santa drawing results!
This craft will surely be a hit on Christmas days! You can decorate this artwork in your room and show it off to everyone who comes to your house and let them admire your art skills and creativity! Unleash the inner artist in you by creating this Santa drawing and who knows if this art is the first step of your future artist career! As the goals preparation is done right from childhood! Also, you can use this artwork to gift it to your best friend with a sweet Christmas gift!
Follow us on Youtube for art and craft tutorials and much more.
More Articles from Kids Art & Craft
- Fun Screaming Lemon Drawing Step-by-Step Instructions
- Cute Jellyfish Underwater Painting Using Hand Outline
- Easy Tree Craft Using Christmas Tree Leaves & Pom Poms
- Easy & Fast Christmas Crafts Video Tutorial for Kids
- Christmas Santa Face Paper Craft Step-by-step Tutorial For Beginners