Painting
How To Make Shrub Plant Blow Painting Tutorial for Kids

Try out a new trick of painting that will turn out into a masterpiece! Blow painting! This shrub rose plant is made from blowing paint using a plastic straw! So easy and unique artwork! Try it out!
A warm welcome to you! Today we present you this amazing artwork that will definitely blow your mind! This shrub plant painting is made using a plastic straw to scatter the paint by blowing in it!! Isn’t it amazing!? It is like spilling the painting over the paper and trying to make something out of it just like the artists! You can too make this painting and show it off to your friends and firmly! Unleash the inner artist within you and make a unique piece of artwork with us like a pro! Go ahead and gather the painting supplies, and don’t forget the straw with it! Straw is our star supply today! Let’s roll on!
How To Make Shrub Plant Blow Painting

Read More: Learn To Make Tree with paper step by step Tutorial
Materials Required
- White Circular Paper Sheet
- Paints (Red, Black, And Green)
- Water
- Color Palette
- Plastic Straw
- Cotton Earbud
- Matchstick
Procedure
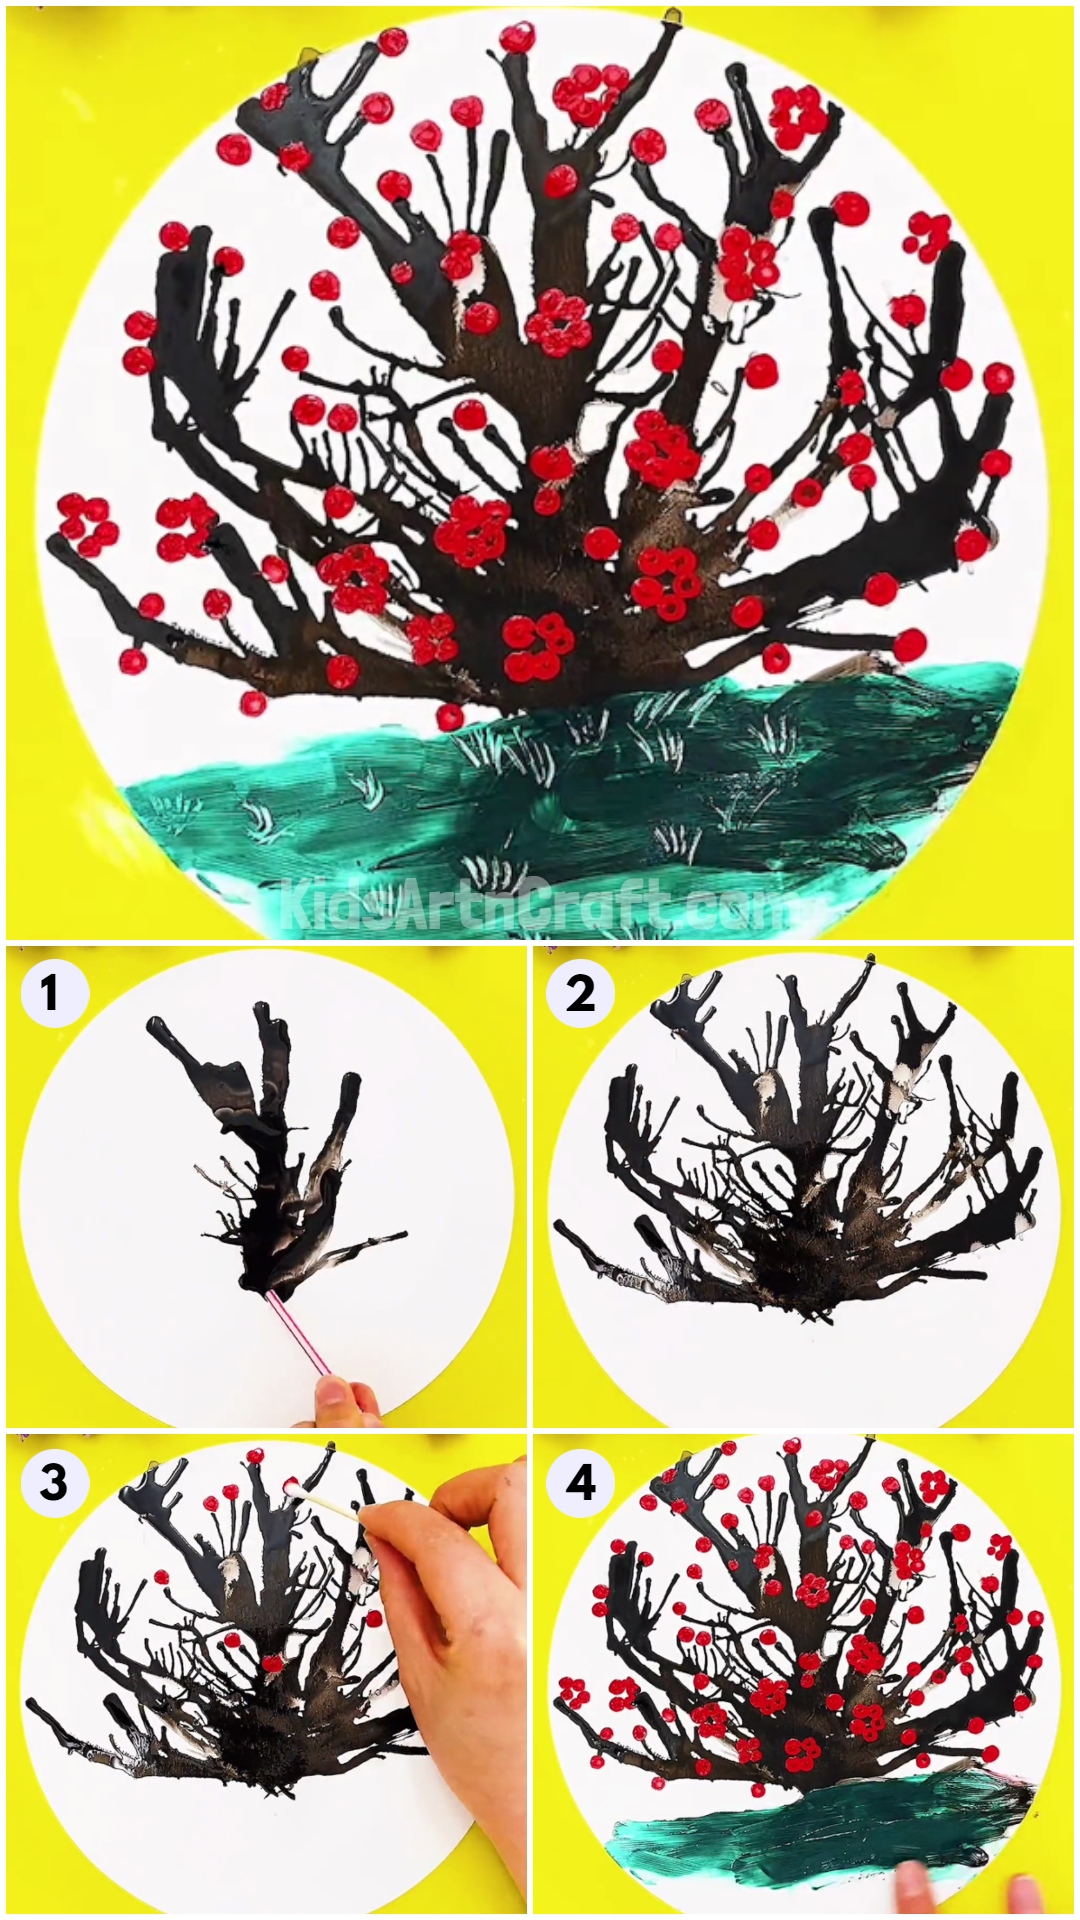
Step 1: Spilling Black Paint Over A Paper
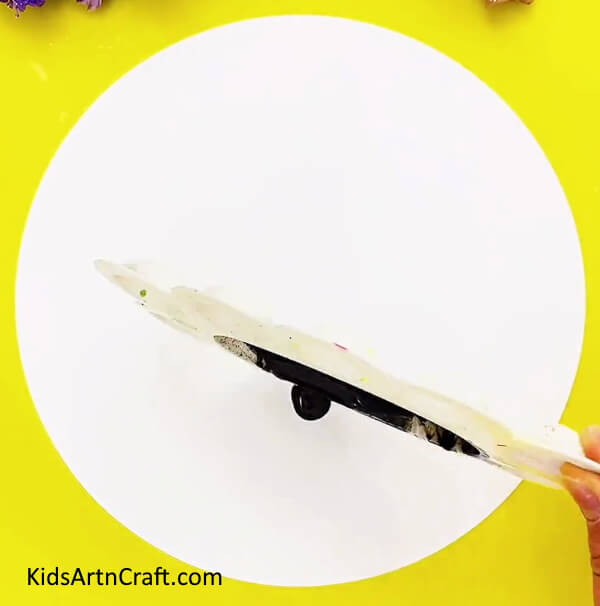

To begin this craft, take a white colored circular paper sheet and a color palette. Pour some black paint into the palette and a few drops of water to make the solution less thick. Now, spill the paint over the white sheet in the center.
Step 2: Blowing To Scatter The Paint
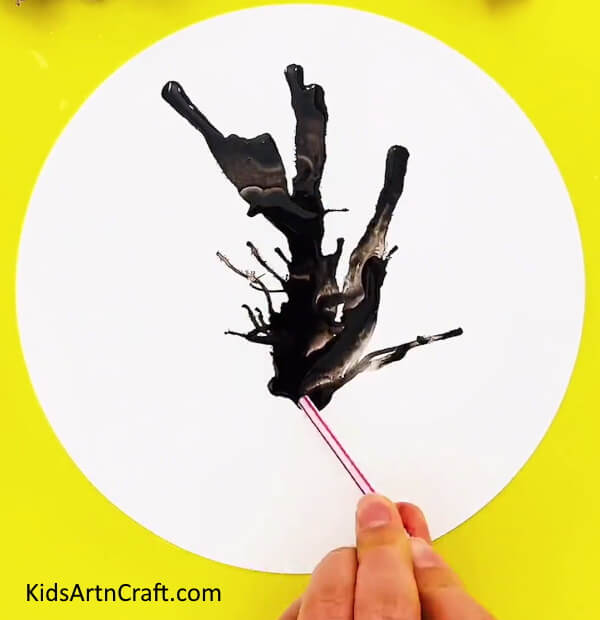

Take a plastic straw and start blowing air through it to the spilled paint to scatter it over the sheet. Make sure to blow from the below side to make the water scatter upward in a growing direction.
Step 3: Completing Scattering The Paint
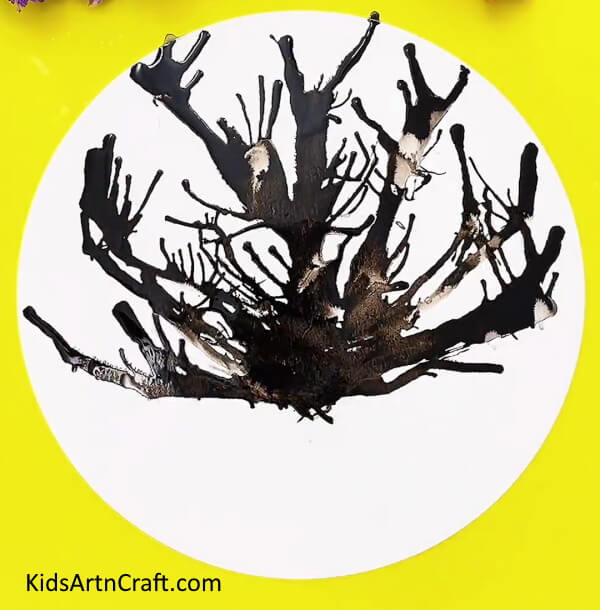

Scatter the paint wholly over the upward side of the sheet. Also, scatter it sideways to make it look like a shrub’s scattered branches.
Step 4: Making Flowers
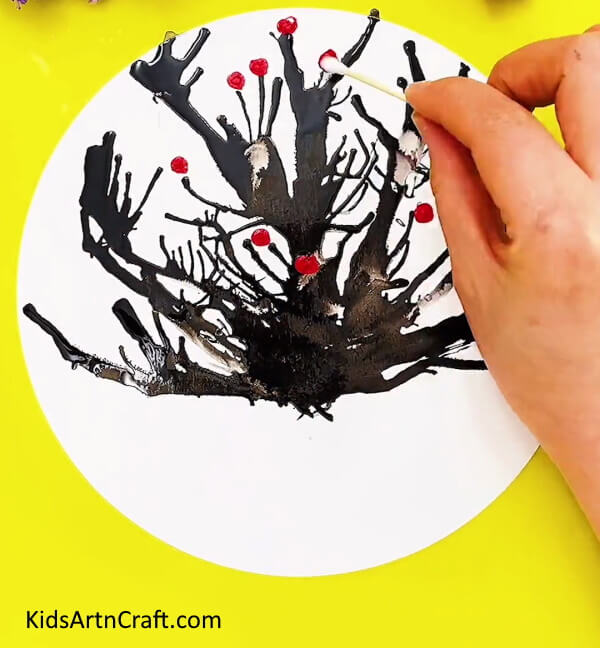

Dip a cotton bud into red paint and dab it over the branches to make them look like dotted flowers.
Step 5: Making More Flowers
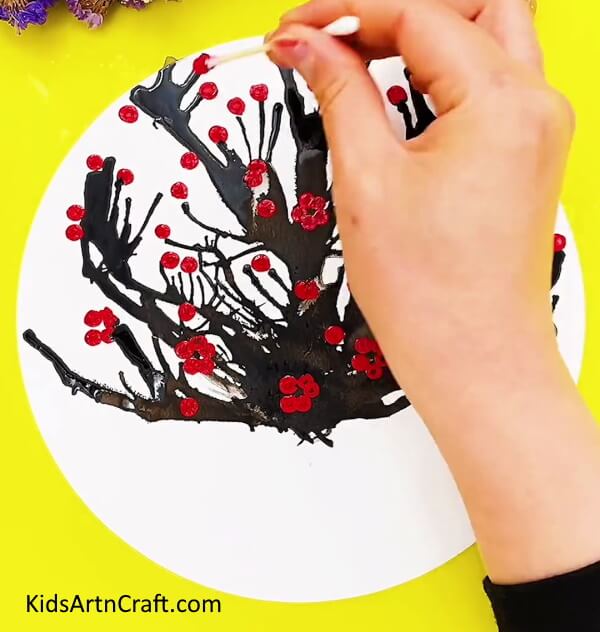

Make 5 dots in a circle to form a complete flower and also make more dotted flowers over the shrub to cover it wholely.
Step 6: Making Ground
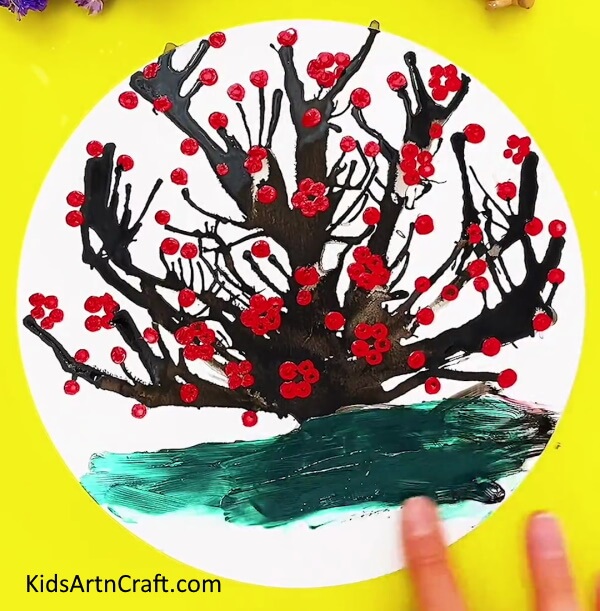

With the help of your finger, paint some green paint below the shrub to make the ground beneath it.
Step 7: Completing Making The Ground

Wholely paint beneath the shrub over the white sheet to complete the ground.
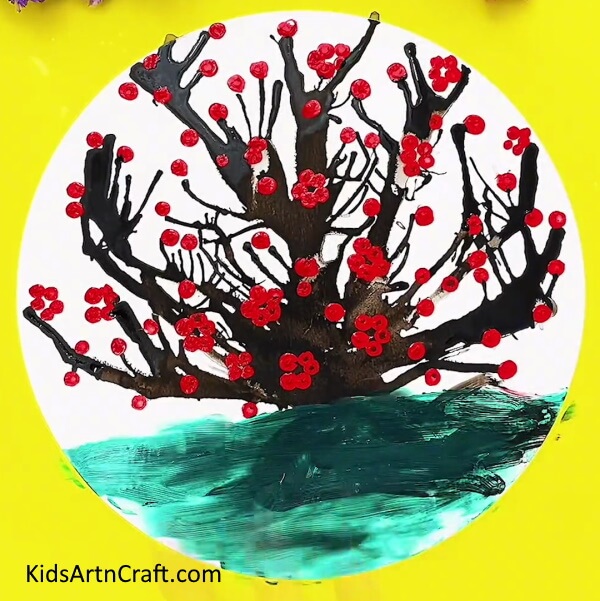
Step 8: Making Grass
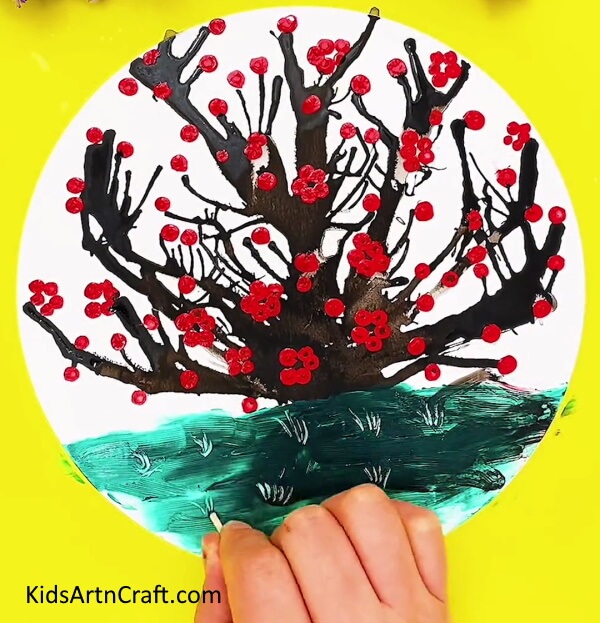

Using a match stick, make some strokes to remove the paint from the side and make them look like grass on the ground.
Now, The Final Look Of Your Shrub Plant!
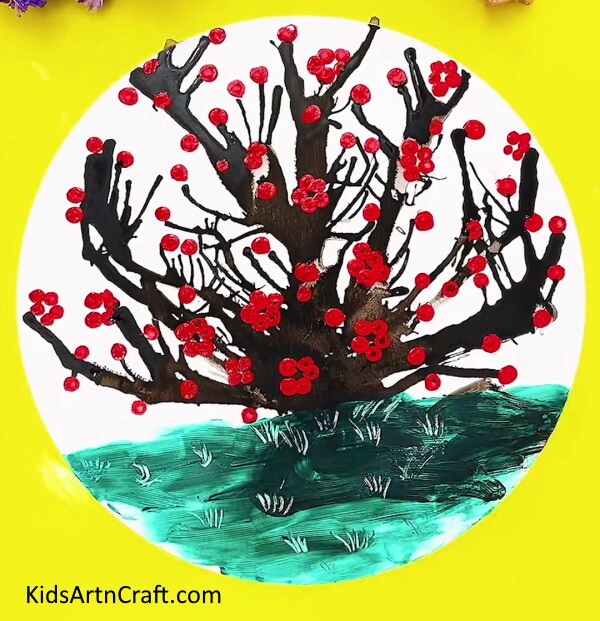

Voila! This is the final output of your shrub made by blowing paint art!
Through this art, you learned a new technique to paint! You also used various materials other than the basic art supplies to make the whole painting, this will unleash your creativity and will be a support for innovating something new every time! You can also customize your shrub plant by adding different colored leave and flowers to it to give it a hint of your innovation!
Follow us on Youtube for art and craft tutorials and much more.
More Articles from Kids Art & Craft
- Handprint Paper Rocket Craft for Kids
- Cool Paper Craft Video Tutorial for Kids
- Learn to Make Penguin Step by Step Instructions
- How to Make a Paper Bunny Easy Tutorial for Kids
- DIY Paper Butterfly Easy Craft For Kids