Paper Crafts
Easy Paper Butterfly Craft Tutorial For Kids

This simple tutorial is perfect for kids of all ages to make a pretty paper butterfly. Just follow the easy step-by-step instructions to make a fun and colorful butterfly. It’s a great activity for a summer craft project or a day when it’s raining.
We all love butterflies and the colors and vibrance they add to our gardens- making our summer mornings more pleasant. We always try to catch them, especially little kids like you but they always seem so unachievable, but not anymore as this tutorial will teach you to make a butterfly through craft and you can hold it in your hands as much as you want to and it won’t even fly away or even die. With some sheets of paper, you can make this craft. So, collect all the material required, and let’s begin with the tutorial.
Easy To Make Paper Butterfly Craft Tutorial For Kids

Read More: DIY Easy Paper Cactus Craft Tutorial for kids
Materials Required
- A purple sheet of paper
- A yellow sheet of paper
- A pair of scissors
- A glue stick
- Double-sided tape
Procedure
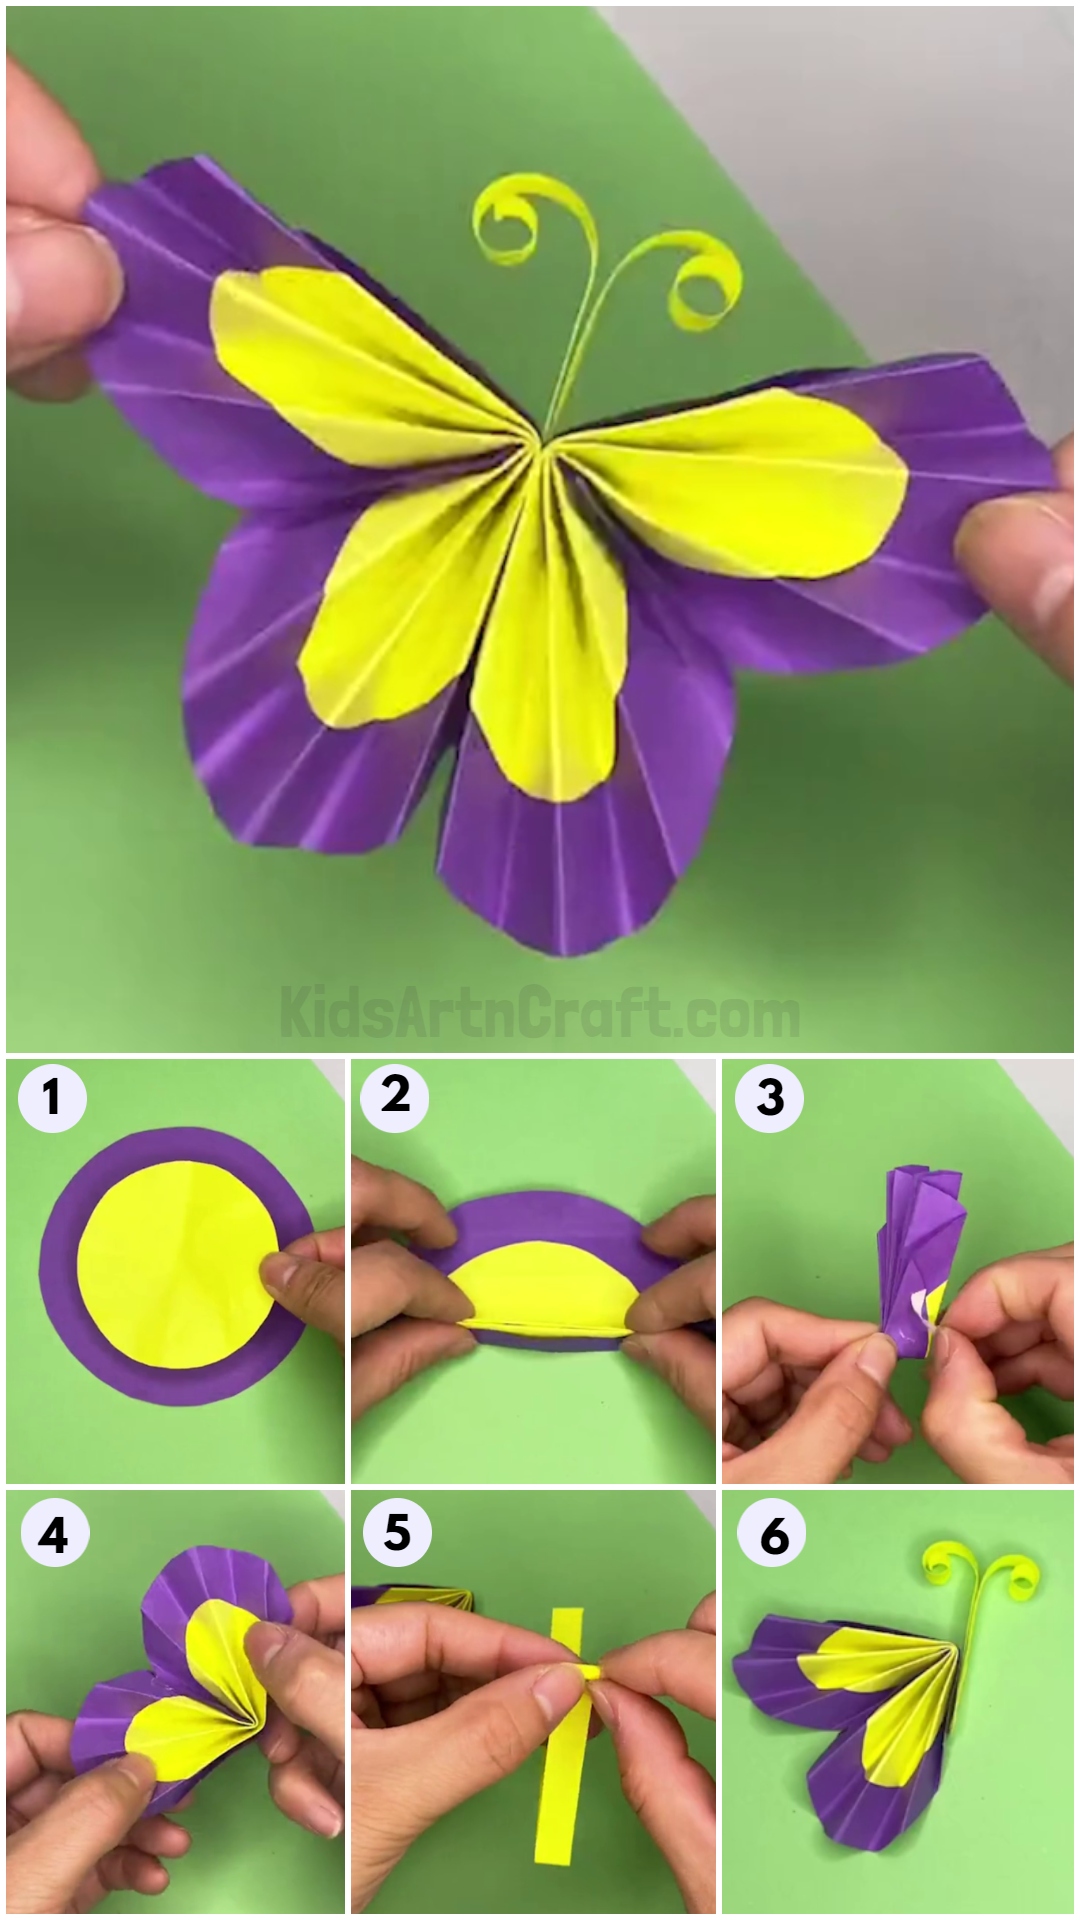
Step 1: Starting With The Purple Sheet Of Paper
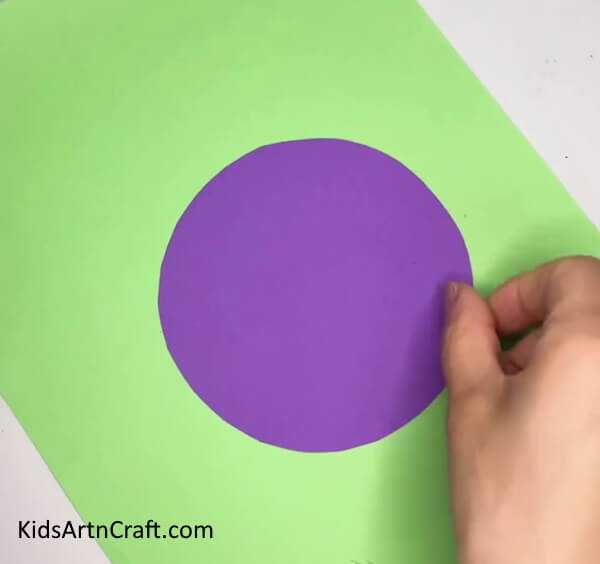

Take a purple sheet of paper and using a pair of scissors, cut a circle out of it. Place the circle on the table as done in the picture below.
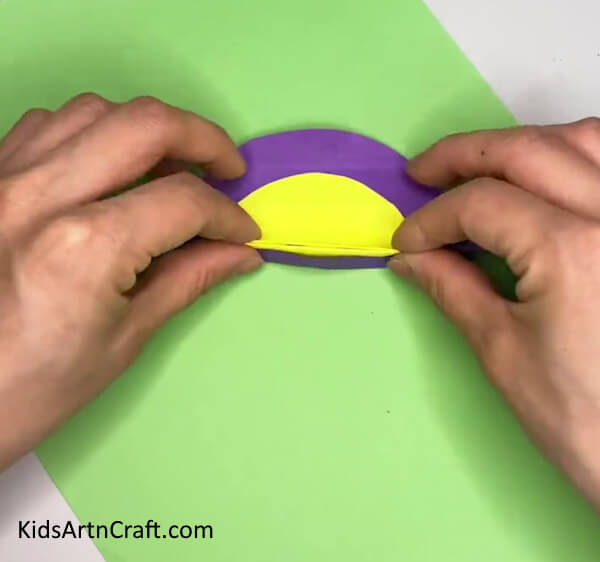
Step 2: Working On The Yellow Sheet Of Paper


Take a yellow sheet of paper and cut a circle out of it as well. This yellow circle should be smaller than the previous purple circle. Apply some glue on one of the sides of the sheet and paste it in the middle of the purple circle as shown in the picture below.
Step 3: Making Folds On The Sheets
Take a little area from the bottom of the pasted circles and make a tiny horizontal fold on it. The fold should be made by pinching the sheet and making the fold stand. Now, using the same technique, make more horizontal folds each next to the previous one up to the middle of the circle. This shall compress the sheets and make the area shrink. Press on the folds to seal the shape. Check the image below for reference.
Step 4: Folding The Whole Circular Sheet
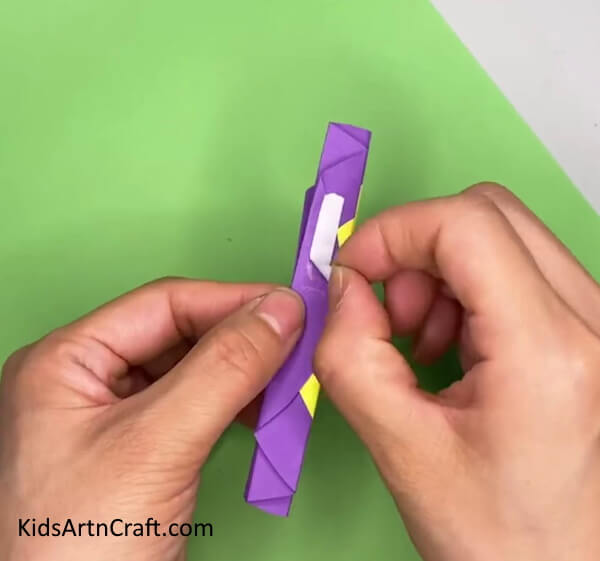

Fold the entire circular sheet employing the same technique. Take one of the sides of the compressed sheet and stick a piece of double-sided tape on it. Have a look at the picture below to understand the step better.
Step 5: Folding The Compressed Sheet
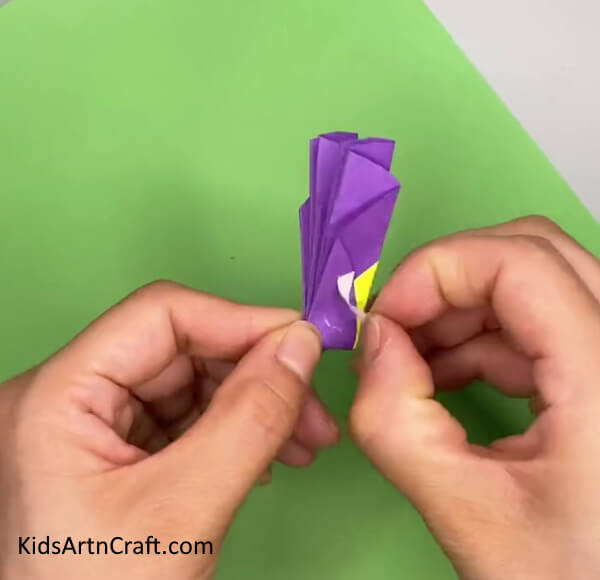

Fold the compressed sheet into half. Press down on the fold to achieve the shape desired. Now, peel off the top layer of the double-sided tape that you pasted earlier on the sheet as shown in the picture below.
Step 6: Revealing The Shape Achieved
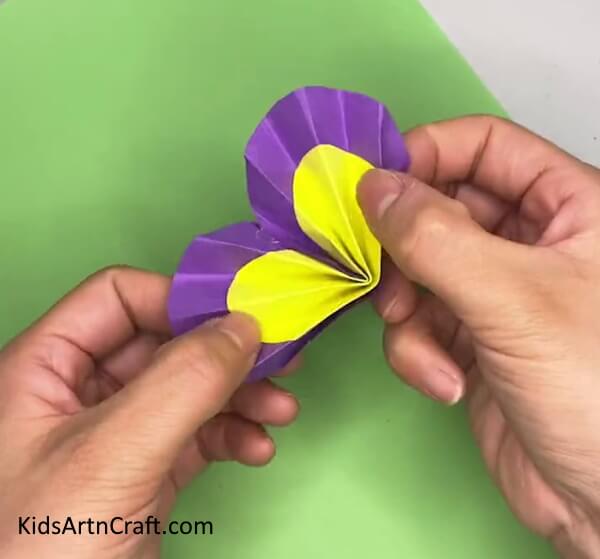

Decompress some of the outer folds made on the circular sheet to reveal the colorful wings of the butterfly. They will act as one side of the two big wings of the butterfly.
Step 7: Cutting A Strip Out Of A Yellow Sheet
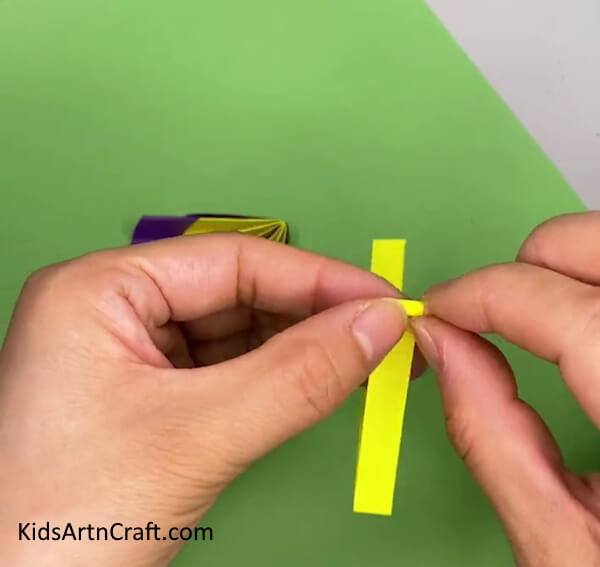

Take a yellow sheet of paper and cut two thin and long strips out of it. Roll on the ends of each strip covering a quarter of the strip. Press down on the roll to lock the shape in. Follow the picture below for reference.
Step 8: Pasting The Rolled Strips On The Wings

Paste the sides of the strip to each other making them look like antennas. Now, paste one of the sides of this antenna to the side you pasted the double-sided tape on. The butterfly bow has a wing and a set of antennas. See the picture below for reference.
Step 9: Making The Other Wing
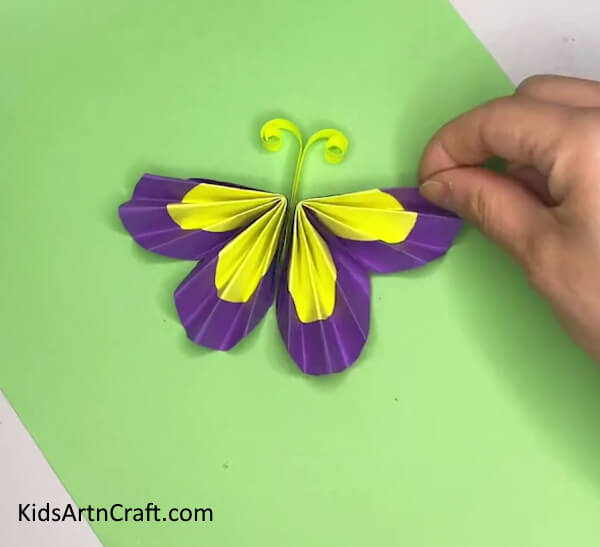

Repeat all the steps that you followed in making the wings of the butterfly beginning from the cutting of the purple sheet to compressing the circular sheet and eventually, the sticking of the double-sided tape. Now, peel the top layer off of the tape and paste it to the sides of the antennas as shown in the picture below.
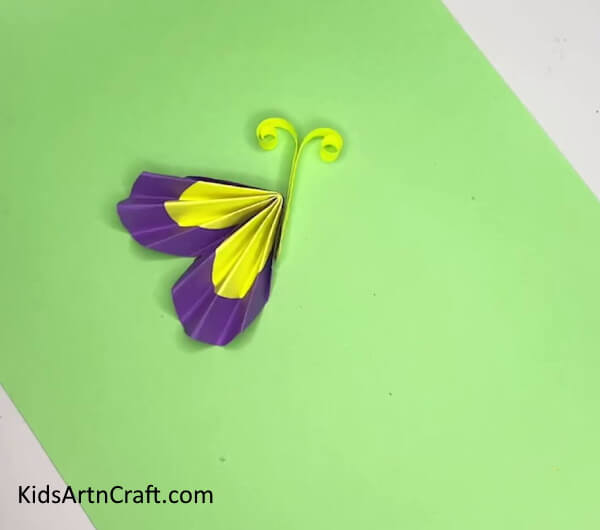
Colourful Flying Butterfly Is Ready!
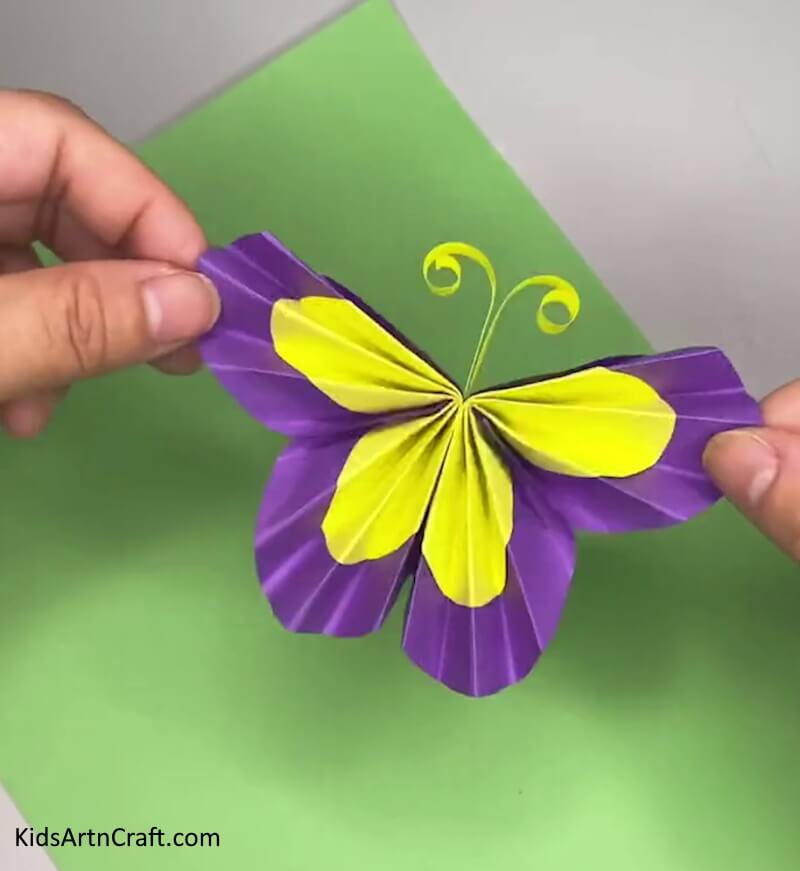

There you have it, full of vibrant colors with big wings and antennas, our butterfly is ready.
For More Butterfly Craft Tutorial
Art Projects For Kids To Create Origami Butterfly Craft

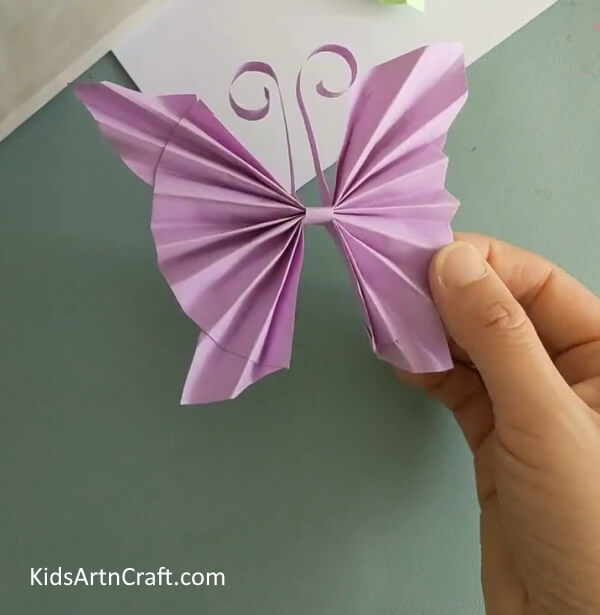
Image Source/Tutorial: Kids Art & Craft
This art project is perfect for kids! They will have fun learning how to make origami butterflies. It is an easy craft that will help them practice their fine motor skills and create something beautiful to be proud of.
You learned some good cutting, folding, and pasting skills in this craft. You can hang this craft next to your window by simply attaching a thread to it or you can paste it on the walls of your room or classroom. Use the techniques that you just learned in many more craft adding originality and uniqueness to your art and craft. Keep tracking the tutorials to learn more craft and grow with it at the same time. Good luck.
Thank you for visiting the website.
Follow us on Youtube for art and craft tutorials and much more.
More Articles from Kids Art & Craft
- Paper Butterfly Craft Easy Tutorial for Kids
- DIY Paper Butterfly Easy Craft For Kids
- DIY Bird Nest Paper Craft For Kids
- Easy Paper Robot Craft Step By Step Tutorial
- DIY Easy Paper Strawberry Tutorial For Kids