Clay Crafts
Blueberry Clay Craft Step-by-step Tutorial For Beginners

Learn how to make your own beautiful blueberry clay craft with this step-by-step tutorial for beginners. Get all the tips and tricks you need to create stunning pieces of art with ease.
Blueberry is one of the most beloved fruits in other countries. Blueberries also have many benefits such as it is rich in antioxidants, rich in minerals and vitamins and many other such benefits. So, to make you understand the importance of blueberries let us make some clay craft out of it. Let’s get started!
To make a blueberry clay craft, bring all these materials to the table and follow these teeny tiny steps.
Blueberry Clay Craft For Beginners

Read More: Clay watermelon ice cream easy craft tutorial
Materials Required
- Craft paper (White, Light Green and Dark Green)
- Marker/sketch pen (Black and White)
- Blue clay
- Glue
Procedure
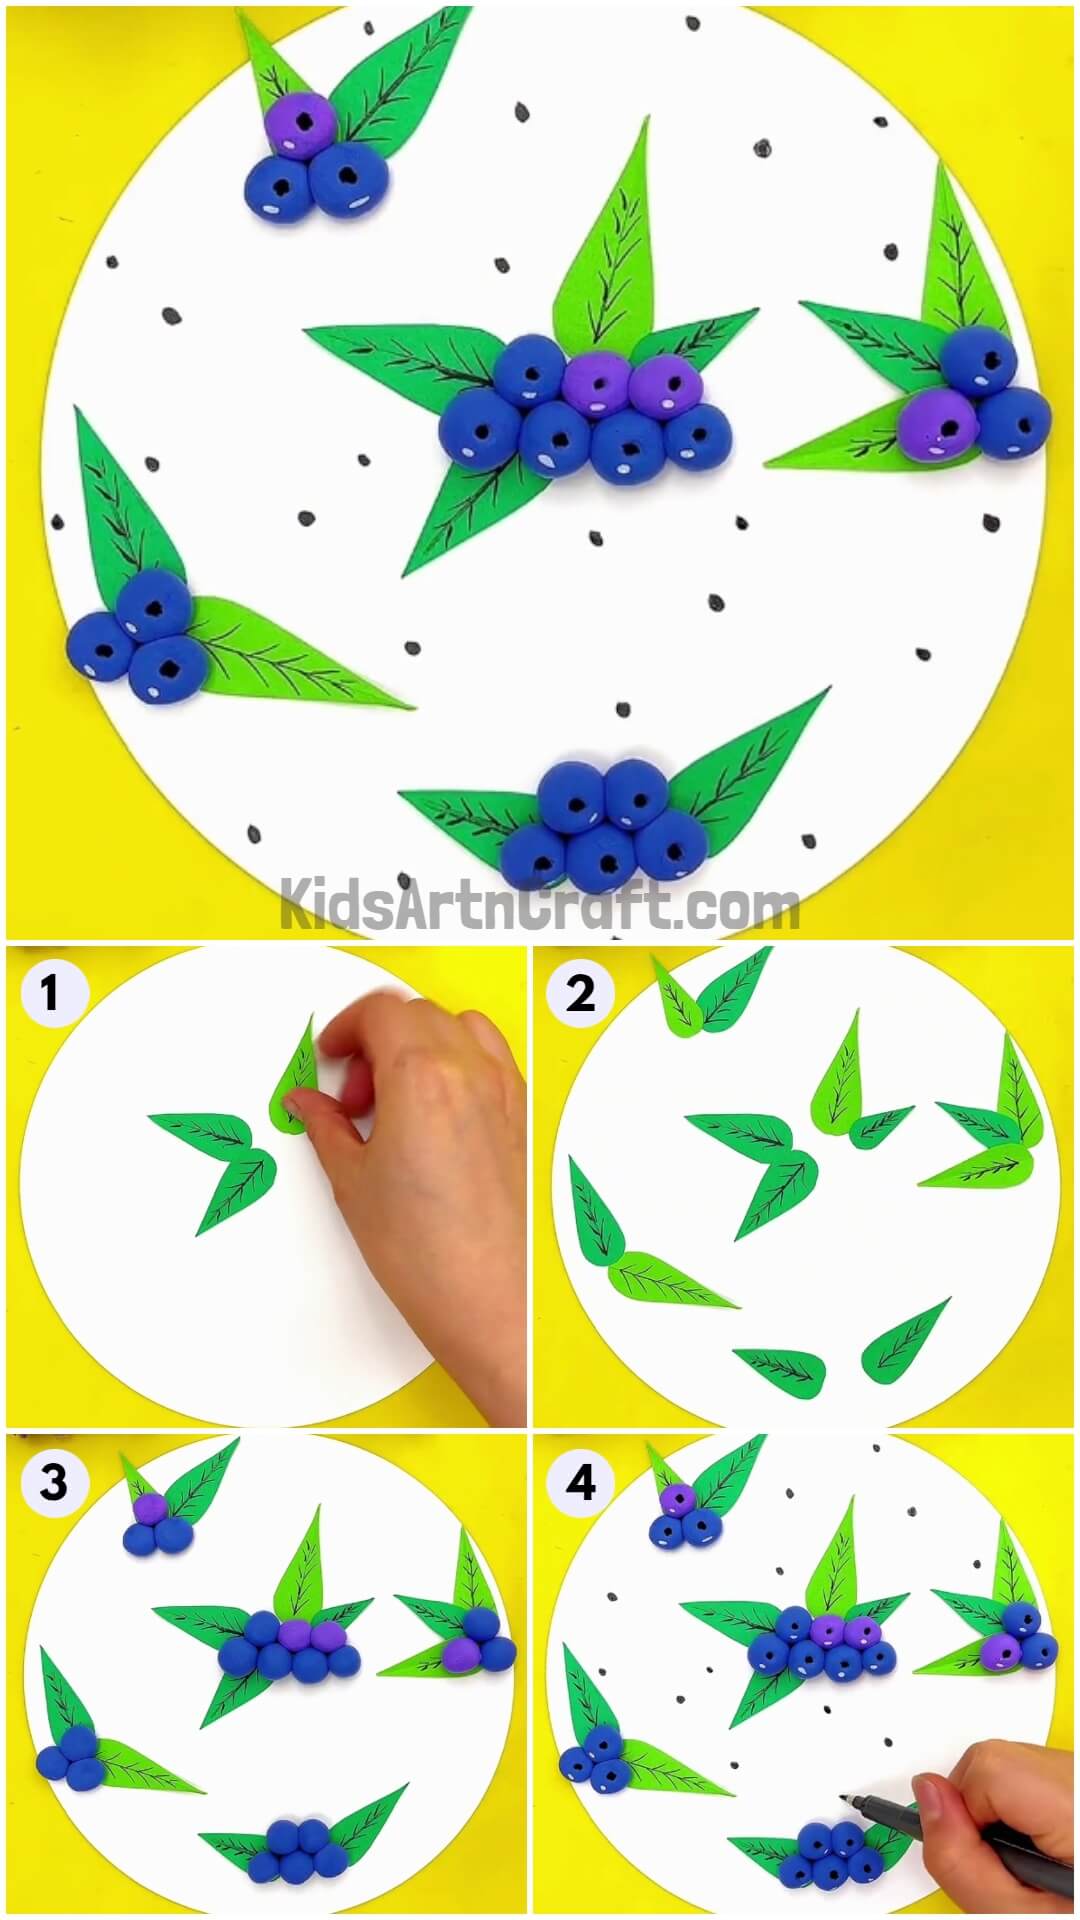
Step 1: Make Leaves With Green Craft Paper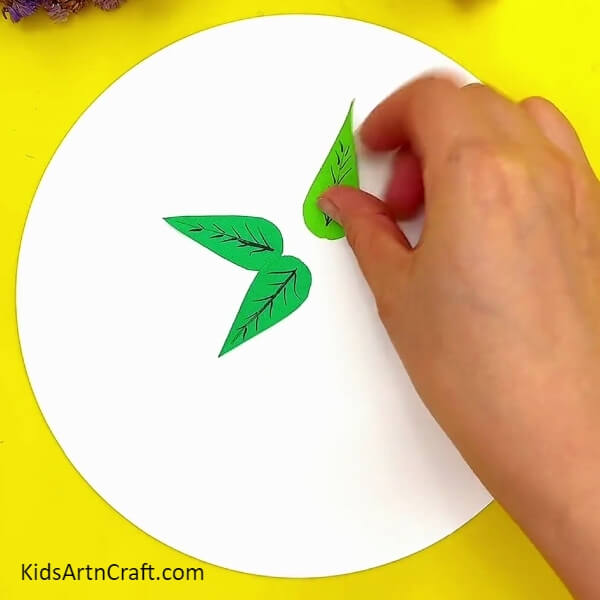

Your first step is to make leaves with the help of light green coloured and dark green coloured craft paper. Then, make veins on each of the light green coloured craft paper and dark green coloured craft paper with the help of a black marker/sketch pen.
Then, take a piece of white coloured craft paper. The white coloured craft paper should be in a circle shape.
Step 2: Stick Green Leaves On White Craft Paper With Glue
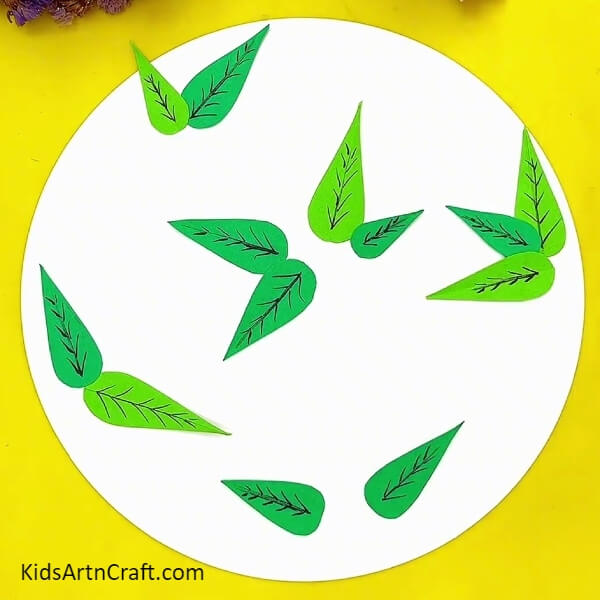
Now, with the help of the glue, stick the light green coloured craft paper and dark green craft paper in a particular position on the white coloured craft paper as shown in the picture.
Step 3: Make Big Blue Balls With Blue Clay
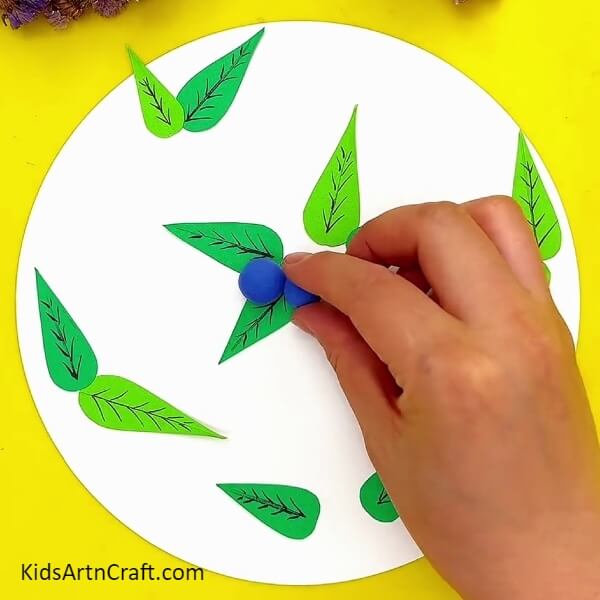
Make big blue balls with the help of blue-coloured clay. After making big blue balls with the help of blue coloured clay, stick the big blue balls with the help of glue on the intersection of leaves which are stuck on the white coloured craft paper as shown.
Step 4: Stick A Bunch Of Blue Balls On The Leaves
Keep repeating the step of sticking the big blue coloured balls with the help of glue and make a bunch of blue coloured balls by sticking them together on the leaves with the help of glue.
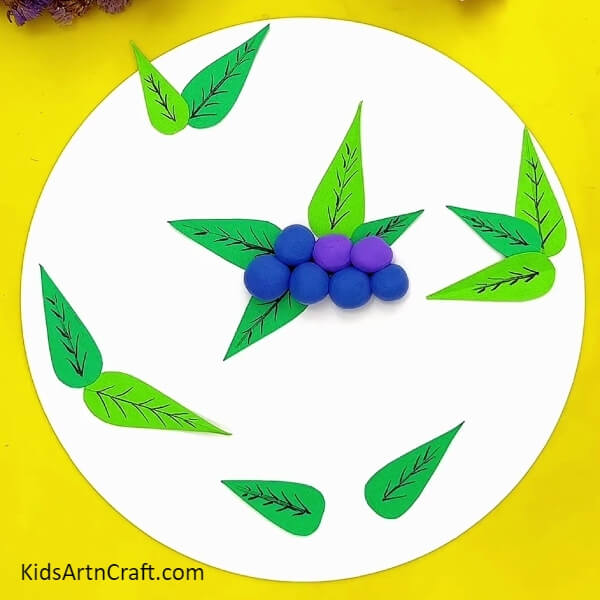
Step 5: Make Five Groups Of Blue Balls
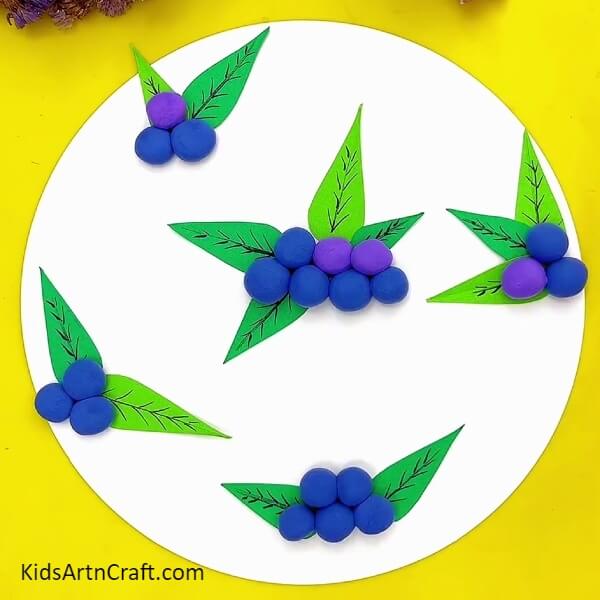
Now, keep repeating the above step and keep making bunches of blue-coloured balls on the light and dark-coloured leaves with the help of glue. You have to make a total of five groups of blue-coloured balls stuck together as shown in the picture.
Step 6: Make Holes In The Blue Balls With Black Marker/sketch pen
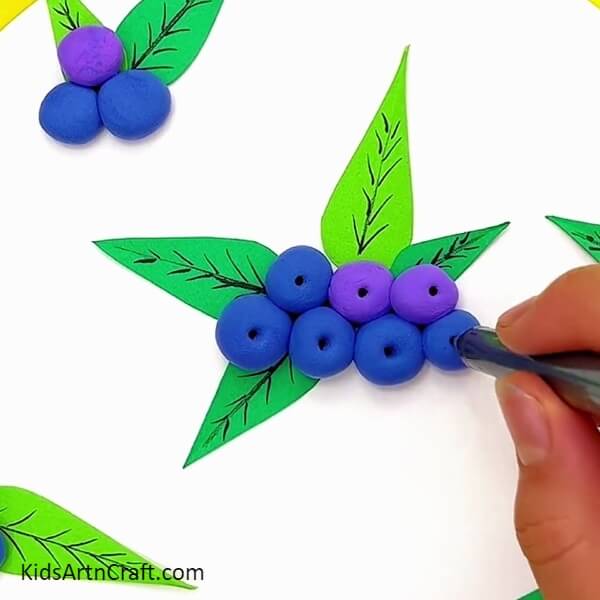
With the help of a black marker/sketch pen, make a hole in the blue-coloured balls which you made from blue-coloured clay. You have to make holes in each of the blue-coloured balls by pressing the black/sketch pen inwards in the middle of the blue-coloured balls.
Step 7: Give An Effect To Blue Balls With White Marker/sketch pen
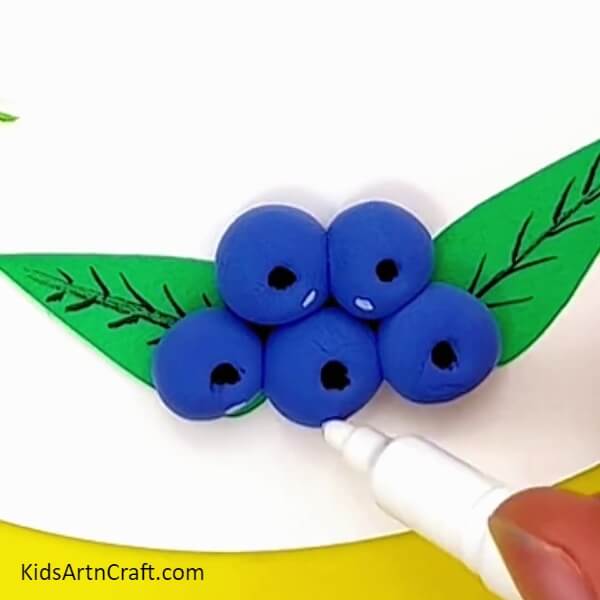
Now, with the help of a white marker/sketch pen, give a shiny effect to each and every blue-coloured ball which is made from blue-coloured clay.
Step 8: Make Black Dots On White Craft Paper With Black Marker/sketch pen
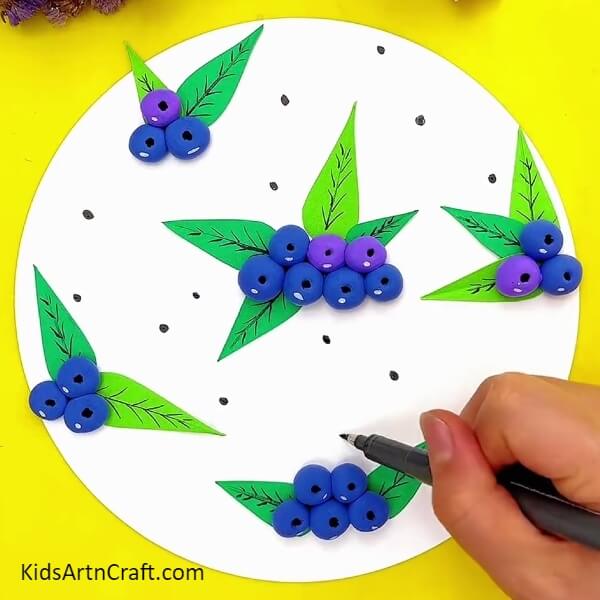
Take a black marker/sketch pen and keep making black dots on the white coloured craft paper to give an effect to the blueberry clay craft.
Finally, your juicy blueberries are ready!

Finally, your juicy blueberries are ready to be savoured. It is looking absolutely delicious though, I wish I could just pluck them and eat them as it is. I’m sure even your mouths are getting wet from seeing these mouth-watering blueberries. If you want to eat these blueberries, firstly you have to try to make this delicious craft. This craft is actually very simple and easy to make. From this kids can learn the importance of different fruits and they can even learn much more about clay art.
I hope you give this mouth-watering craft a try. You just have to follow the simple steps and everyone will actually be confused about that is this craft real or what! So, go and try right now!
Follow us on Youtube for art and craft tutorials and much more.
More Articles from Kids Art & Craft
- How to Make Worms Using Clay For Kids
- DIY Clay Giraffe Step-by-Step Tutorial For Kids
- Pretty Snowman Paper Clay Craft Tutorial For Beginners
- DIY Miniature Clay Cake Craft Activities for Kids
- DIY Bees Clay Art Tutorial for Kids