Painting
Cute Bunny & Flower Painting Art

Bring a little bit of nature into your home with this gorgeous, hand-painted art featuring a cute bunny and beautiful flowers. This one-of-a-kind painting will make a heartfelt addition to any room in your home, and bring a cheerful atmosphere to your space.
Welcome to the world of Cute Bunny & Flower Painting Art! If you’re looking for a unique and creative way to express yourself, this art form is perfect for you. With its eye-catching designs and vibrant colors, this type of art will bring a beautiful and unique touch to any space. From large wall murals to small canvases, this art form has something for everyone. Whether you’re a beginner or an experienced painter, you can find a design that suits your style and skill level. Let’s take a closer look at this delightful art form and all it has to offer.
Super Cute Bunny & Flower Painting Craft Idea For Kids

Read More: DIY Easy Tomato Paper Craft For Kids – Step by Step Tutorial
Material Required:
- Sky blue A4 sheet
- Cotton earbud
- Paint Brush
- Watercolors
- Tiny plastic eye
- Glue
- Wide-tip paintbrush
- Flower petal-shaped object
- Stick with round sponge
Instructions:-
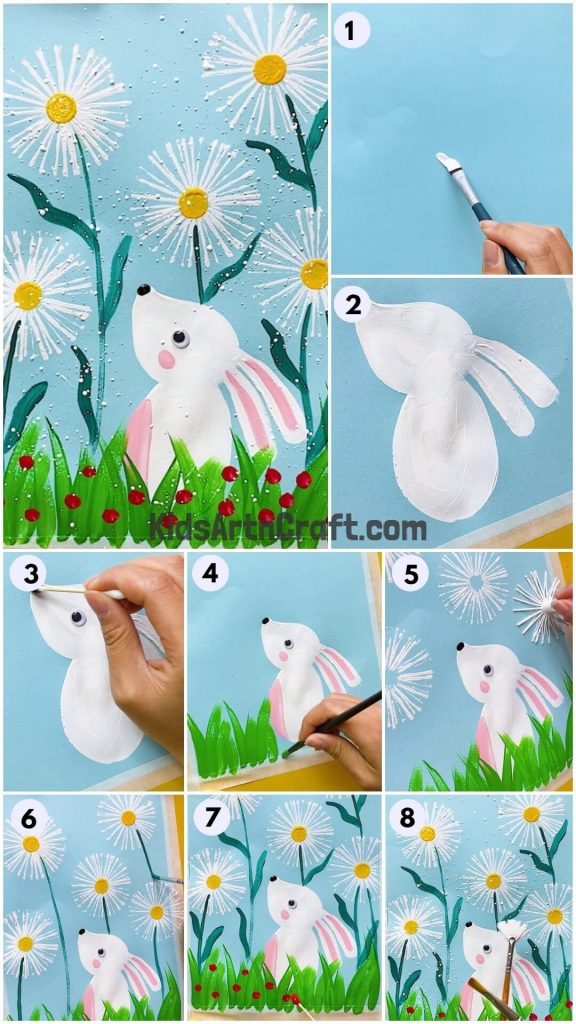
Step -1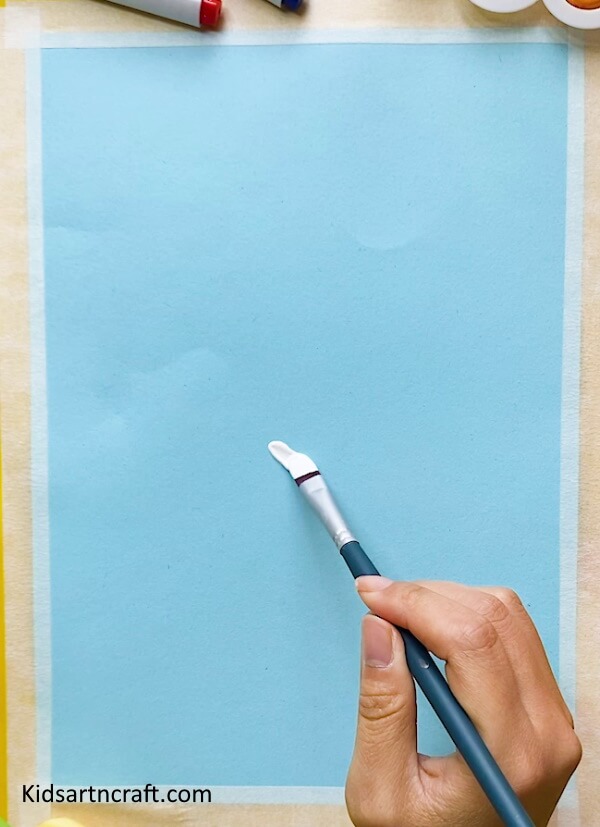

Let’s start making this craft by drawing the face of the bunny using white watercolor and a paintbrush on a sky-blue A4 sheet.
Step -2

The bunny’s face should look something like this.
Step -3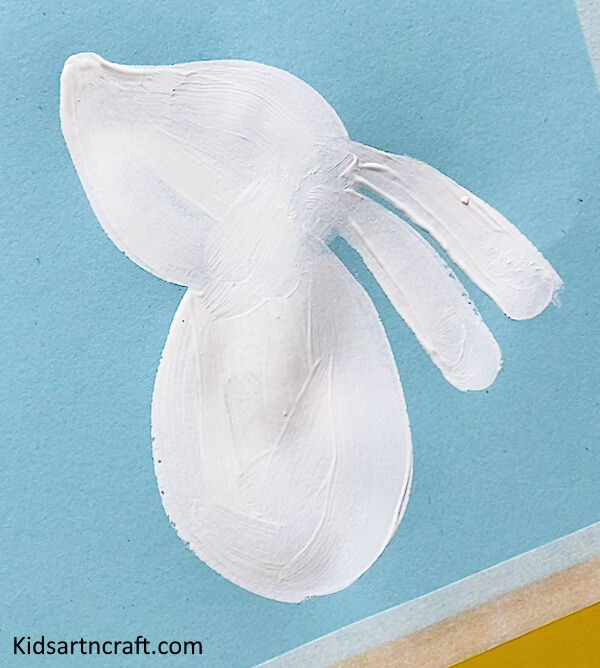

Next, draw the ears and oval-shaped body of the bunny using the same white color.
Let the paint dry.
Step -4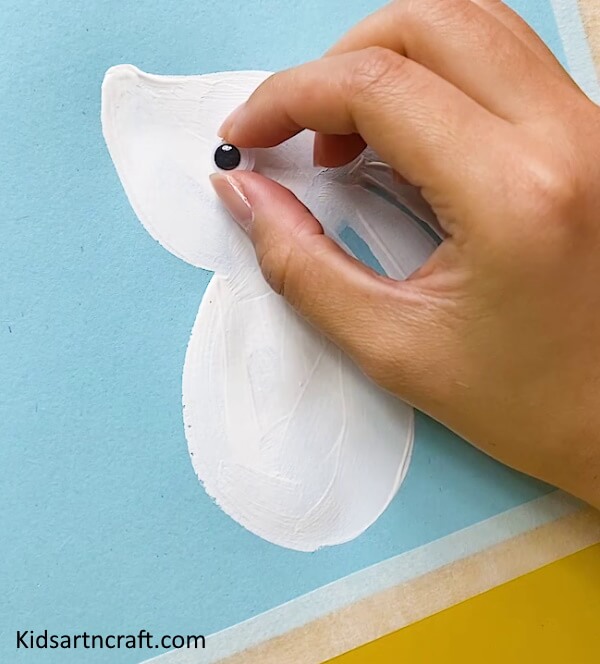

Now, stick the plastic eye at the correct place on the bunny’s face using glue.
Step -5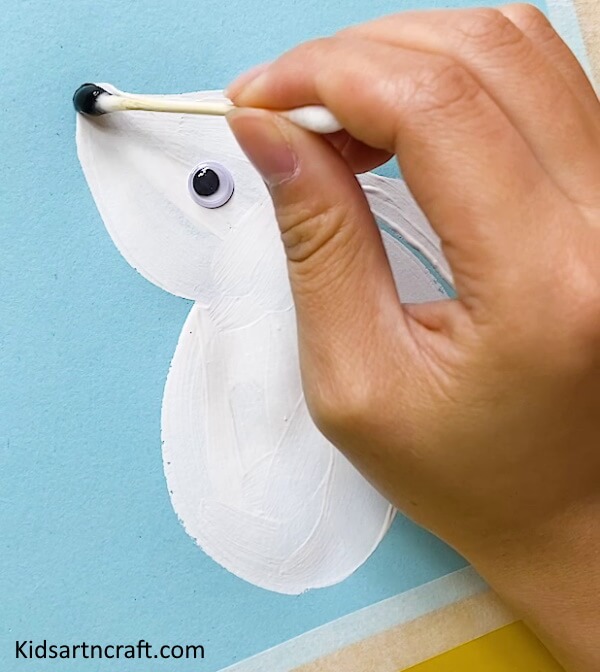

Now, take a cotton earbud and dip it in black color. Draw a small black nose using it on the tip of the bunny’s face as shown above.
Step -6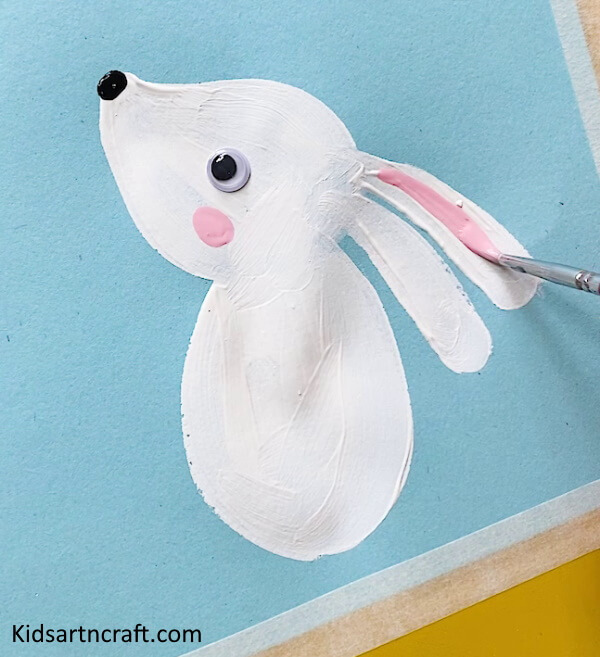

Now, take a pink color dipped paintbrush and paint the inner side of the ears. Draw a little circle using pink color under the eye for the blush on the cheeks.
Step -7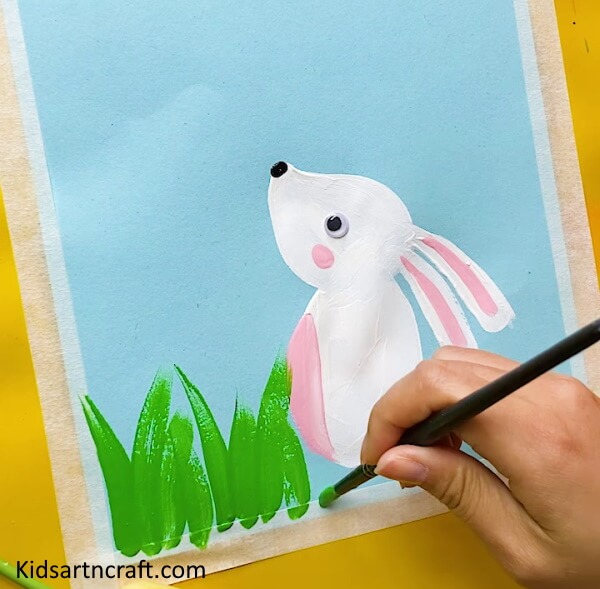

Now, comes the grass part. Take a green color-dipped paintbrush and draw some grass at the bottom of the sheet by striking the brush from bottom to top, as shown in the above picture.
Step -8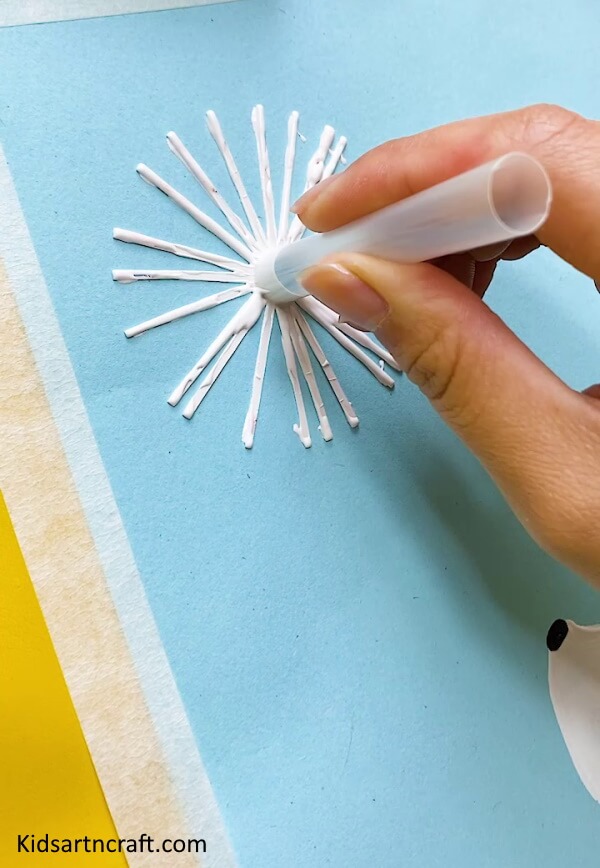

Now, take an object as shown in the above image or you can even draw flower petals by yourself using white watercolor.
Step -9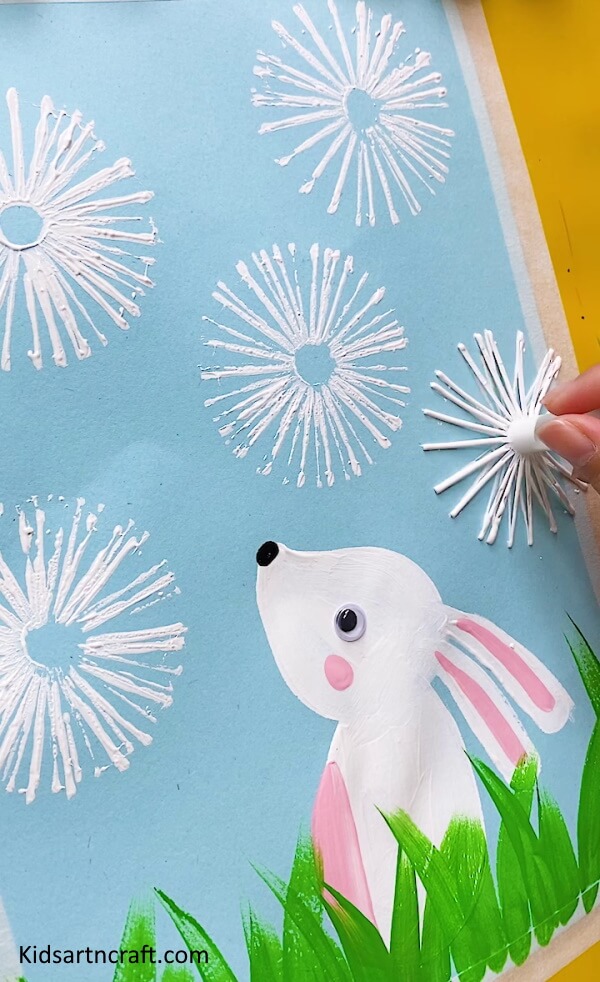

Make 5-6 white flowers as shown above, at some gaps.
Step -10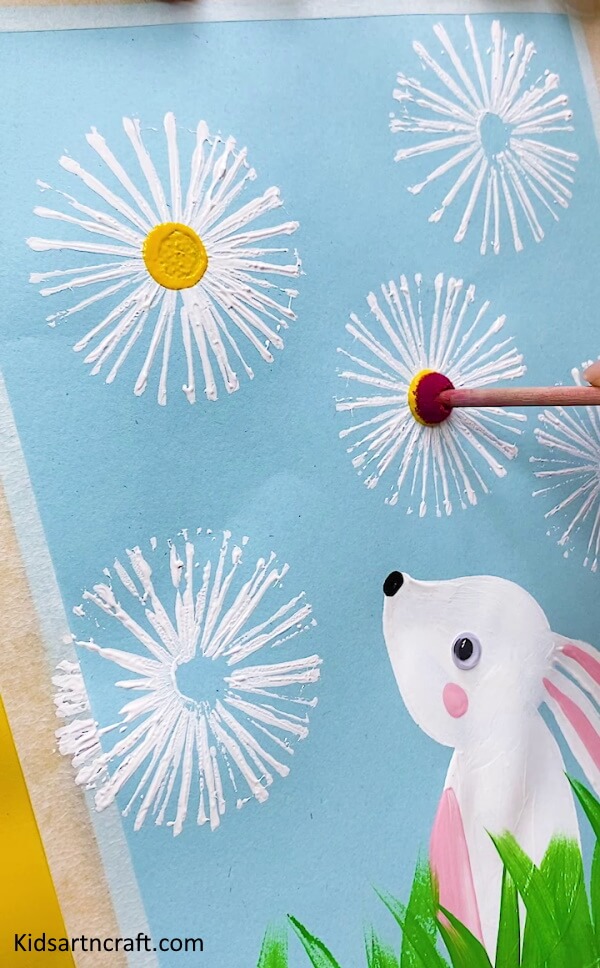

Now, for the centers of the flowers take a stick with a round top and dip it in yellow watercolor. Make yellow circles in the center of all the flowers using that stick.
Step -11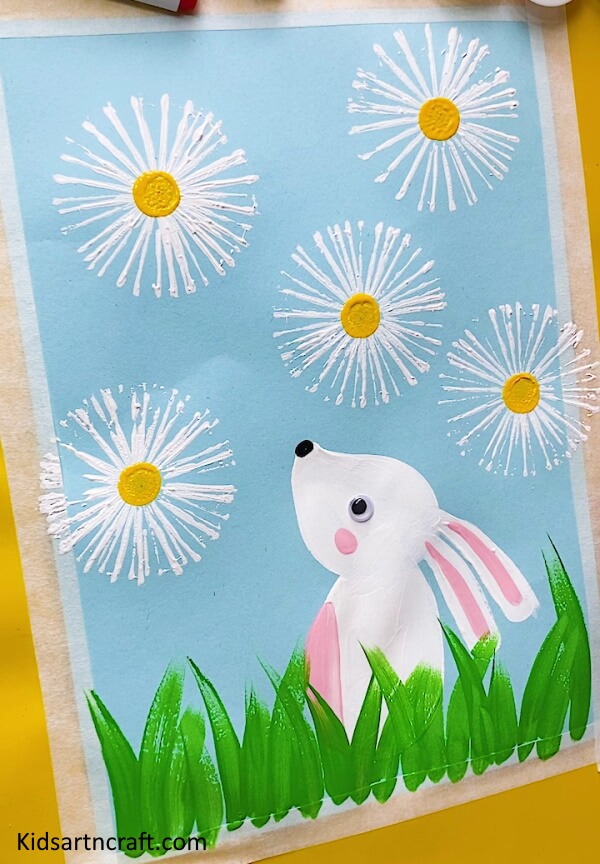

After making all the centers of the flowers, your craft would look something like this.
Step -12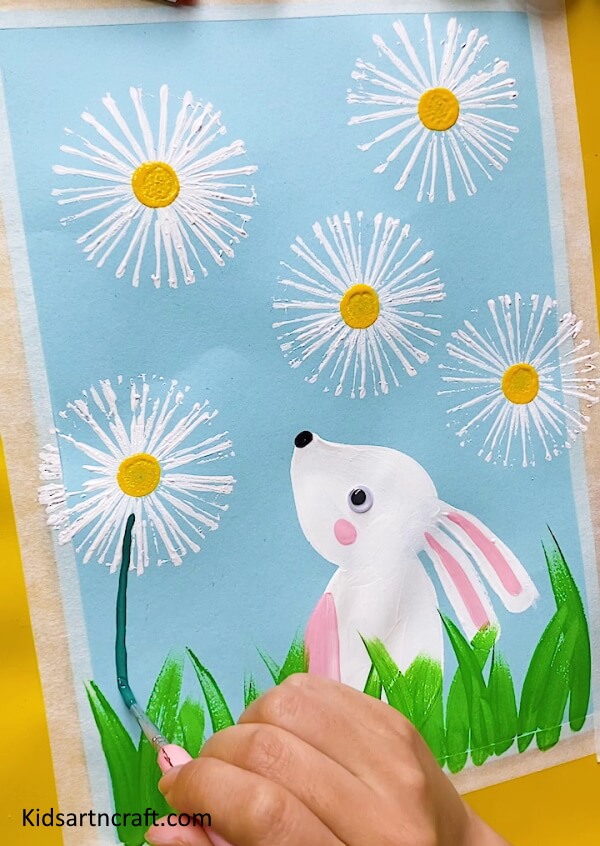

Next, take a darker green color to draw the stems of the flowers. Make the stems not-too-straight and also, not-too-curvy.
Step -13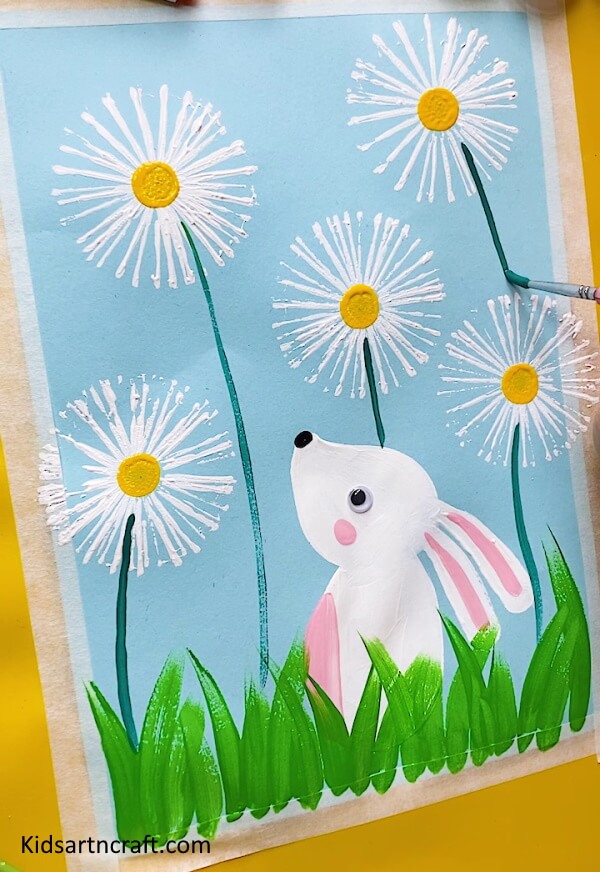

Draw all the stems of the flowers.
Step -14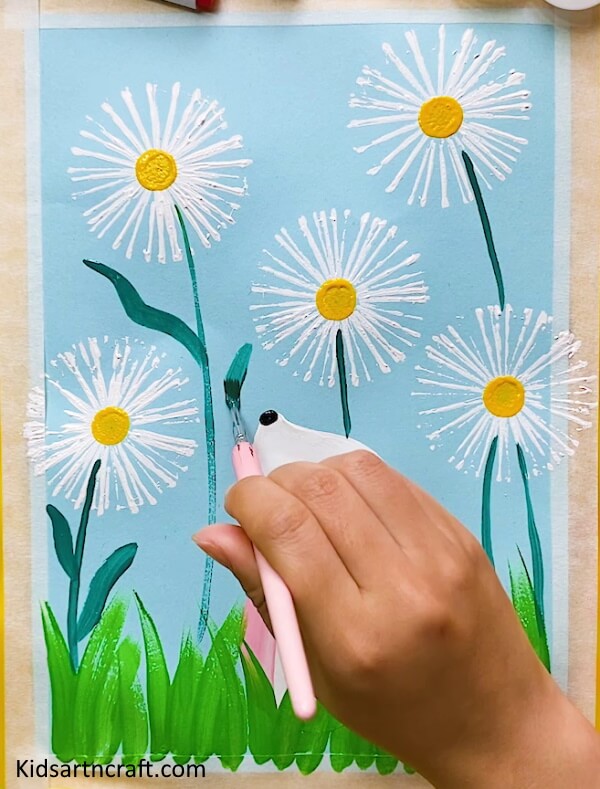

In this step, draw some wavy leaves on all the stems as shown above.
Step -15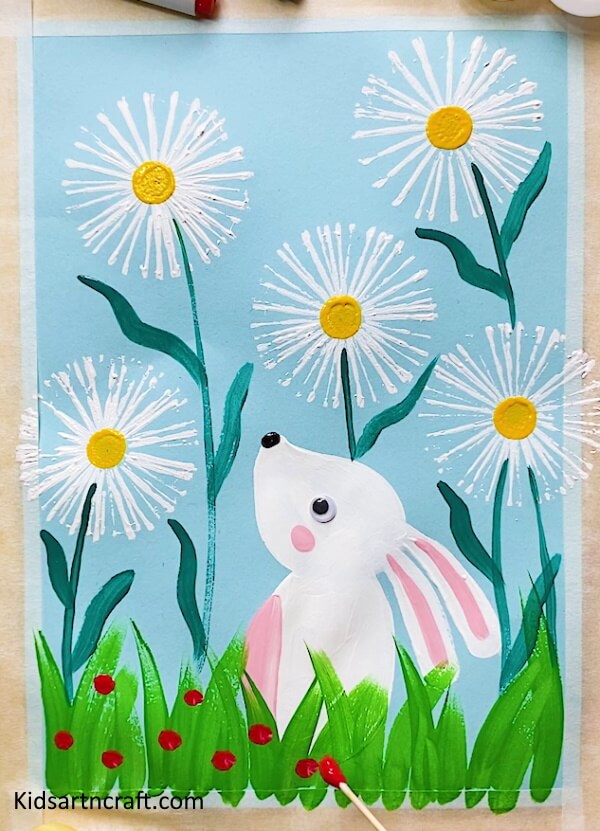

Now, take a red color dipped cotton earbud and make some dots on the grass to beautify the overall look.
Step -16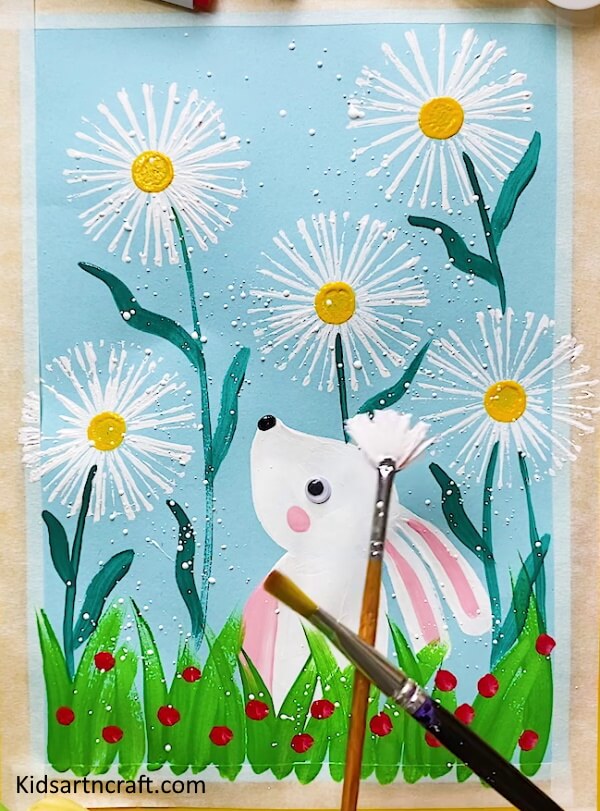

At last, take a wide-tip paintbrush and dip it in white watercolor. Sprinkle some dots all over the painting except the bunny.
Final Image:
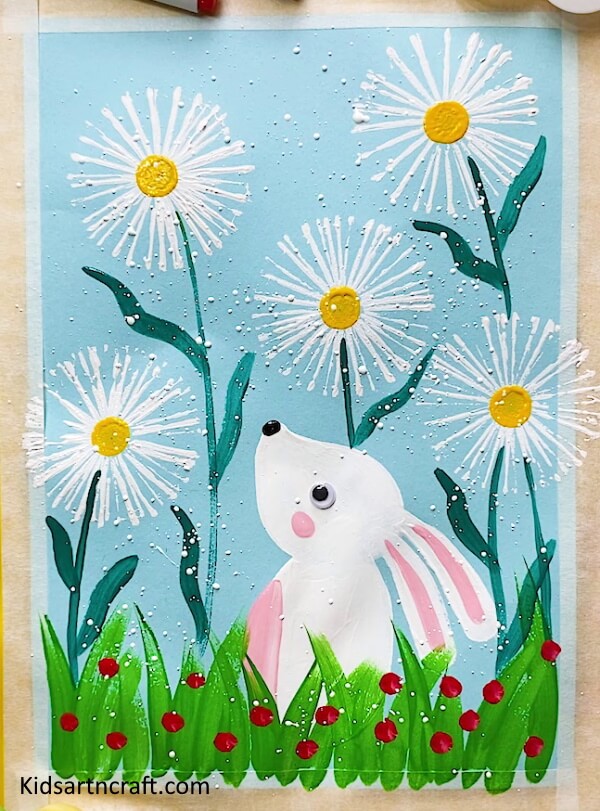
And that’s it!! Your beautiful bunny painting is ready to be showcased. It looks so beautiful and fresh that anyone would be impressed just by looking at it. You just need some watercolors and a sky-blue sheet for this amazing bunny and leaves painting. Kids would love to make it as the bunny is a super cute & friendly animal and holds a special place in everyone’s heart. So what are you waiting for? Grab the supplies and make this beautiful painting to enhance your creativity.
This cute bunny & flower painting art is perfect for any room in your home. It adds a touch of charm and beauty that is sure to make any room feel more inviting.
FAQs
1. What type of paint is used for Cute Bunny & Flower Painting Art?
Answer: Acrylic paint is usually used for Cute Bunny & Flower Painting Art.
2. What type of canvas is best for Cute Bunny & Flower Painting Art?
Answer: Cotton canvas is best for Cute Bunny & Flower Painting Art.
3. What is the best brush size to use for Cute Bunny & Flower Painting Art?
Answer: A size 8 or 10 round brush is best for painting with acrylics.
4. How long does it take to create a Cute Bunny & Flower Painting Art?
Answer: It depends on the size and complexity of the painting, but it typically takes anywhere from a few hours to several days to complete.
5. What is the best way to get started with Cute Bunny & Flower Painting Art?
Answer: Start by sketching out the design of your painting on the canvas. Then, use the acrylic paints to fill in the colors and details.
6. Is there a specific order I should follow when painting a Cute Bunny & Flower Painting Art?
Answer: Yes, you should usually start by sketching out the design of your painting. Then, use the acrylic paints to fill in the colors and details.
7. What type of sealant should I use to preserve my Cute Bunny & Flower Painting Art?
Answer: A clear acrylic sealant is recommended for finishing your painting.
8. How can I make sure my artwork stays vibrant over time?
Answer: Always use high-quality paints and sealants and avoid exposure to sunlight and humidity.
9. How do I hang my Cute Bunny & Flower Painting Art?
Answer: You can hang the artwork with a sawtooth hanger or use a hanging kit for larger paintings.
10. Are there any tips for creating a realistic-looking Cute Bunny & Flower Painting Art?
Answer: Use a variety of brush sizes and techniques to create a realistic effect. Pay attention to the details and use a light-handed touch to avoid creating an overly saturated look.
Follow us on Youtube for art and craft tutorials and much more.
More Articles from Kids Art & Craft
- Simple Watercolor Art Projects For School Kids
- DIY Painting Hacks for Kids – Flower Making Step-by-Step Tutorial
- Bouquet Painting Step by Step Tutorial for Kids
- May Day Craft Ideas for Kids
- 3D Flower Dough Art for Kids – Step-by-Step Tutorial