Recycled Crafts
Handmade Christmas Scenery Craft Using Pistachio And Peanut Shell

This article will show you how to make your own special Christmas scene using pistachio and peanut shells. All you need is a few materials and this guide, and you’ll be able to make a stunning decoration for your house. Follow the steps and you’ll have a lovely holiday decoration ready in no time.
Today, we will be making a scenery craft inspired by Christmas. The craft requires unique material to be used in its creation. Material like pistachio and peanut shells. The craft is one of its kind and it is a winter scenery made on sheets of paper and some natural craft material. So, collect all the material required, and let’s start making this craft.
DIY Handmade Christmas Scenery Craft

Read More: DIY Leaf Art Fish Making Easy Tutorial for kids
Materials Required
- A blue, a brown, and a white sheet of paper
- A pair of scissors
- Pistachio and peanut shells
- Watercolors
- Paintbrush
- Clay doughs
- A black sketch pen
- Liquid glue
Procedure
Step 1: Starting With The Sheets Of Paper
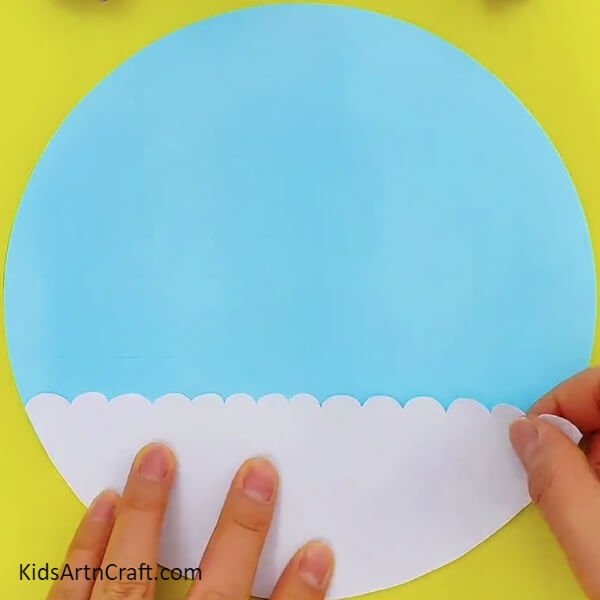

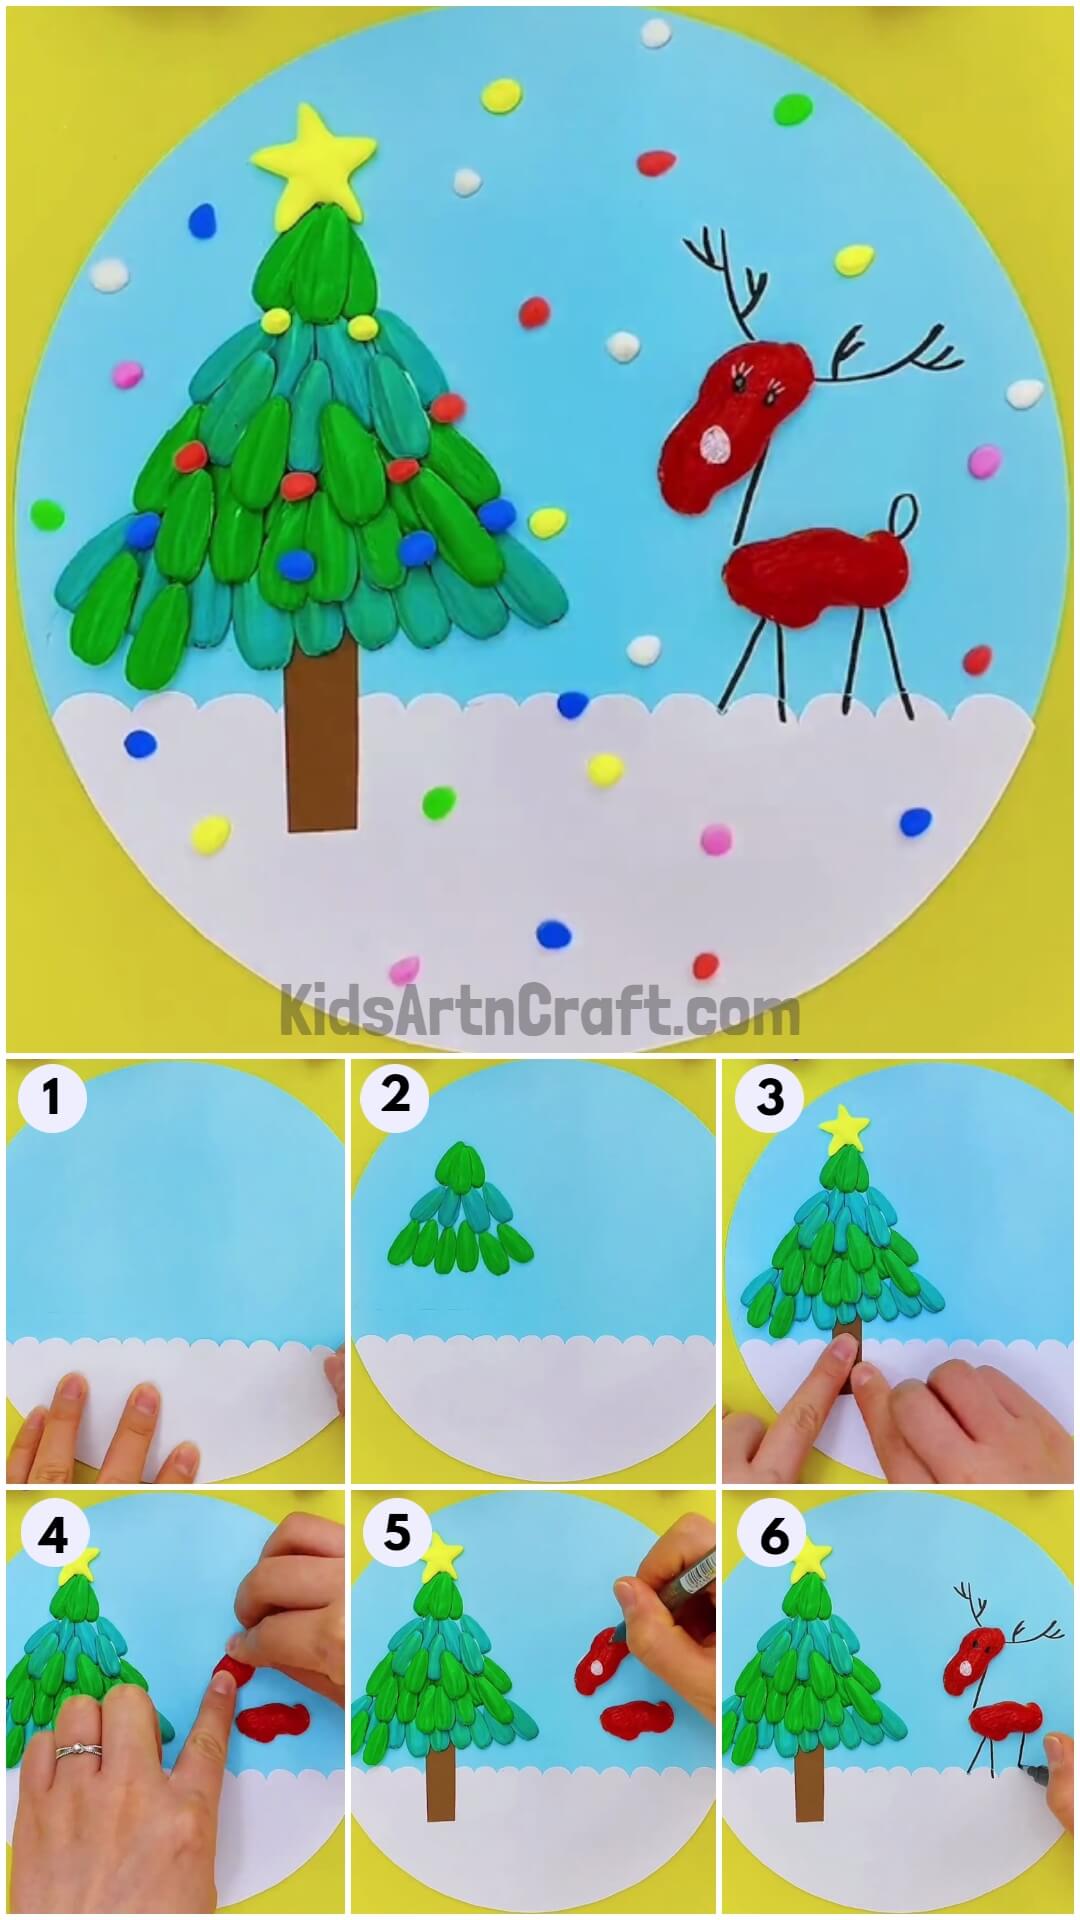
Take a blue sheet of paper and cut a big circle out of it. Now, taking a white sheet of paper, cut a circle sharing the size with the previous one, and then cut two-quarter of the circular sheet leaving just a quarter behind. Finally, cut the top of this quarter sheet in the shape of small cloud linings and paste it at the bottom of the blue sheet. See the picture below for reference.
Step 2: Painting The Pistachio Shells
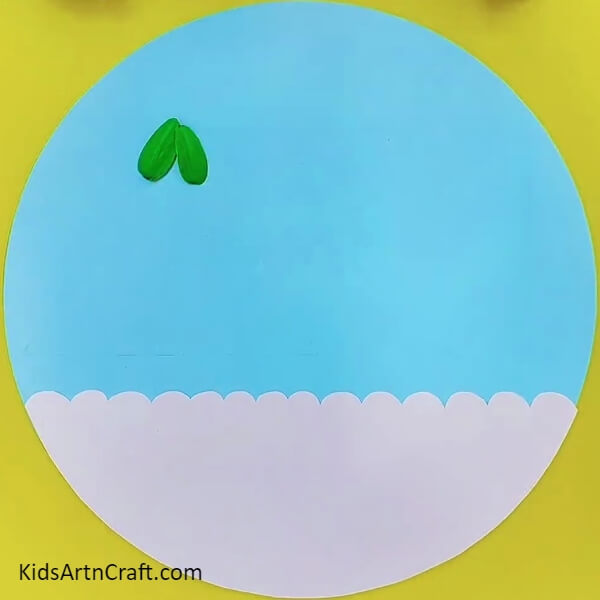
Take thirty-five pistachio shells and paint nineteen in color green and the rest in color blue. Now, paste two green shells next to each other on the top section of the blue sheet as shown in the picture below.
Step 3: Pasting The Pistachio Shells
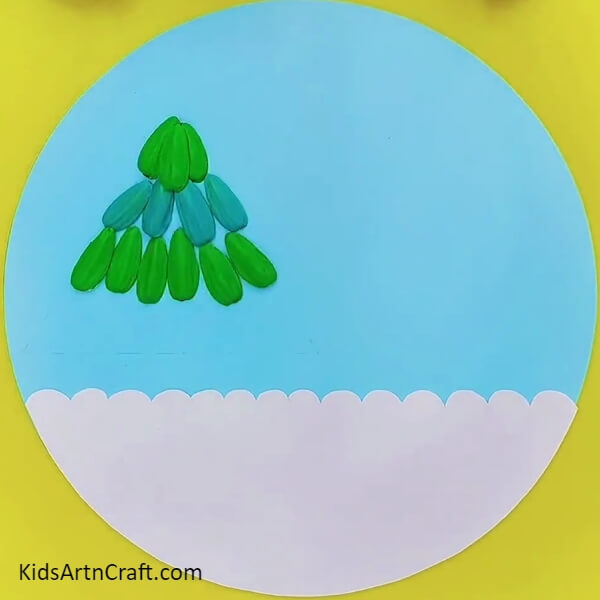
Paste one more green shell right in the middle of the green shells that you just pasted. Now, paste four more blue shells next to each other below these green shells. Finally, paste six green shells in a similar fashion below the blue shells that you just pasted as shown in the picture below.
Step 4: Pasting The Rest Of The Shells
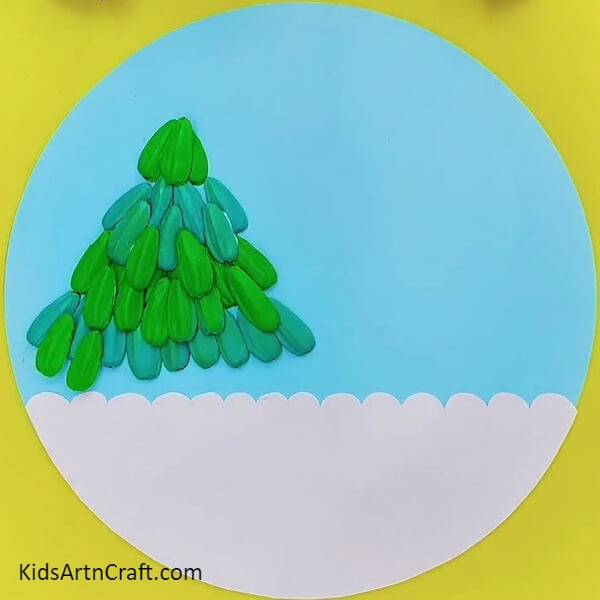
Paste nine more blue shells next to each other below the green shells that you pasted in the previous step. Then, eight green shells were on top of the shells in the middle. Now, three blue shells in between the shells that you just pasted. Finally, paste two green shells on top of the shells pasted at the bottom left side as shown in the picture below. The shells now resemble the shape of a Christmas tree.
Step 5: Working On The Clay Dough
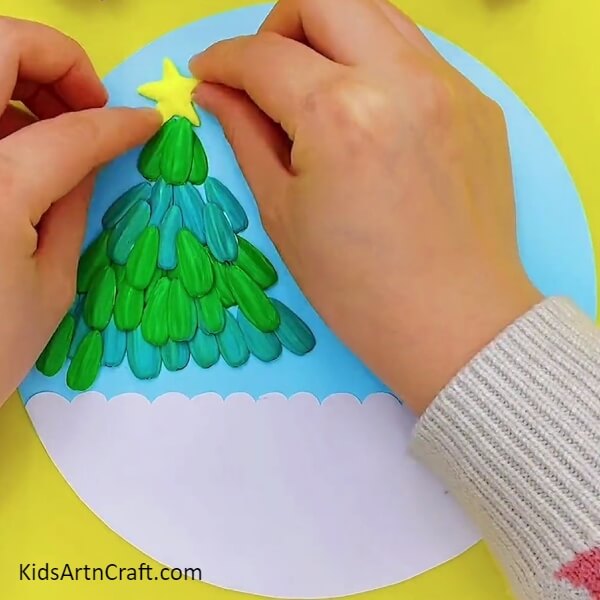
Take a yellow clay dough and mold it into a small star. Now, paste the star at the top of the tree. See the picture below for reference.
Step 6: Make The Tree Trunk
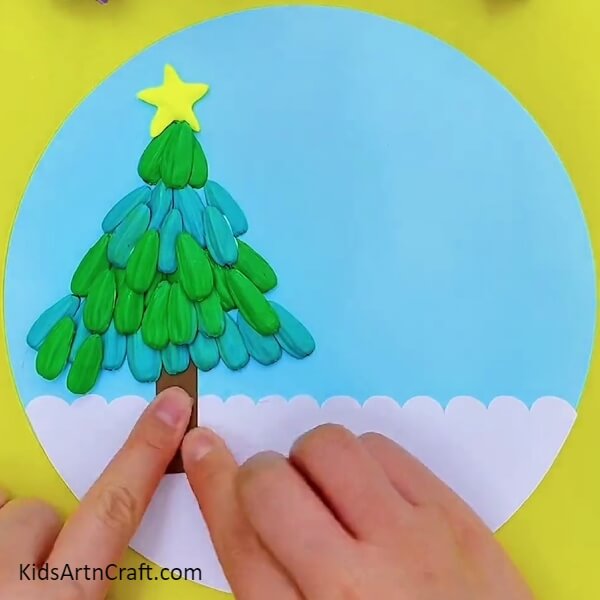
Take a brown sheet of paper and cut a strip out of it. Now paste the strip below the tree right in the middle. See the picture below for reference. This shall serve as the trunk of the tree and with this we have completed the process of making the Christmas tree.
Step 7: Working On The Peanut Shells
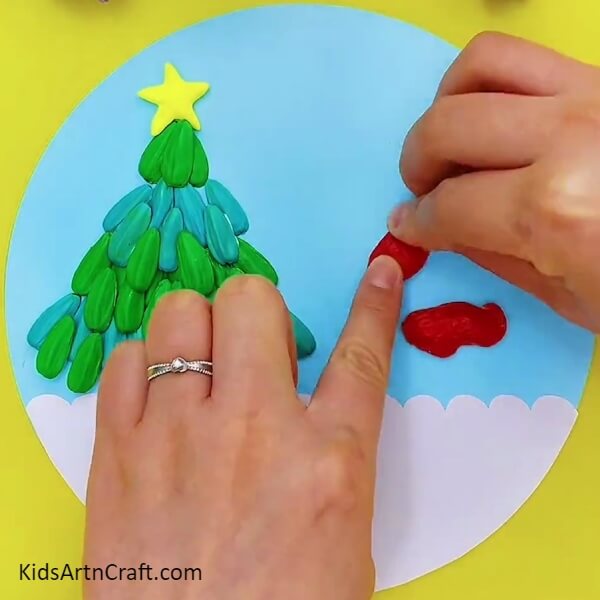
Take two big peanut shells and paint them red. Now, paste the first shell a little above the white pasted sheet, horizontally. Finally, paste the other shell vertically, a little above the shell that you just pasted. See the picture below for reference.
Step 8: Painting The Shell
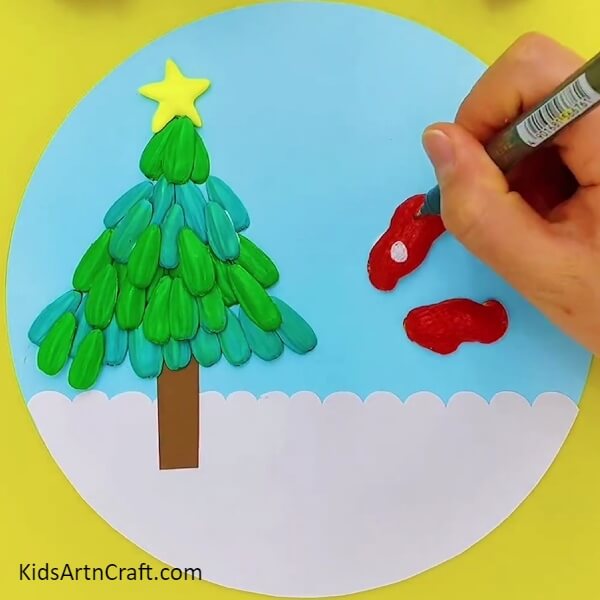
Take some white paint and paint a tiny circle on the left side of the vertically placed shell. Now, make two small dots on the right side of the same shell using a black sketch pen. See the picture below for reference.
Step 9: Make Some More Drawings
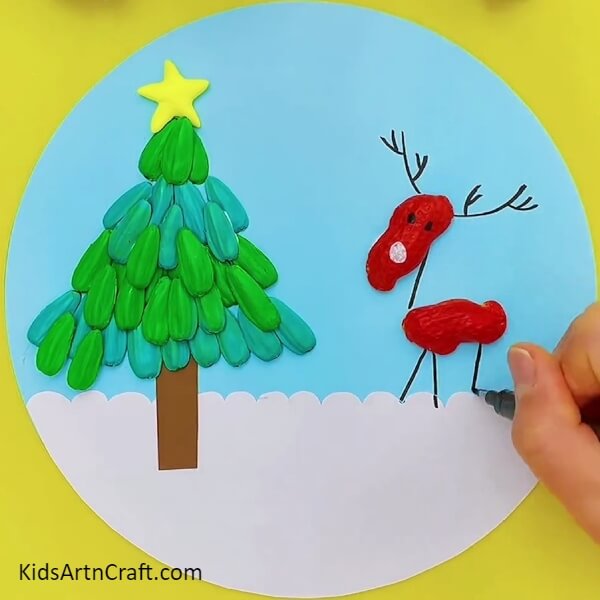
Using the same sketch pen, some reindeer horns on the sheet above this vertically placed peanut shell. Now, connect the two shells with a line and draw four legs below the horizontally placed peanut. See the picture below for reference. This figure shall serve as a reindeer in this scenery.
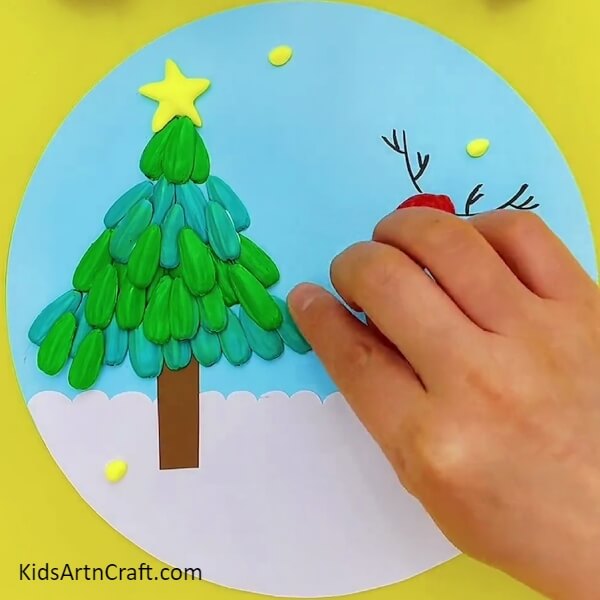
Step 10: Moulding Some More Clay
Take some yellow, blue, red, green, and white clay and cut little amounts out, press them on the entire sheet giving them the appearance of tiny dots. See the picture below for reference.
Finally, Adding Some More Details To The Reindeer
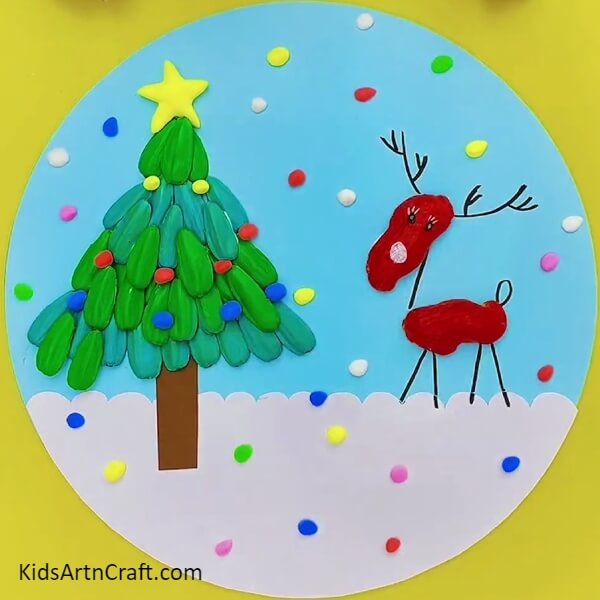
Using a black sketch pen, draw a tail at the back of the reindeer, and using a white sketch pen, add some lashes to its eyes. See the picture below for reference.
There you have it, beautiful winter scenery with white snowy ground and colorful snow falling from the sky onto the tree and the reindeer. You learned to work with unique craft material in this tutorial. You also learned good painting skills. You can hang it on the walls of your room or use it as a Christmas decoration. Follow the tutorial to learn more techniques and see you soon in another tutorial. Till then, good luck and goodbye.
Follow us on Youtube for art and craft tutorials and much more.
More Articles from Kids Art & Craft
- How To Make Dog From Peanut Shell Easy Craft Tutorial
- Easy Peanut Shells Giraffe Art And Craft For Kids
- Beautiful Way To Make Tree & Bird Paste Painting With Peanut Sells
- Learn To Make Duck Artwork For Kids Using Watercolor & Toilet Paper Roll
- Paper & Flower Hat Craft for Kids – Step-by-Step Tutorial