Clay Crafts
Pretty Clay Flowers And Bee Craft Idea For Beginners

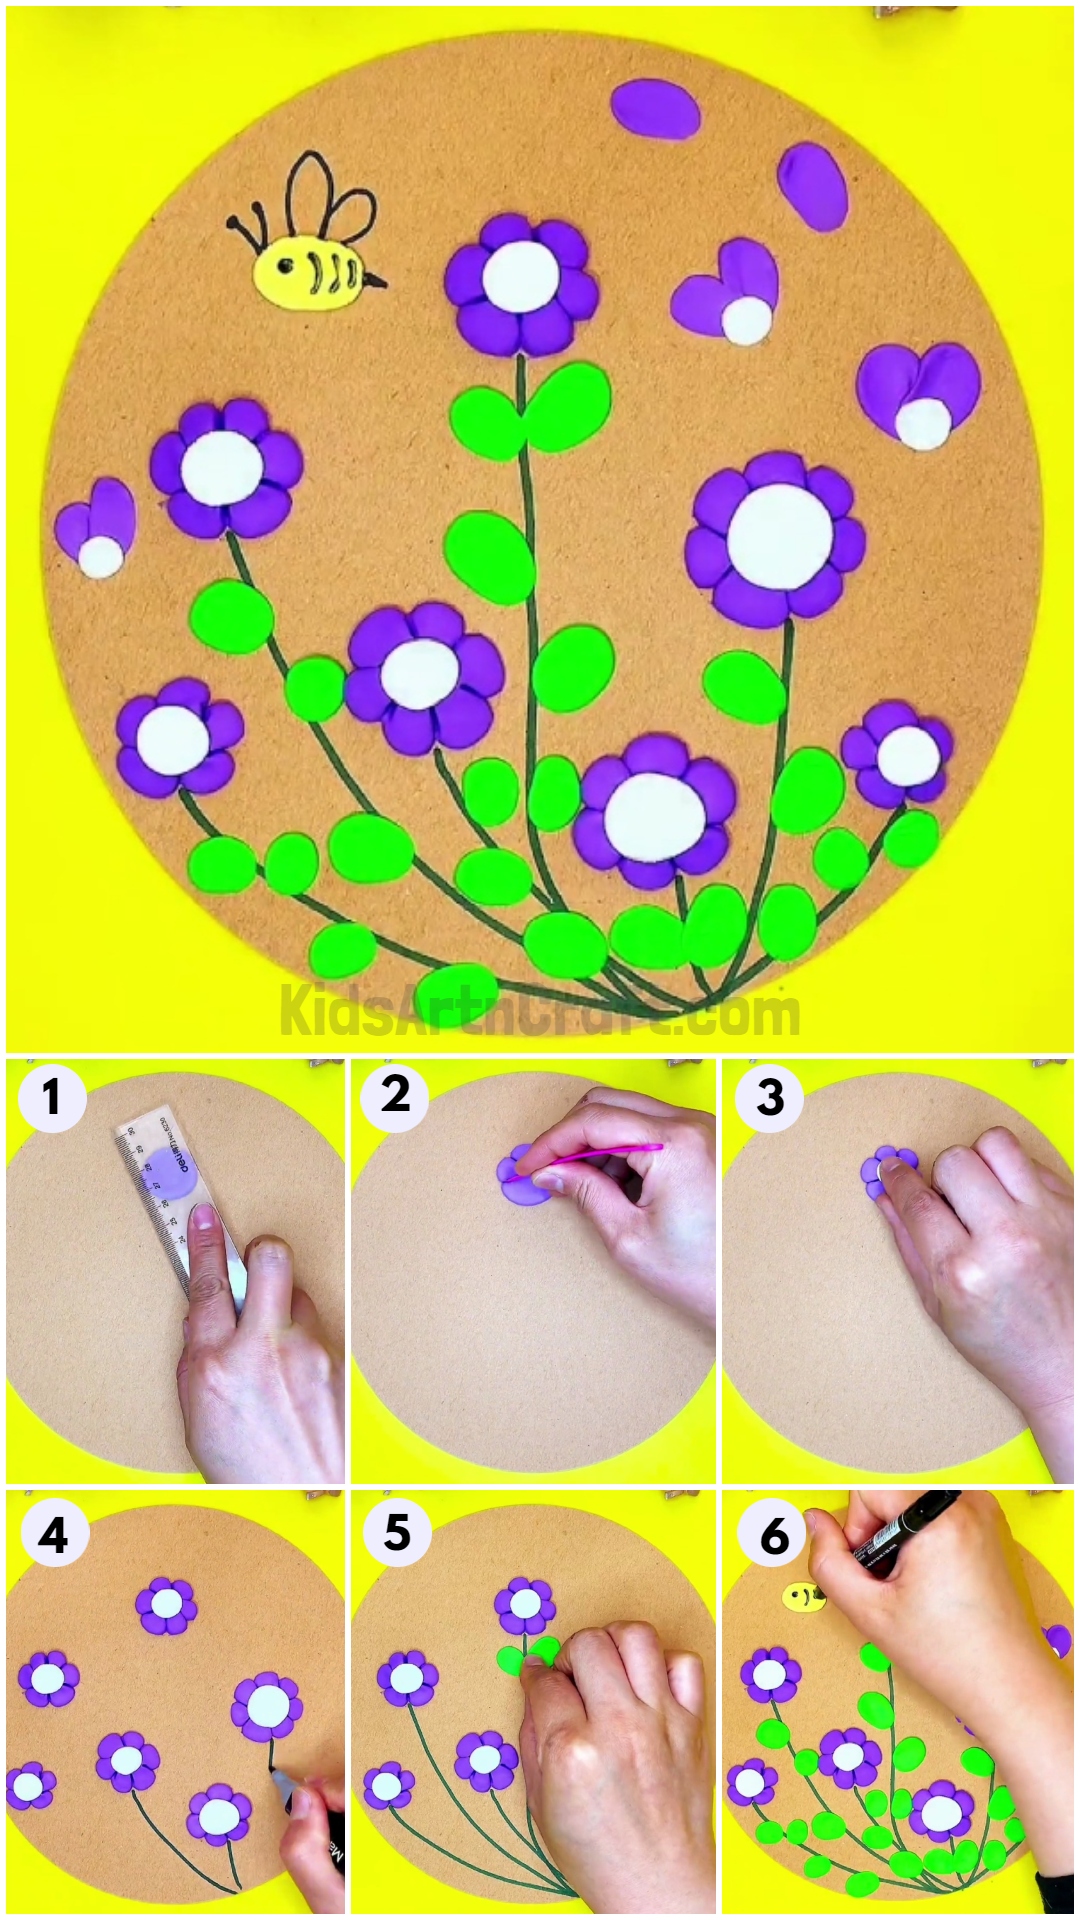
Create a beautiful and unique clay flower and bee craft project with this easy-to-follow tutorial. Perfect for beginners, this tutorial guides you step-by-step through the process of creating a colorful clay flower and bee.
Everybody loves flowers! And why won’t they?! They are the beauty of nature! So, today we brought you this craft to get that beauty of nature right in your room! These pretty flowers and bees are made of colored clay and using creativity and this tutorial you will learn to make and arrange them perfectly! Playing with clay is also a fun learning activity for kiddos! You can engage your little ones in this craft-making activity during the boring afternoon time and keep them away from screens and devices! They will learn this with interest through this craft without their knowing!
Simple Clay Flowers And Bee Craft Idea

Read More: How to Make Clay Flower Easy Tutorial for Kids
Materials Required
- Colored Clay (Purple, White, Yellow, And Green)
- Green And Black Marker
- Scale
- Clay Shaping Tool
Procedure
Step 1: Kneading The Purple Clay

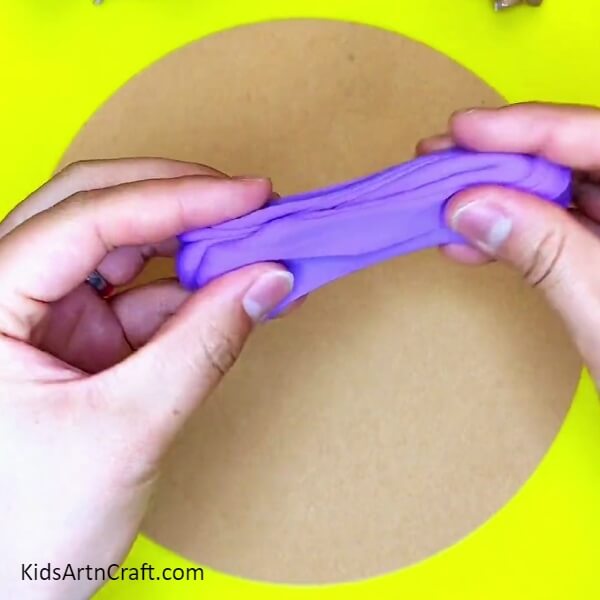
Let’s begin this craftwork by taking circular cardboard as the base of the craft and purple-colored clay! Knead the purple clay to make it soft!
Step 2: Placing A Purple Clay Ball
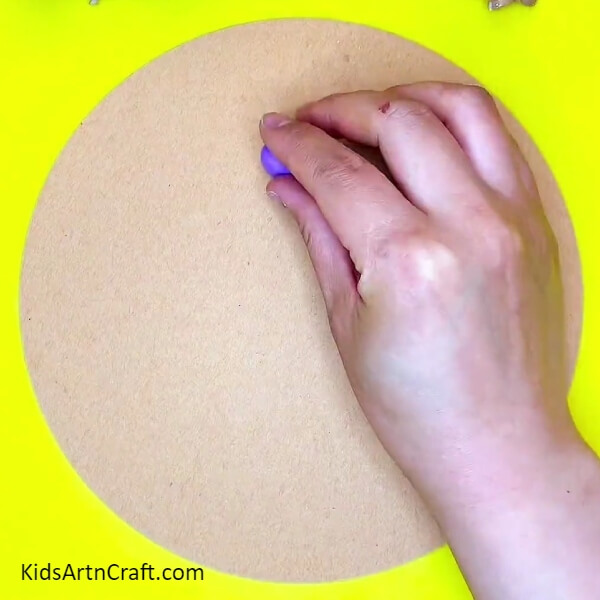
Dough a little amount of clay into a small ball and place it over the top center of the cardboard.
Step 3: Flattening The Clay Ball
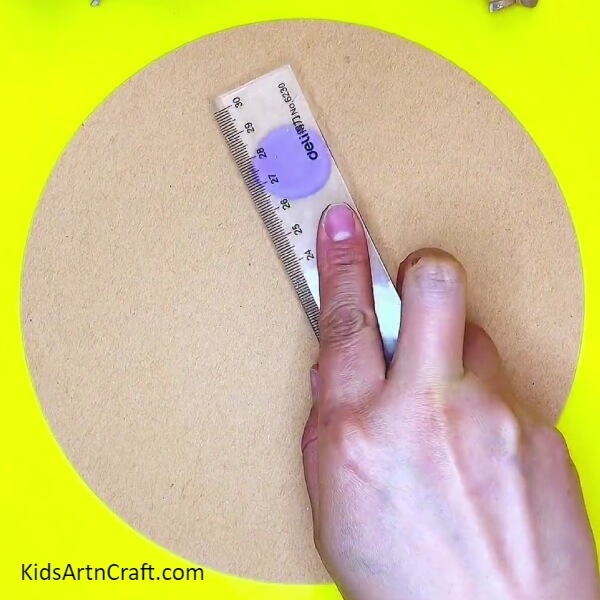
Take a scale and press over the clay ball to flatten it to form a circle and stick it over the cardboard.
Step 4: Shaping Petals
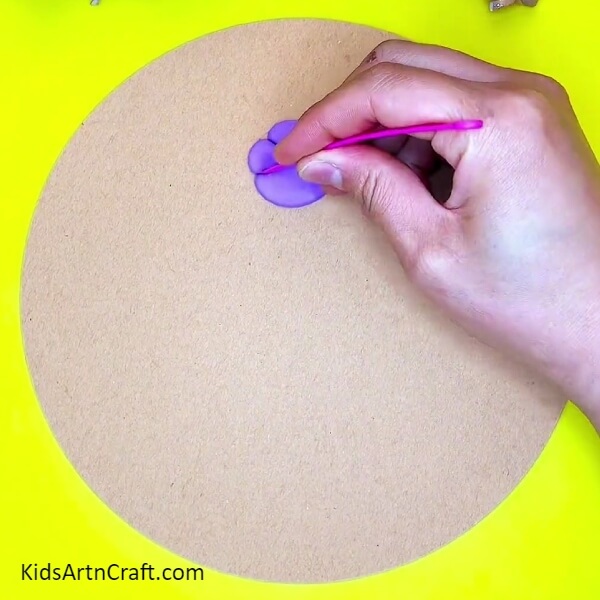
Using a clay shaping tool, make 5 petals of the circle. Put the tool on the circumference of the circle then push and drag it inwards to form a line. Likewise, make 5 lines at the same distance to each other to form a flower with 5 petals.
Step 5: Making The Center Of The Flower
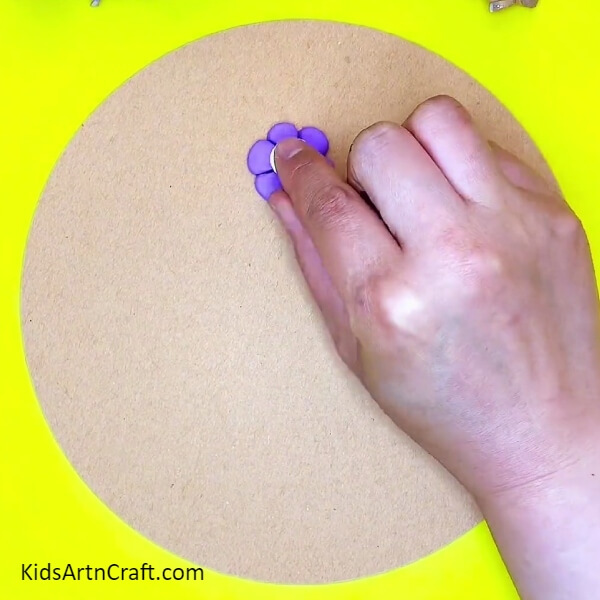
Dough a white clay into a small ball and press it in the middle of the flower to make its center.
Step 6: Making More Flowers
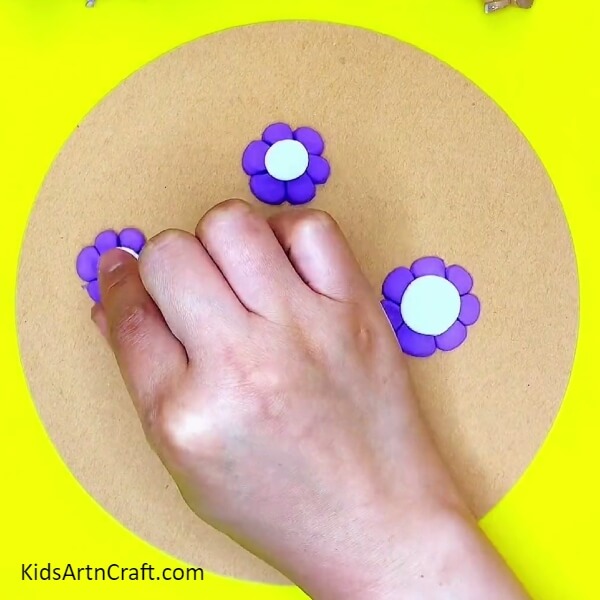
Following the previous same steps, make more flowers below and around the already formed flower over the cardboard randomly at a certain distance.
Step 7: Drawing Flower Stems
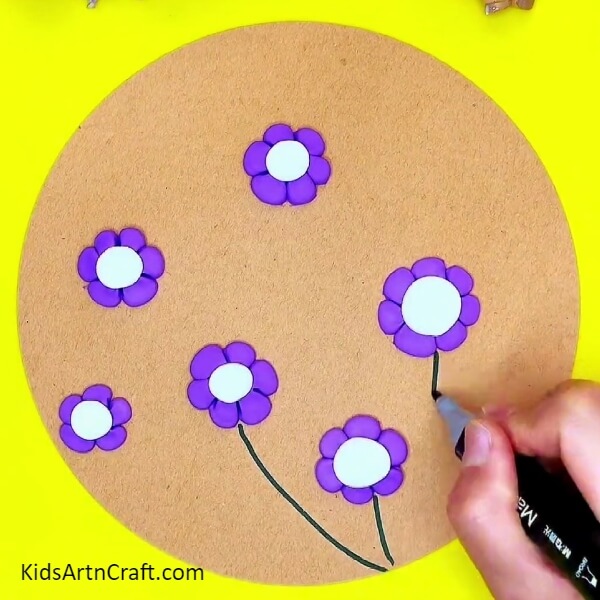
Using a green marker, make irregular curvy branches coming from each flower to the end of the cardboard.
Step 8: Making Leaves Of The Flowers

Dough green clay into balls and place them near the stems of each flower on both sides. Now, place your finger over the ball and press and drag your finger toward the stems to make the oval leaves of the flower.
Step 9: Making Detached Flower Petals
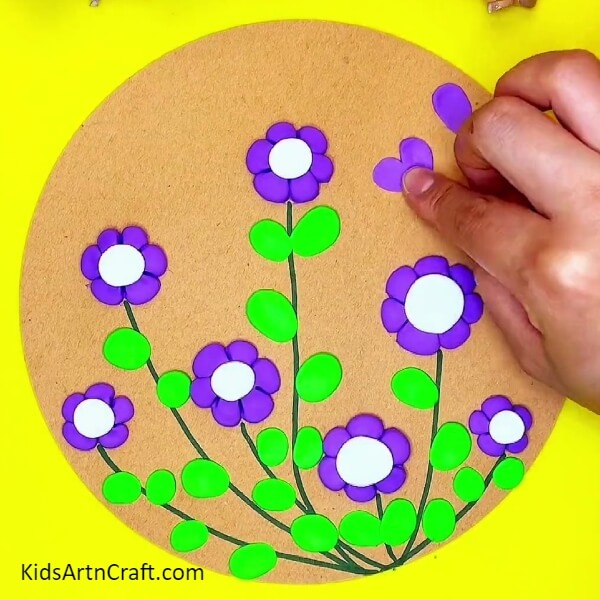
Using the same way as you made the leaves make some detached flower petals above the flowers over cardboard of the flower-colored clay.
Step 10: Making A Bee
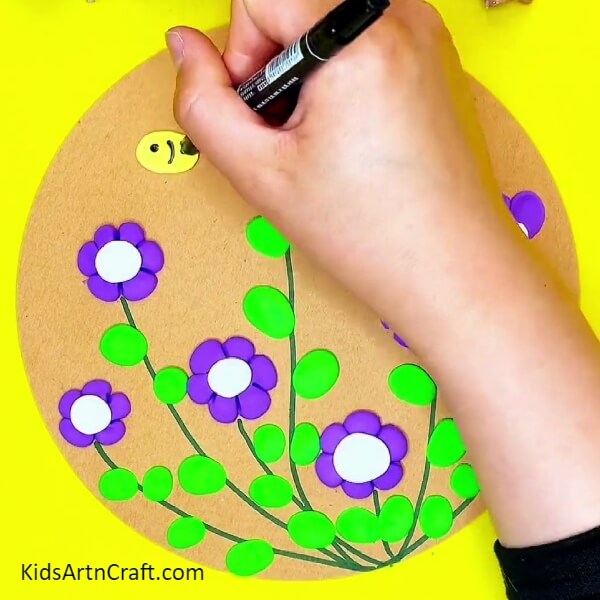
Using yellow color clay, press and make a bee shape, now using a black marker, draw the striped texture of the bee, eyes, wings, antennas, and sharp tail.
The Final Look Of Your Bee Flowers Clay Craft!
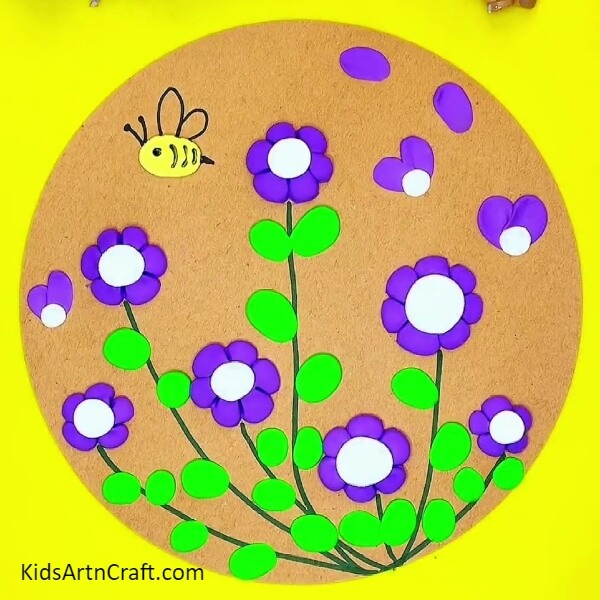
Congratulations! You have successfully created your clay craft of a bee over a purple flower garden!
You can now hang over your creation in your room to mesmerize its beauty! You can also customize the craft in various ways, like naming different colored or shaped flowers, making various types of flowers, more bees, or anything! Your imagination is the limit!
Follow us on Youtube for art and craft tutorials and much more.
More Articles from Kids Art & Craft
- DIY Bees Clay Art Tutorial for Kids
- DIY Miniature Clay Cake Craft Activities for Kids
- How to Make Worm Using Clay For Kids
- DIY Clay Giraffe Step by Step Tutorial For Kids
- Pretty Snowman Paper Clay Craft Tutorial For Beginners