Clay Crafts
DIY bottle Cap and Clay Snail Craft for kids

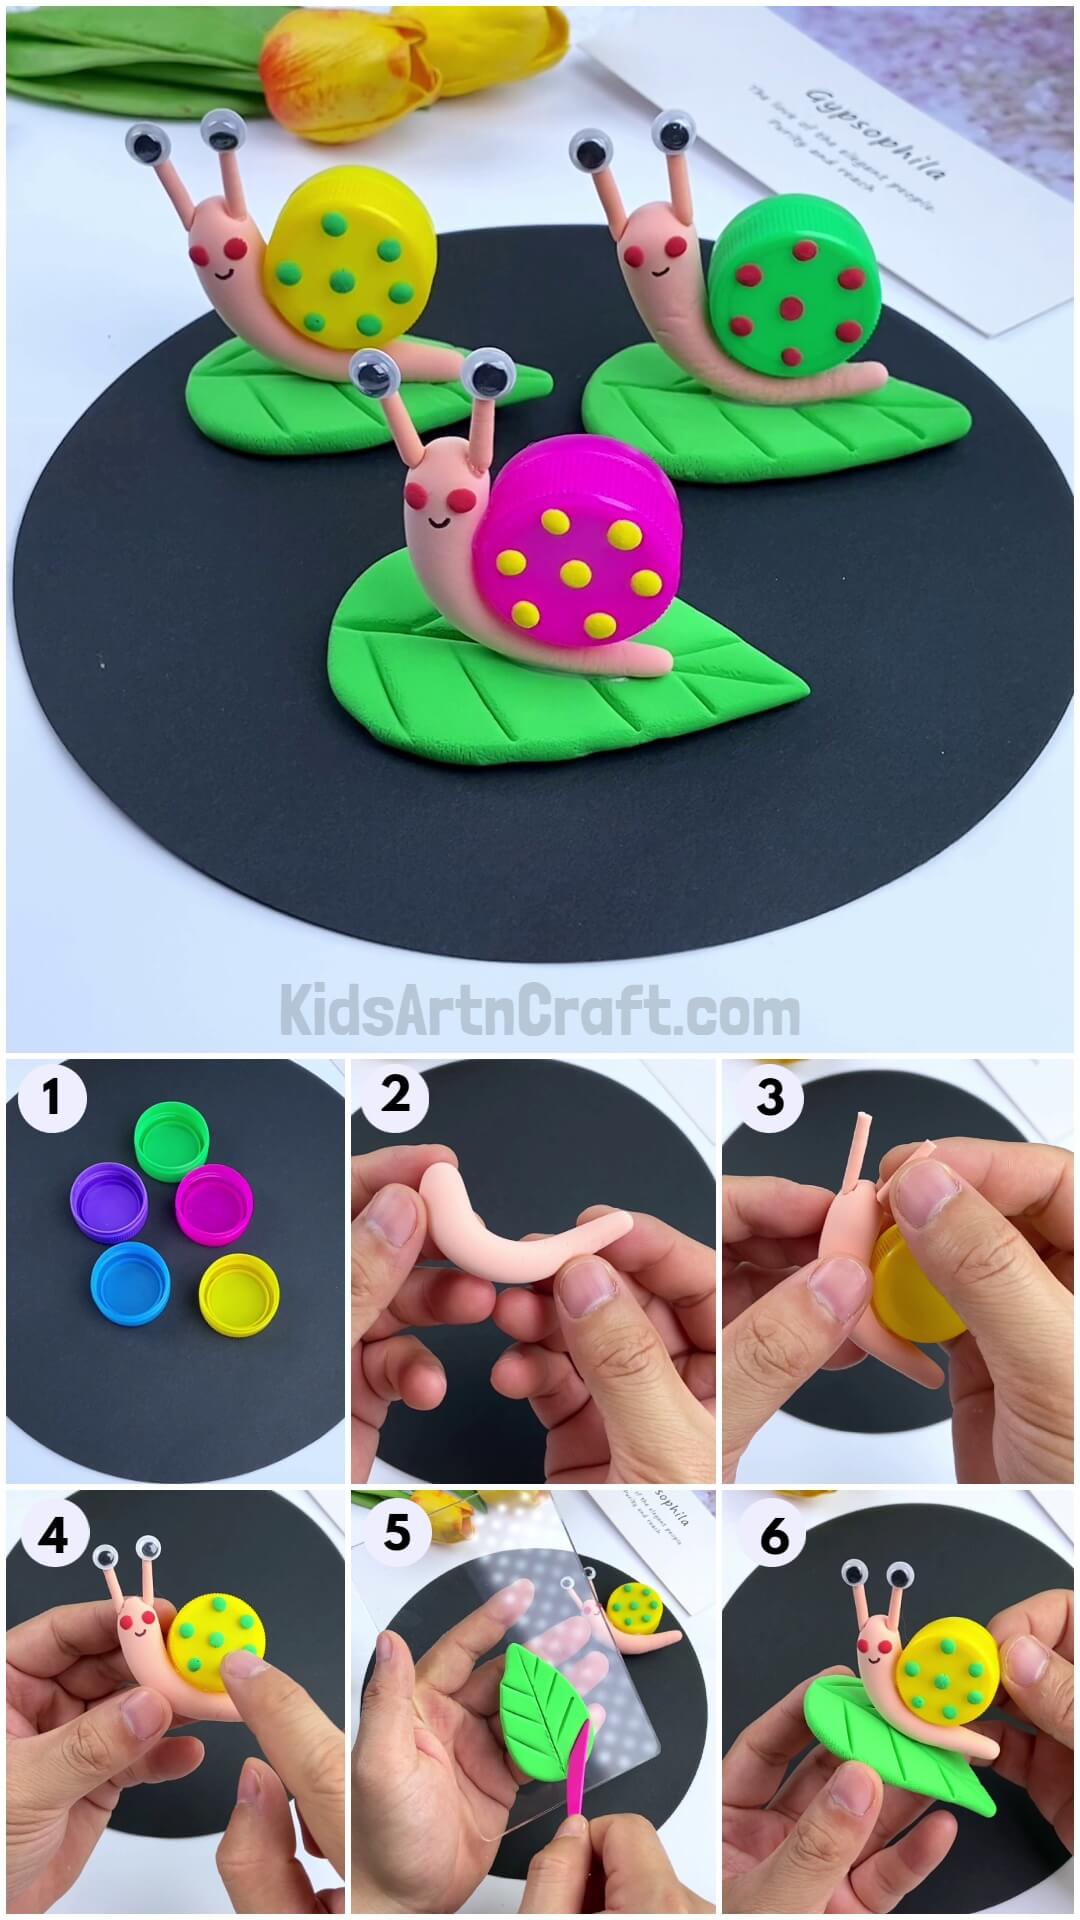
Welcome to our exciting and easy craft tutorial. One designed especially for kids like you! In this project, we’ll be using bottle caps and clay to create adorable snails. Get ready to have loads of fun and let your creativity soar! With just a few simple steps, you’ll be able to make your very own snail friends.
We’ll show you how to mold clay into cute snail bodies. Together with how you can decorate their shells with colorful patterns. Even give them googly eyes and wiggly tentacles! Each step will be explained in detail, with helpful images to guide you along the way. So, let’s dive in and embark on this wonderful crafting adventure! Get your materials ready and let your imagination run wild. Let’s make some amazing bottle caps and clay snails together!
Easy Bottle Cap And Clay Snail Craft – Step by Step Tutorial

Read More: Plastic Bottle Bee Craft For Kids
Materials Required
- Bottle caps (blue, yellow, pink, purple, and green)
- Skin-colored clay
- Transparent plastic case
- Steel picker
- Googly eyes
- Glue
- Green clay
Procedure
Step 1: Gathering Colorful Bottle Caps
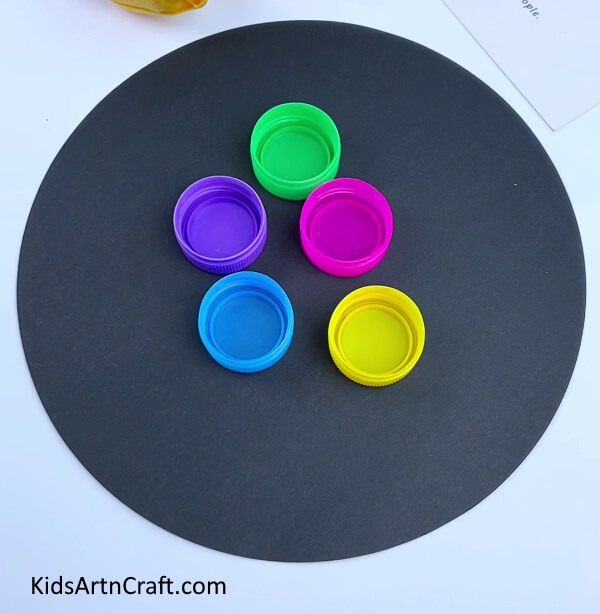

Gather five bottle caps in different colors – blue, yellow, pink, purple, and green. These will be the shells for our snails. Make sure they are clean and free of any sharp edges.
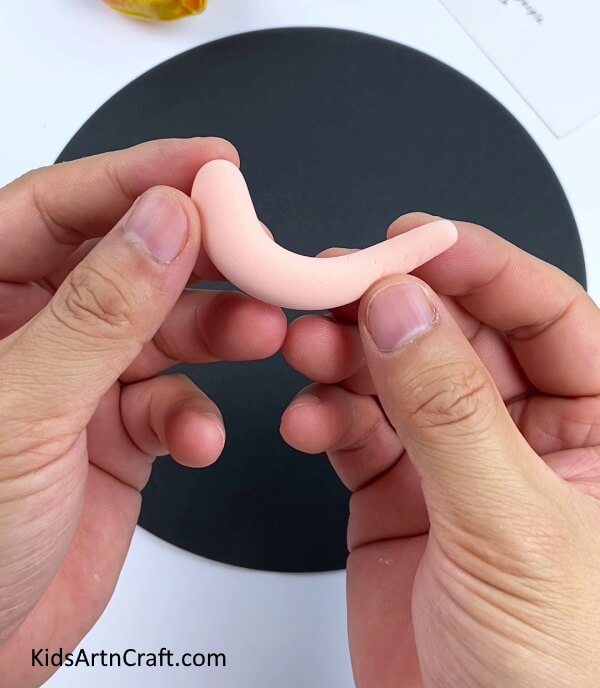
Step 2: Shaping the Skin-Colored Clay

Take the skin-colored clay and mold it into a strip shape. Look at the first image attached for reference. Encourage the kids to follow along and shape the clay accordingly. The snail’s shell will serve as its body.
Step 3: Molding the Snail’s Body

Now, mold the skin-colored clay into the shape of a snail’s body. Create a curved form as shown in the second image. The snail’s body should fit nicely along the edges of the bottle cap shell.
Step 4: Creating the Snail’s Shell
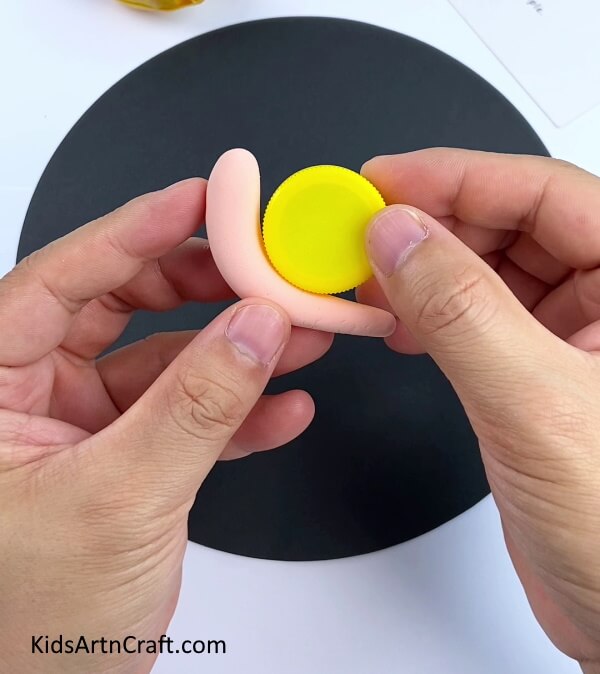

Using one of the bottle caps, gently press it along the circular edge of the clay snail’s body. Twist it halfway to give it the appearance of a snail’s shell. Refer to the above image for guidance.
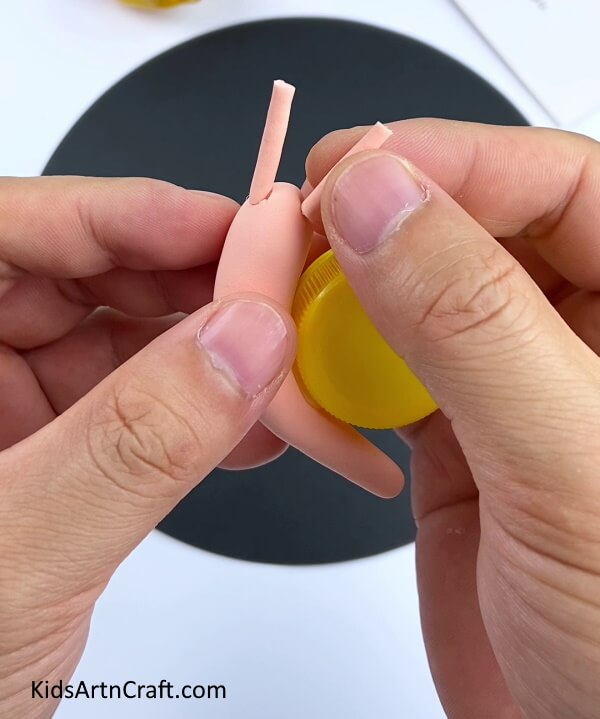
Step 5: Adding Cute Tentacles

Let’s add some adorable tentacles to our snail! Take two small pieces of clay and shape them into tentacles. Attach them to the head of the snail, as shown in the image.
Step 6: Attaching Googly Eyes
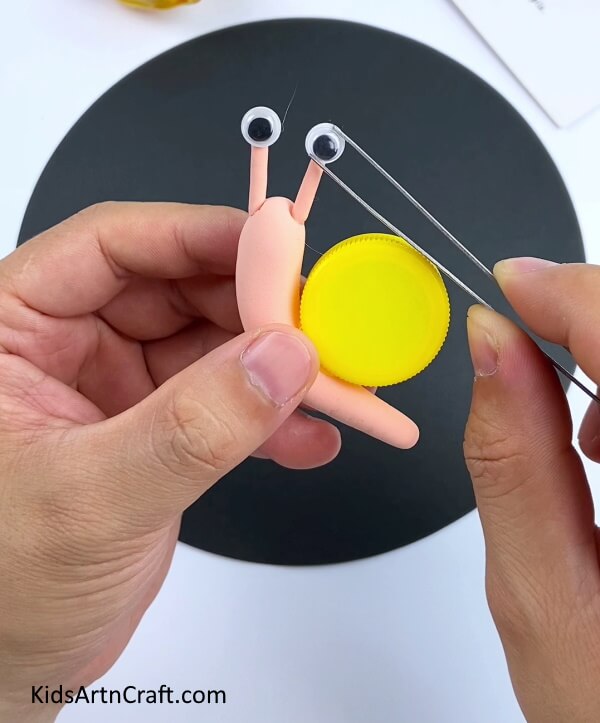

Using a steel picker, carefully pick up two googly eyes. Apply a small amount of glue paste to the back of each eye and attach them to the tips of the tentacles. This will give our snail a cute and playful look. Look above for reference.
Step 7: Decorating the Snail’s Shell
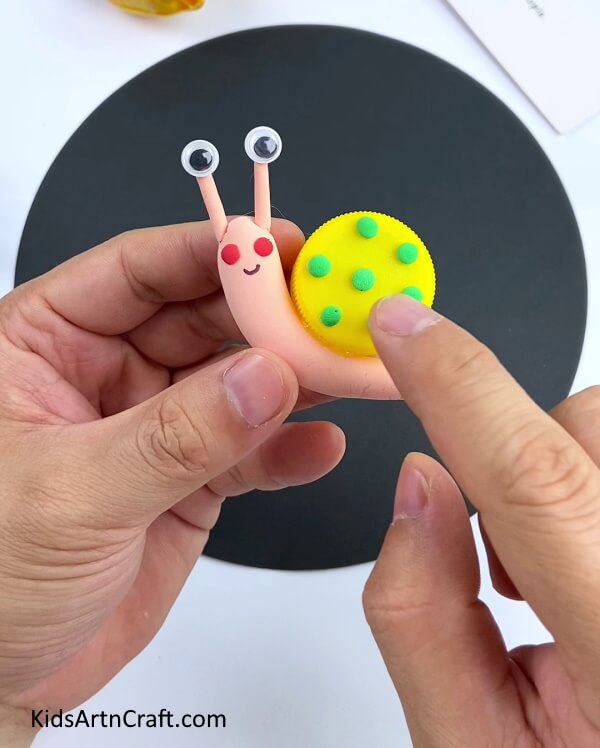

To make the snail’s shell more realistic and creative, we will decorate it with green clay circles. Roll small green clay balls and paste them all over the shell in a circular pattern. This will give the appearance of a spiral. Let your imagination run wild and create a unique design. Further, you can add a cute smile to it using a black marker. Add two little red circles as well. Look at the image for inspiration.
Step 8: Crafting a Leaf Surface
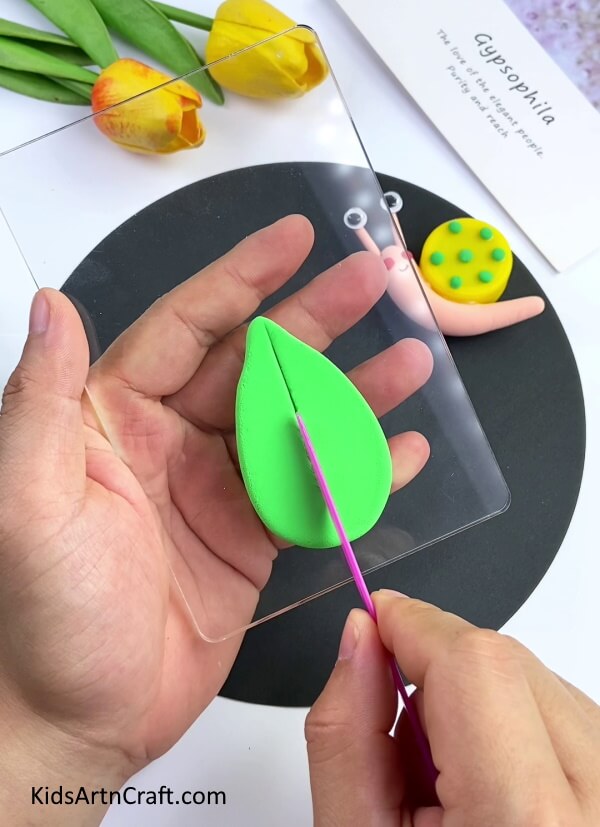

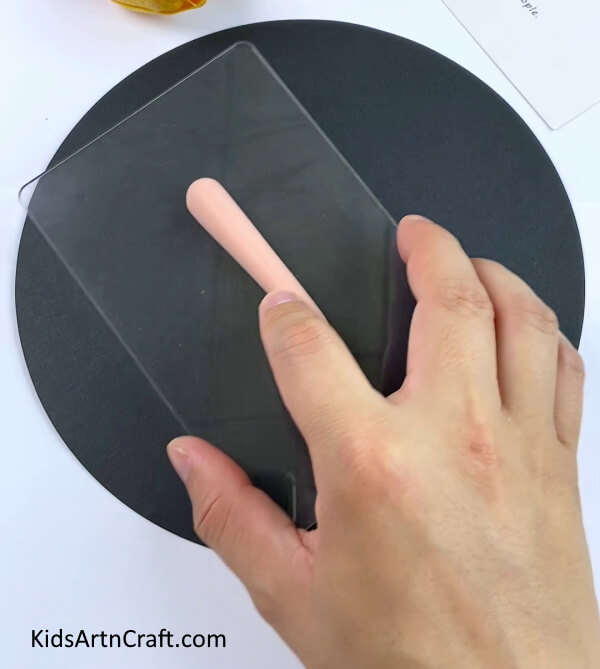
Let’s create a surface for our snail to rest on. Take the green clay and mold it into the shape of a leaf on the transparent plastic case. Use a clay knife to make cuts in the leaf, as shown in the image. This will add texture and make it look more like a real leaf.
Step 9: Progressing to the Next Step
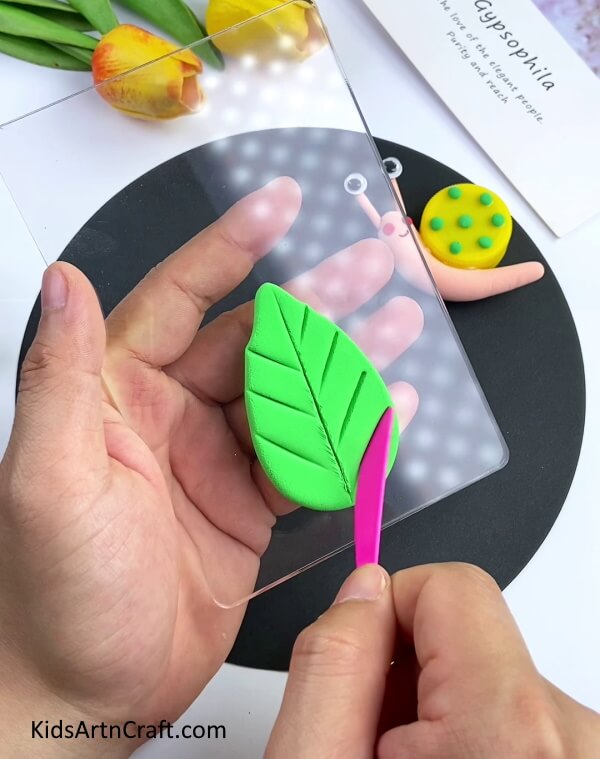

Refer to the above image to see how we achieved this step. We are almost done; just one more step to go! So let’s proceed to the following step.
Step 10: Attaching the Leaf as a Base
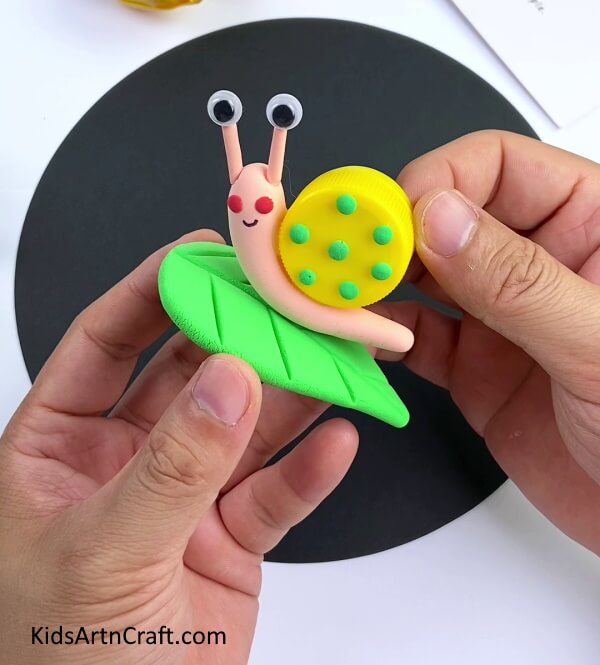

When you’re done with the leaf, attach it to the base of the bottle cap, just below the snail’s body. This will act as a surface for the snail to sit on. Take a moment to admire your cute snail creation!
Celebrate Your Snail Creation!
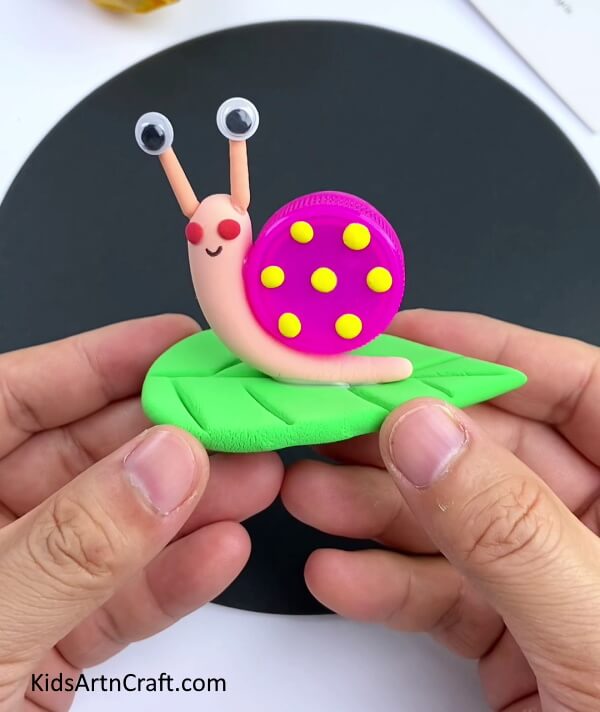

Congratulations! You have successfully created a bottle cap and clay snail. You can try making more using different colored bottle caps. For example, we used a purple bottle cap in the final image. Let your creativity run wild and create snails based on your whims.
Some More Snail Craft Tutorial
Easy To Make Paper Snail Craft for Little Ones

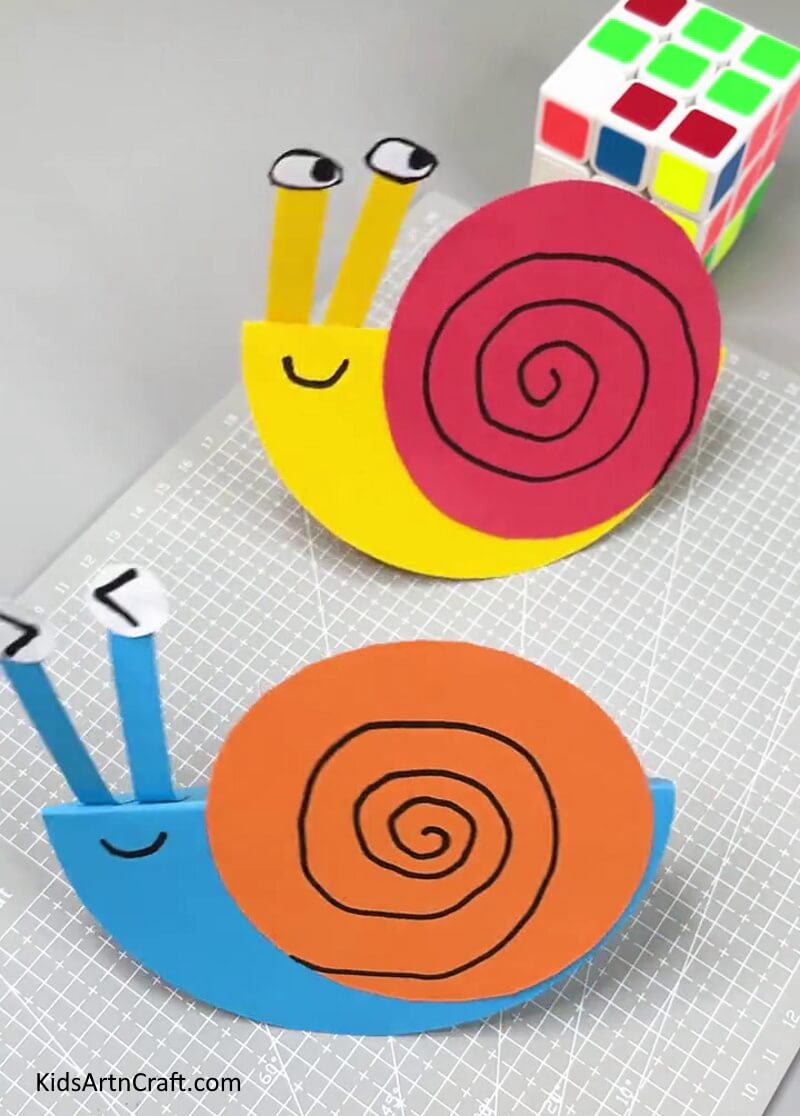
Image Source/Tutorial: Kids Art & Craft
This paper snail craft is a great way to get little ones involved in crafting. It’s easy to make and a fun activity for them to enjoy. All you need is paper, glue, scissors, and a few other items to make this cute little snail.
Homemade Snails Using A Reused Egg Carton For Kids

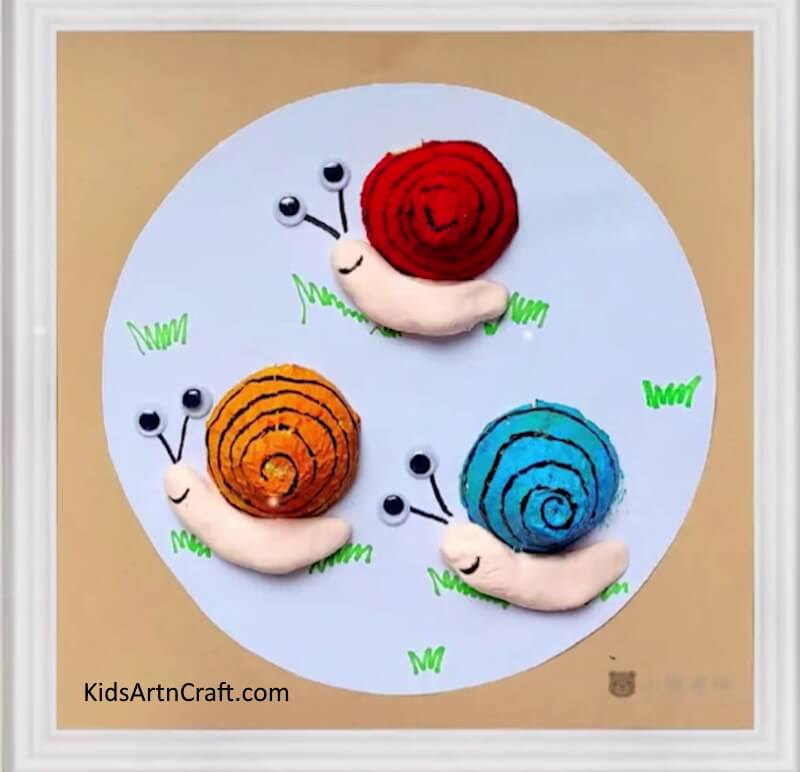
Image Source/Tutorial: Kids Art & Craft
This article provides a fun and creative way for kids to make their own snails using a reused egg carton. It’s a great activity to encourage kids to get creative and have fun with crafting. Plus, it’s a great way to encourage recycling.
We hope you had a fantastic time creating these bottle caps and clay snails! It’s a great method to discover your creative side. Start experimenting with colors, and have fun with textures. If you enjoyed this tutorial, remember to visit our website. Here you will find more such crafty articles and inspiration. Keep nurturing your creativity and enjoy the magic of crafting! Happy snail-making and happy crafting adventures.
Follow us on Youtube for art and craft tutorials and much more.
More Articles from Kids Art & Craft
- DIY Egg Carton Turtle Craft For Kids
- Easy Bubble Wrap Monsters Craft Tutorial For Kids
- Water Bottle Airplane Tutorial for Kids
- Easy Peanut Shells Giraffe Art and Craft For Kids
- Handprint Craft Paper Frog Easy Craft for Kids