


Recycled Crafts
Easy Bubble Wrap Monsters Craft Tutorial For Kids

Bring out your kid’s creativity with this easy Bubble Wrap Monsters Craft Tutorial! It’s a fun and simple way to help your kids make their own monsters with bubble wrap and other simple materials. Perfect for a fun art project or rainy day activity.
Bubble wraps are therapeutic and also a fun thing to play with. But do you know, you can also create many things out of bubble wrap? Don’t believe me? Let me show you how you can create something fearful and spooky but also kind of cute and adorable at the same time with bubble wrap! A Halloween pumpkin artwork craft! Creepy pumpkins are a must for your Halloween, so, let’s create something to make with it! I’m sure everyone would love it as it will give pure Halloween vibes on the day!
You just need to bring these materials to the table and get started with your craftwork by following these simple steps.
DIY Bubble Wrap Monster Craft To Make With Kids
Read More: DIY Paper Cup Crab Easy Tutorial for Kids
Materials Required
- Bubble Wraps
- Paint (Orange And Green)
- Craft Paper (Black And White)
- Markers/Sketchpens (Yellow And Black)
- Paintbrush
- Double-Sided Tape
- Scissors
- Glue
Procedure
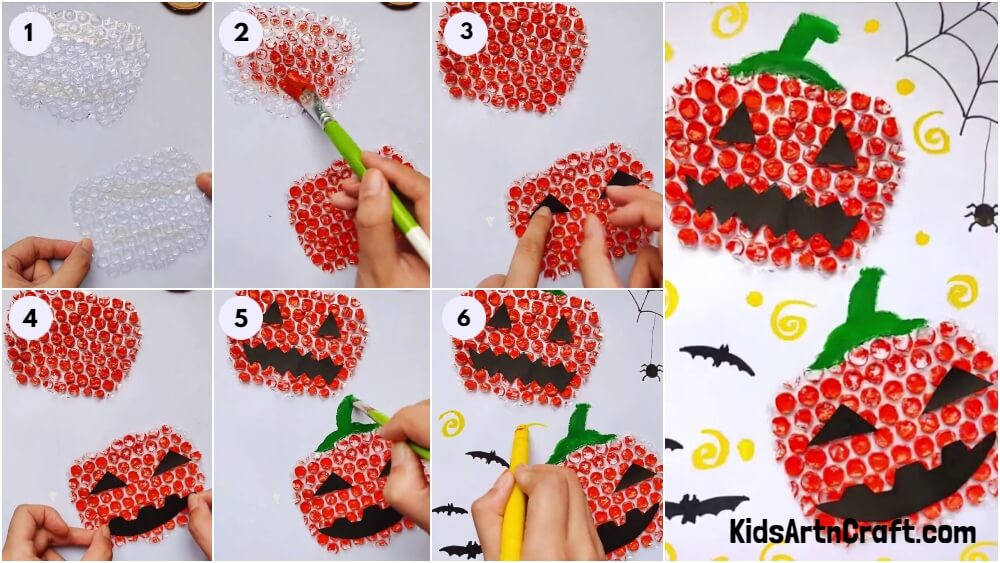
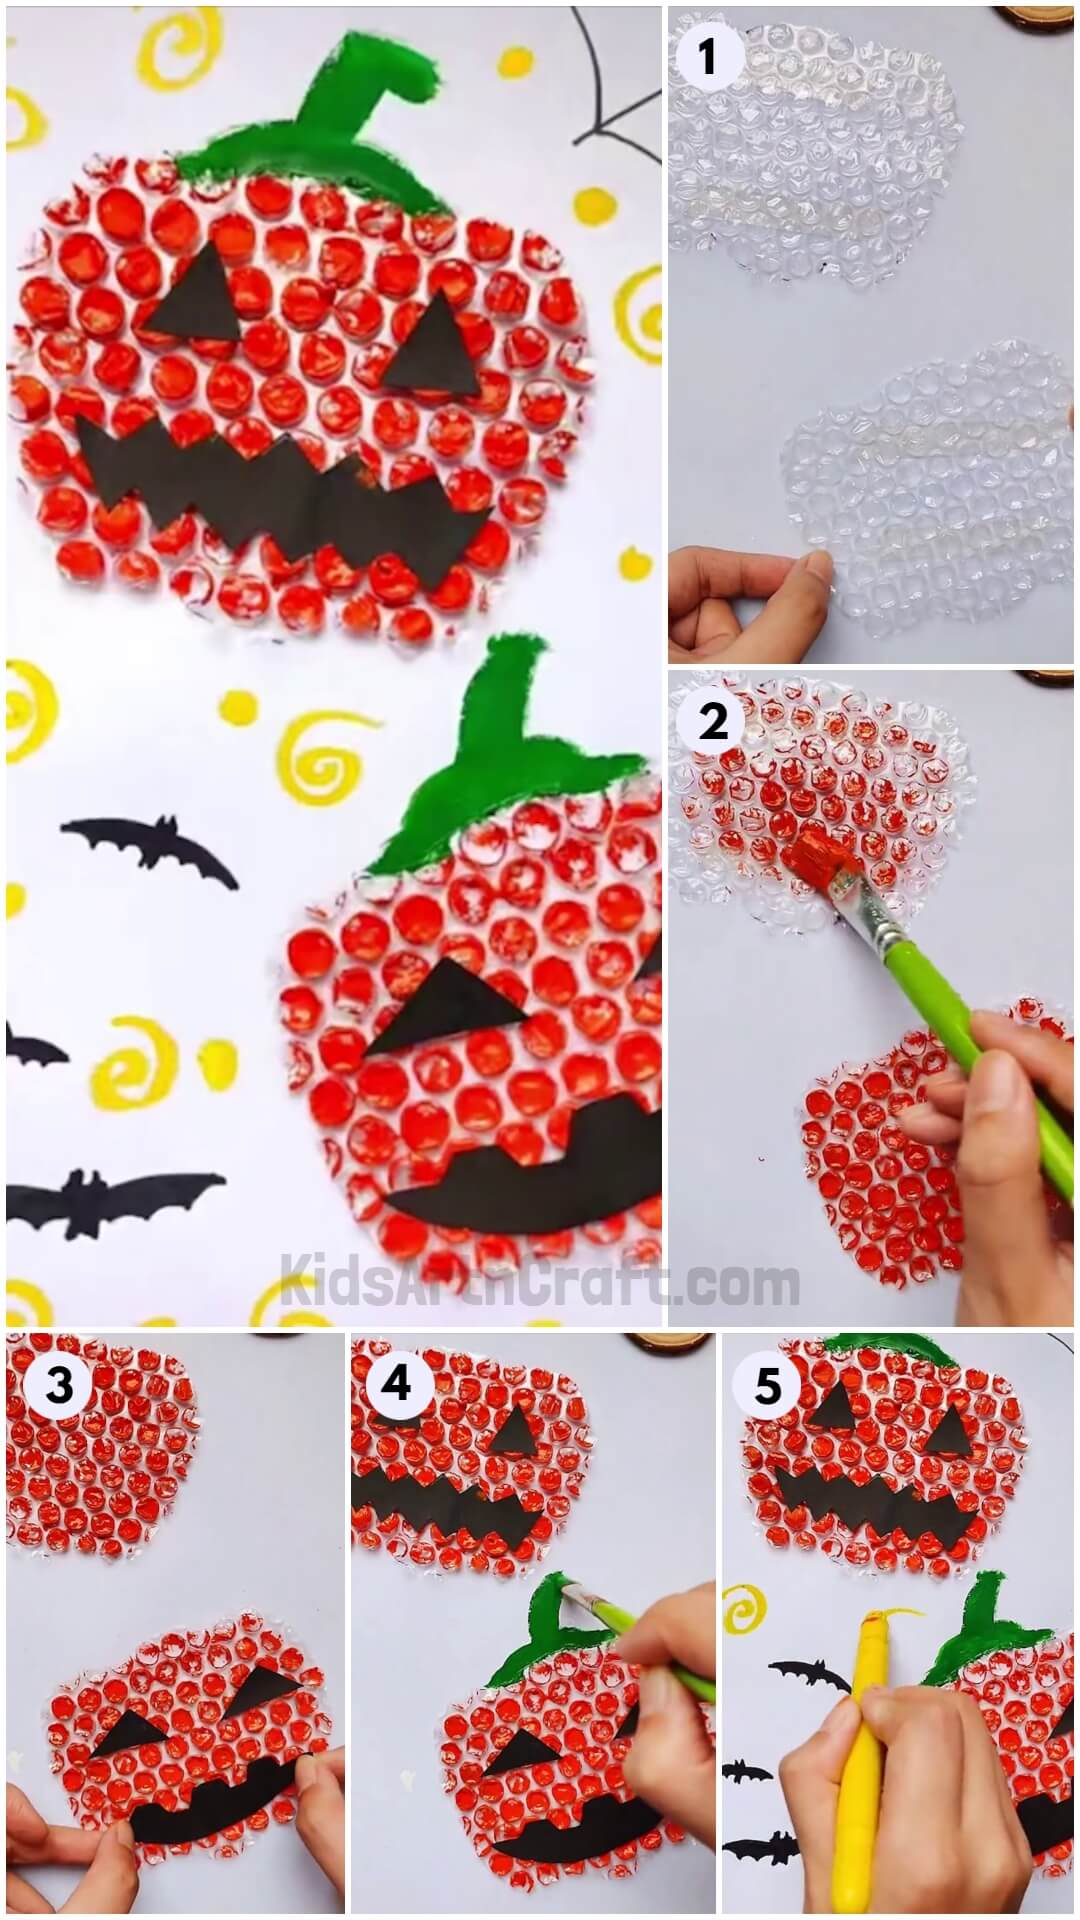
Step 1: Making Pumpkin Shape
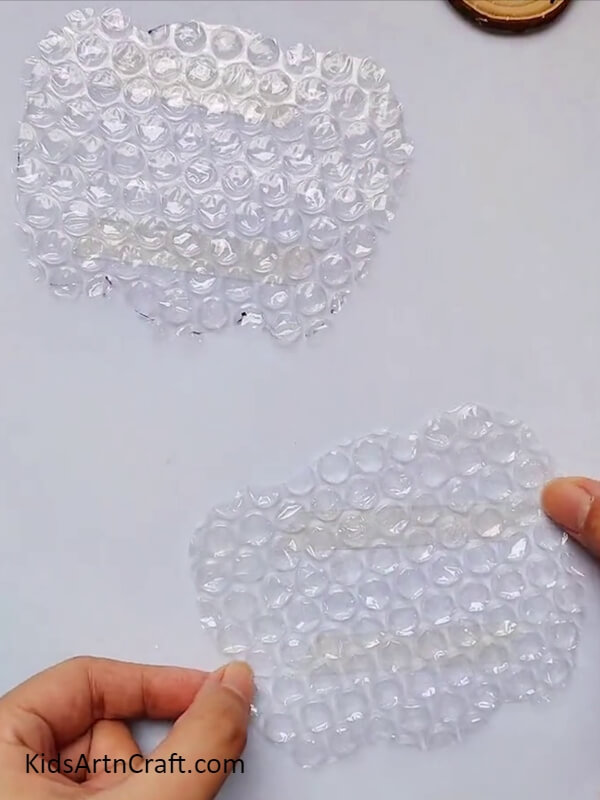
For the first step, take bubble wrap cut out 2 pumpkin shapes, and stick them with double-sided tape on a white sheet of paper as shown in the image.
Step 2: Painting The Pumpkins
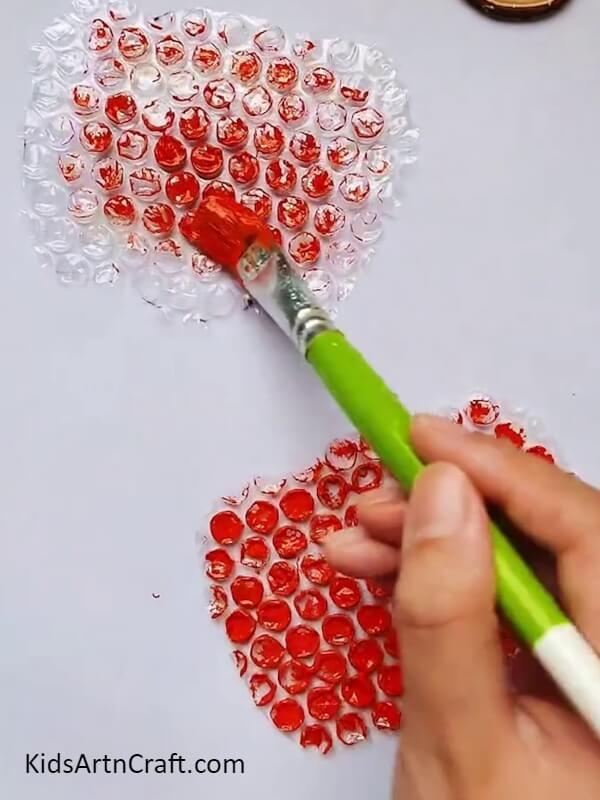
With the help of a paintbrush, paint over the bubble wrap/pumpkin with orange paint.
Step 3: Making Eyes
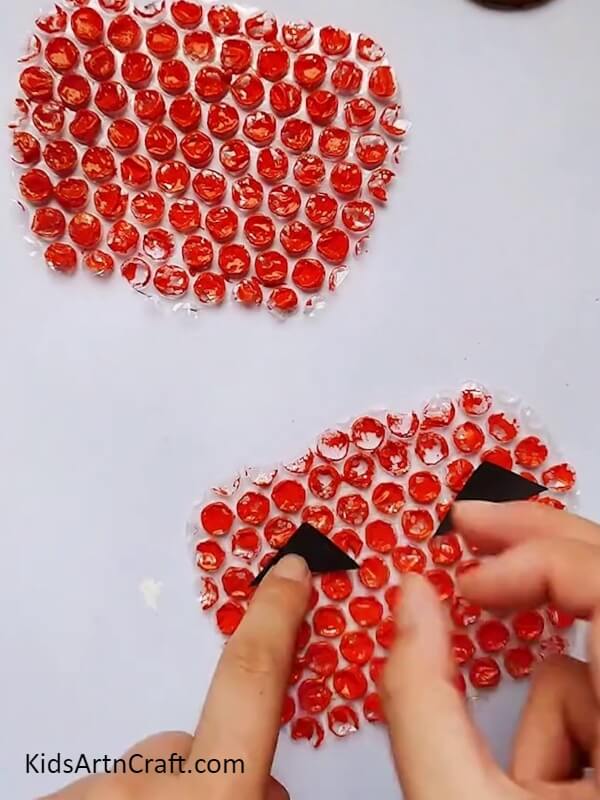
Now, cut two triangles from black-colored craft paper with the help of scissors to make eyes. Stick the eyes over the lower pumpkin with the help of glue as shown.
Step 4: Making Mouth
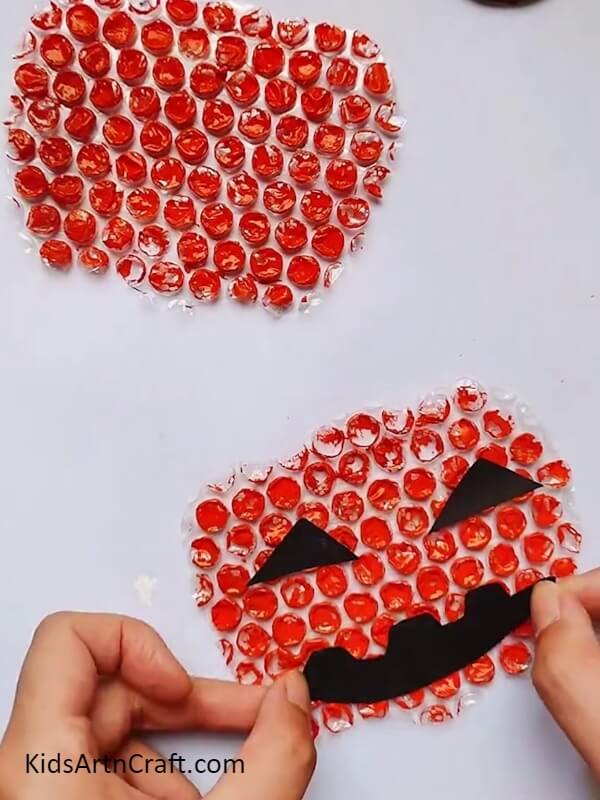
From black colored craft paper, cut out a shape of a mouth as shown above with the help of scissors. Stick it over the pumpkin with the help of glue.
Step 5: Detailing The Other Pumpkin

Now, make features of another pumpkin, and repeat the same steps from above. Make eyes and mouth with the black colored craft paper and stick it.
Step 6: Making Pumpkin Stem
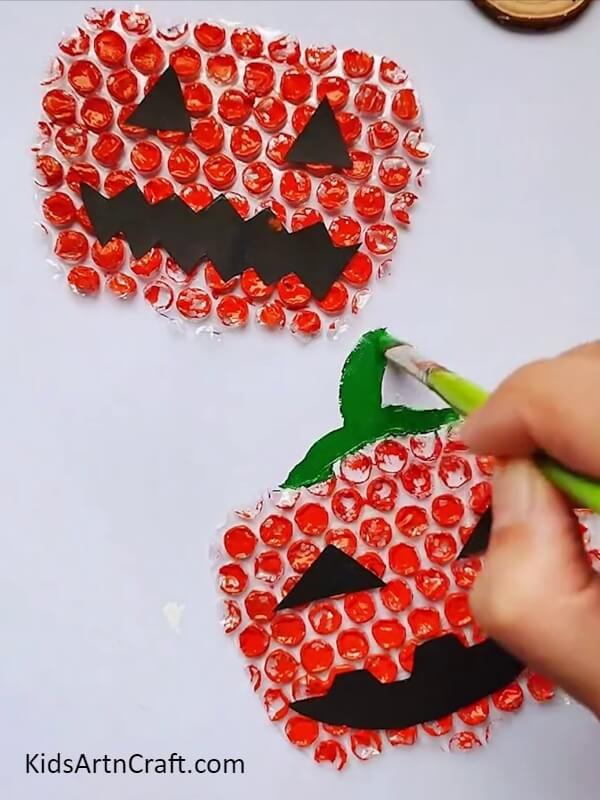
Now, with the use of green paint, make the stems of the pumpkins over them.
Step 7: Making Cobwebs And Spider
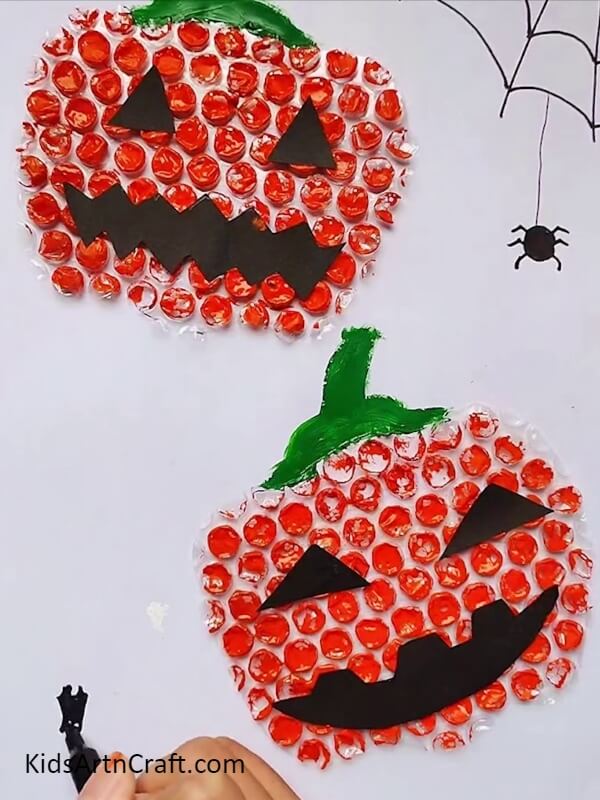
To give the craft a more spooky look, draw cobwebs and spiders on white paper with the help of a black marker/sketch pen as shown in the picture.
Step 8: Drawing Spirals And Bats
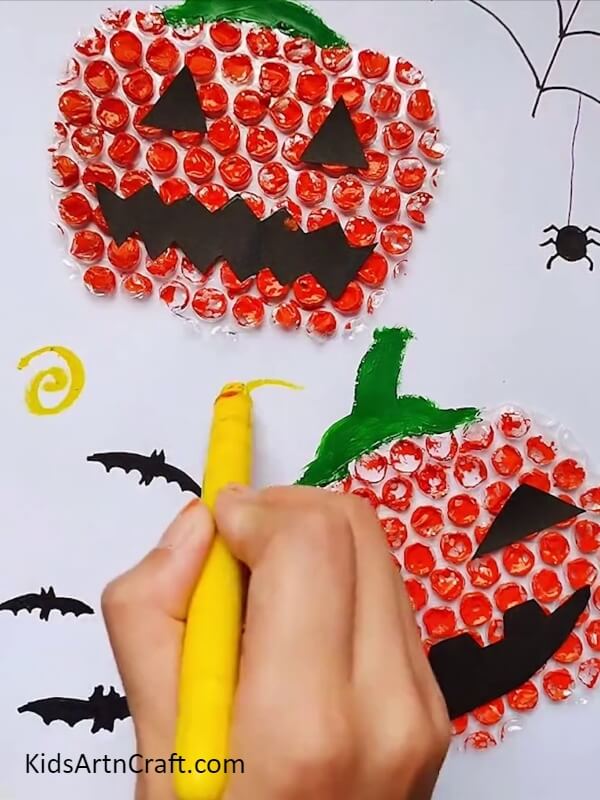
Now, draw bats and spirals with the help of black and yellow marker/sketch pen on white paper as shown to give a more spooky and dark effect to the craft.
Your Halloween Pumpkin Artwork Craft Is Ready!

Your spooky Halloween pumpkins are finally ready to slither their way to the dark.
It actually looks both spooky and sweet at the same time. But you can always prank someone with this craft and have some fun. You can also use this craft for decorative purposes or a theme party. This artwork craft is actually really very simple and easy to make. Just follow the simple steps and get your monster party on and have fun with it!
Follow us on Youtube for art and craft tutorials and much more.
More Articles from Kids Art & Craft
- How to Make Paper Cup Wrist Watch Tutorial for Kids
- How to Make Bubble Wrap Corn Craft Easy Tutorial
- DIY Paper Cup Swan Step-by-Step Tutorial For Kids
- How to make Sunflower From Paper Cup Craft
- Easy to Make Snowman by Bottle Craft Tutorial


