


DIY and Crafts
DIY Venus Fly Trap Craft Step-by-step Tutorial For Kids

This DIY Venus Fly Trap craft step-by-step tutorial for kids is perfect for a fun science project. Learn how to make a Venus Fly Trap with everyday materials and watch your kids have a blast as they create their carnivorous plant!
This article provides a step-by-step tutorial to help kids make their own Venus fly trap craft. With simple and easy-to-follow instructions, kids can create their own unique and fun DIY projects. Not only is this craft fun to make, but it also teaches kids about the importance of the Venus fly trap in nature.
Embark on a vibrant Venus Fly Trap craft journey, ideal for young plant enthusiasts! Unleash your creativity with simple materials, and let’s explore together! Get ready to have hands-on fun and create a mesmerizing masterpiece! Let the adventure begin!
How To Make Venus Fly Trap Craft Tutorial For Kids
Read More: How to Make a Toy Car using straw Easy Tutorial for Kids
Materials Required
-
Pastel Sheets in Different Colors
-
Glue Stick
-
Blue Highlighter Pen
-
Black Marker or Sketch Pen
-
Triangular Cut White Pieces (15-20)
-
Paper Cut Googly Eyes
Procedure
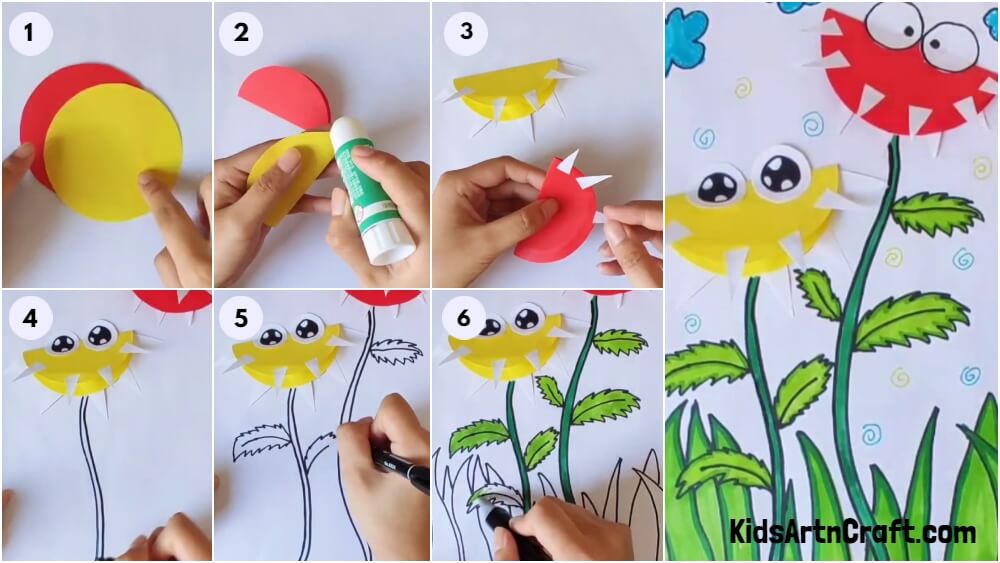
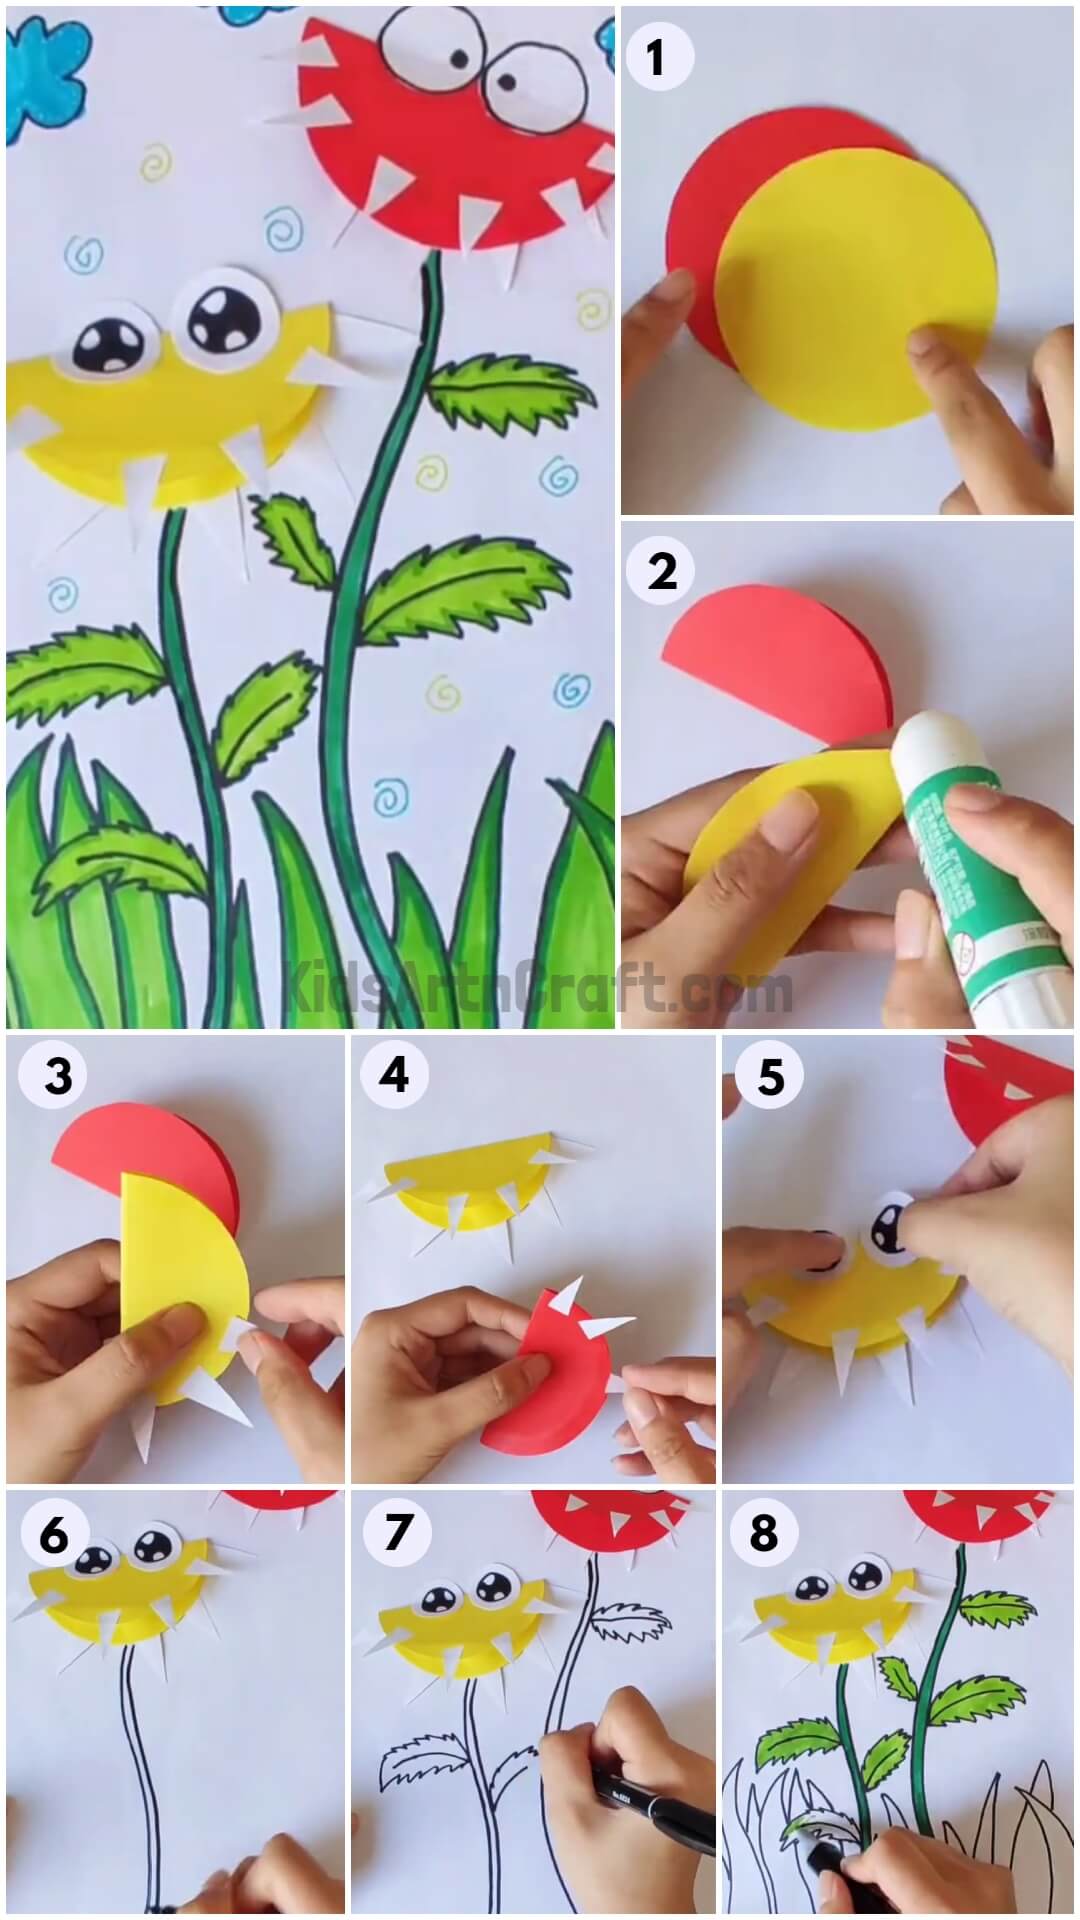
Step 1: Gathering The Pastel Sheets of Your Choice
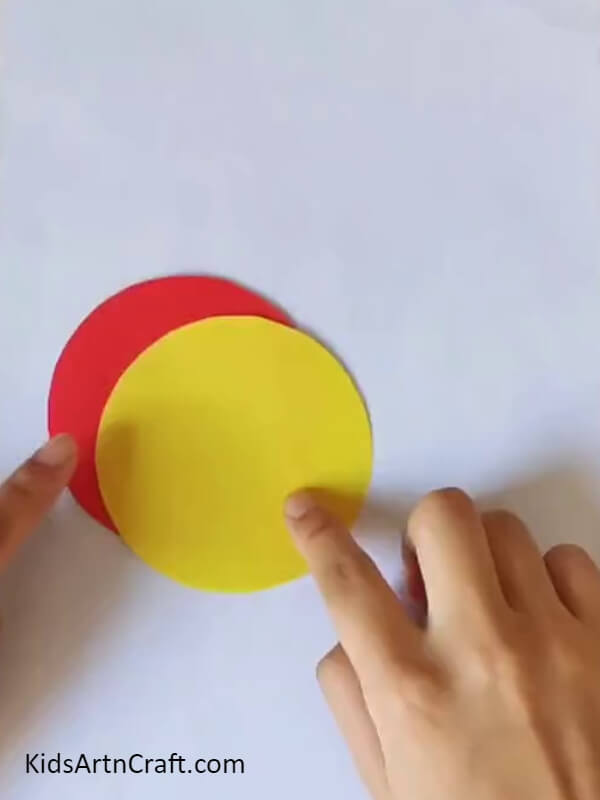
Gather all the materials needed for this craft project. Ensure that you have pastel sheets in various colors. Then, take two sheets of any color of your choice. To make the craft easier and more colorful, we have chosen the colors red and yellow! Cut both sheets into circular shapes as shown in the image above.
Step 2: Folding the Circle-Cut Pastel Sheets in Half
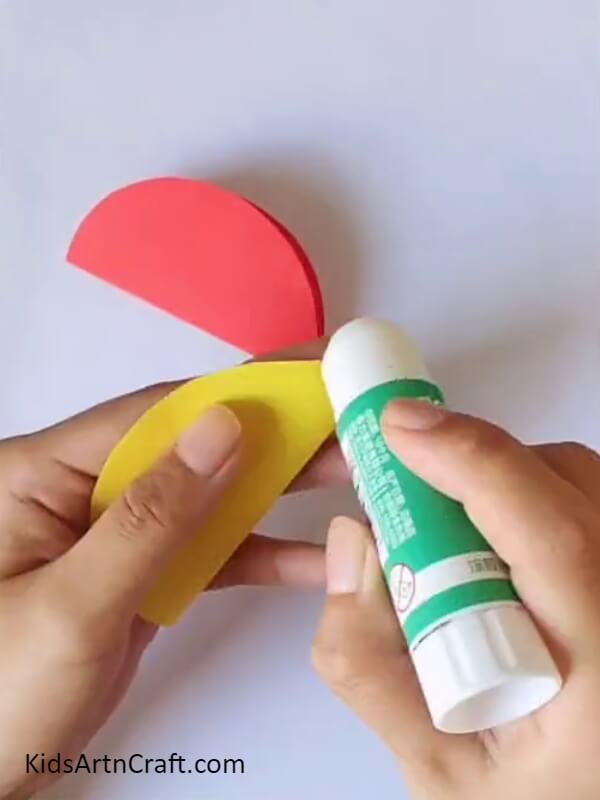
After you have made your selection, fold the circular cutouts in half. This will serve as the base of your Venus Fly Trap craft. Apply glue to one side of each cutout and paste them together to create a semi-circular shape. You can refer to the image above for guidance.
Step 3: Attaching the Spikes or Teeth
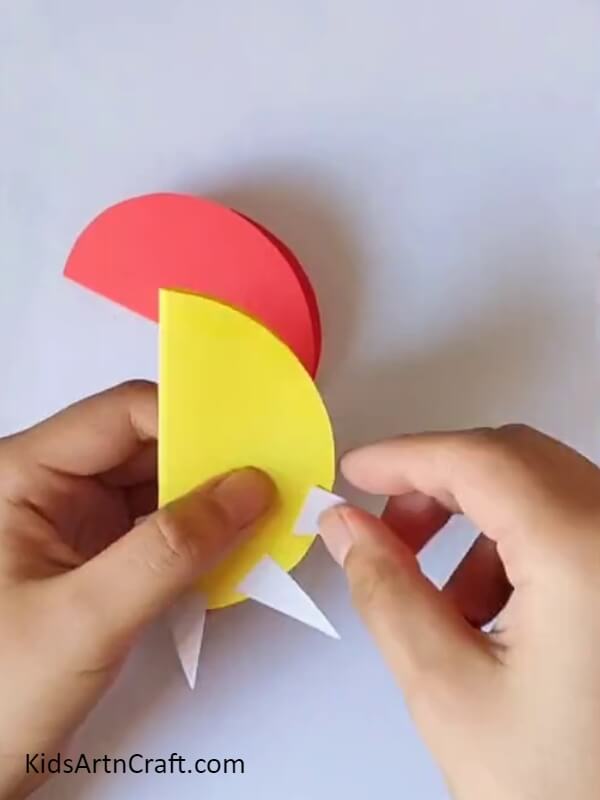
Now, take the triangular white pieces and apply glue to one side of each piece. Stick the glued side of the white triangular pieces onto the circular cutouts. These pieces will serve as the teeth or spikes of the Venus Fly Trap.
Step 4: Repeating the Process
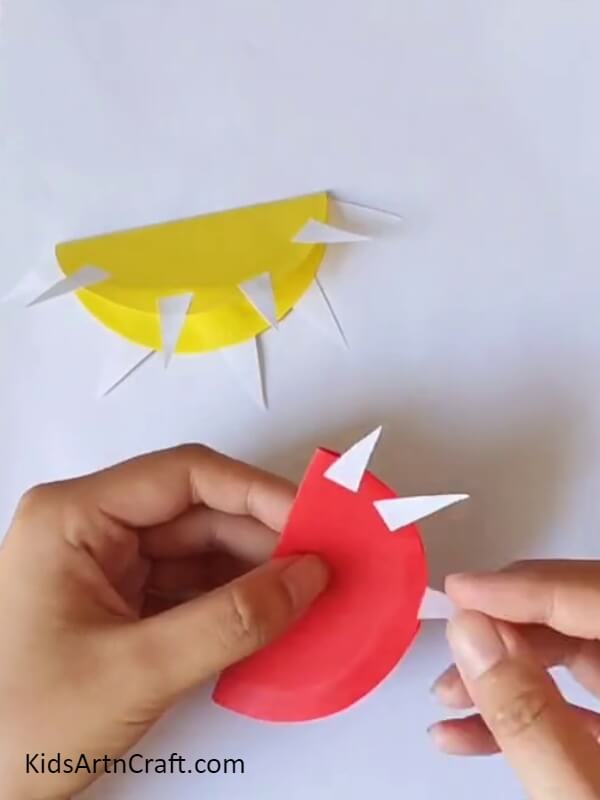
Once you have completed one side, repeat the process with the other cutout. These spikes will represent the mouth of the Venus Fly Trap. Be creative and try to give your craft a more realistic look by spacing them evenly.
Step 5: Sticking the Googly Eyes
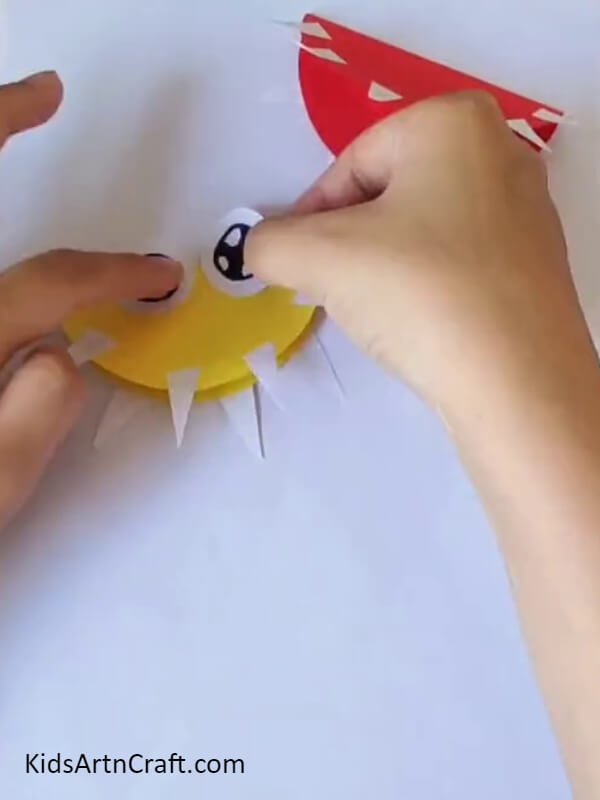
If you have finished working on the spikes, it’s time to add a realistic touch to your craft. Use the provided googly eyes and stick them onto the surface of the folded sheets. Position them symmetrically to give your Venus Fly Trap a pair of eyes.
Step 6: Sketching a Wavy Line
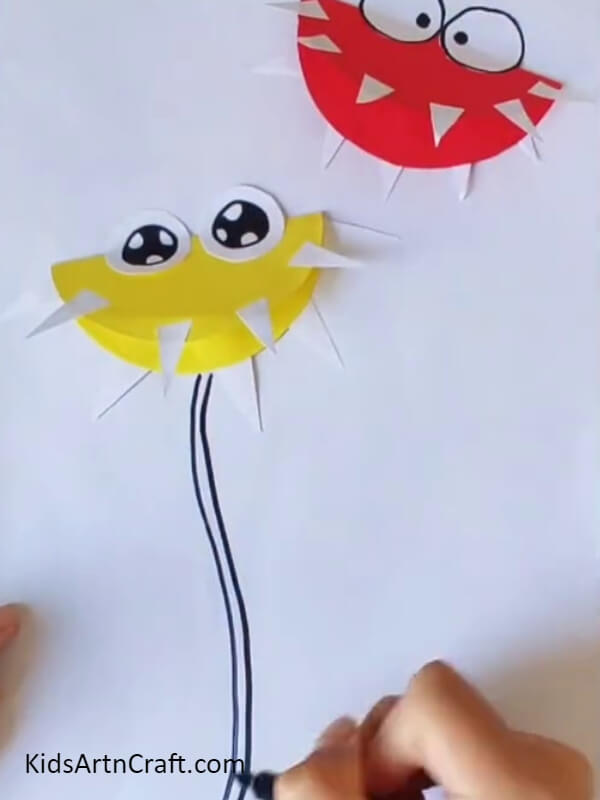
Using the black marker or sketch pen, sketch a wavy line from the bottom of the craft to the end of the sheet. Make sure it is drawn in a way that makes your craft more prominent. This line represents the outer edge of the Venus Fly Trap’s mouth.
Step 7: Adding Leaves
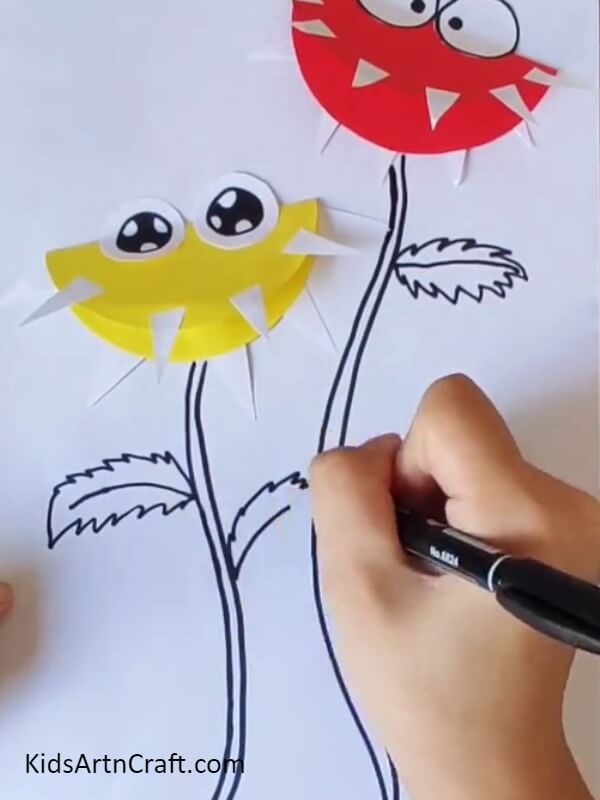
After drawing the wavy line, use the same marker to create leaves. Once you have completed them, compare your craft with the provided image. We are almost done, but do you want to add a creative touch to your art? If the answer is yes, then the following steps will be even more interesting.
Step 8: Adding Colors
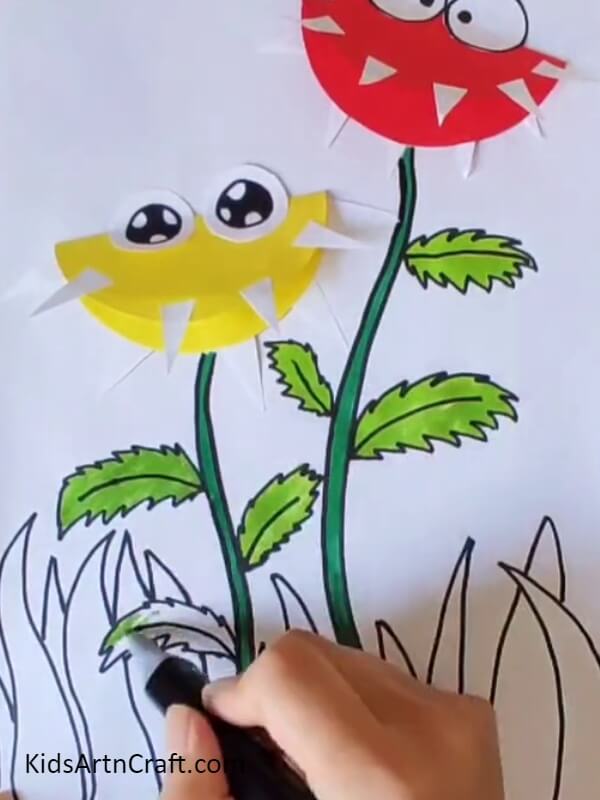
Since the designing part is complete, let’s make it colorful and visually appealing. Start by coloring the leaves and the wavy lines. After that, you can add your personal touch. Remember, being creative is a great thing!
Step 9: Adding Additional Decorations
We are just one step away from completing our beautiful and interesting craft. Now is the perfect time to add any additional decorations or details to your Venus Fly Trap. You can draw veins on the leaves or add tiny insects for more visual interest.
Step 10: Getting Creative with Clouds
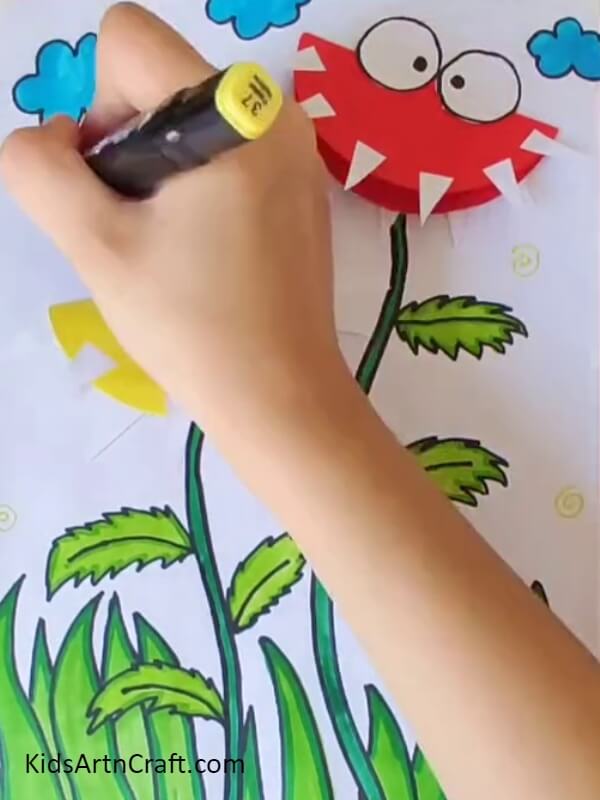
If you’re struggling to come up with ideas, don’t worry, we’ve got you covered! Use a blue highlighter or crayon to add clouds to the background, just like in the image above. It will give your craft a great finishing touch!
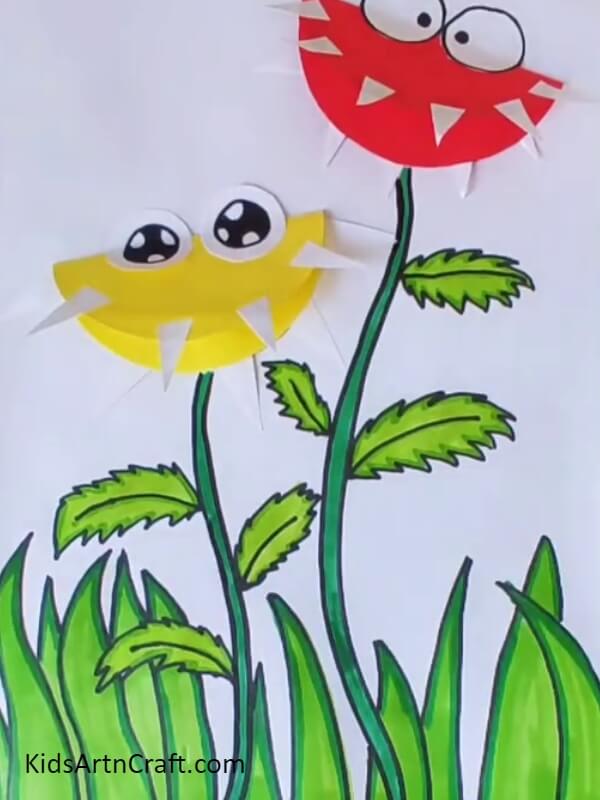
Yay, We’re Done! Your Venus Fly Trap Craft is Ready!
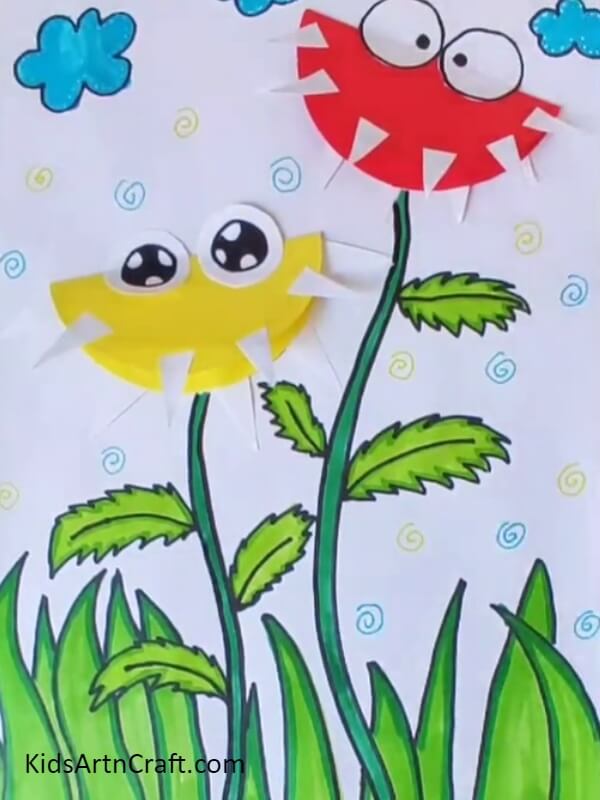
Congratulations on making your own Venus Fly Trap craft! You can use it as a fun decoration or create a small play scene with it.
This DIY Venus Fly Trap Craft Step-by-step Tutorial For Kids is a great way to introduce children to the wonders of nature in a fun and creative way. With easy-to-follow instructions, kids can make their own Venus Fly Trap that they can proudly show off to their family and friends! We hope you enjoyed this tutorial and had fun exploring your creativity. Remember to take care of your craft and keep it in a safe place. Happy crafting!
Follow us on Youtube for art and craft tutorials and much more.
More Articles from Kids Art & Craft
- How to Make Easy Paper Snowflakes Tutorial
- How to Make Paper Lavender Flower Easy Tutorial
- DIY Heart Shape Cat Craft for Valentine’s Day
- DIY Bird Nest Paper Craft For Kids
- Easy Paper Robot Craft Step-By-Step Tutorial


