Clay Crafts
DIY Clay Giraffe Step by Step Tutorial For Kids

This step-by-step tutorial shows kids how to make their very own clay giraffe. With easy-to-follow instructions, learn how to create a fun and unique clay giraffe that any child will love! Bring out your little one’s creative side and get crafting with this fun and easy DIY clay giraffe tutorial.
Welcome to this fun and easy craft idea for kids! This clay giraffe craft is perfect for kids of all ages. It’s a fun and creative activity that will help your little ones express their creativity and unleash their inner artist. With a few easy steps, you can help your kids create a beautiful clay giraffe that will be the envy of all their friends. Plus, this craft project is easy to do, requires minimal materials, and will keep kids busy for hours! So, let’s get started and create a beautiful clay giraffe together!
Beautiful Clay Giraffe Craft Ideas For Kids

Read More: Easy Fall Leaf Craft Step by Step For Kids
Materials Required
- Clay (Light yellow, Yellow, Orange, Red, Green)
- Brown sketch pen
- Black marker
- White paper
- Scissors
- Protractor
- Metal Ruler
Procedure
Step 1: Making The Green Base
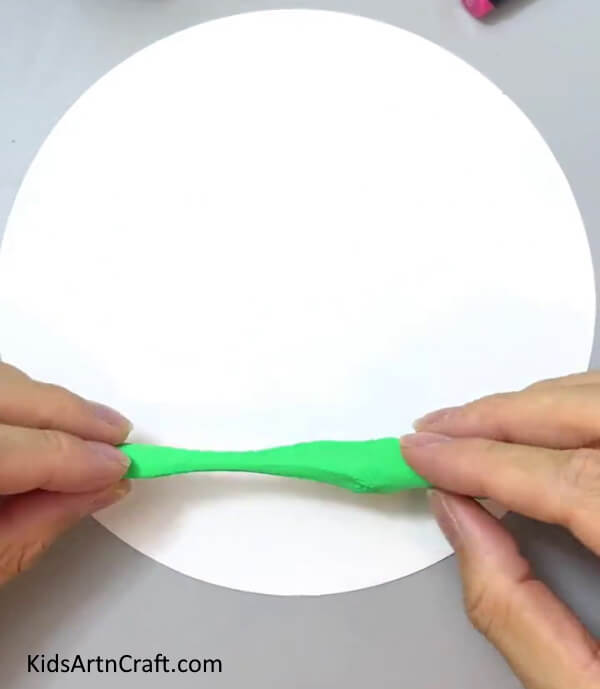

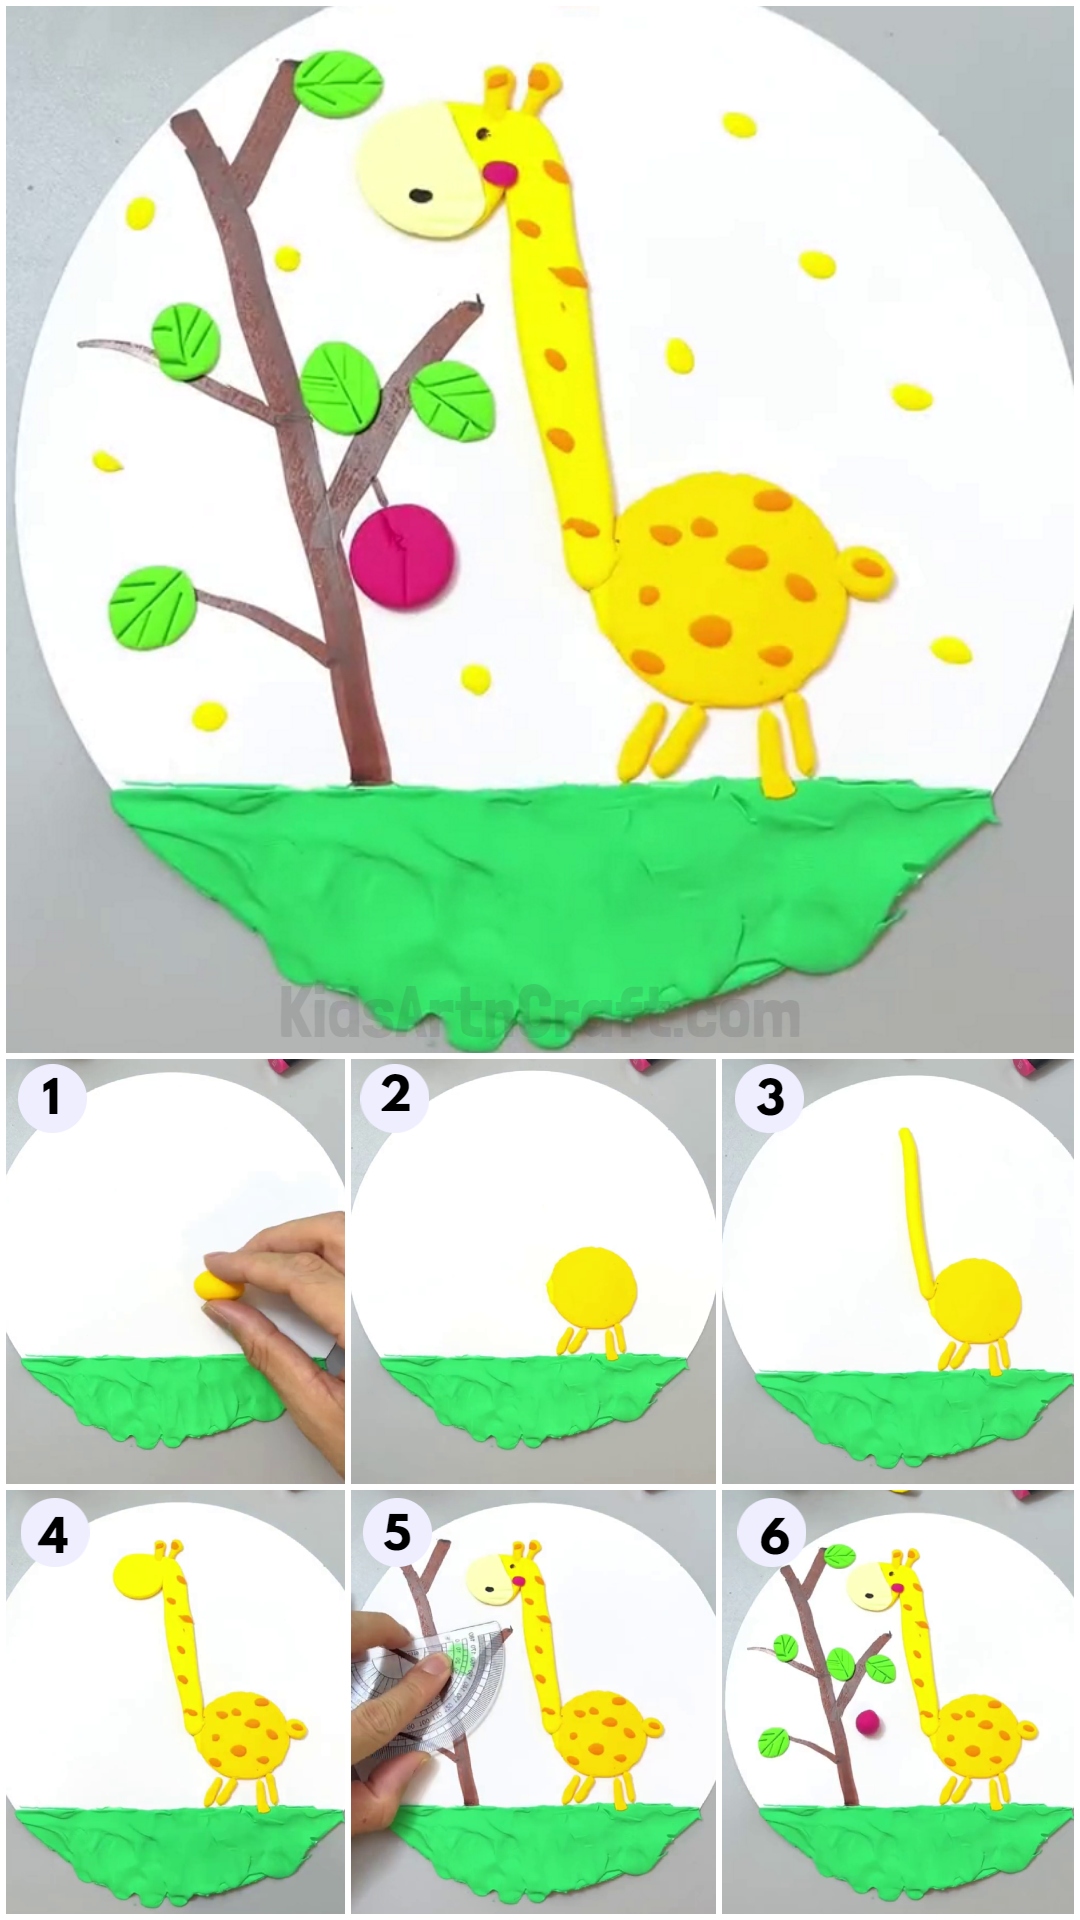
To begin this unique craft, take a white paper. Cut out a big circle as shown in the image. Take green clay and spread it uniformly to make a green base for our clay giraffe.
Step 2: Making The Body Of The Giraffe

Take yellow clay. Make a ball out of it. Place it near the right corner of the white paper just above the green base as shown.
Step 3: Pressing The Yellow Clay Ball
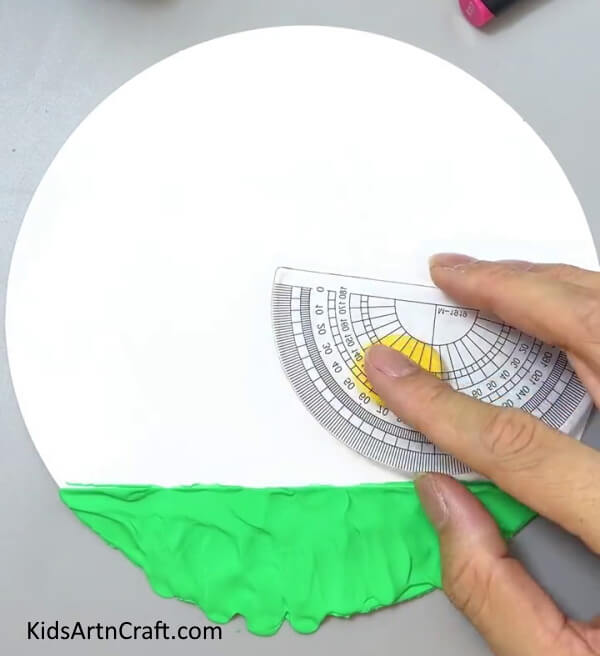

Take a protractor, and press it uniformly in a circle to make the giraffe’s body.
Step 4: Making Legs Of The Giraffe
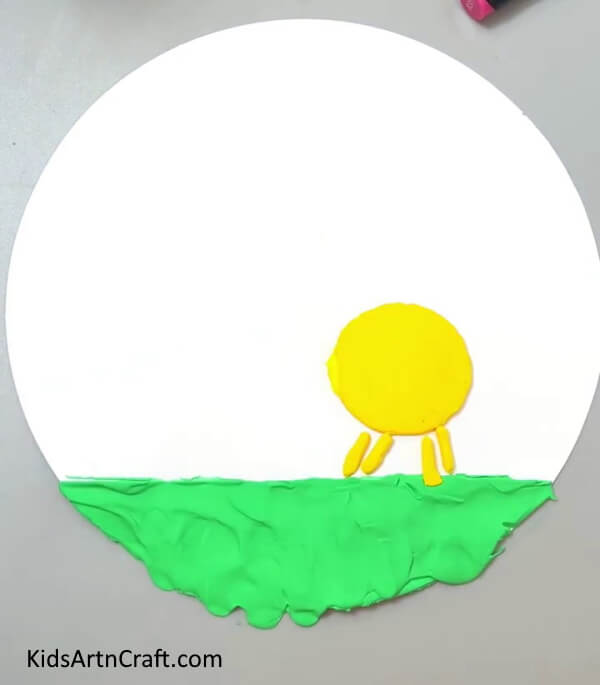

As shown in the image, take yellow clay, make four little legs, and paste them.
Step 5: Making The Neck Of The Giraffe
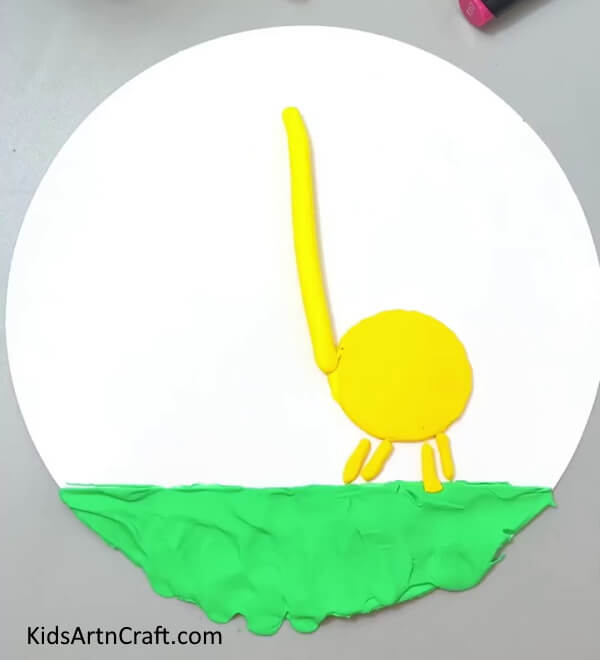

Make a long neck out of the yellow clay and paste it on the left side near the middle as shown.
Step 6: Making The Mouth Of The Giraffe
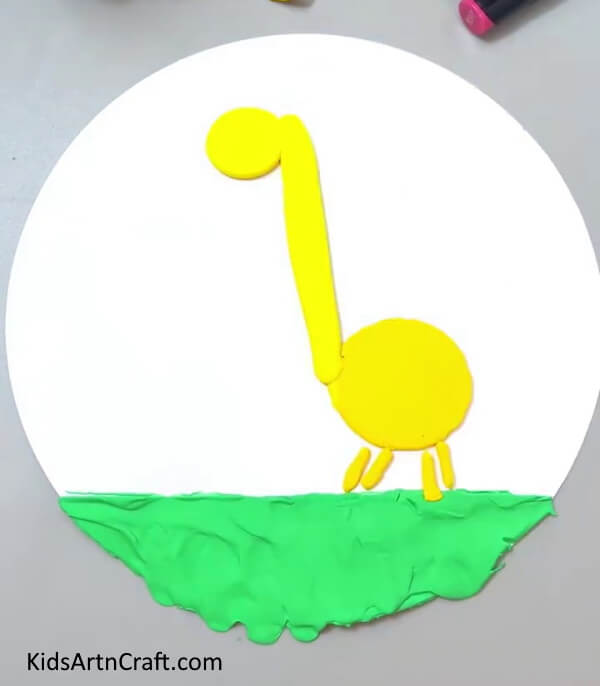

Take the yellow clay and make a flat circle. Paste the clay circle on the neck as shown in the image.
Step 7: Making Ears And Tails Of The Giraffe
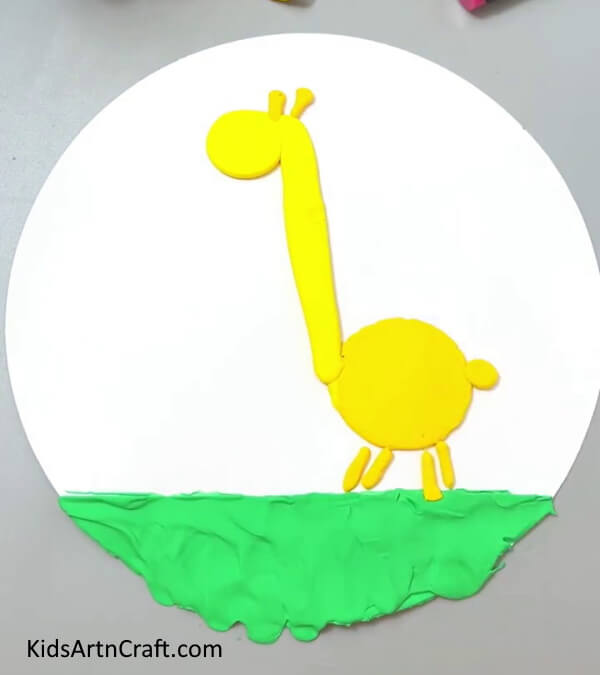

Make two small ears and a small tail for the giraffe. Paste them as shown.
Step 8: Making Orange Spots On Giraffe
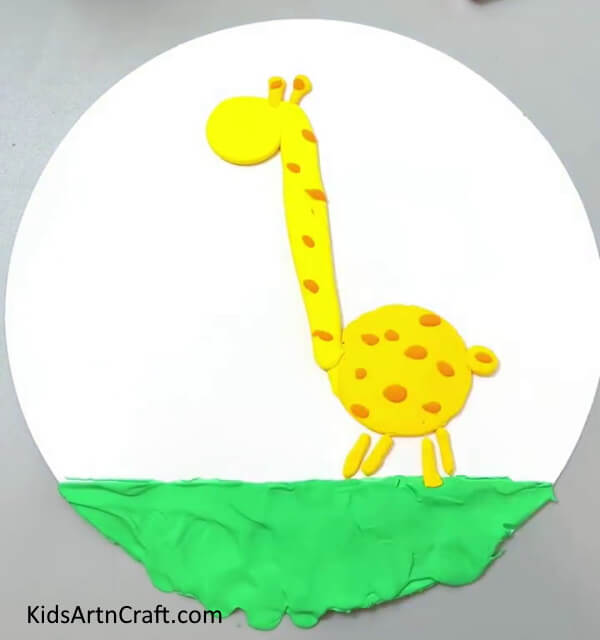

Take orange clay. Make small irregular circles out of it. Paste them on the entire body of the giraffe as shown.
Step 9: Making Mouth Of Giraffe


Take clay of a light yellow shade. Make a semicircle out of it. Paste it on the mouth of the giraffe as shown. Using a black marker, make two dots, one for the eyes and one for the mouth.
Step 10: Drawing Tree With Brown Marker
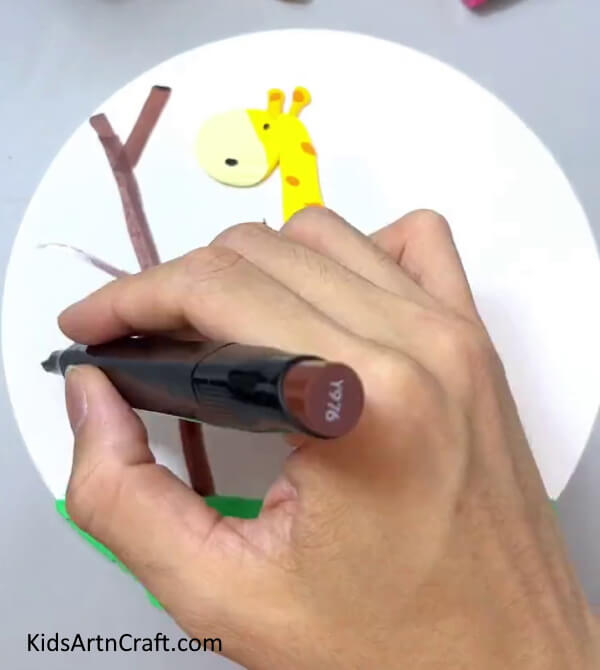

Take a brown marker. Using it, draw tree trunk and stems as shown.
Step 11: Making Green Leaves And Red Tongue

Take green clay and make a small ball. Place it on one branch and press it into an oval shape with the help of a protractor. Take red clay and make a small ball out of it. Using a protractor, make it flat. Place it below the eyes and near the mouth as shown.
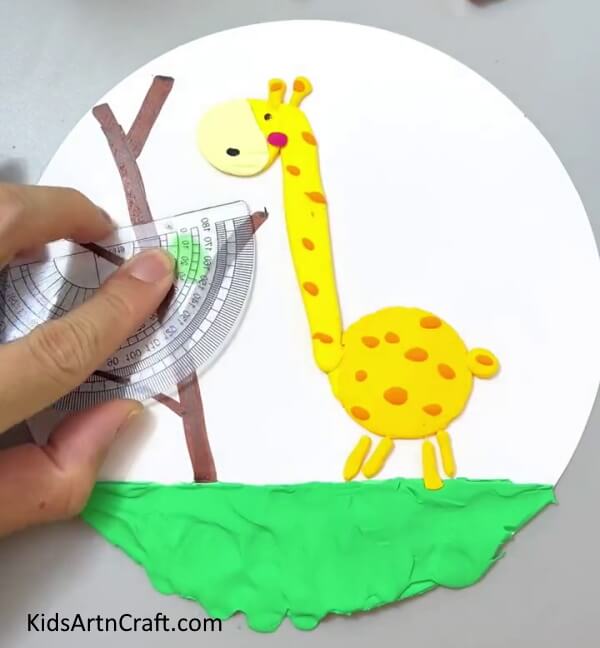
Step 12: Making A Vein On The Leaf


Take a metal ruler and draw a line in the middle of the green leaf as shown. Make four more similar leaves to complete the tree.
Step 13: Adding Apple To The Tree
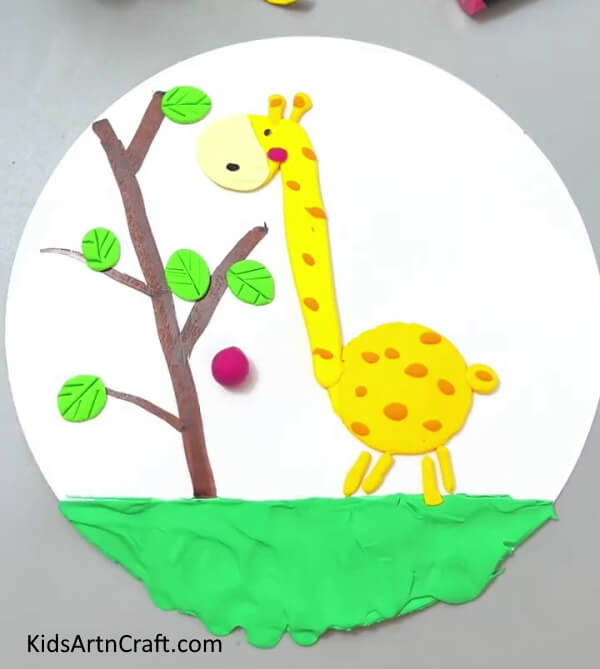

Take red clay for making the fruit. Make a small red ball out of it. Press it in a flat circle and paste it below a branch as shown. Finally, draw a brown stem connecting the fruit to the stem. With the help of a metal ruler, draw a line in the middle of the fruit. Now, make tiny balls out of yellow clay and paste them all over the white sheet as shown in the final image.
Yay! This Is The Final Look Of Our Clay Giraffe Craft!
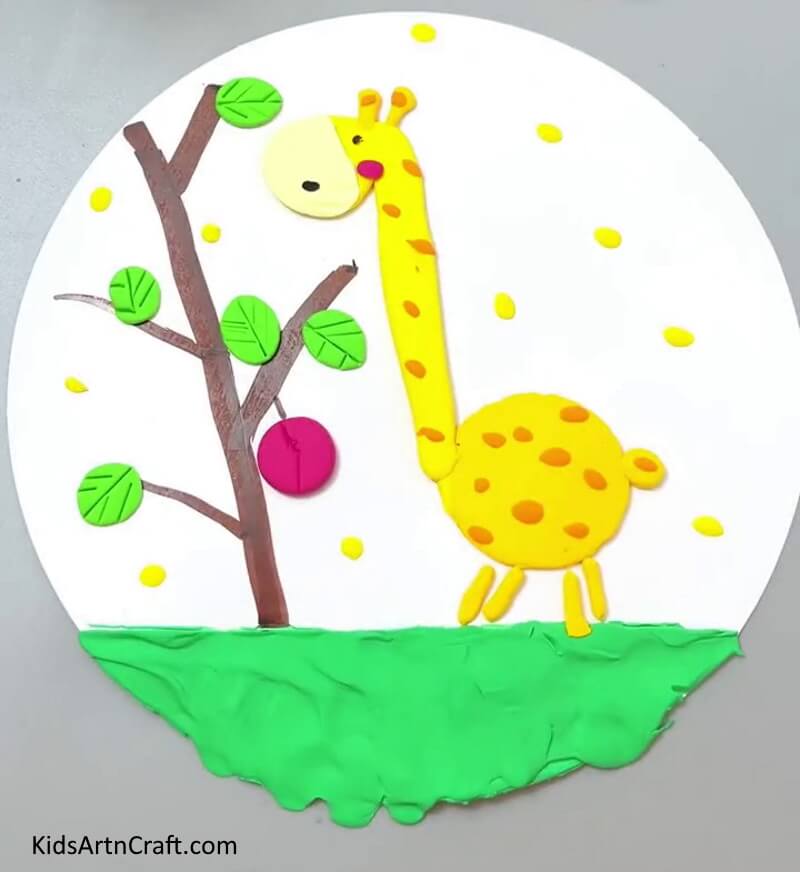

Congratulations! Your hard work and creativity have paid off! The clay giraffe project is finally finished and it looks amazing! Different colors of clay are used to create the giraffe’s features and to decorate it with small details. Kids will enjoy making it as it is easy and fun to make. With just a few simple steps, this masterpiece can be created, that is sure to be admired. This beautiful clay giraffe craft is sure to be a bright spot in any room. Have fun!
Some More Giraffe Craft Tutorial
Create Giraffe Art with Peanut Shells For Toddler

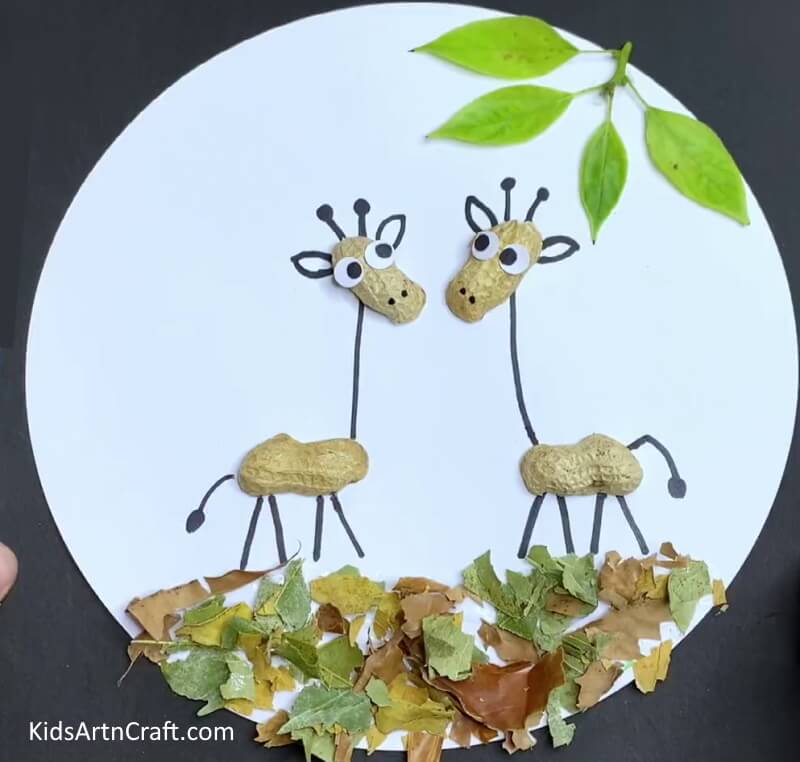
Image Source/Tutorial: Kids Art & Craft
This fun and creative art project for toddlers allows them to make a giraffe sculpture using peanut shells, glue, and paint. They will have a blast creating this adorable creature and can proudly display their work.
FAQs Related To DIY Clay Giraffe Step-By-Step Tutorial For Kids
1. Is the clay giraffe easy to make?
Yes, the clay giraffe is easy to make.
2. Do I have to use air-dry clay?
Yes, you must use air-dry clay for the clay giraffe.
3. How long does it take to make a clay giraffe?
It usually takes around 30 minutes to make a clay giraffe.
4. Can I use other colors of clay?
Yes, you can use other colors of clay to make your clay giraffe.
5. Do I need to bake the clay giraffe?
No, you do not need to bake the clay giraffe.
6. Can I make the giraffe a different size?
Yes, you can make the giraffe any size you want.
7. Is the clay giraffe a difficult project for kids?
No, the clay giraffe is an easy project for kids.
Making a clay giraffe is a great way to get your kids creative and have fun! With this step-by-step tutorial, your kids will be able to make their own clay giraffe in no time!
Follow us on Youtube for art and craft tutorials and much more.
More Articles from Kids Art & Craft
- Paper Strips Frog Craft Step-By-Step Tutorial
- How to Make Paper Cup Wrist Watch Tutorial for Kids
- DIY Giraffe Handprint Craft Tutorial For Kids
- Easy Paper Robot Craft Step-By-Step Tutorial
- Water Bottle Airplane Tutorial for Kids