


DIY and Crafts
DIY Easy Ostrich Craft Tutorial for Kids

Nature inspires every aspect of our lives, be it literature, knowledge, architecture, and art as well. And the best inspiration you can take from nature to create art and improve it is through the animal kingdom. And the species we have bought for you today is BIRDS. And not just any bird but the largest bird on the planet. This tutorial is very simple and requires very basic material to make. It can be used as a very good starting point to start your journey of art and strengthen your basics as well. So, find a comfortable place to sit, clear your mind, collect all the material, and let’s make this bird.
Easy Ostrich Craft Idea With Step by Step Tutorials
Read more: Paper Cup Bird Craft Ideas for Kids
Material Used
- Multiple Colored Sheets Of Chart Paper( Pink, Black, Yellow, And White)
- A Pair Of Scissors
- A Black Sketch Pen
- A Glue Stick
Procedure
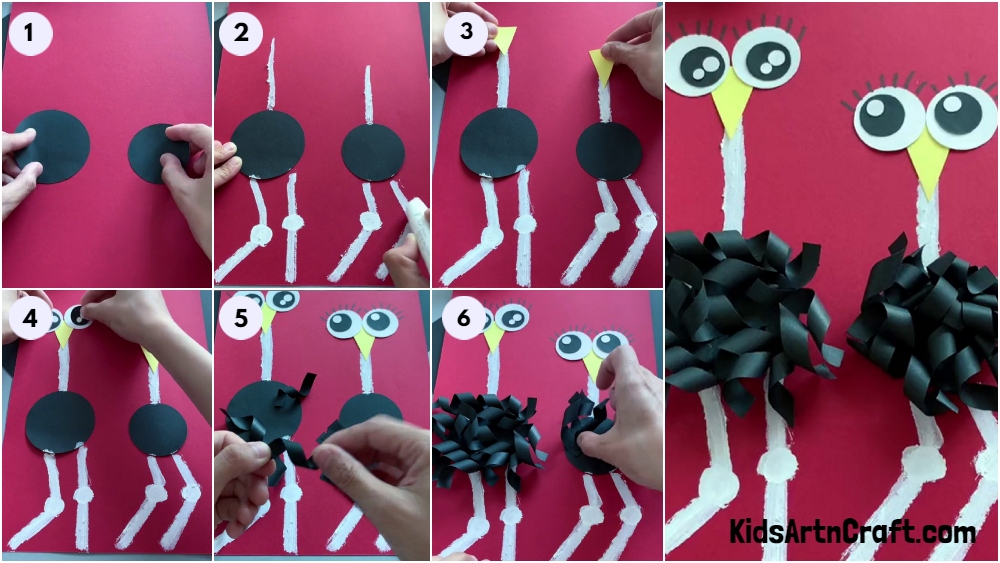
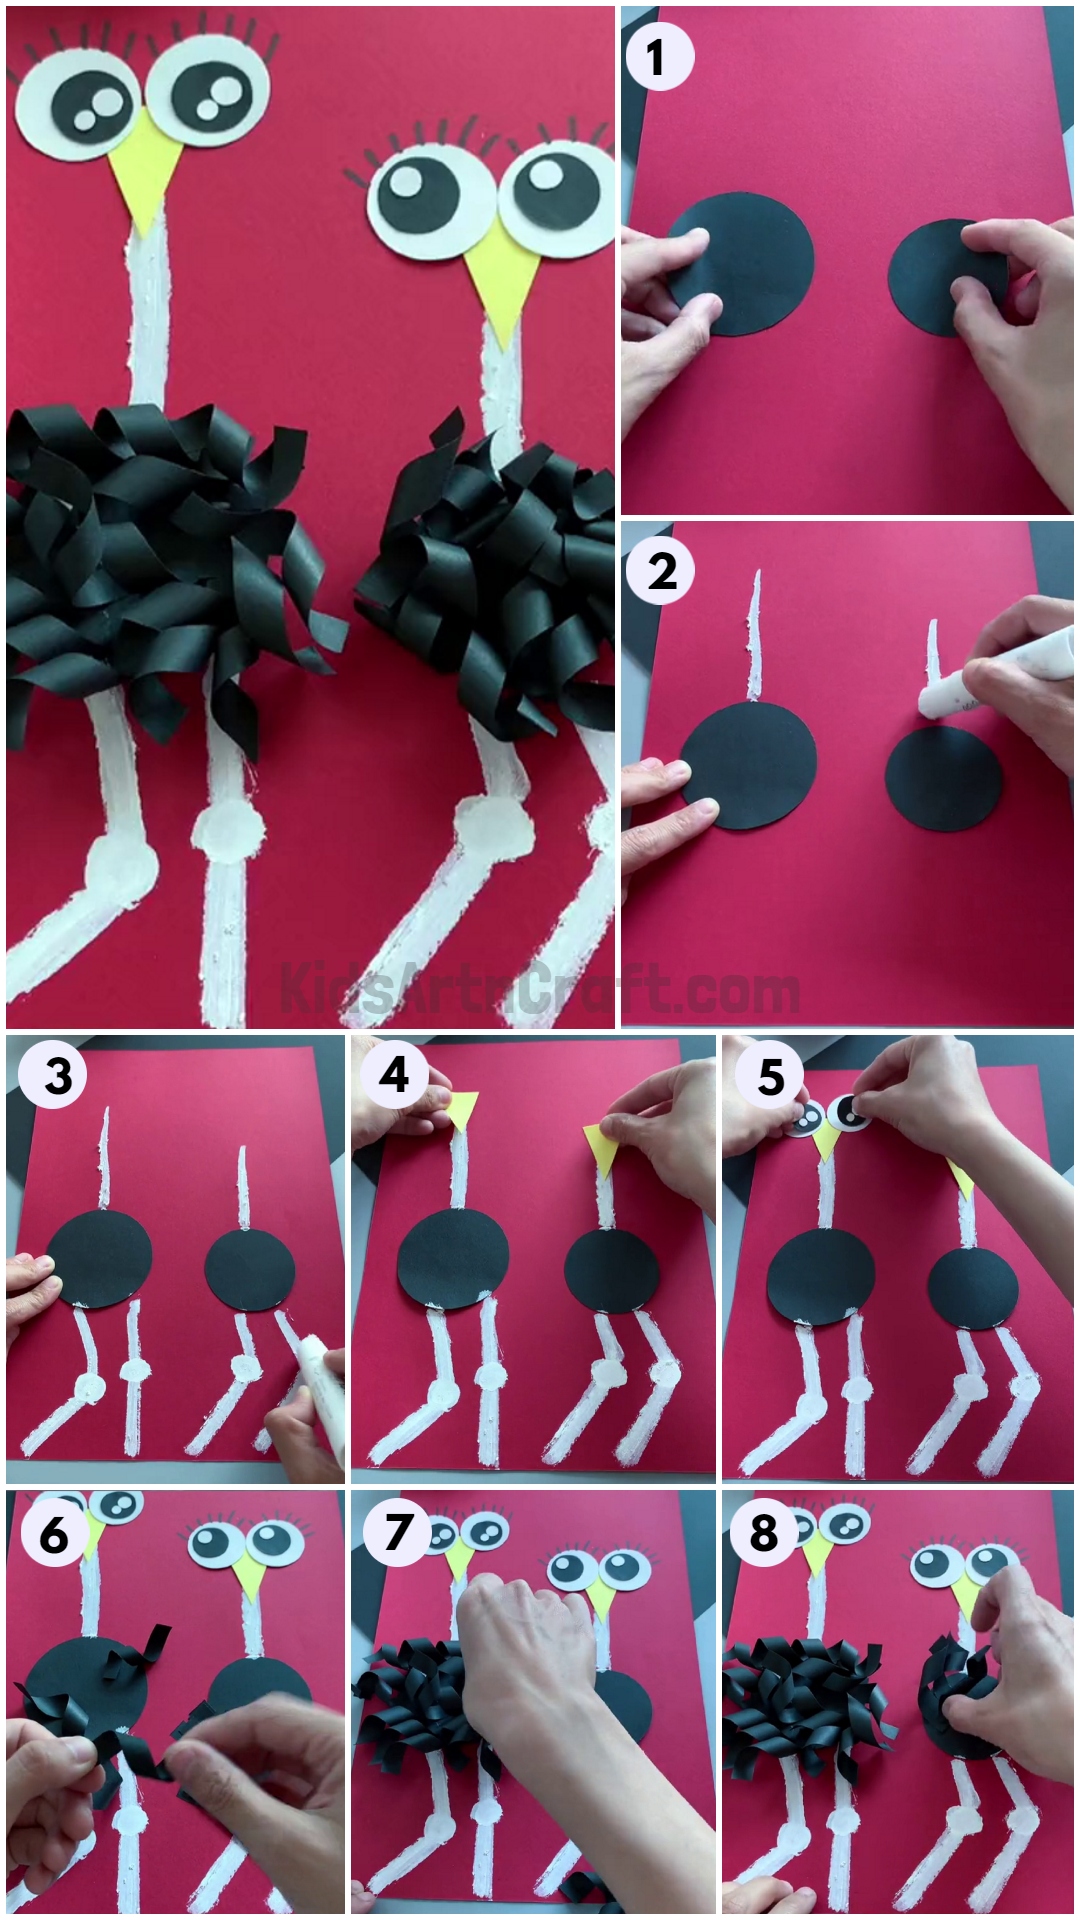
Step 1: Cutting Sheets In Different Shapes
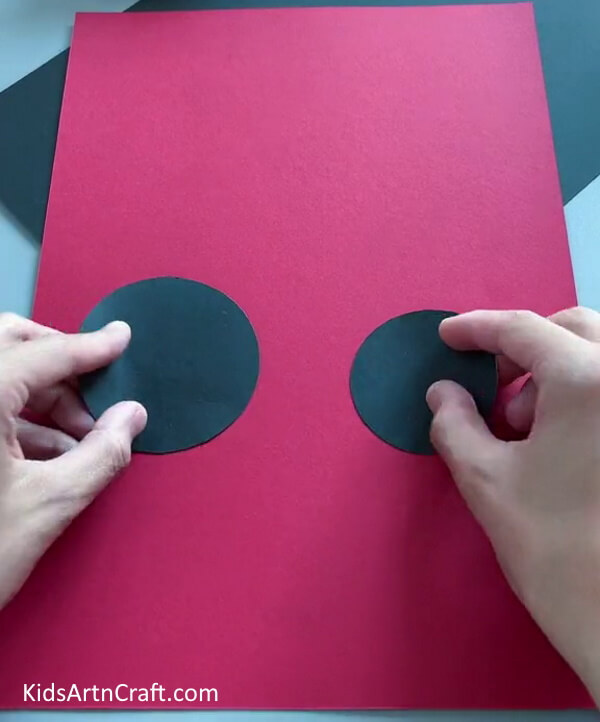
Take the black sheet of paper and cut it into perfect round shapes, one as big as your palm and another one, smaller than your palm. Take another sheet of paper in pink color. Now paste the bigger circle on the left side of this paper and the smaller circle on the right side of the same paper with the help of a glue stick. They should be parallel to each other.
Step 2: Giving The Circles a Body
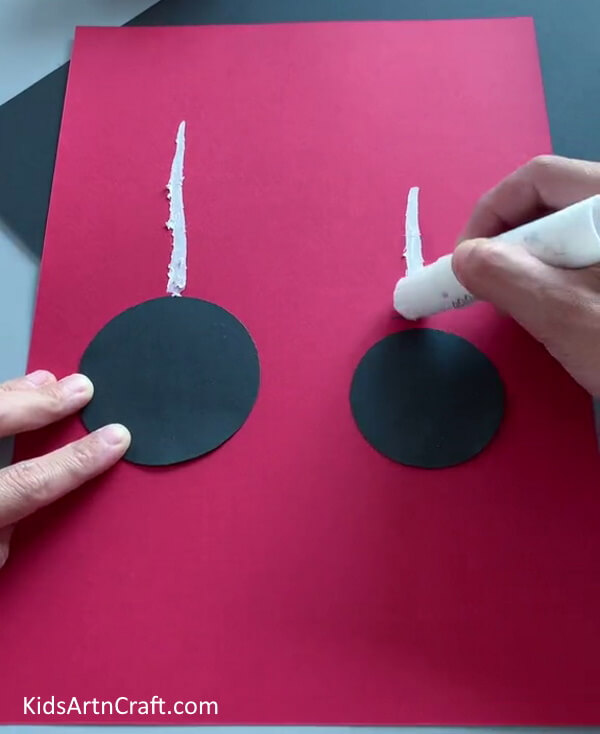
Take a white crayon and draw a thick line on the pink sheet just above both circles. The smaller circle should have a shorter line than the bigger circle.
Step 3: Add Some Legs To The Circle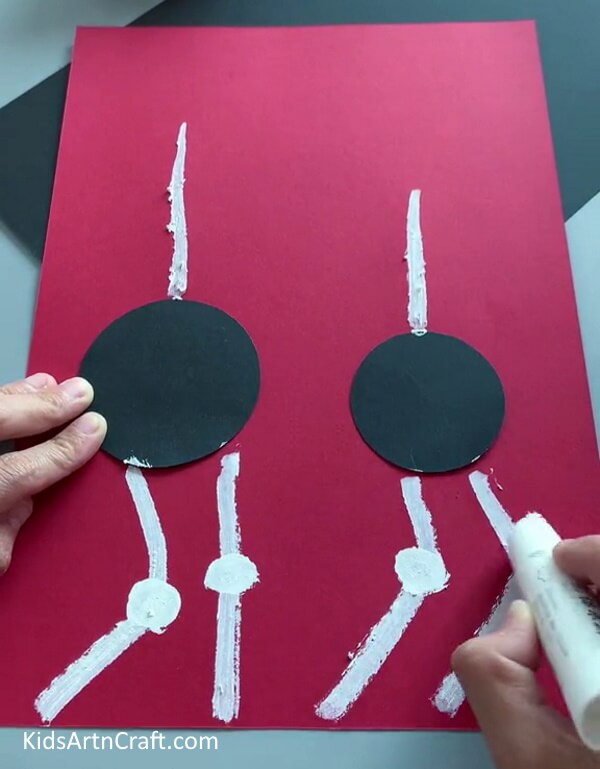
Take the same crayon and draw two thick legs on one of the circles. You can do that by drawing a slightly slanting line below the circle and a straight line next to it. Now, draw another slightly slanting line connected to the first line you drew in this step and another straight line connected to the second line you drew in this step. This step also includes making joints on the legs. To do that, take a white sheet of paper and cut two very small circles out of it, and paste them at the connecting points of the lines you drew in the step. Repeat the process on the smaller circle, right from drawing the lines to pasting the circles.
Step 4: Pasting The Beaks.
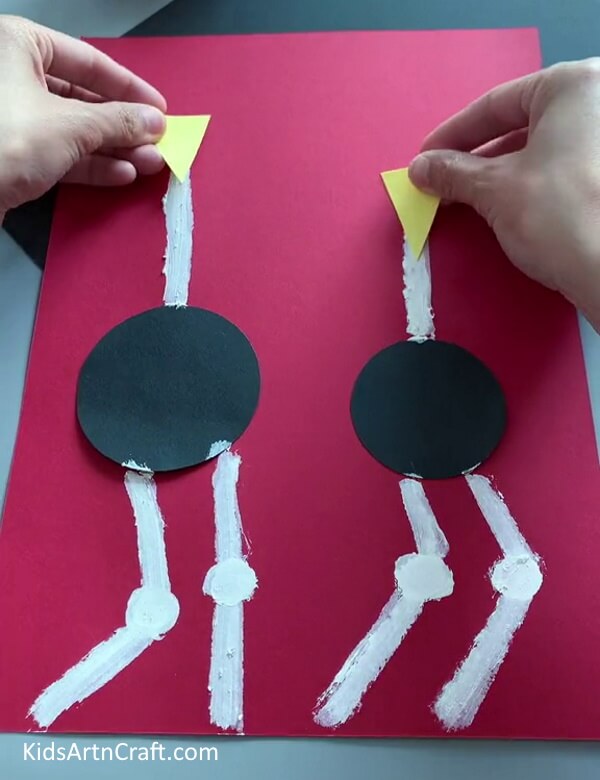
Take a yellow sheet of paper and cut two small triangular shapes and paste them on the top of the lines defining the body of the ostrich.
Step 5: Pasting The Eyes
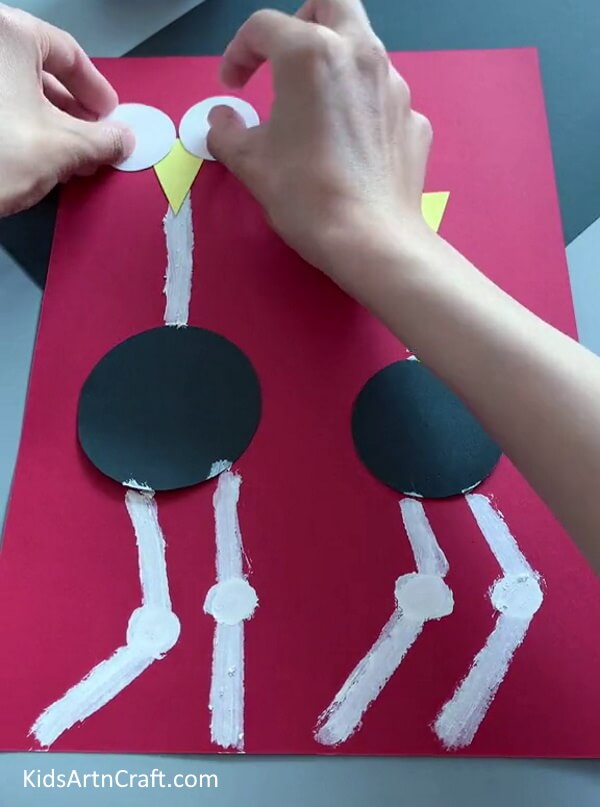
Take a piece of white paper and cut two small circles out of it and paste them next to each other on the top of the triangle you just pasted.
Step 6: Making The Eyes Look Real
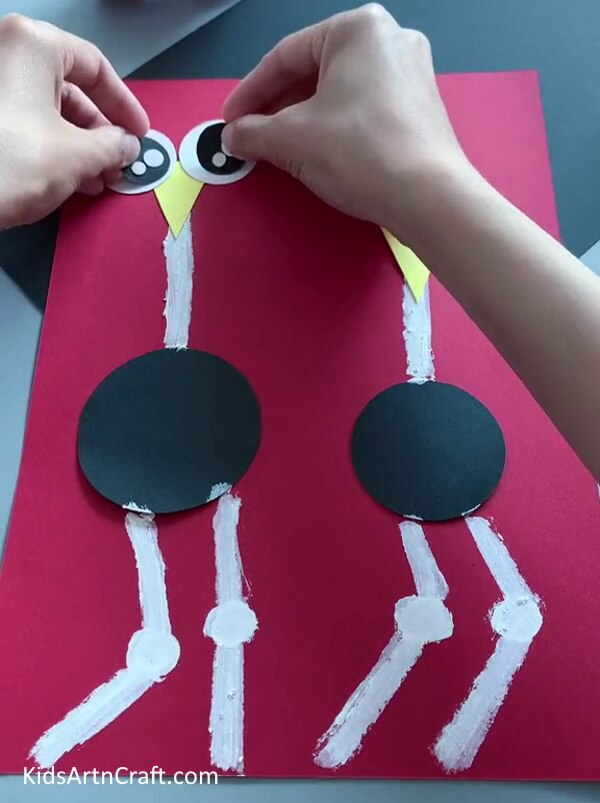
Take a black sheet of paper and cut it into two small circles. They should be smaller than the eyes you pasted. Now, take a white sheet and cut two circles out of it. These circles should be smaller than the black circle we made in this step and one of the circles should be smaller than the other. Paste the small white circles on the black circle next to each other, the bigger one being positioned slightly above the smaller one. And paste this black circle on the big white eyes of the ostrich. Do this on both eyes.
Step 7: Completing The Eyes
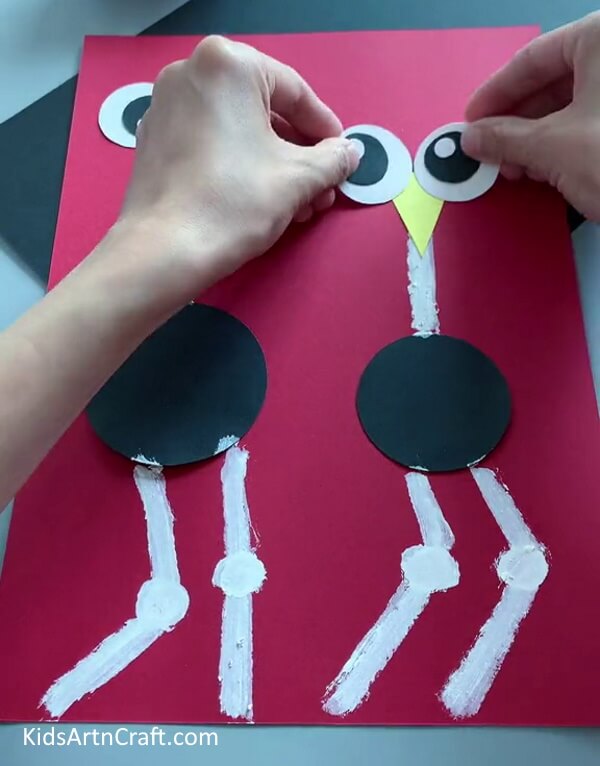
Repeat the entire process of making and pasting eyes right from cutting the bigger white circles to pasting the black circles on it, on both the ostriches.
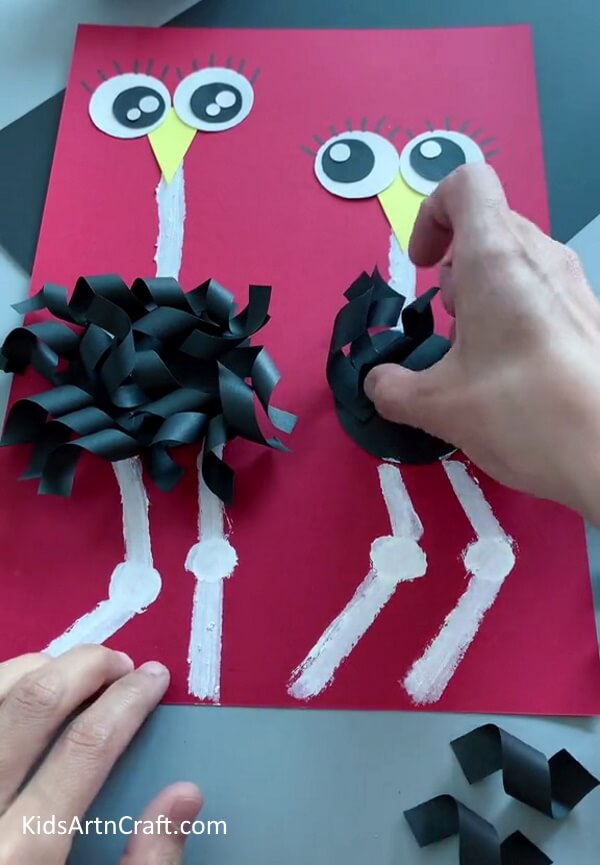
Step 8: Twisting The Strips
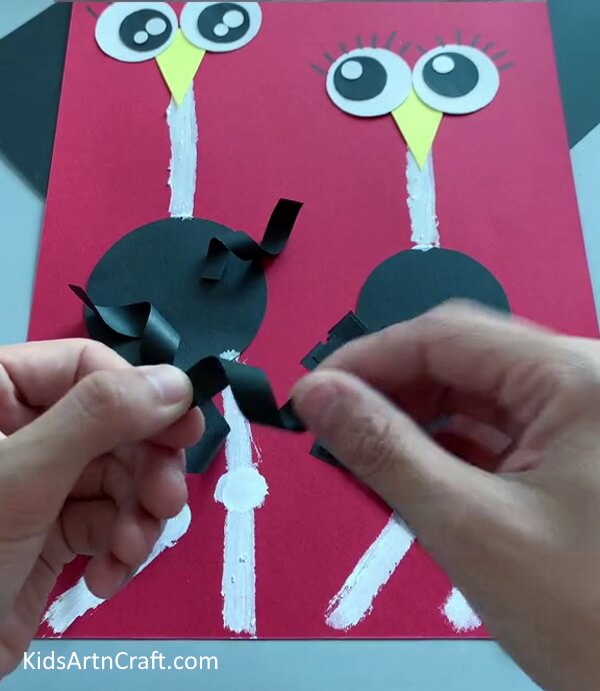
Take a black sheet of paper and cut small strips out of it. Strips should be large in number. Twist these strips to achieve a spiral shape. It’s a long process and might take some time but will teach an important art lesson. Add some lashes to the eyes of the ostrich. That can be done by drawing lines above the eyes on the pink sheet. Repeat the process on both birds.
Step 9: Pasting The Twisted Strips
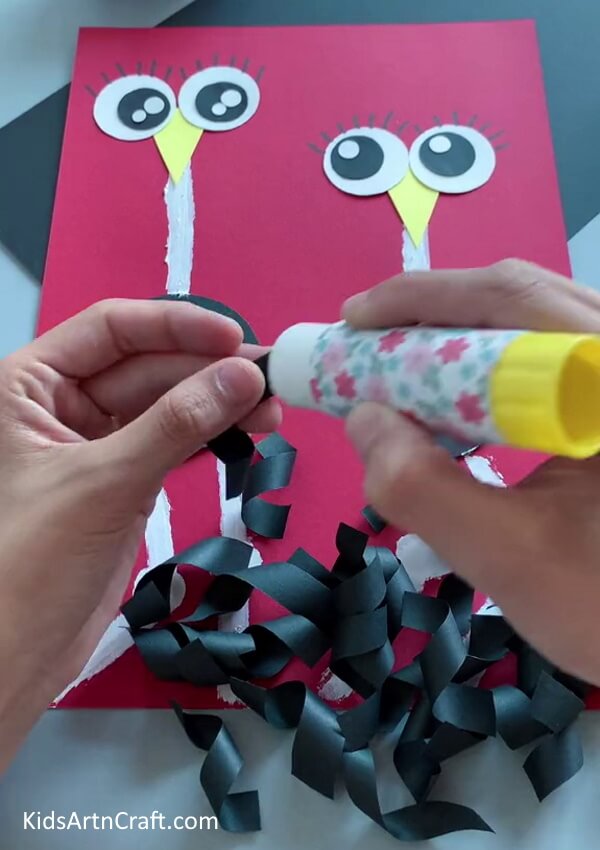
Take a glue stick and start pasting the strips on the big black circle.
Step 10: Adding Feathers
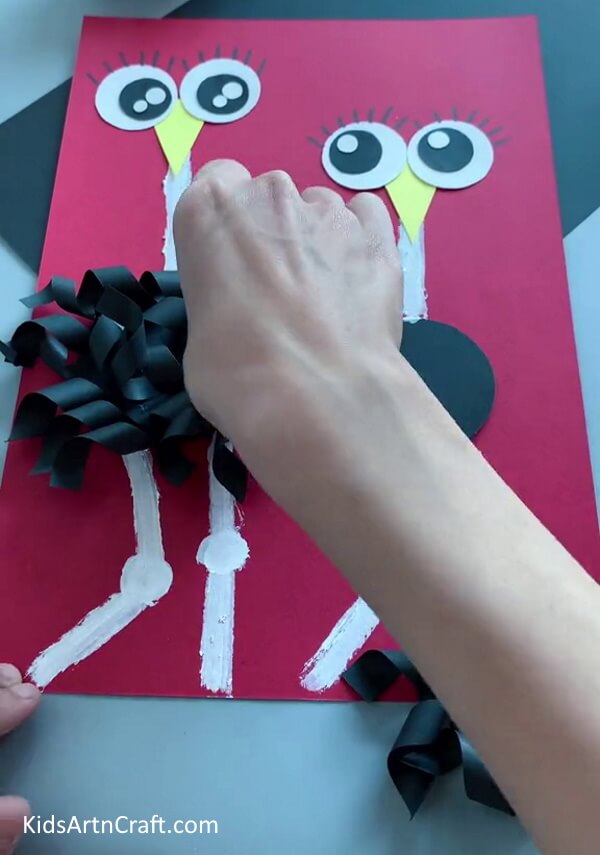
Cover the entire circle with these strips until it looks like the picture below.
Step 11: Doing The Same On The Other Ostrich
Repeat the process on the smaller ostrich. This completes the process of adding feathers to the bird.
Beautiful Bird!
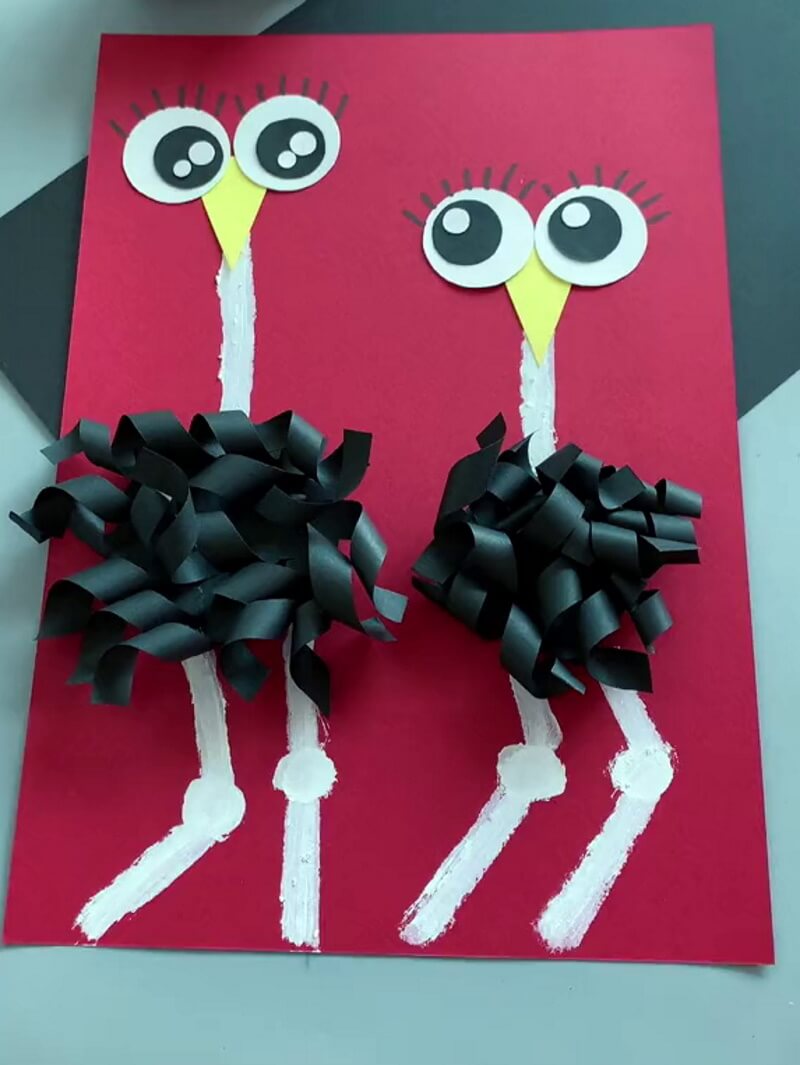
This leaves us with these adorable ostriches with thick feathers, lashes, bright beaks, and twinkling eyes.
We completed yet another marvelous piece of craft that can be hung on the walls of your bedroom, fridge, or even drawing room for your entire family to witness your artistic excellence. You can also submit it as an art project to your class and who knows, it might feature in the school yearbook or even be used to decorate classroom walls or school hallways. Try making more of such animals especially birds as you now know how to add feathers and make beaks. Keep experimenting with new ideas and don’t forget to use these techniques on them. Start easy and keep practicing it to achieve more complex techniques and art smoothly.
Follow us on Youtube for art and craft tutorials and much more.
More Articles from Kids Art & Craft
- DIY Easy Paper Cup Octopus Craft For Kids
- Easy Paper Robot Craft Step By Step Tutorial
- DIY Easy Paper Strawberry Tutorial For Kids
- Step-by-Step Drawing Tricks Video Tutorial for Beginners
- How to Make Bubble Wrap Corn Craft Easy Tutorial