Recycled Crafts
Easy Egg Carton Pigs Step by Step Tutorial For Kids

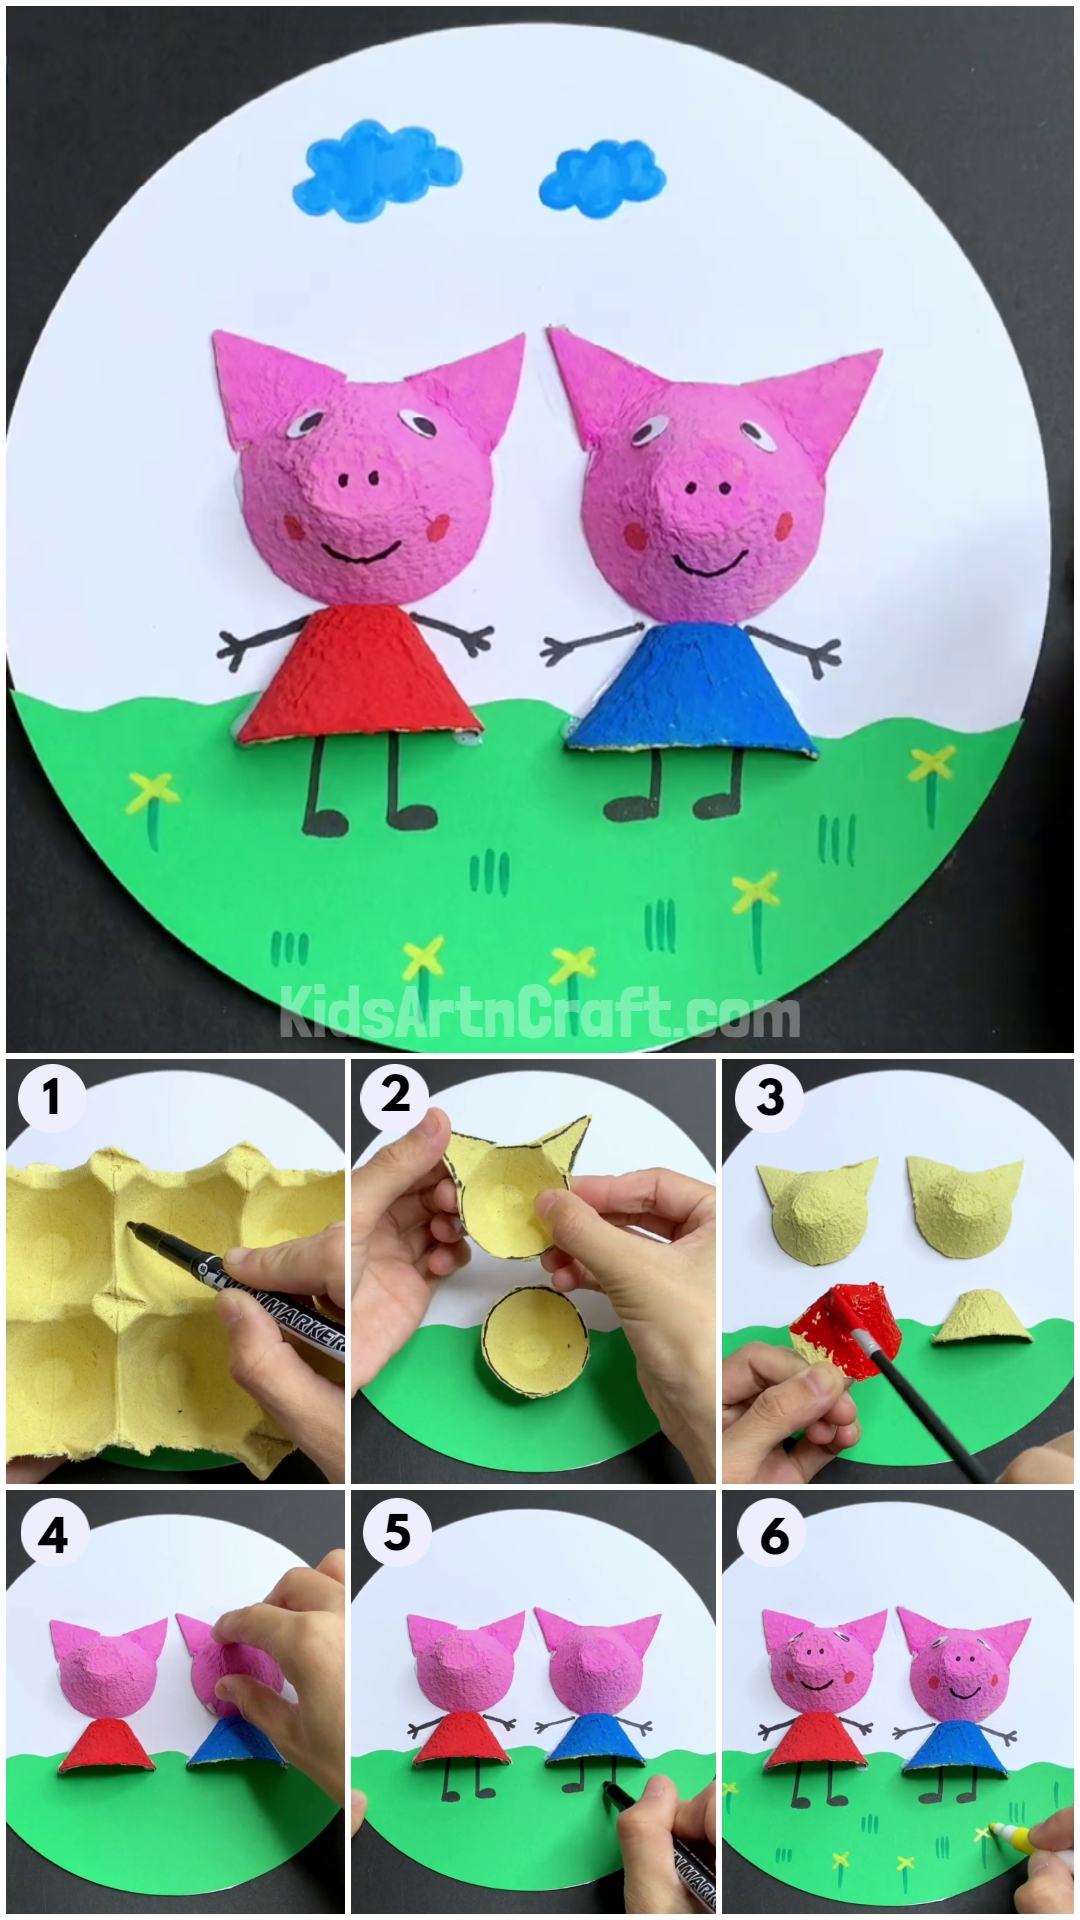
Make a cute egg carton pig craft with your kids with this easy step-by-step tutorial! This fun activity is perfect for kids of all ages and will keep them entertained for hours. Get creative and make your very own piggy family with supplies you have around the home!
Empty egg cartons are versatile and can be made into a variety of interesting craft items. If you are looking for a pig animal craft using egg cartons then you are in the right place! We present to you an easy tutorial on making a pig animal craft from an empty egg carton in a few simple steps. Reusing empty egg cartons is an eco-friendly step. This activity will be greatly loved by your kids and will also be a perfect example of your hard work and crafting skills. Grab your craft supplies and let’s get started!
Reuse Egg Carton Pigs Animal Craft Idea For Kids To Make

Read More: How to Make Bubble Wrap Corn Craft Easy Tutorial
Materials Required
- Empty Egg Carton
- Scissors
- Sketch Pens
- Watercolors
- Colored sheets(Green, White, Black)
- Glue
Procedure
Step 1: Drawing The Pig

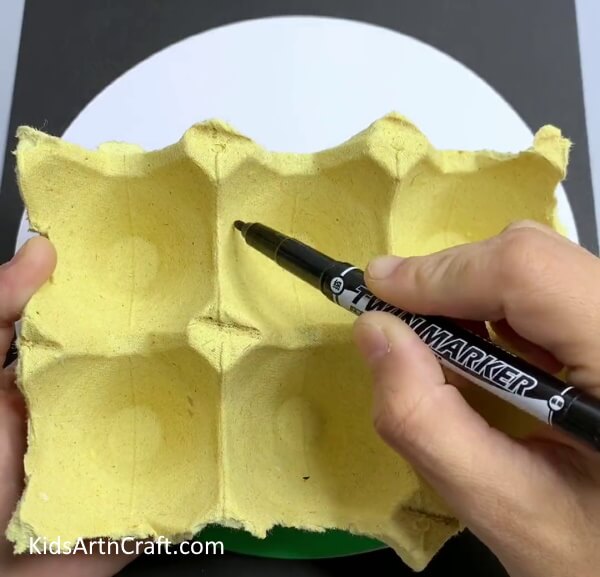
Using a black marker, create the shape of the face of a pig with ears on one of the containers. Then, create a circle shape on the other container.
Step 2: Cutting The Pig

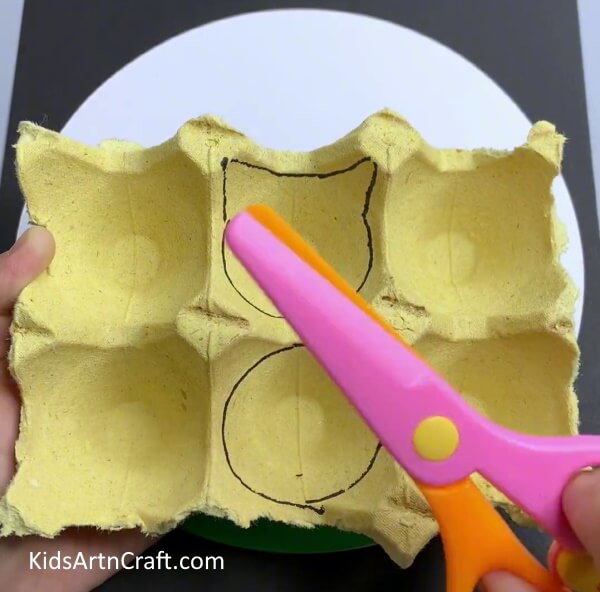
Now, using a pair of scissors, you are supposed to cut these shapes out.
Step 3: Taking Both Shapes Out

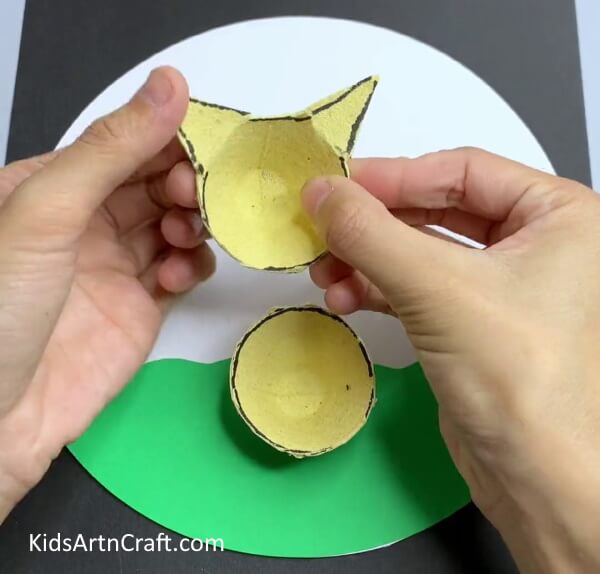
Now, take both shapes out and adjust the ears by folding them. Side by side, take a white-colored sheet of paper and cut it into the shape of a circle then, take a green-colored sheet of paper and cut it in a wavy pattern. Finally, using the glue, paste the green sheet on the white one.
Step 4: Cutting One Of The Shapes


Now, take the circular container cutout, and using the pair of scissors, cut it as shown.
Step -5: Painting The Cutouts

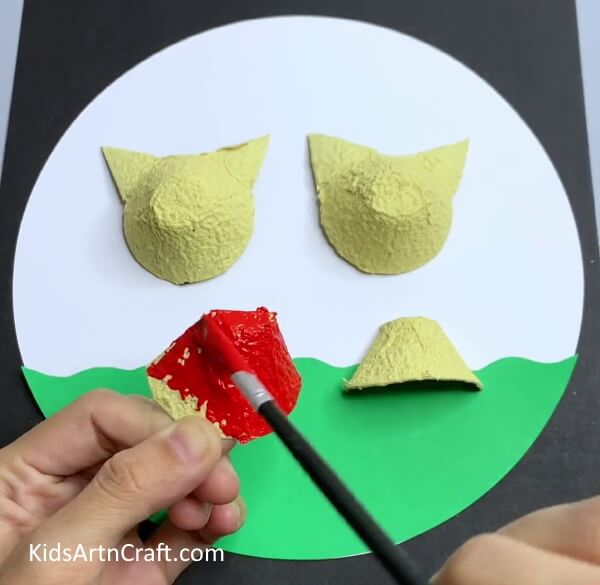
Now, take the final cutout and using the paintbrush, color it red.
Step -6: Pasting The Cutouts

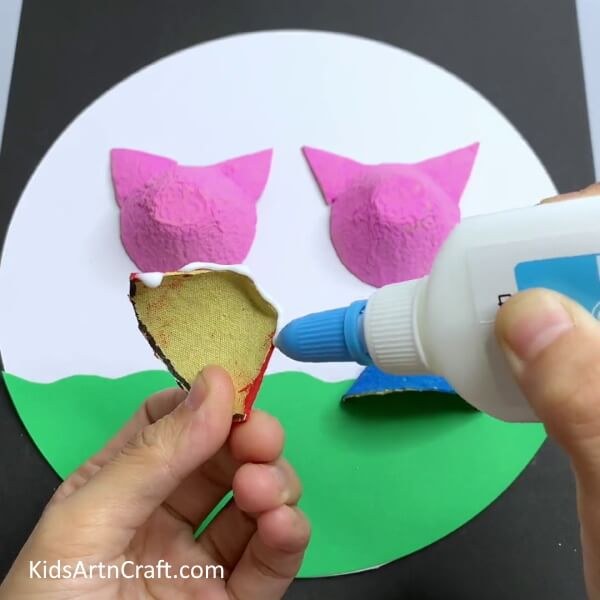
Then, using pink color, paint the faces of the pigs. Once the paint on the cutout dries off, paste it on the paper design as shown.
Step -7: Pasting The Other Cutouts

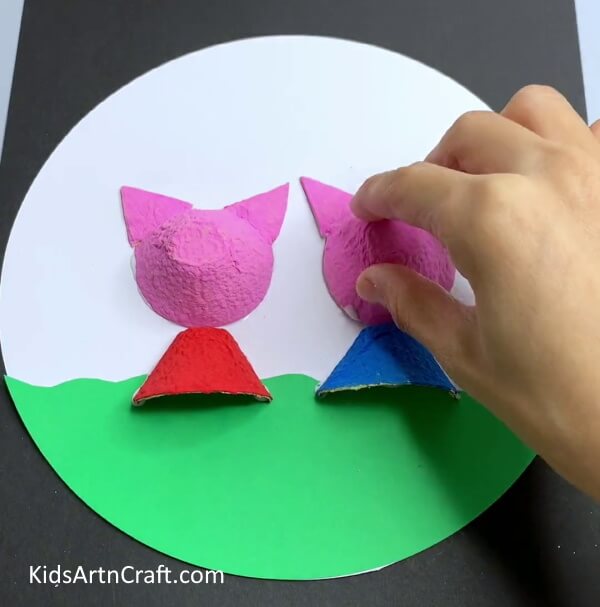
Now, paste the cutout using the glue for the other pig too.
Step -8: Drawing Hands And Legs Using A Marker

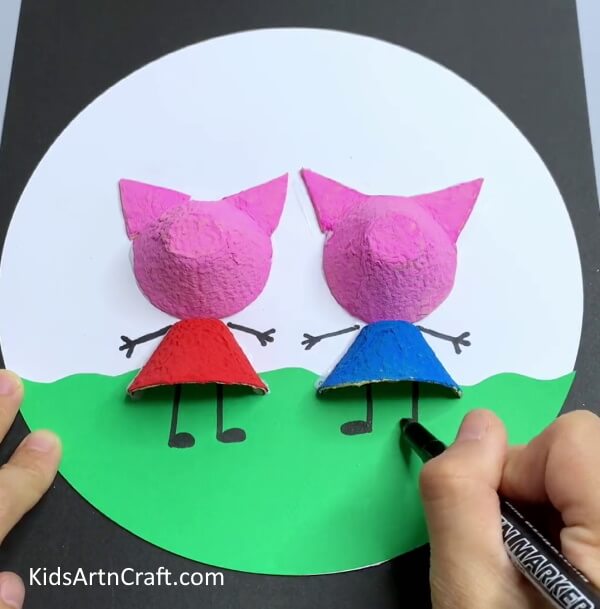
Now, take the marker and draw the hands, legs, and shoes of the pigs.
Step -9: Adding Eyes To The Pigs’ Face

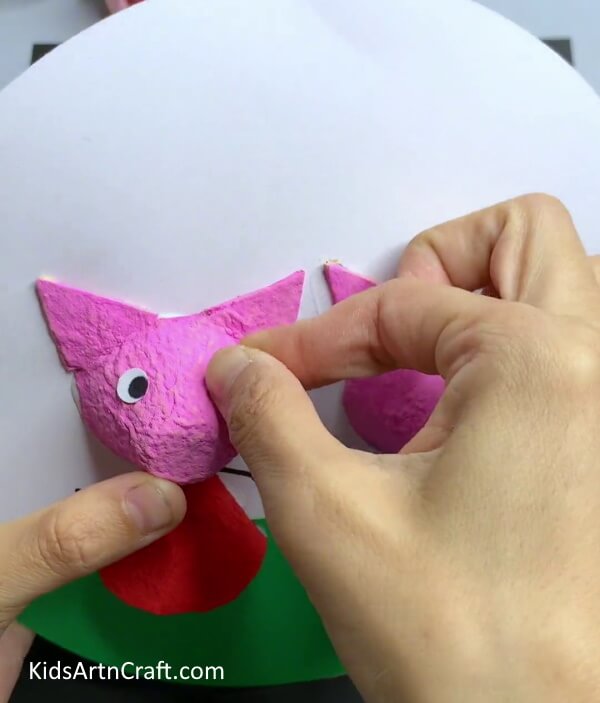
Now, take another white sheet and cut a small circle out of it, then take a black sheet and cut another circle smaller than the previous one. once you paste them together, you will get the eyes for your pigs.
Step -10: Adding Nose, Blush, And A Smile!

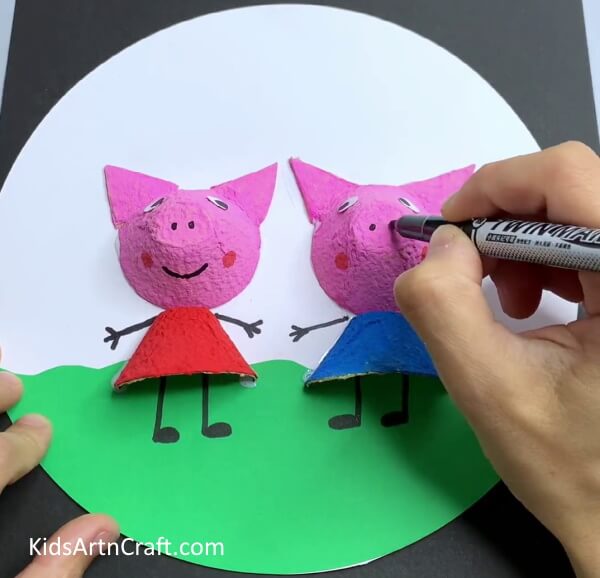
Now, add details such as smile, nose, and blush to your pig using markers.
Step -11: Adding Other Details On The Garden

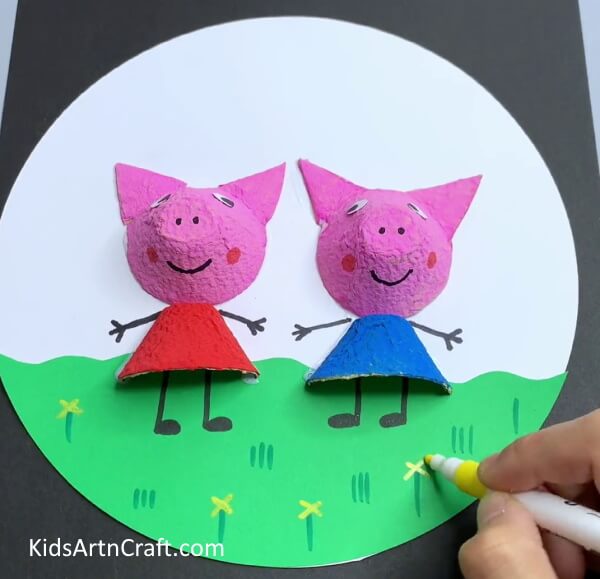
Now, take the yellow and green colored markers and add details of the garden such as plants and flowers.
Welcome To The Peppa Pig World Of Animations !!

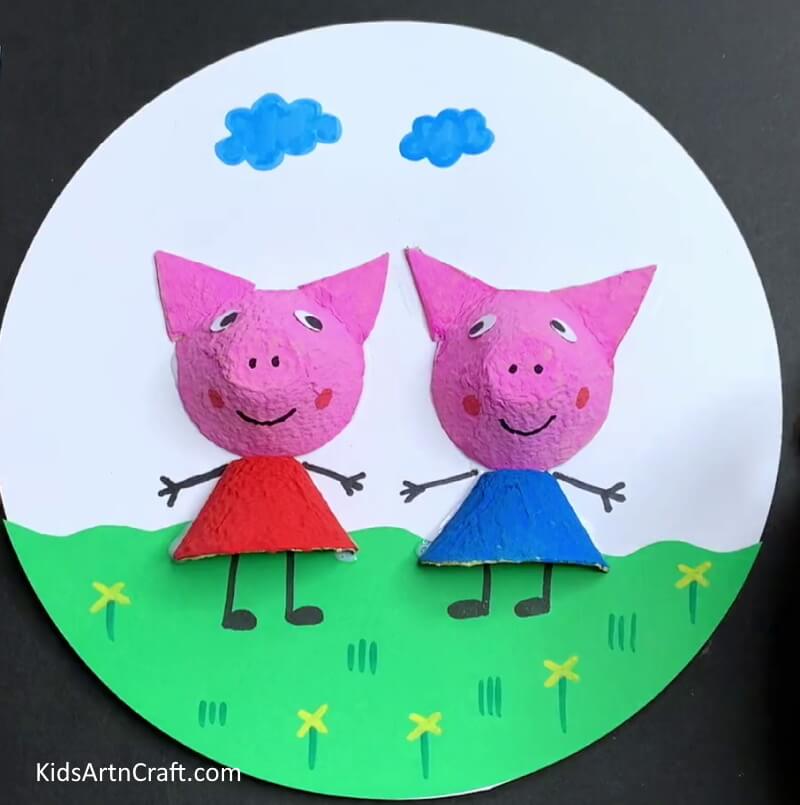
Look at this amazing craft idea, this one is suitable for quality time with pre-scholars and toddlers and can be created by their siblings or parents. The best part about this idea is that it allows the little ones to understand that the use of creativity should not be restricted to just canvas and other expensive materials. Other than promoting the best out of waste, this one can also become one of the best decorations adorning your kid’s room. I mean, who doesn’t love Peppa Pig, right? Have fun with this idea, check our other posts for more such amazing art and craft activities, and let us know how you feel in the comment section!!
Follow us on Youtube for art and craft tutorials and much more.
More Articles from Kids Art & Craft
- Water Bottle Airplane Tutorial for Kids
- Easy to Make Handmade Bee Craft Tutorial for Kids
- How to Make Handmade Straw Fan Tutorial for Kids
- How To Make Pine Cone Mouse Craft For Kids
- Easy Dinosaur Craft Step-by-Step Tutorial For Kids