Clay Crafts
Cute DIY Frame Full of Emotions Clay Craft- Step-by-Step Tutorial

Learn how to make an adorable, heartfelt gift for someone special using this guide. Perfect for any occasion, this thoughtful present will definitely bring a smile to your loved one’s face!
Are you looking for a unique way to express your emotions? This step-by-step tutorial will show you how to make a cute DIY frame full of emotions. This project is perfect for any occasion and is sure to be a hit with all your friends and family. With just a few simple supplies, you will be able to create a beautiful and meaningful craft that will be treasured for years to come.
Cute DIY Frame Full of Emotions Craft

Read More: Easy Paper Butterfly Craft For Kids
Materials Required
- Yellow Sheet of paper
- White and Green Craft Paper
- White Clay
- Black and Red Sketch pens
- Googly eyes
- Scissors
- Glue
- A Photo Frame
Procedure
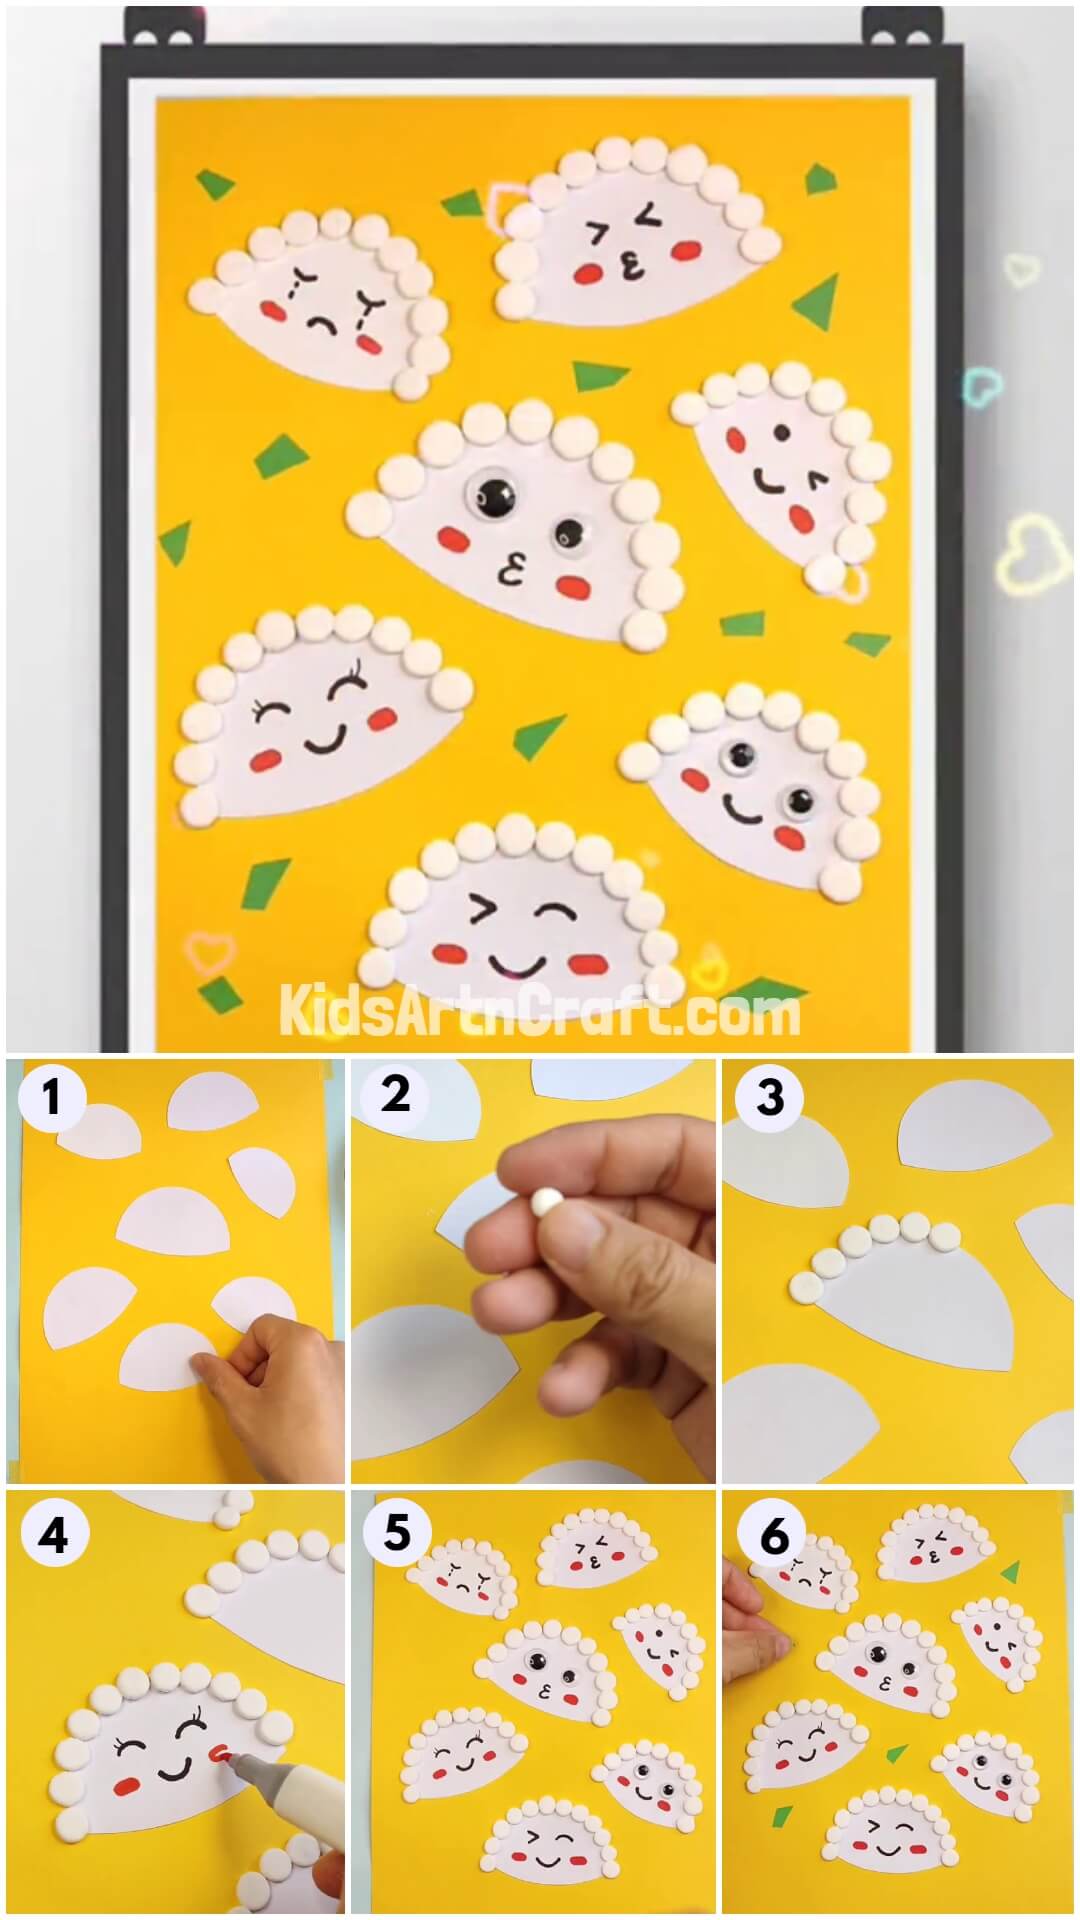
Step 1: Making the Faces of the Family
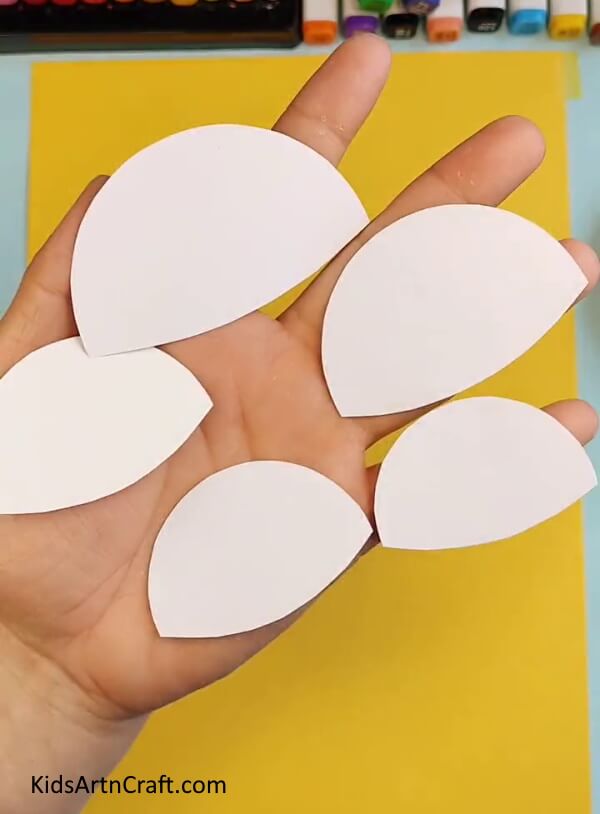

Your first step would be to cut out the faces of the family members you will be sticking on the frame. Take your white craft paper and draw on it 5 to 6 semi-circles with a straight line and a little curved. These semi-circles should be of different sizes. Grab your scissors and cut these semi-circles.
Step 2: Sticking The Semi-circles
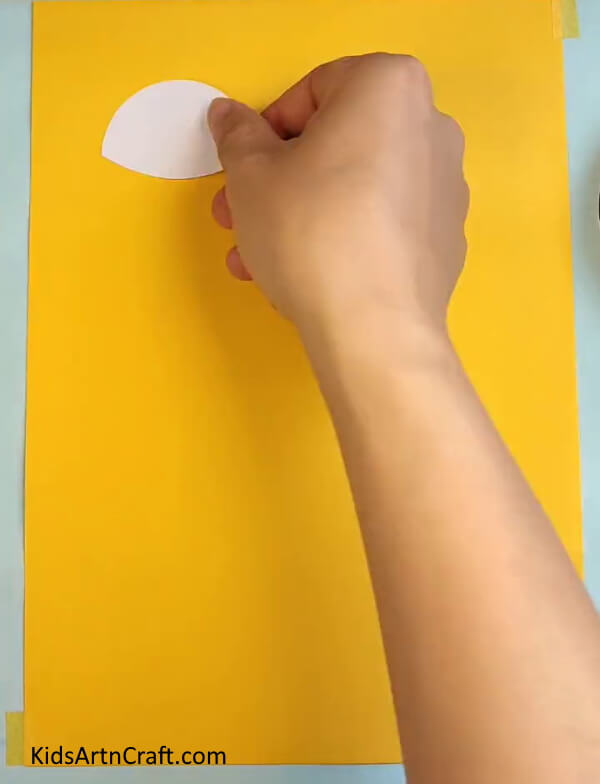

Once you have all the cutouts, start sticking them on the yellow sheet of paper one by one. Start by sticking the first semi-circle in one corner. Make sure you stick each cut-out in different positions and maintain a distance between them.
Step 3: Keeping Sticking
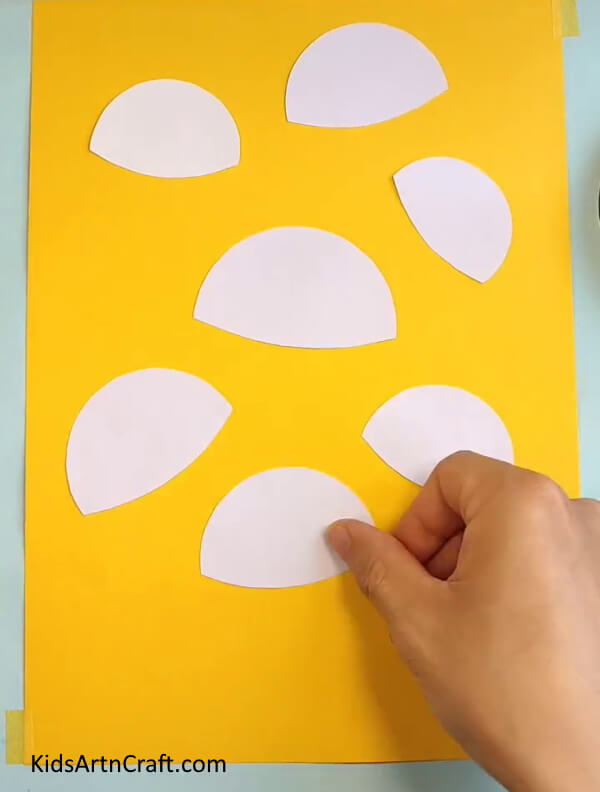

Keep sticking! Once you’re done sticking all of the semi-circles, make sure it looks nice and pretty.
Step 4: Making the Hair Using Clay
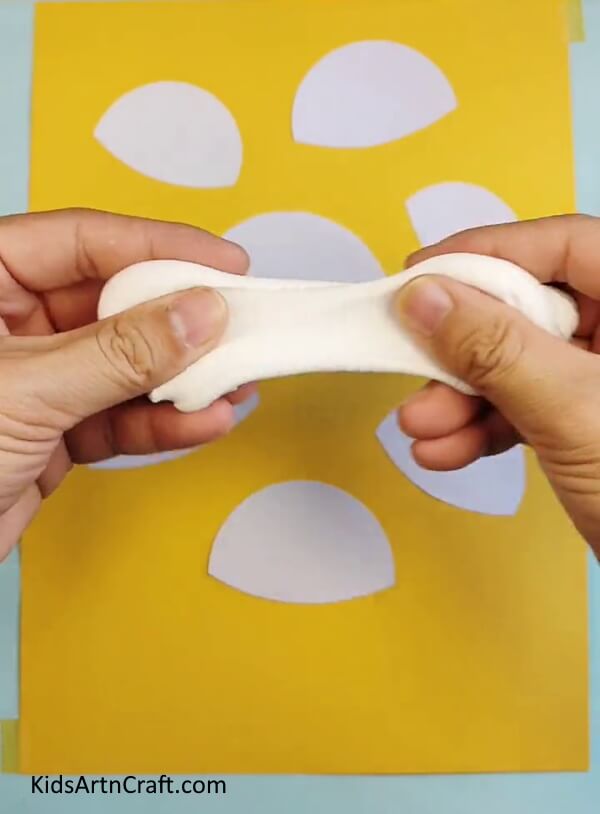
Now, grab your white clay and knead it to loosen it up. Once loosened up, prepare to use it to make tiny balls.
Step 5: Making Tiny Balls Using Clay
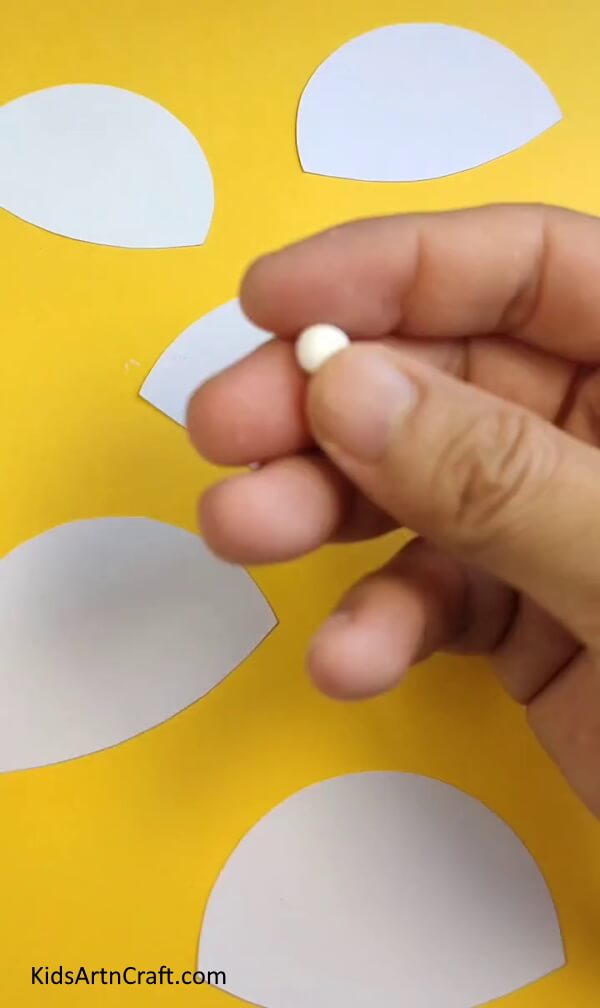

Using the clay, tear small pieces and roll them into balls. Make as many balls as you can. You will be using these balls to make the hair of your photo frame family.
Step 6: Sticking The Hair
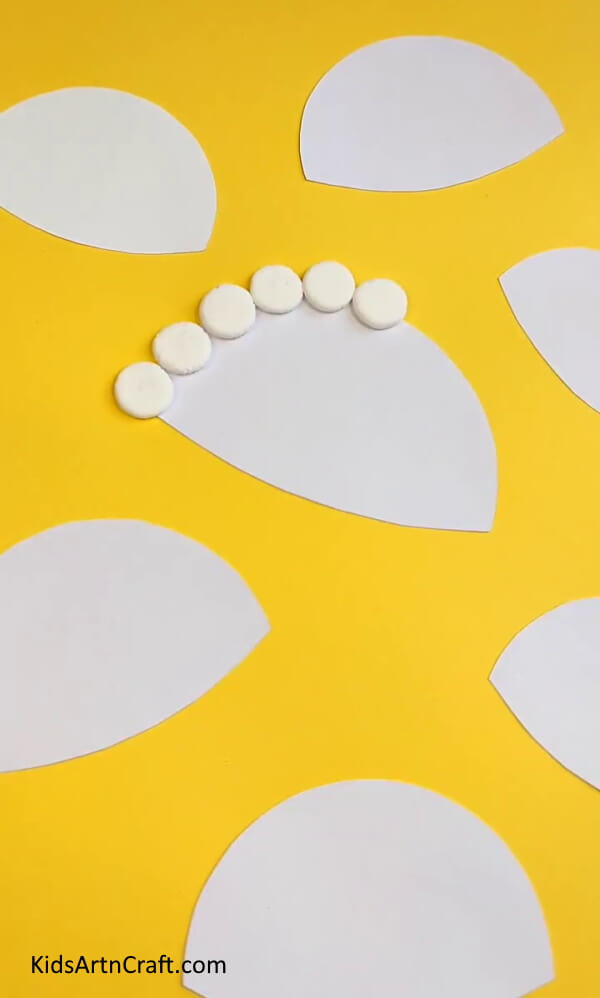

Next, take a clay ball and stick it in a semi-circle. Start by sticking from one corner of the semi-circle and keep sticking to the other corner. Make sure to stick them close to each other.
Step 7: Keeping Sticking
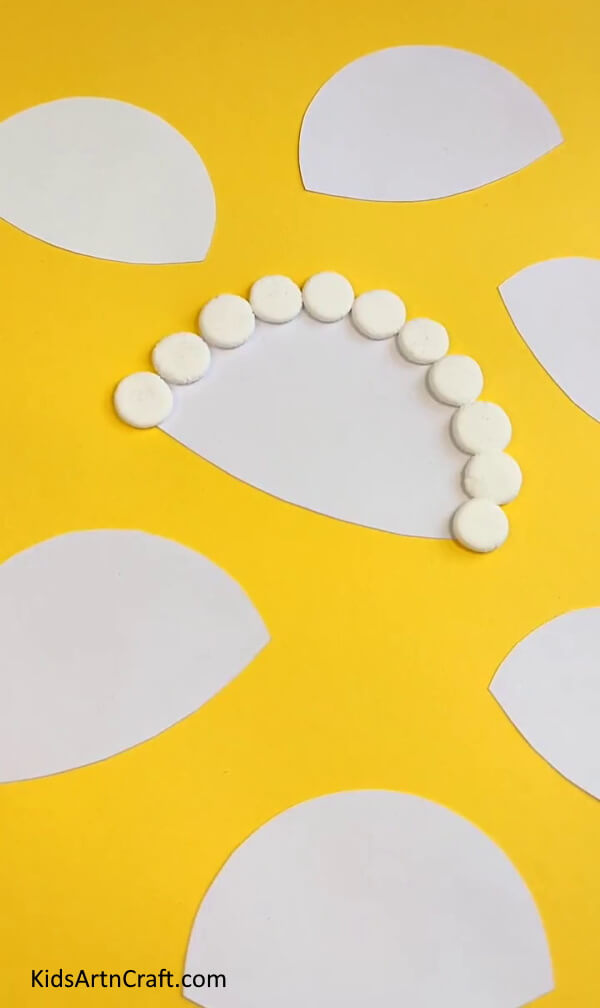
Keep sticking your clay balls just like you did for your first semi-circle. Start on your other semi-circles and stick them in a similar manner.
Step 8: The Hair Of Your Frame Family


Ta-da! You are now all done with the hair of your DIY frame family. Make sure all the clay balls are stuck properly.
Step 9: Making The Faces
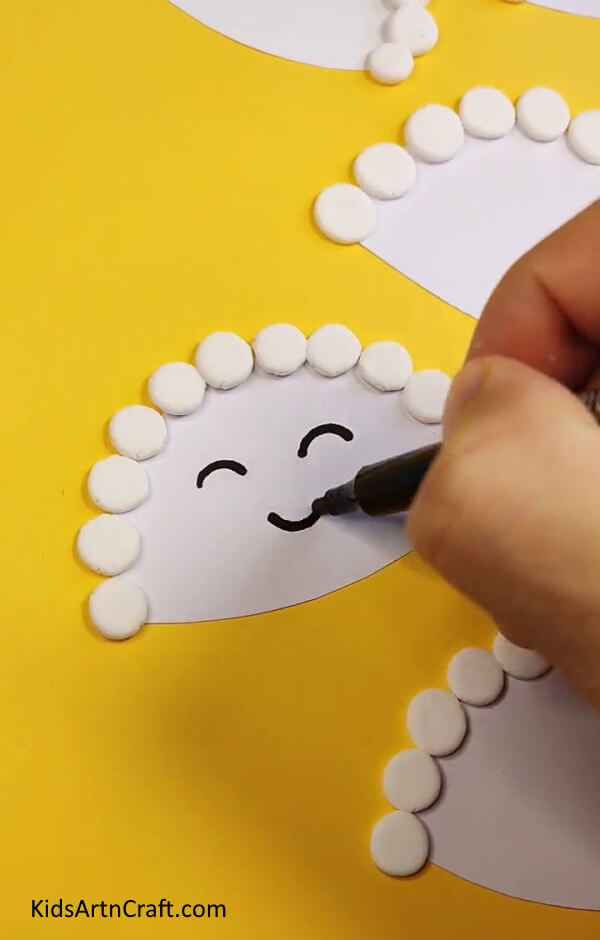

You will now start with the faces of your family! Grab your black sketch pen and draw eyes and a mouth for your first member!
Step 10: Adding Some Blush
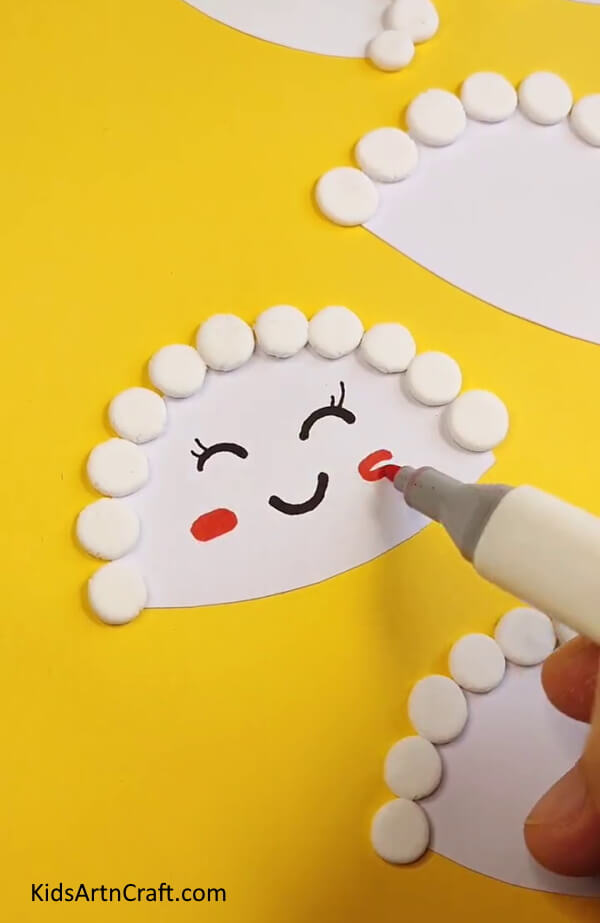

Take your red sketch pen and add two red circles to the cheeks of your first family member. This makes them look even cuter!
Step 11: Making All The Faces
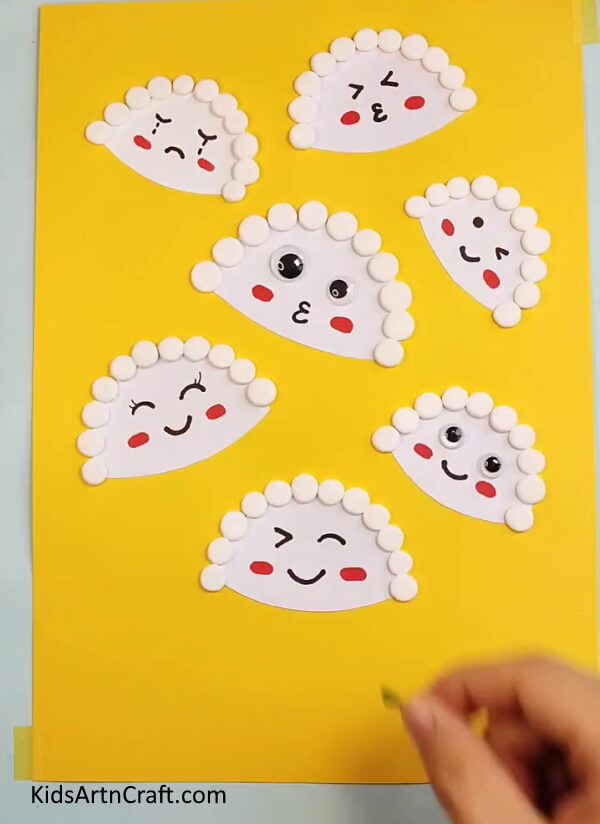

Now go on to add faces to all the members. Makes different expressions and you can even add googly eyes to make them funnier!
Step 12: Final Touches
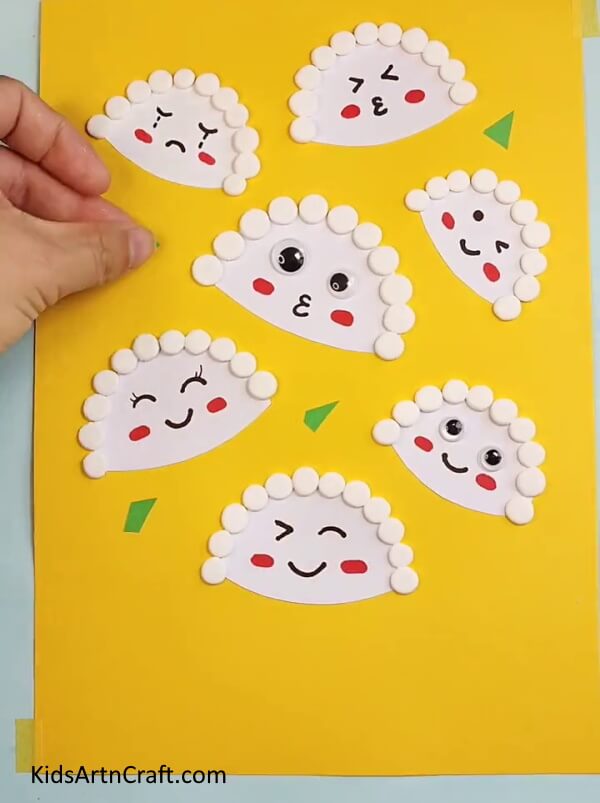

Now on to the final touches! Take your green craft paper and cut out a few confetti-like triangle pieces from it. They should be small and not too big. Stick these pieces onto the yellow sheet. Stick them in convenient gaps and make sure to not make it look stuffy.
Your Craft Is Ready!!
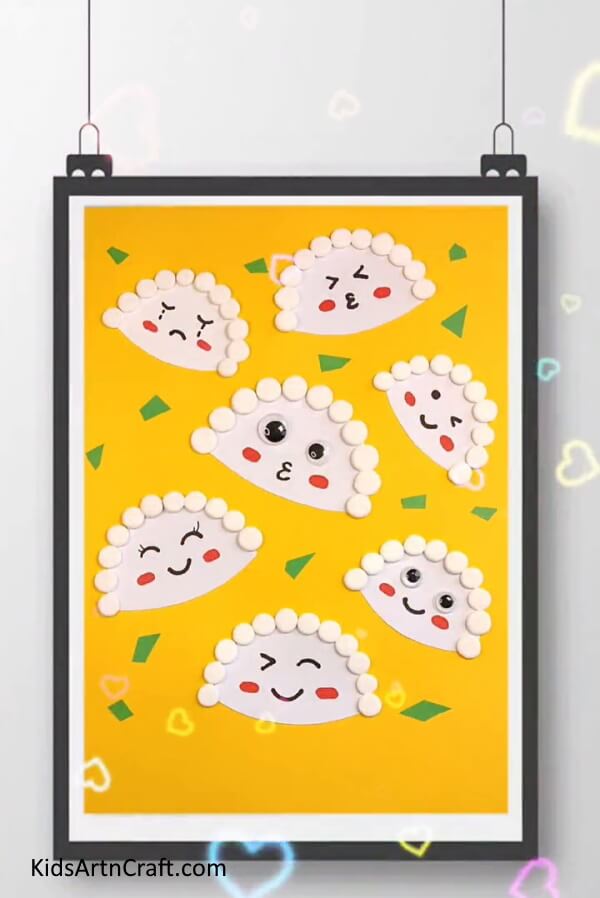

There we have it! Now grab your frame and just stick or slide your craft on or in it. And your Frame is ready!
With this easy tutorial, kids can make an easy and beautiful craft in minutes. Use it as gifts or decorations. You can get even more creative by drawing more details on the sheet. This DIY is engaging, fun and creative and will be liked by all kids! So give it a try and engage your kids in a fun craft-learning activity!
Hope you like this Cute DIY Frame Full of Emotions step-by-step tutorial. We would love to hear your thoughts in the comment section below. And be sure to visit our other articles for more ideas!
Thank You for visiting our website!
Follow us on Youtube for art and craft tutorials and much more.
More Articles from Kids Art & Craft
- How to Make Clay Flower Easy Tutorial for Kids
- How to Make Worms Using Clay For Kids
- DIY Clay Giraffe Step-by-Step Tutorial For Kids
- Simple & Tasty Ice-Cream Craft Using Clay – Step-by-Step Tutorial
- Simple Paper Crab Craft – Step-By-Step Tutorial