Paper Crafts
Love Paper Envelop Origami Step by Step Tutorial

Make a pretty envelope with a heart over it! Give it to someone special with love filled in this with this DIY envelope step-by-step tutorial!
Whoa! Look at this prettiest envelope! You can create it too with our amazing step-by-step tutorial for making this envelope in a blink of an eye! This love envelope will be a perfect fit for Valentine’s week or even you can make it for your loved ones for making thier day special! This tutorial involves just some easy turns and folds over a paper to form this amazing envelope! Origami can also be the perfect afternoon activity in the boring hours to engage in a fun learning activity that will help drive those motor skills! This will be a budget-friendly alternative that will even look expensive to the one whom you gift it to!
DIY Love Paper Envelop Origami


Read More: DIY Origami Fruit Using Craft Paper For Kids
Materials Required
- 2 Floral-Print Origami Sheets
Procedure
Step 1: Folding The Paper In Half

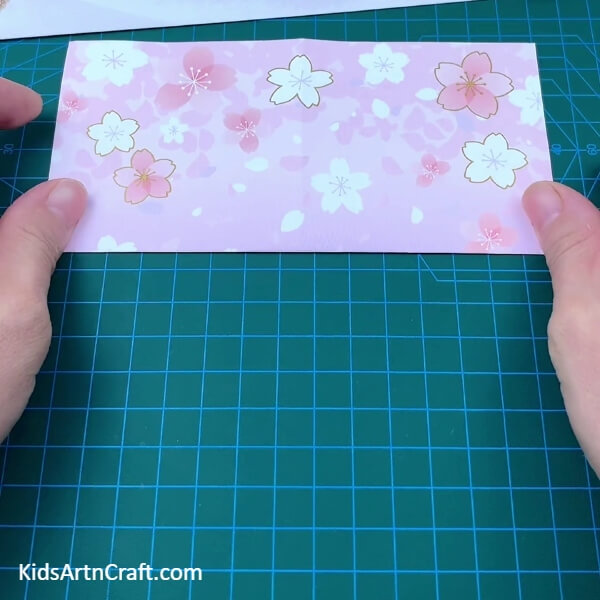
Let’s begin this craft by taking a flower print origami sheet. Now, fold the paper in half, make a crease then unfold it.
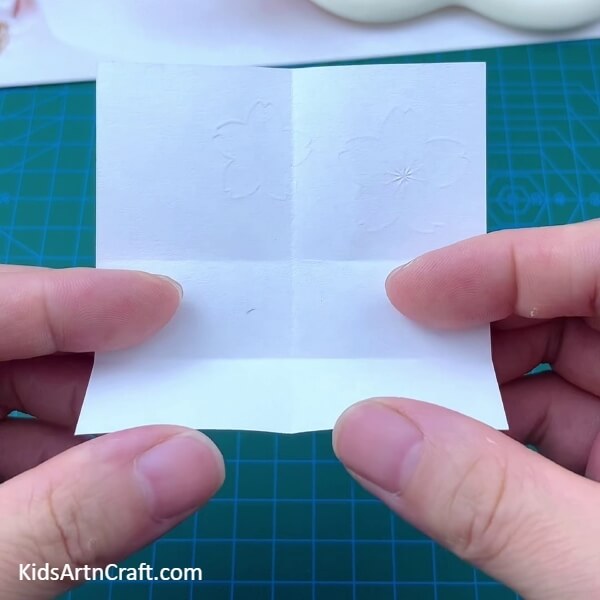
Step 2: Making A ‘+’ Crease
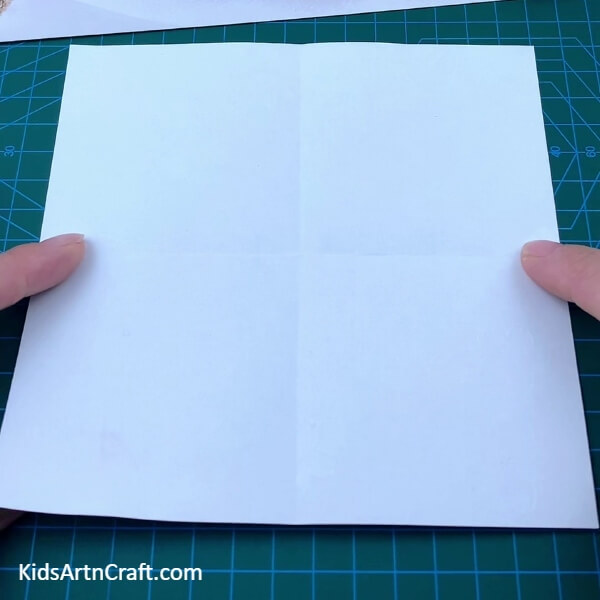
Again fold it in half, make a crease to form a ‘+’ crease over the paper, and unfold it.
Step 3: Folding The Paper Half And Half Of Horizontal ‘+’ Crease
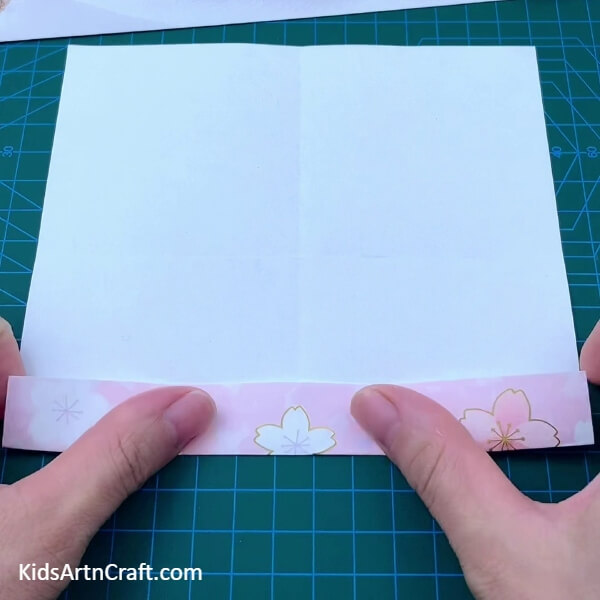
Fold the paper’s bottom side to the horizontal crease, make a 1/4th crease, and unfold again. Again fold the bottom side to the formed crease and make a 1/8th crease and unfold again.
Step 4: Folding The Paper To The 1/4th Crease
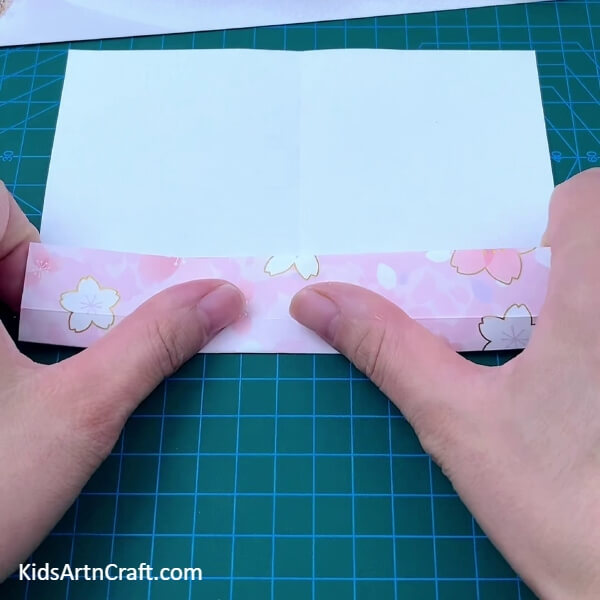
Again fold the bottom side of the sheet to the 1/4th crease and make a crease.
Step 5: Folding The Corners To Form Triangles
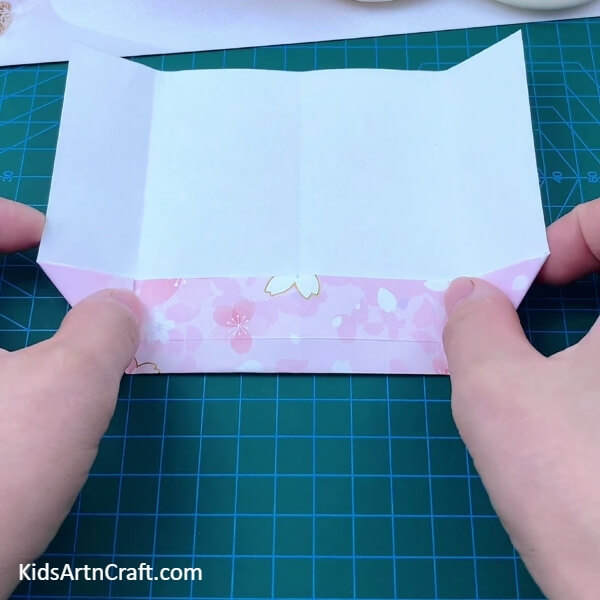
Now, fold the bottom corners to the 1/4th crease to form 2 triangles on each side.
Step 6: Folding The Corners To Form Triangles
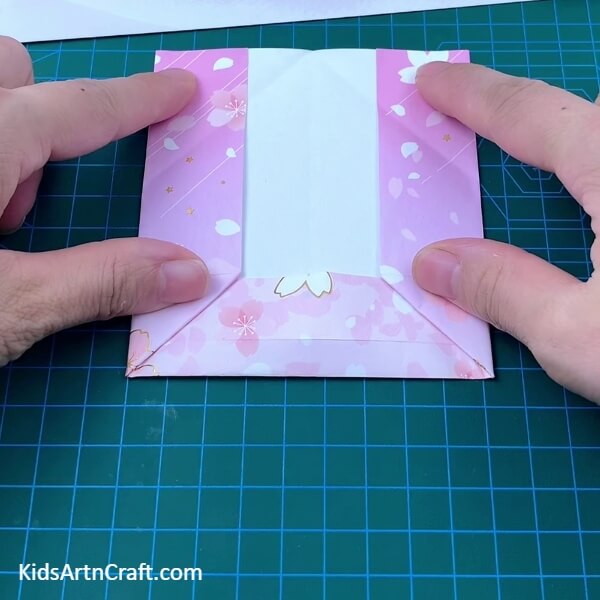
Fold the paper from both the right and left sides along the sides of the triangle.
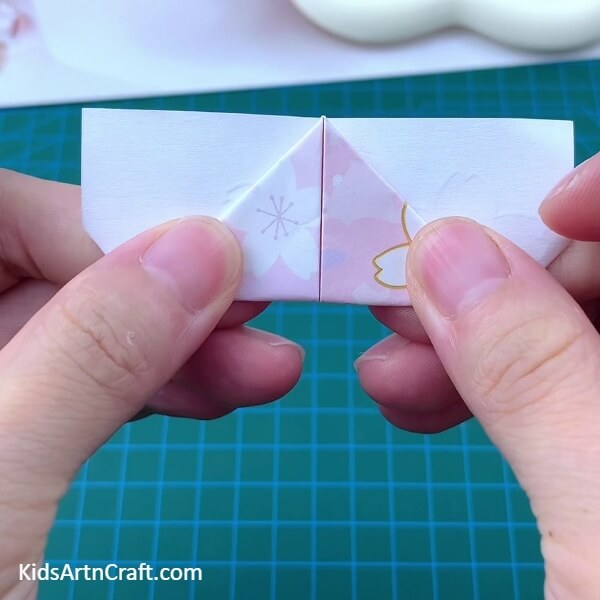
Step 7: Folding The Top Corners To Form Triangle
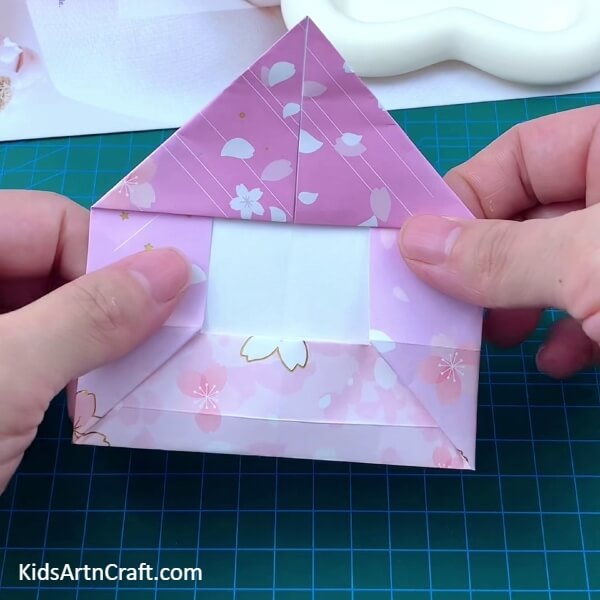
Fold the top corner of the paper to the middle equally to altogether form a triangle and crease the folds.
Step 8: Folding The Large Side Of The Triangle
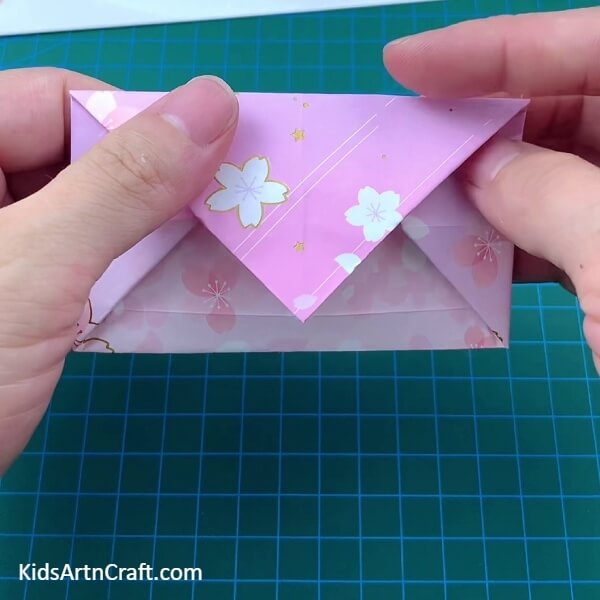
Fold the paper along the large side of the triangle and make a crease to form an envelope.
Step 9: Inserting The Folded Triangle Inside The Envelope
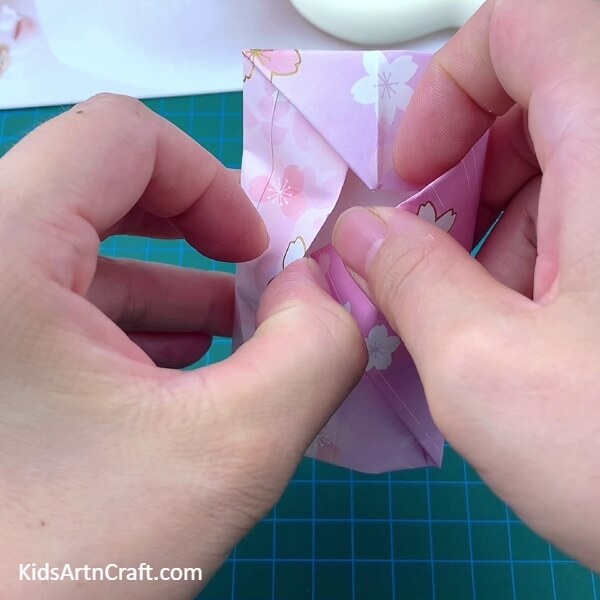
Open and push the folded triangle inside to enclose the envelope.
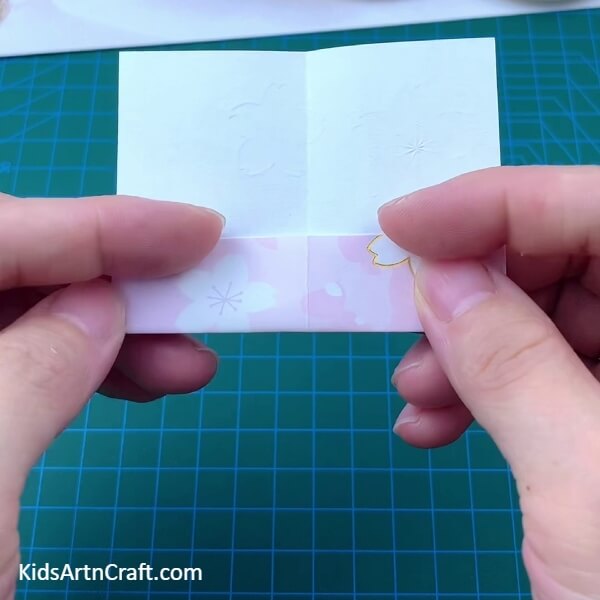
Step 10: Folding The Paper To The Horizontal ‘+’ Crease
Take another floral-print sheet to make the heart over the envelope. Follow the same steps 1-2 to make the ‘+’ creases, then fold the bottom side of the sheet to the horizontal ‘+’ crease to form 1/4th crease.
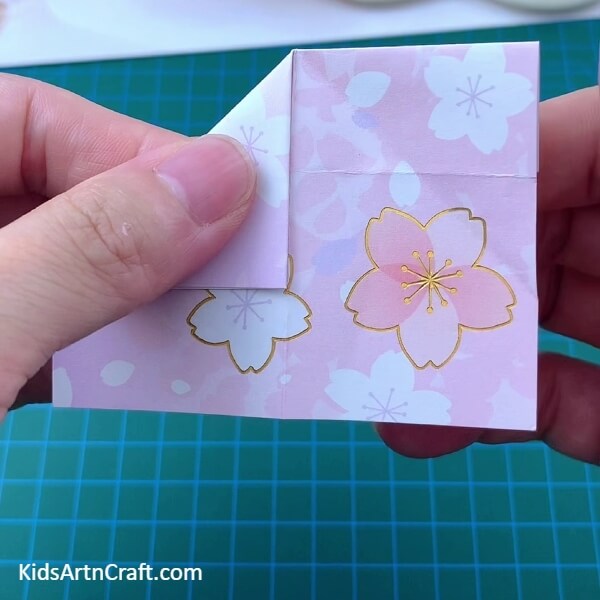
Step 11: Folding The Paper Along The 1/4th Crease
Fold the paper along the 1/4th crease which is created.
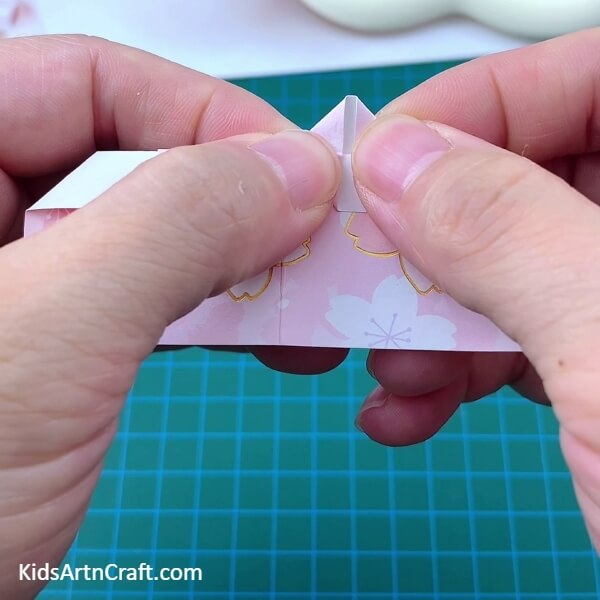
Step 12: Making The Left Triangle Crease
Turn over the paper and from the previously folded side fold the left corner of it to the middle to form the left triangle and make a crease.
Step 13: Making The Right Triangle Crease

Now, fold the right corner of the paper to the middle to form the right triangle and make a crease. You will see 2 triangles made into a single large triangle.
Step 14: Folding The Large Triangles
Again turn over the sheet and fold the large triangle to the back, make sure to only fold more than half of the triangle to leave some of the triangle part unfolded.
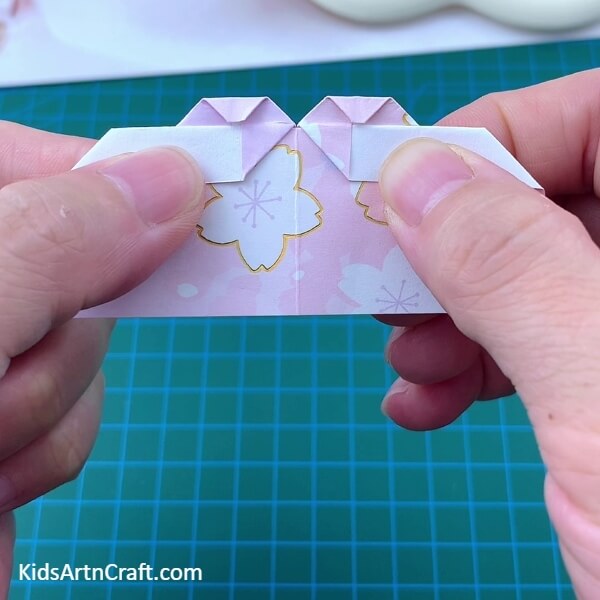
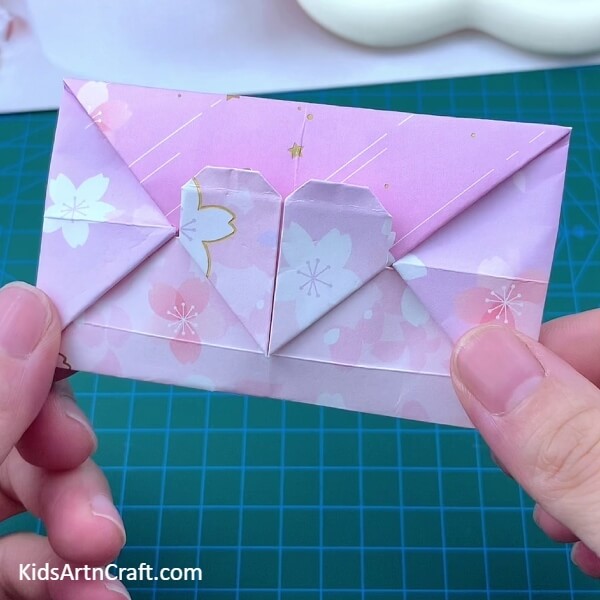
Step 15: Forming Tiny Triangles
Again turn the paper to the other side and you will see the unfolded part of 2 triangles coming out of the paper. Now, squash fold-open these folded parts to the paper and you will see 2 very small triangles formed with a paper left behind them. Now, fold the corner of the paper which was left behind them to the middle to form 2 more tiny triangles, right behind the earlier ones.
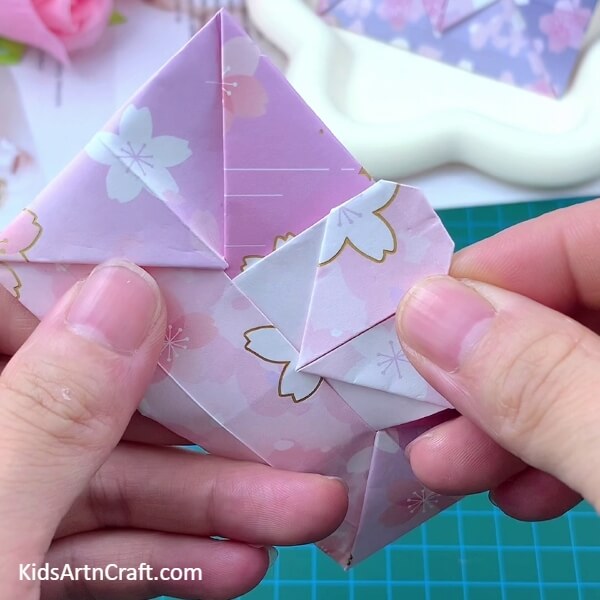
Step 16: Folding The Mid-Top Of The Tiny Triangles
Now, fold the mid-top of the tiny triangles to the crease.
Step 17: Folding The Sides Of The Paper In The Middle

Now, fold the left and right sides of the whole paper to the middle of the back side of the heart
Step 18: Inserting The Heart In The Envelope
Turn over the sheet and you will see a heart formed. Now, slide this heart into the envelope where previously we inserted the triangle.
Congratulations! Your Amazing Love Envelope Is Ready
Congratulations! You have finally made your amazing love envelope just in time!
This envelope is now ready to be given to your special one anytime! You can even customize this envelope by adding colors and textures to it, or can even use different colored paper to make it! Your imagination is the limit! Bring a smile to your loved ones’ faces by gifting them a precious message in this pretty envelope which they will love! Flaunt your origami skills by making this unique envelope and also can teach your friends and family to make it!
Follow us on Youtube for art and craft tutorials and much more.
More Articles from Kids Art & Craft
- DIY Easy Origami Paper Shark Toy Tutorial For Kids
- Easy Origami Paper Paku Paku Step by Step Tutorial for kids
- Pretty Origami Umbrella Creative Craft Tutorial For Kids
- Easy Ladybug Craft For Kids Using Leaves and Paper
- How to Make Origami Paper Star Tutorial