Painting
Colorful Flower Bouquet Painting Art – Step by Step Tutorial

This vibrant painting of a colorful flower bouquet will add a cheerful touch to any room. With its unique blend of bold and pastel colors, this art piece will bring a sense of joy and beauty to any space. Hang this painting up in your home to bring a touch of nature indoors!
Welcome to the world of Colorful Flower Bouquet Painting Art! This type of art is a delightful and vibrant way to bring a bit of color and beauty into your home or office. Painting with a bouquet of flowers can create unique and stunning works of art that are sure to brighten up any space. From traditional watercolor techniques to more modern and abstract creations, the possibilities with this type of painting are endless. Whether you’re a beginner or an experienced artist, you’ll find that painting with flowers is a great way to express yourself and your creativity. So, let’s get started!
Easy To Make Colorful Flower Bouquet Painting Art & Craft For Kids


Read More: Super Simple Pine Cone Crafts For Kids
Material Used:
- White Sheet
- Paint Brush -One Flat Brush and One Round Brush
- Earbuds
- Popsicle Stick
- Water Colors
Instructions:-
Creating a Bow with a Popsicle Stick – Step 1
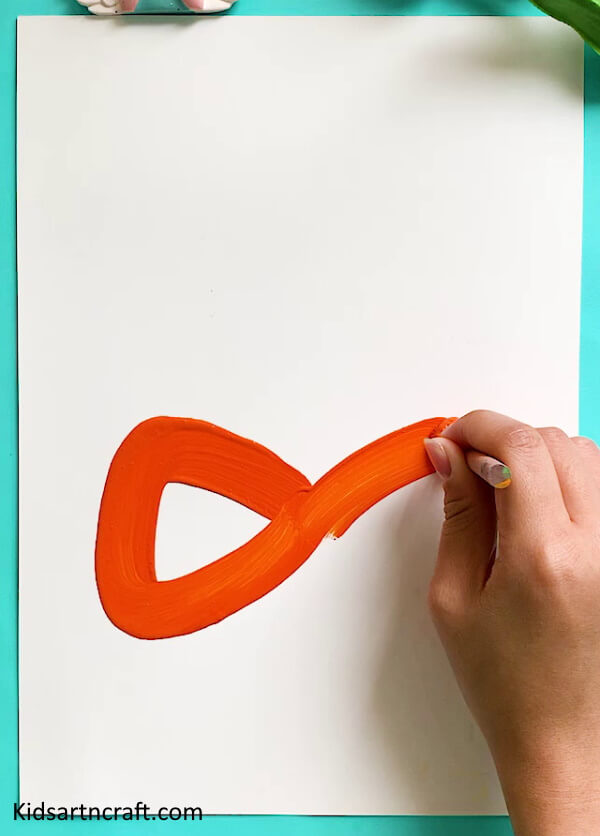

Let’s start by making an outline of the bow on the white sheet of paper using the popsicle stick and dipping it into the red watercolor.
Giving The Bow Color – Step 2
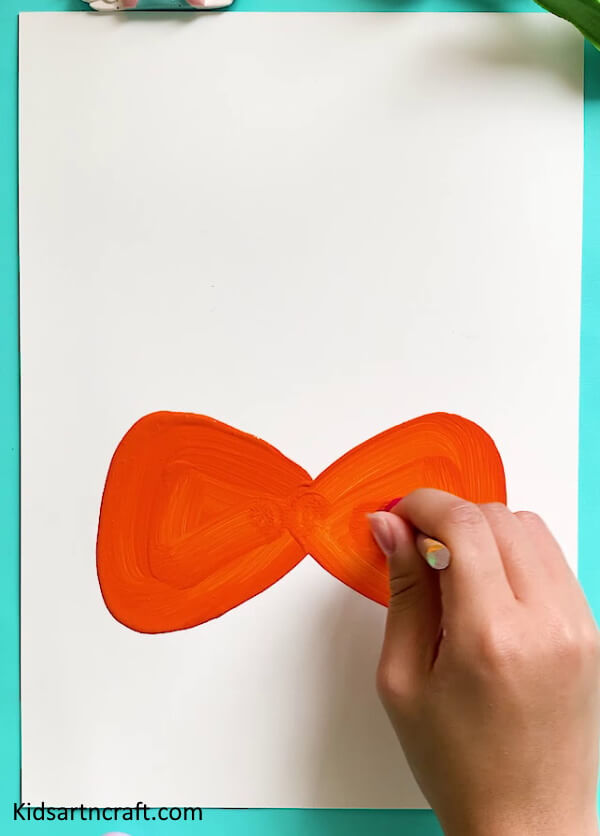
Fill the bow outline with the red color using the same popsicle stick by dipping it in the paint and applying it in the outline by moving in the shape of the bow.
Making The Ribbons – Step 3
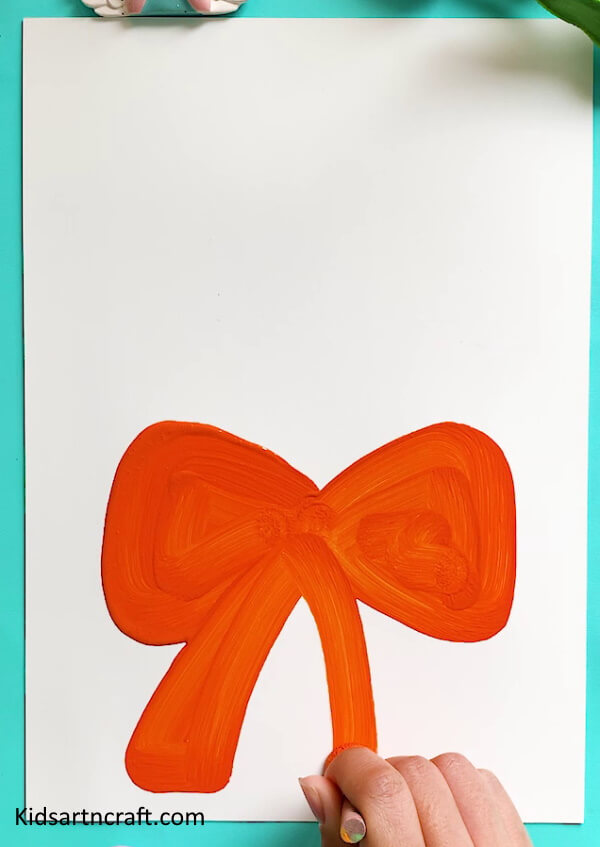

After making the bow center part, here come the ribbons. Using the same stick dip it again in the paint and apply in the shape of ribbons.
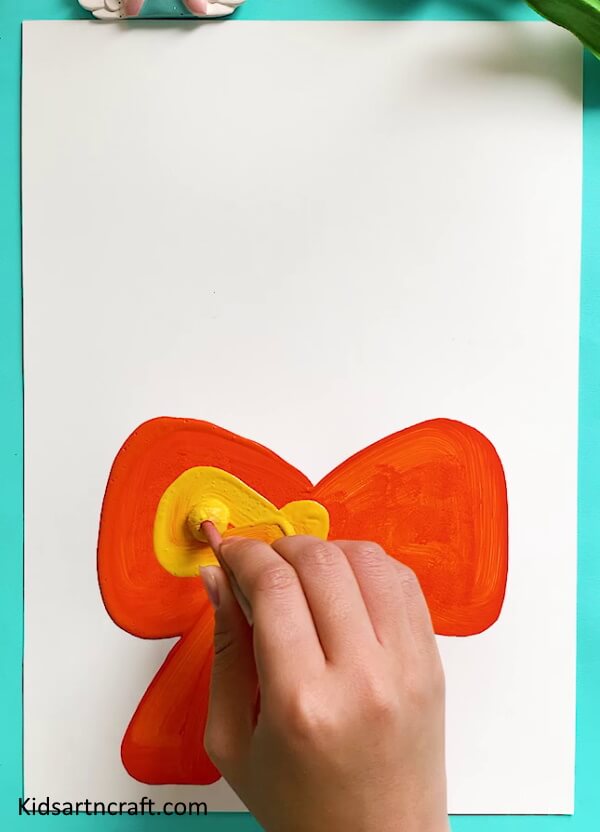
The Center – Step 4
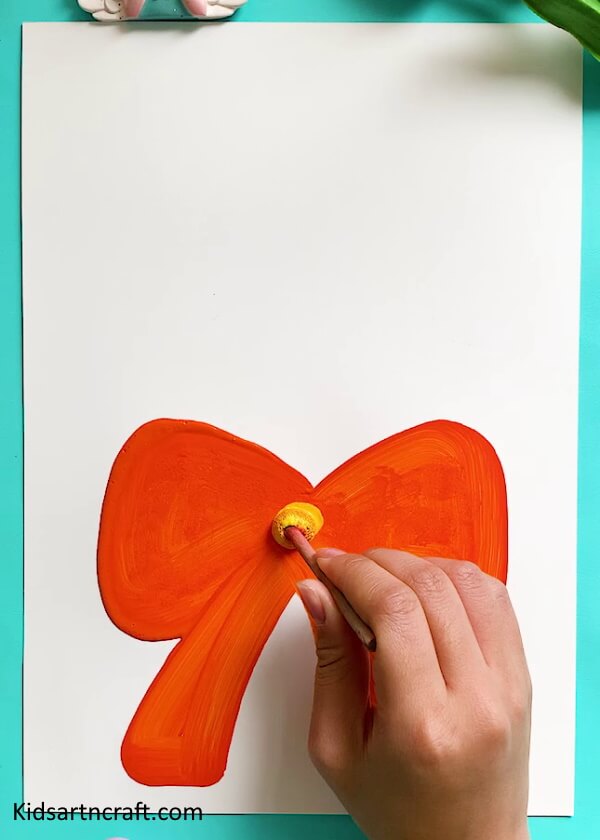

To make the bow center part dip the stick into the yellow paint and apply to the bow painted previously by making a circle with a circular hand motion.
Giving A 3D Look – Step 5

To give a 3D Look let’s start by making an inner bow by extending the dot in the shape of the bow. Use the yellow paint and make a bow on both sides, a little bit smaller than the previous red bow.
Touching Up the Ribbons – Step 6
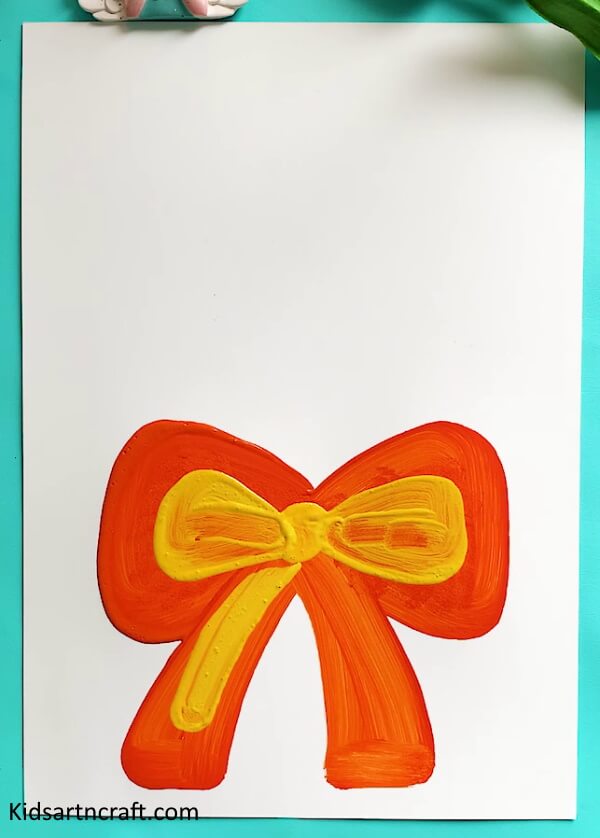

Now after making the inner of the bows with the yellow paint let’s use the same techniques as previous and make the inner of the ribbons too. Completing the inner small yellow bow.
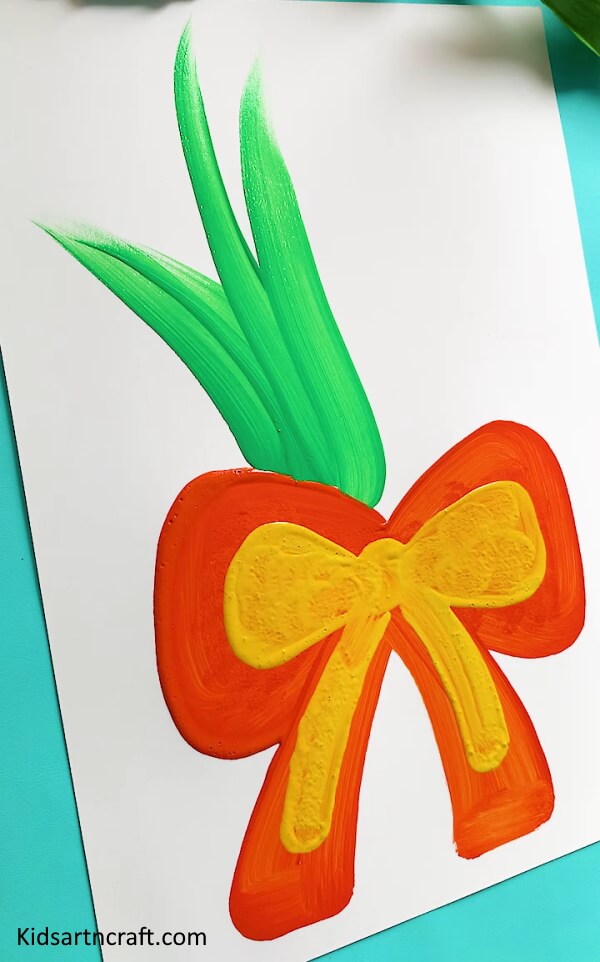
The Complete Bow Look – Step 7
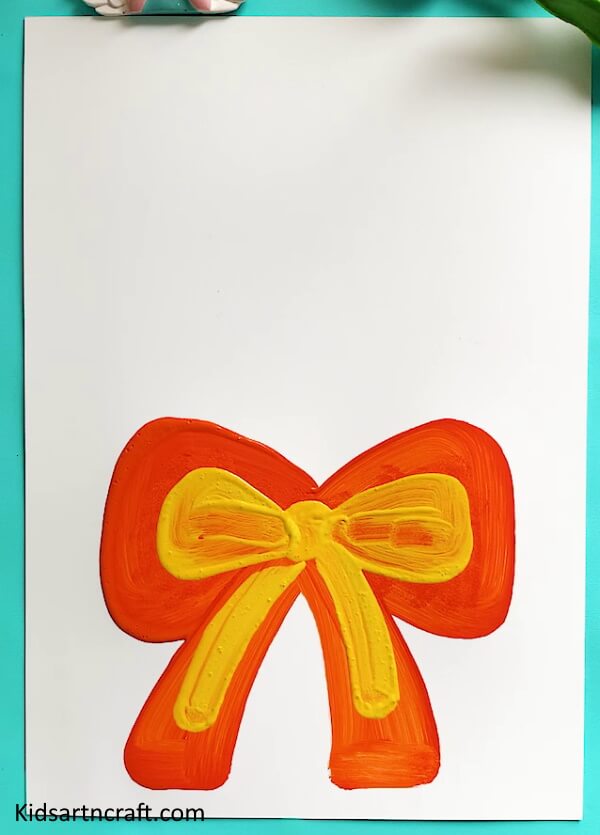

After completing your bow will look something like this.
Making The Leaves – Step 8
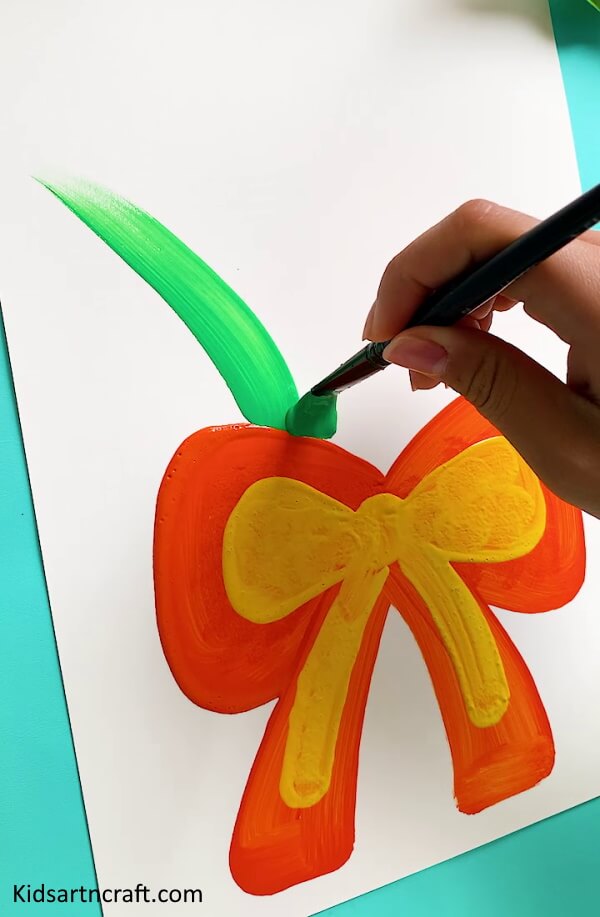

Now Let’s make the leaves of our flower bouquet. To make the leaves, start by dipping the Flat brush into the green paint and start applying it in stokes with a ticker on the bottom and thinner as we go up.
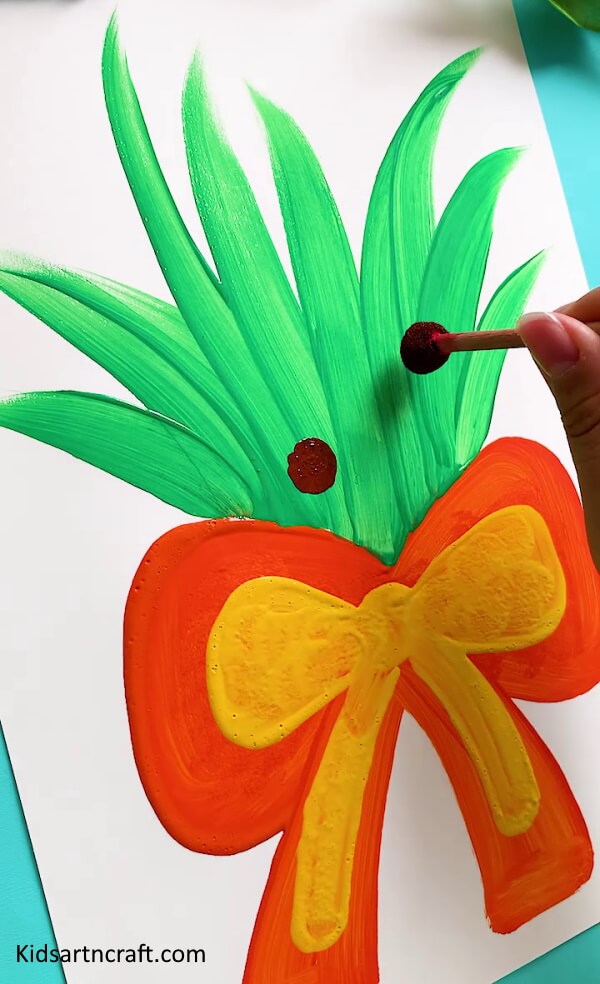
Completing The Leaves – Step 9

Going with the same stroke technique paint the leaves in different directions as you proceed with the middle ones facing up and others to their respective directions to give a natural look.
Adding the Floral Center – Step 10

“The Petals” – Step 11
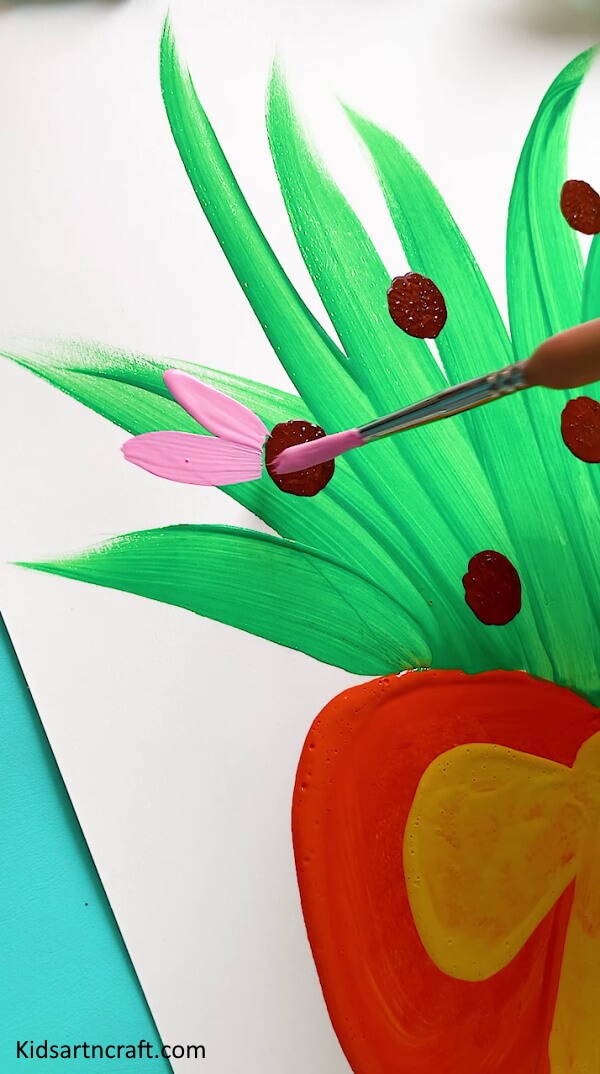

To add the petals to the center of the flowers we made, Dip the round brush into the pink paint or any color you like and make the petals by first applying pressure and the leaving it to the top make the shape of petal. Remember not to take excessive paint.
Making The Flowers – Step 12
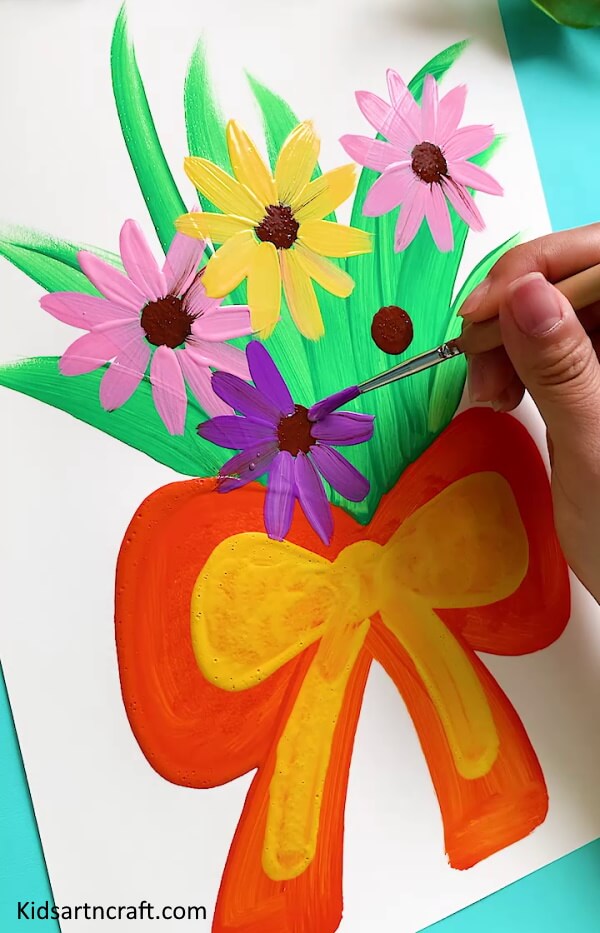

With the same technique, make the petals on the other centers too by using colors purple, yellow, pink, white, or any other color combination you wish to use.
Making The Seed Pods – Step 13
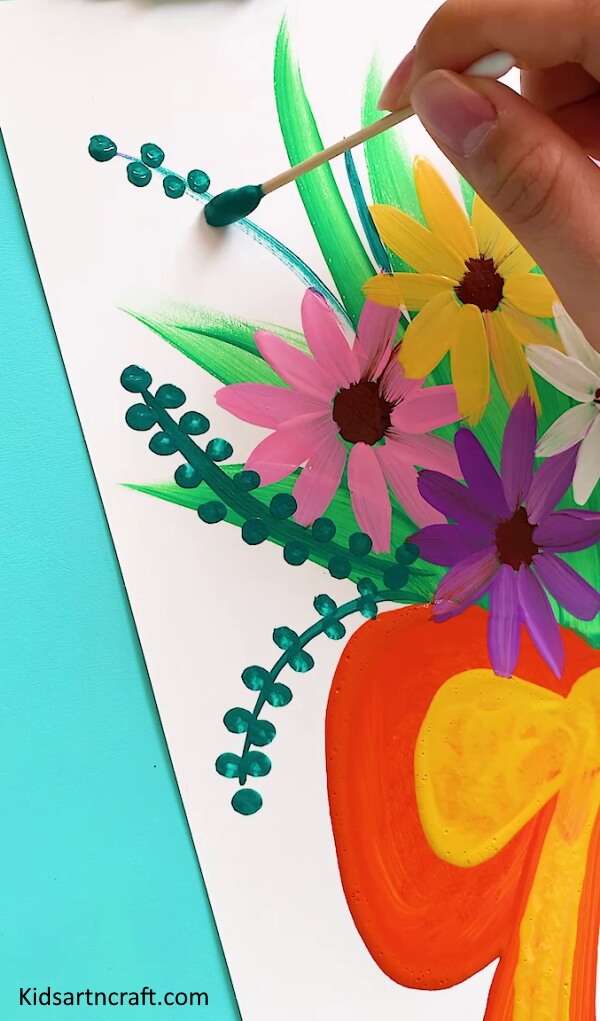

Completing the Seed Pods – Step 14


To complete the decoration of our flower bouquet, Let’s add some seed pods to it. Take the ear bud and dip it into dark green color paint. Now make some lines representing the stem for the seed pods near each flower and add dots with the earbud on it to make seeds.
The Final Flower Bouquet – Final Steps
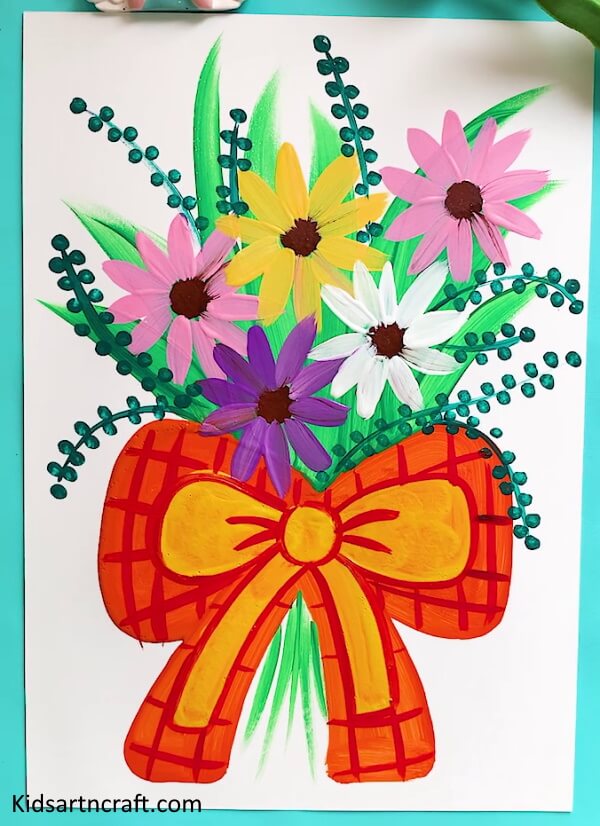

The final step in creating a painting of a flower bouquet is to add the finishing touches. This is where you can add any last details and make any necessary adjustments to the painting. Once you are satisfied with the painting, let it dry completely and then sign your name on it. Congratulations, you have created a beautiful painting of a flower bouquet that you can enjoy for years to come!
FAQs
What kind of paints do I need to use for a Colorful Flower Bouquet painting?
You will need a selection of water-based paints like acrylics, gouache, and watercolors. You may also need some speciality paints like metallic, iridescent, and pearlescent paints.
What type of brushes should I use for a Colorful Flower Bouquet painting?
You will need a variety of different brush sizes and shapes to create different effects. The most common brushes used are round brushes, flat brushes, filbert brushes, fan brushes, and rigger brushes.
What type of paper should I use for a Colorful Flower Bouquet painting?
You will need a thick, heavyweight paper such as watercolor paper, canvas paper, or art board.
How do I mix colors for a Colorful Flower Bouquet painting?
Mixing colors is an important part of painting. You can mix colors on a palette or on the painting surface. Start with the primary colors and mix the colors together to get different shades and hues.
What techniques should I use for a Colorful Flower Bouquet painting?
You can use a variety of techniques such as wet-on-wet, dry-brush, stippling, scumbling, and washes. Experiment with different techniques to create interesting effects.
This Colorful Flower Bouquet Painting Art is sure to bring a touch of beauty to any home or office. With its vibrant colors and beautiful design, this piece of art is a perfect way to brighten up any space.
Follow us on Youtube for art and craft tutorials and much more.
More Articles from Kids Art & Craft
- World Parrot Day Coloring Pages For Kids – Free Printables
- Poppy Coloring Pages For Kids – Free Printables
- Lion Drawing & Sketches for Kids
- Crumpled Paper Animal Crafts for Kids
- Meditation Coloring Pages For Kids – Free Printables