DIY and Crafts
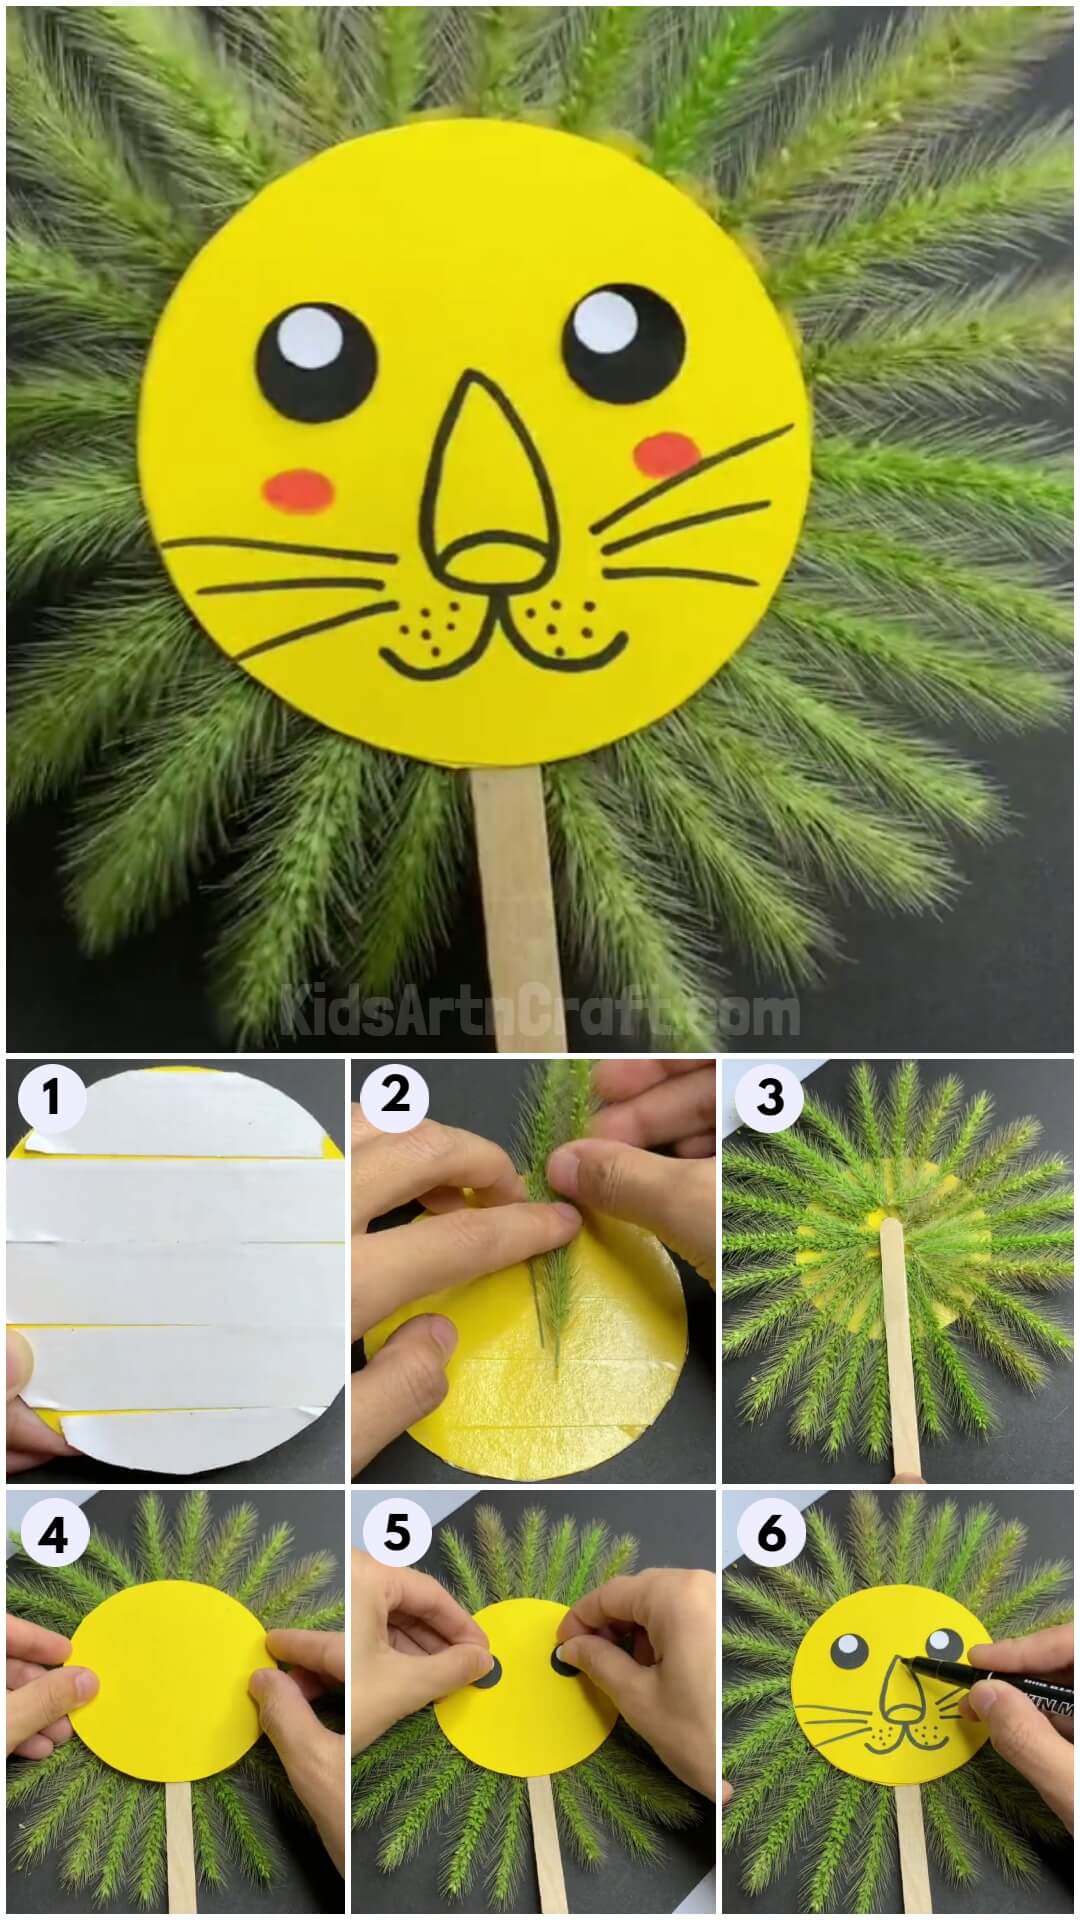
Green Wheat And Paper Lion Craft For Kids

This step-by-step tutorial will guide you to make a cute and adorable lion craft instead of the ferocious one using paper and green wheat!
Hello there, craft lover! Today, we have brought you an amazing craft that will change the perspective to see the lions from ferocious and dangerous animals to cute and adorable ones! This step-by-step tutorial will serve you as a guide on each and every step of this paper and green wheat craft making! This craft is full of motor skills, creativity, and imagination! This result will definitely be a piece to showcase and flaunt in front of your friends and family! Have a fun crafting journey by making it with us!
DIY Green Wheat And Paper Lion Craft For Kids

Read More: Easy To Make Fall Leaves Craft Tutorial For Kids
Materials Required
- Colored Paper Sheets (Yellow, White, And Black)
- Scissors
- Double-Sided Tape
- Green Wheat Strands
- Black Marker
- Red Sketch Pen
- Popsicle Stick
Procedure
Step 1: Applying Double-Sided Tape On Circle
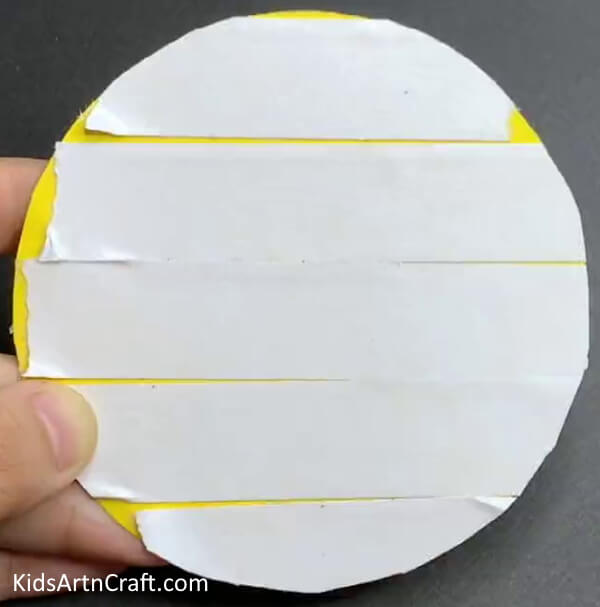

To begin this craft, take yellow-colored paper and cut it out into a big circle using scissors. Apply double-sided tape layers over the circle as shown in the image.
Step 2: Sticking A Green Wheat Strand
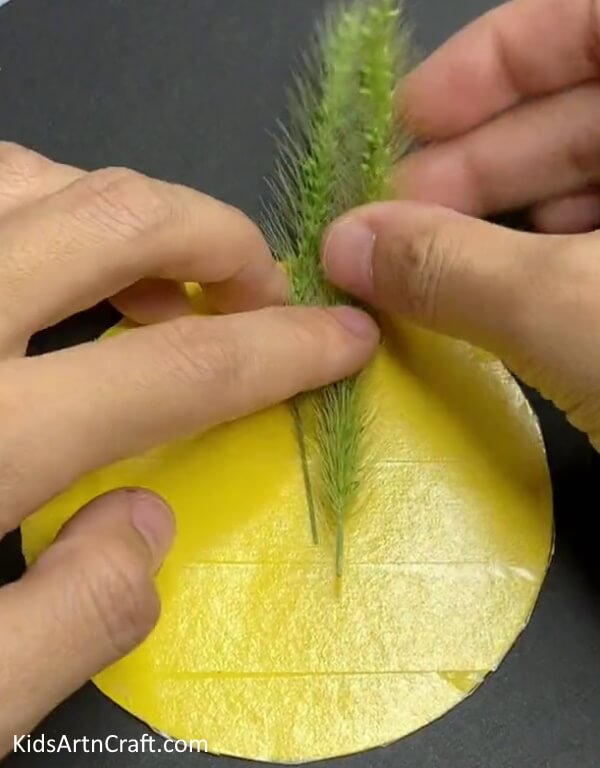

Remove the peel of double-sided tape and stick a strand of green wheat over the tape along the boundary of the circle.
Step 3: Sticking More Green Wheat Strands
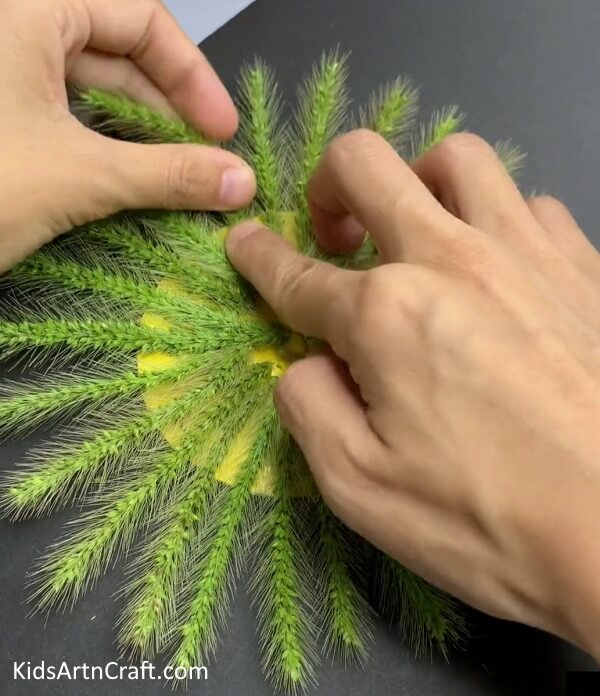

One by one stick more green wheat strands along the boundary of the circle to complete it.
Step 4: Pasting A Popsicle Stick
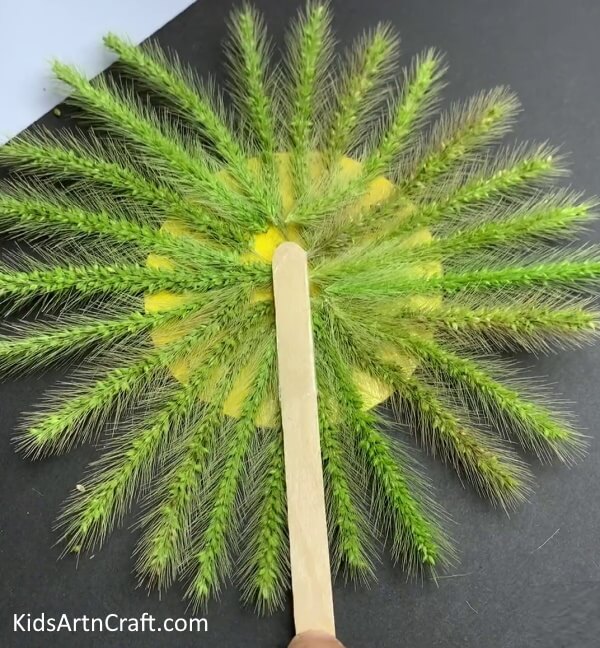

Using the double-sided tape, paste a popsicle stick over the wheat strands in the center.
Step 5: Pasting Another Yellow Circle
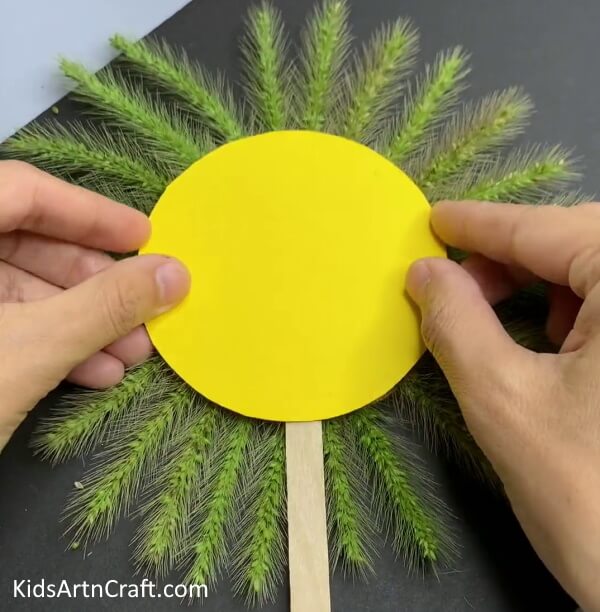

Following the same cut out another yellow circle and using double-sided tape stick it over the popsicle stick and wheat strands to overlap it with the below circle. This will be the face of the lion and the wheat strands will be the hair mane of it.
Step 6: Adding Eyes To The Lion’s Face
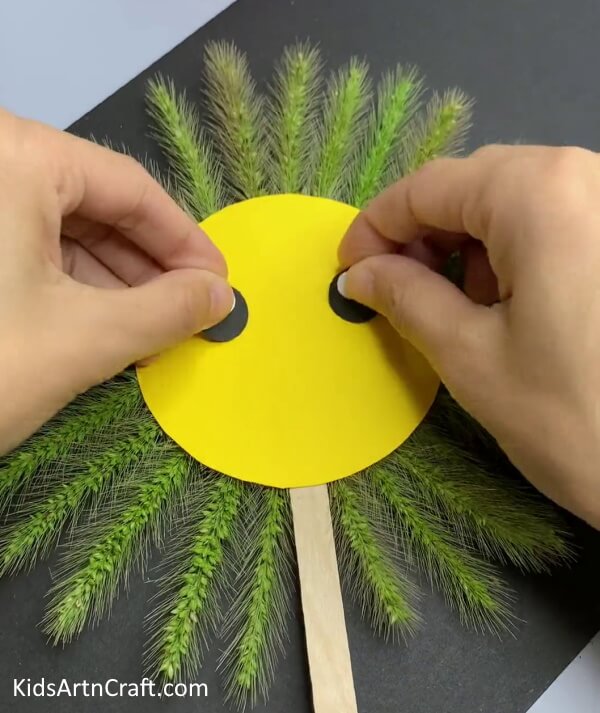

Take the black craft paper and cut it down into two small circles using scissors. After that, take the white craft paper and cut it down into two relatively smaller circles than the black circles. Stick the white ones over the black, these will now be used as eyes. Stick the eyes over the lion’s face side by side using double-sided tape.
Step 7: Drawing Nose, Smile, And Whiskers
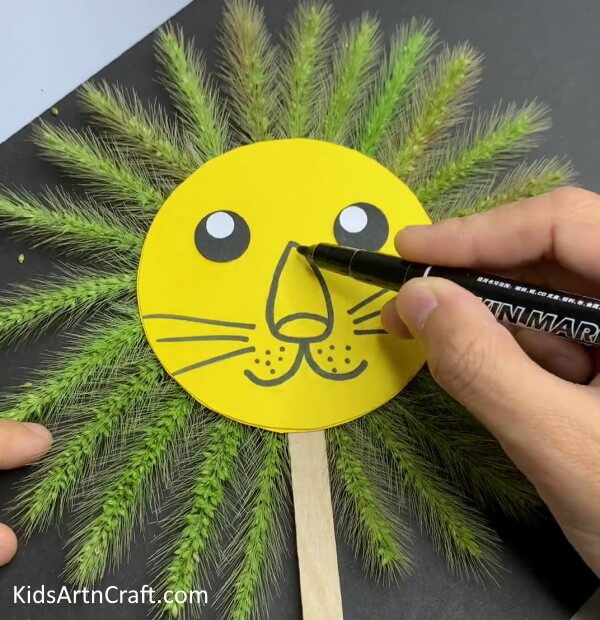

Using a black marker draw its drop-shaped nose, curvy mouth smile with dots over it, and some horizontal and slanting strokes as the whiskers on both sides as shown in the image.
This Is The Final Look Of Your Lion Craft!
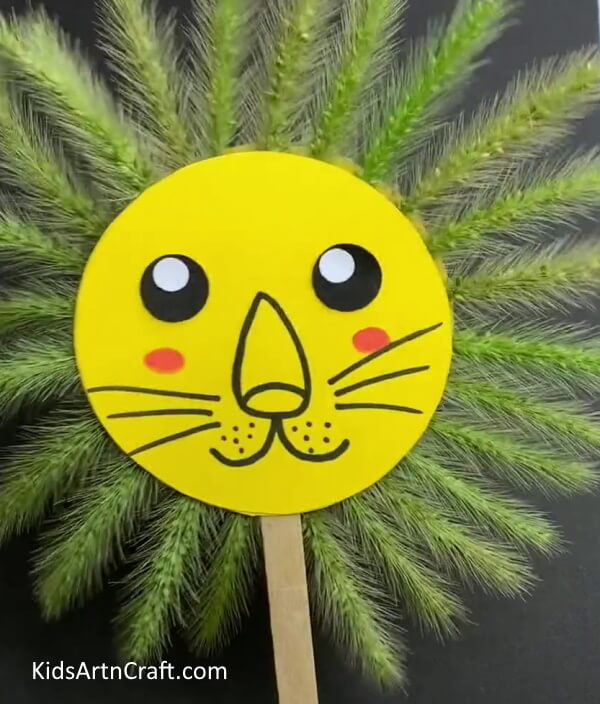

After that, take a red marker or sketch pen and give a little tint of blush as shown in the image.
Voila! Your cute lion craft is ready in no time!
You can now play with your lion craft or use it as a holding mask as well! It can be used for learning purposes, decoration purposes, or leisure time activities! Kids will be keen to learn about lions while making this craft, so, it makes this craft a fun learning one too! You can even decorate your in your own way to make it more unique! It’s a fun activity for kids at the time of the holidays! Children between the ages of 7 to 11 can create this and enjoy this fun learning activity.
We are hoping you loved this article and the craft idea! If so, give it a like and share it with your buddies to create it all together! Also, give your feedback in the comments section below!
Follow us on Youtube for art and craft tutorials and much more.
More Articles from Kids Art & Craft
- Autumn Leaf Squirrel Craft Tutorial For Beginners
- Leaf Garden Butterfly Craft Idea For Beginners
- How To Make Giraffe Art And Craft With Fallen Leaves
- DIY Flying House Using Leaves – Up Movie Inspo
- Easy Dinosaur Craft For Kids Using Fresh Leaf