Home Decor
Handmade Paper Flower Craft For Home Decor

Welcome to the colorful world of paper flower art! With a few simple supplies and a little bit of creativity, you can create beautiful paper flower decorations for your home.
Whether you’re looking for a way to brighten up your living room, add a touch of vibrance to your bedroom, or make a unique gift, paper flowers are a great choice. In this article, you’ll learn the basics of paper flower crafting and get some tips on how to make the most of your creations. Get ready to enjoy the creative process and bring a little charm into your home with handmade paper flower crafts!
DIY Paper Flower Decoration Craft For Home

Read More: Simple Way To Make Paper Flower Tree Craft
Materials Required
- Colored sheets(Pink. Orange, Yellow, Green)
- Glue
- Scissors
Procedure
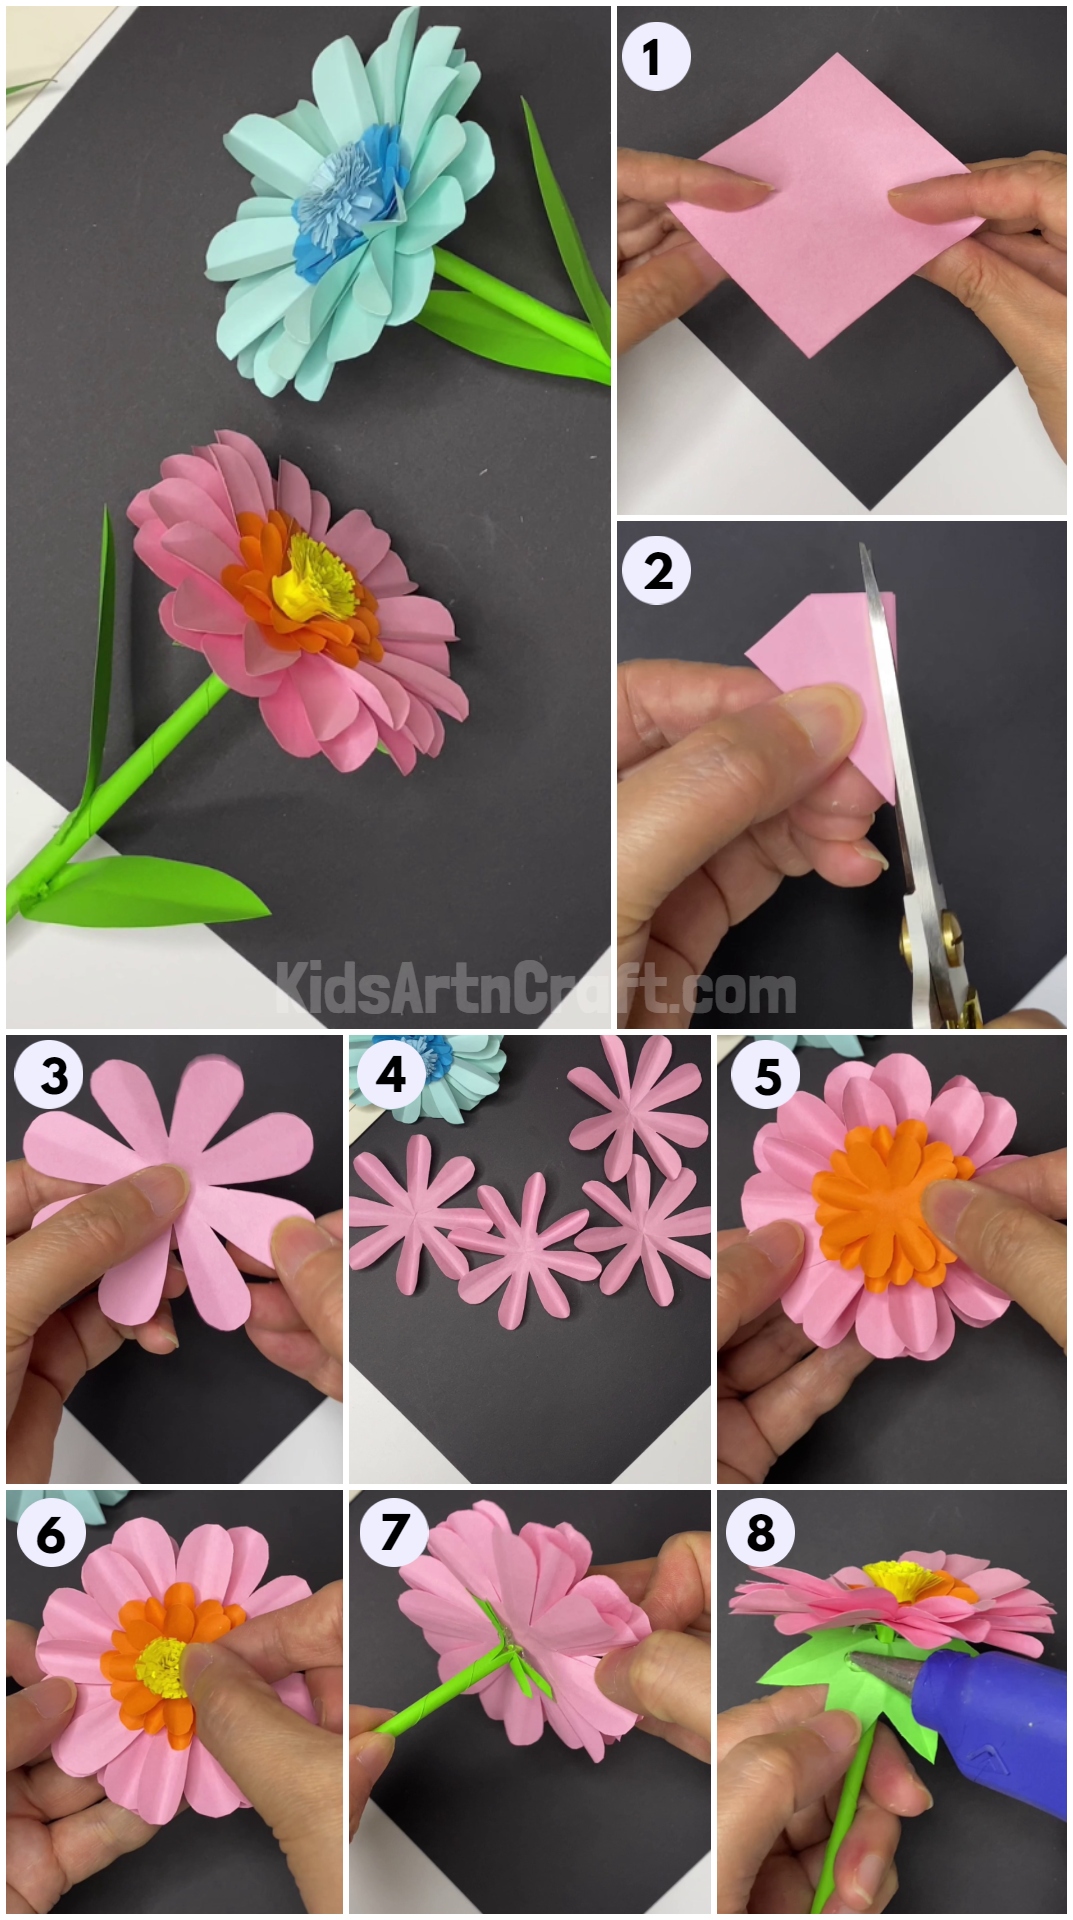
Step-1: Getting A Pink Square Paper
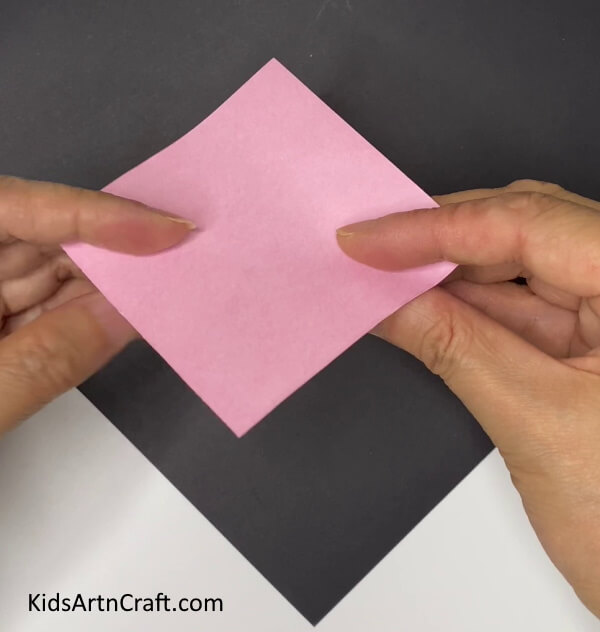

Let’s begin by taking a piece of pink square paper.
Step-2: Folding The Pink Paper Into A Triangle
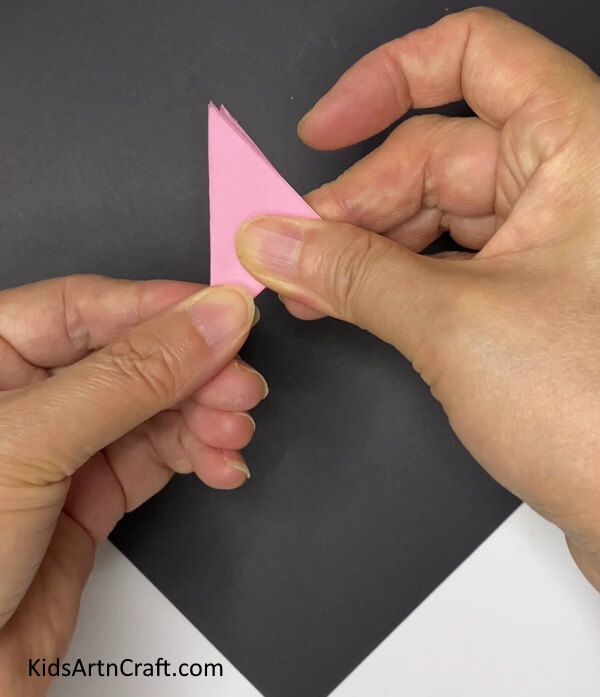

Take the pink craft paper and fold it along the diagonal. Fold it again and again till you get a small triangle as shown.
Step-3: Cutting The Top Portion Of The Triangle
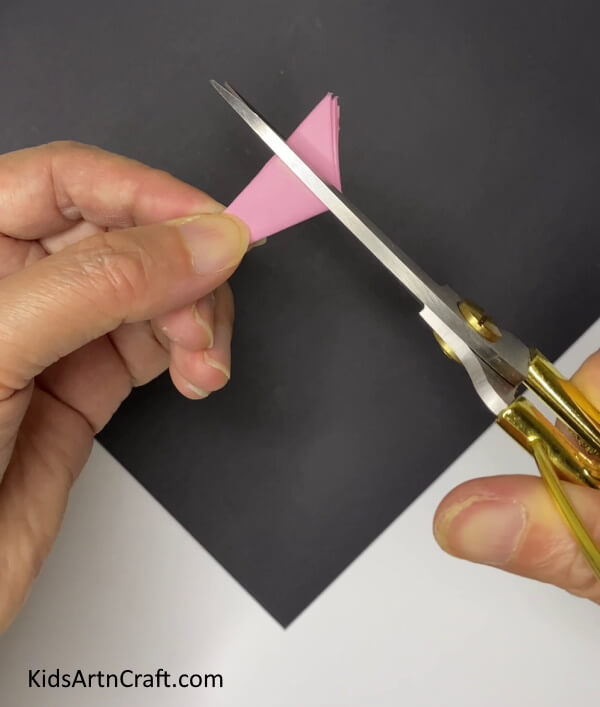

Fold it again. Now, cut the remaining portion from the open edges at the top.
Step-4: Making The Triangle Round from The Sides
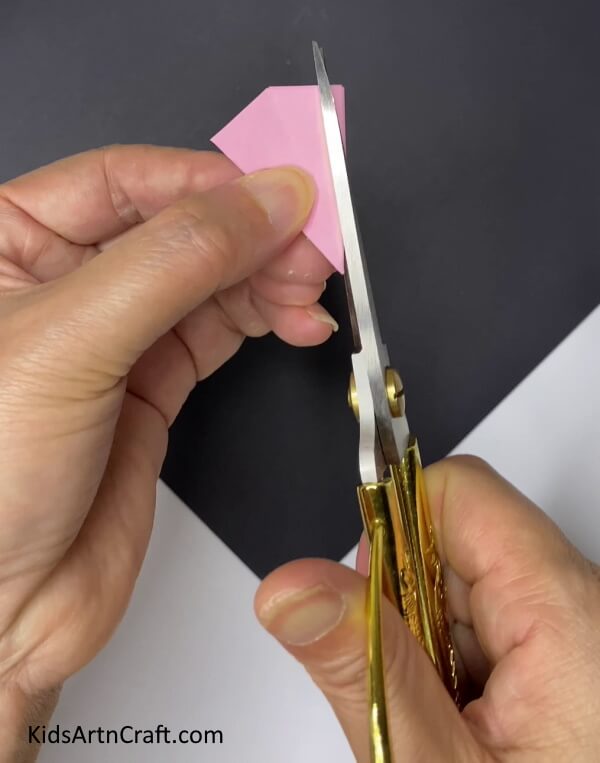

With the help of scissors, make the triangle round from the sides.
Step-5: Making The Triangle Round From The Top
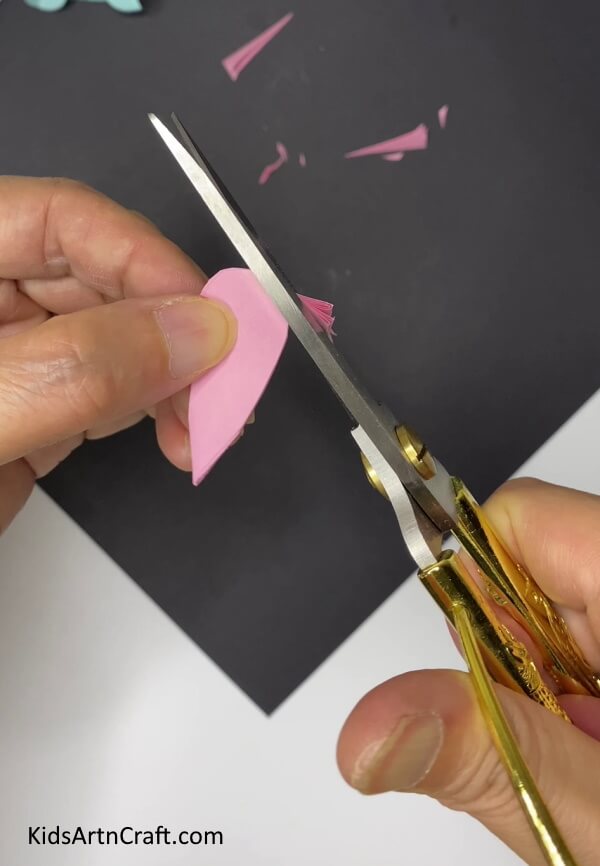

Now, make the top of the triangle round with the help of scissors. You will get a petal shape as shown.
Step-6: Unfolding The Petal Shape


Now, unfold the petal shape to get a paper flower as shown.
Step-7: Rolling The Flower Petals With A Toothpick
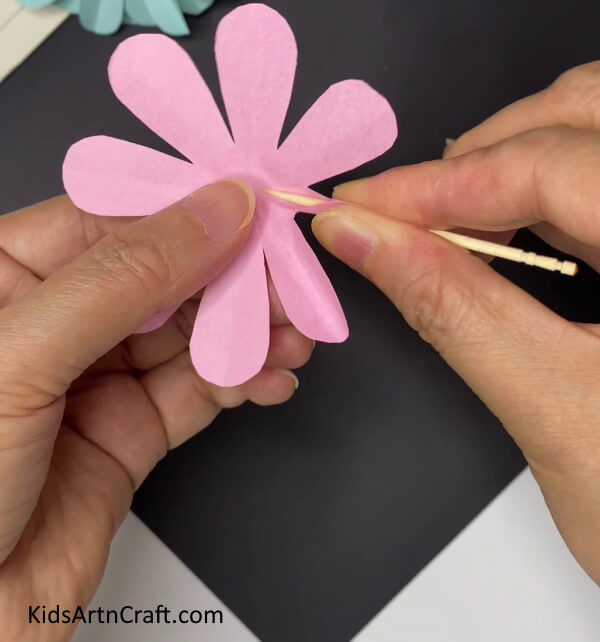

Now, take a toothpick and place it in the middle of each petal and roll each petal inwards as shown.
Step-8: Making Three More Pink Flowers
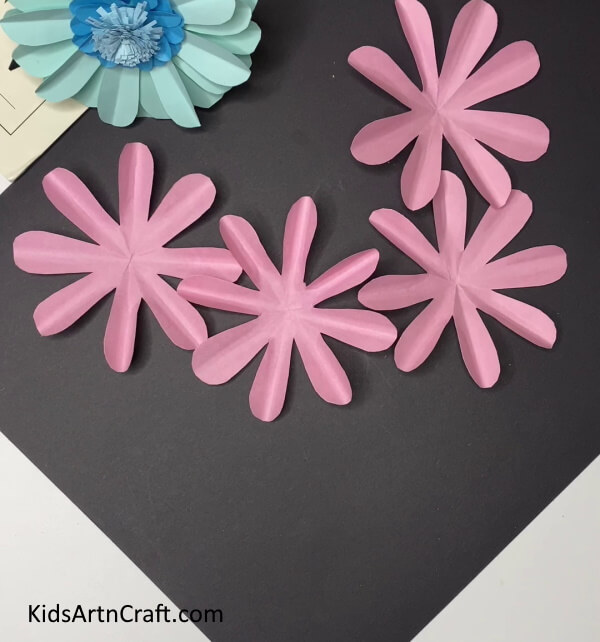
Repeating the above steps, make more such pink flowers.
Step-9: Pasting Two Pink Flowers Together
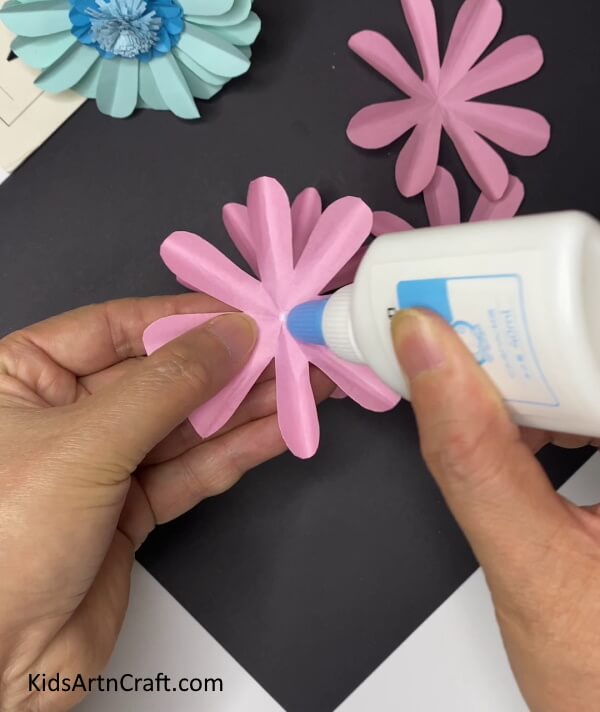

Add a glue drop in the center of a pink flower, now, paste the other flower on it. Take care that the petals of the flowers don’t overlap each other.
Step-10: Pasting All Pink Flowers Together
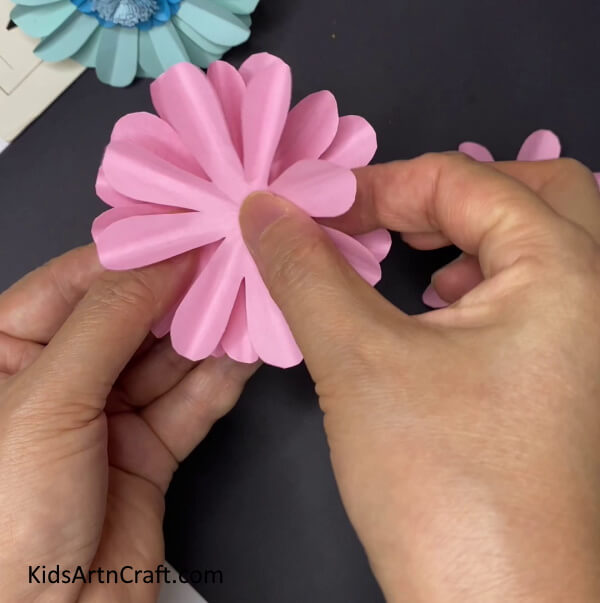

Similarly, paste all the pink flowers.
Step-11: Pasting Orange Flower
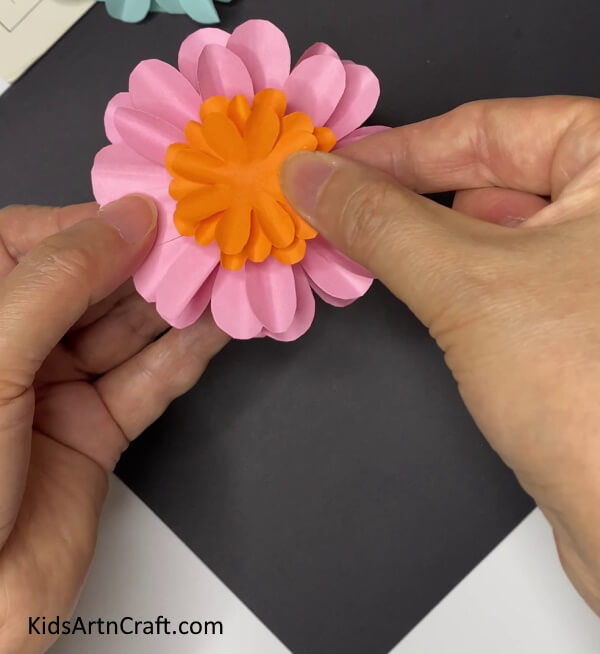

Now, take an orange paper. Following the above steps, make an orange mini flower and paste it at the center of the pink flower.
Step-12: Adding Yellow Pistil To The Flower
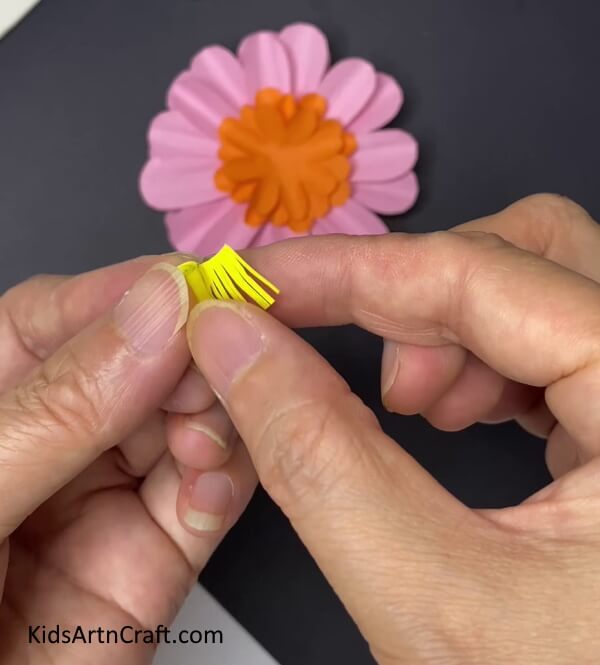

Now, take a piece of yellow paper. Cut out a small rectangular strip. Leaving a small margin, make continuous narrow cuts along the length of the paper. Now, roll the yellow strip and secure the ends together to form a yellow circular pistil for the flower.
Step-13: Pasting The Yellow Pistil At The Center


Now, using glue, paste the yellow pistil to the center of the flower.
Step-14: Making A Green Stem
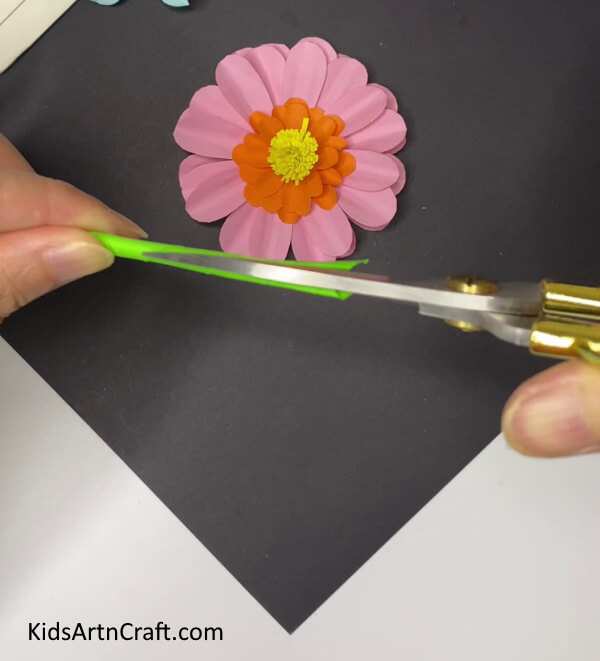

Take green paper. Cut a square piece out of it. Pick one corner and roll it to the opposite corner to form a thin green stem. Make two cuts of about an inch in length on the top of the stem to make two small flaps as shown.
Step-15: Applying Glue On The Green Flaps
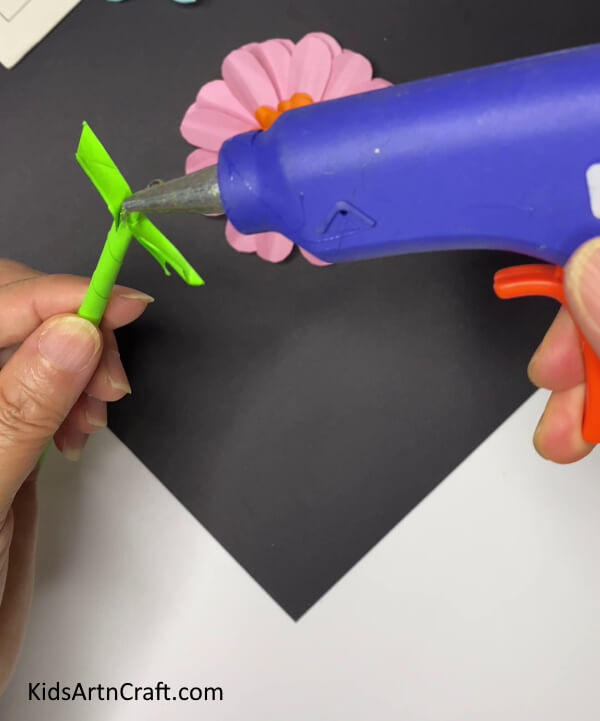

Now, apply glue on the inner portion of the flaps.
Step-16: Pasting The Stem to The Base Of The Flower
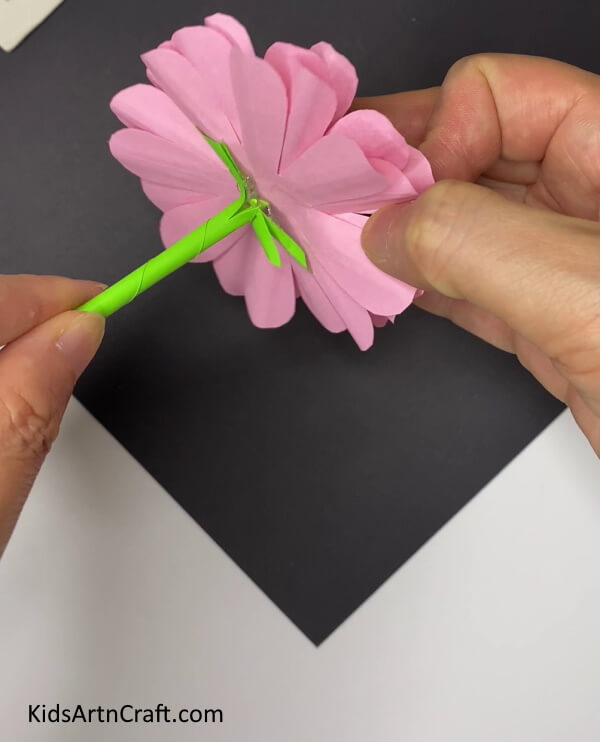

Now, paste the stem on the base of the flower.
Step-17: Cutting Sepals From Green Paper
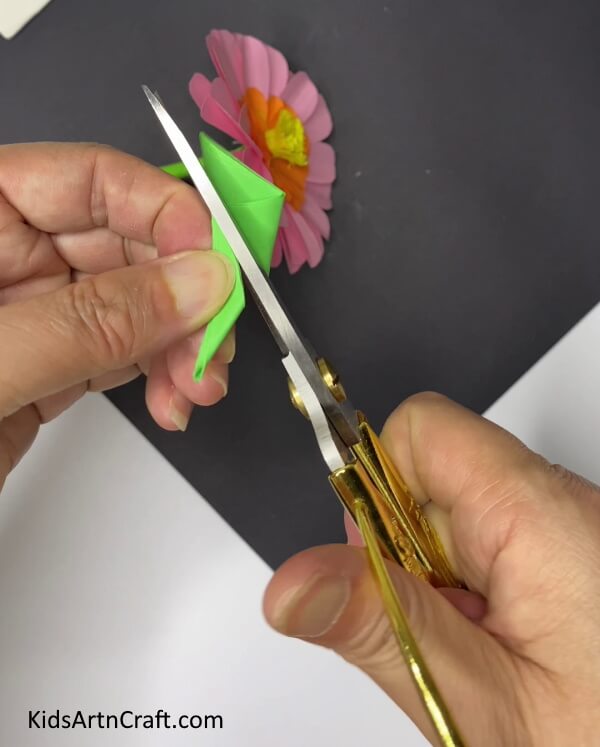

Take green paper. Fold it in a small triangle. Hold it along the closed edge and cut a semicircle shape out of it. Unfold it to get sepals for the flower.
Step-18: Inserting The Sepals Through The Stem
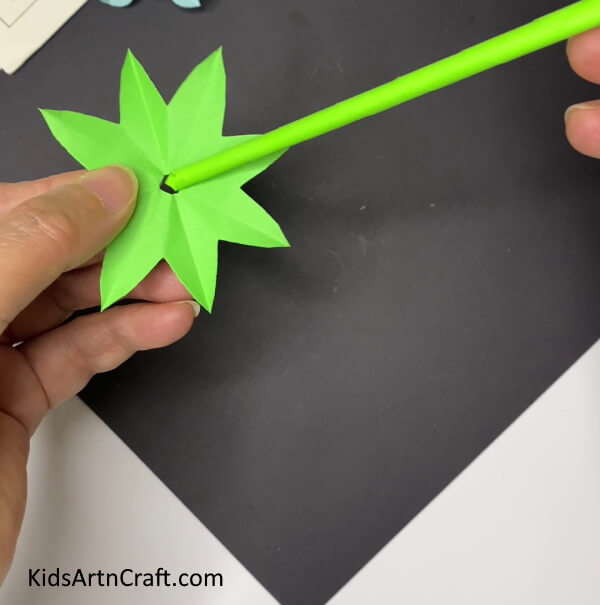

Make a hole at the center of the green sepals and insert it through the stem.
Step-19: Applying Glue On The Sepals
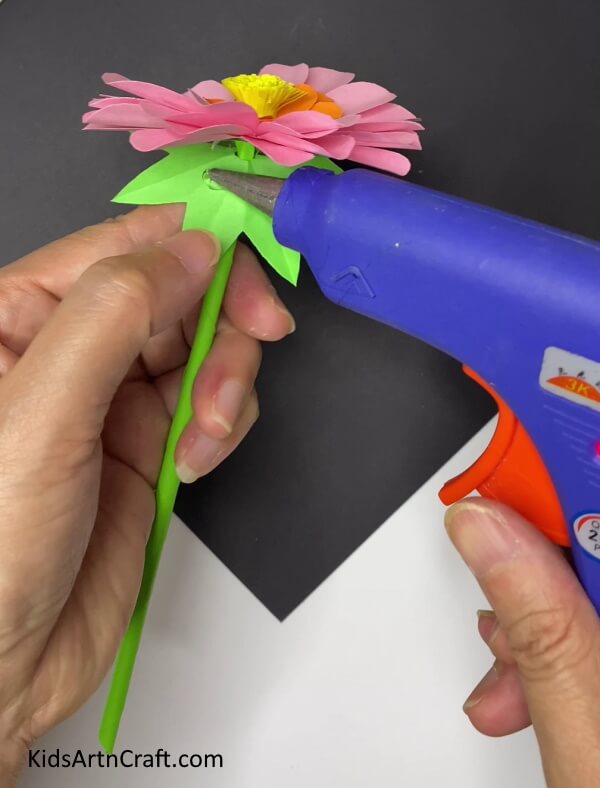

Apply glue on the sepals as shown and paste it to the bottom of the flower.
Step-20: Adding Leaves To The Stem
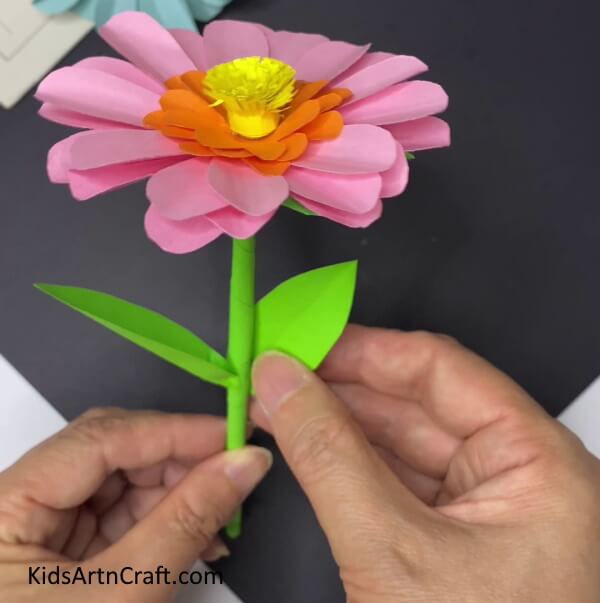
Take green paper and cut two leaves from it. Add the leaves to the stem.
This Is The Final Look Of Paper Flower Decor!
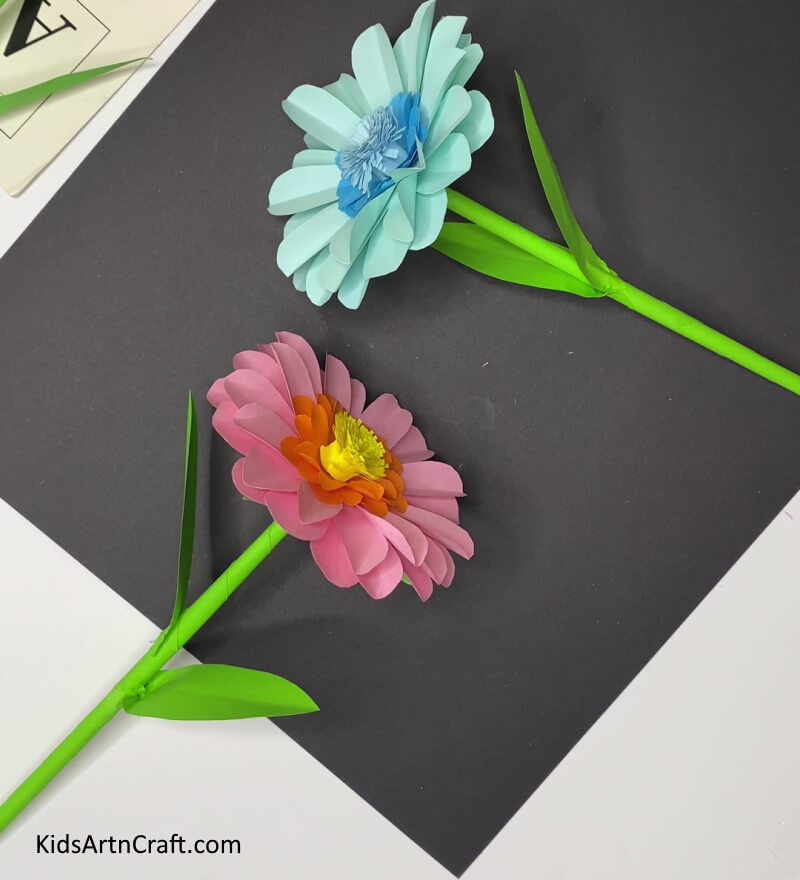

And that’s it! The final look of this paper flower decor is bound to impress and put a smile on everyone’s face.
This creative art is a perfect way to add grace to any special occasion. This paper flower decor is a great way to add some color and texture to your home. With a few simple supplies and a bit of creativity, you can make a beautiful flower wall that will last for years to come. With a few simple steps, you can create stunning paper flower decorations that will last a lifetime. Enjoy!
Some More Flower Craft Tutorial
Beautiful Flower Craft From Fresh Leaves For Kids

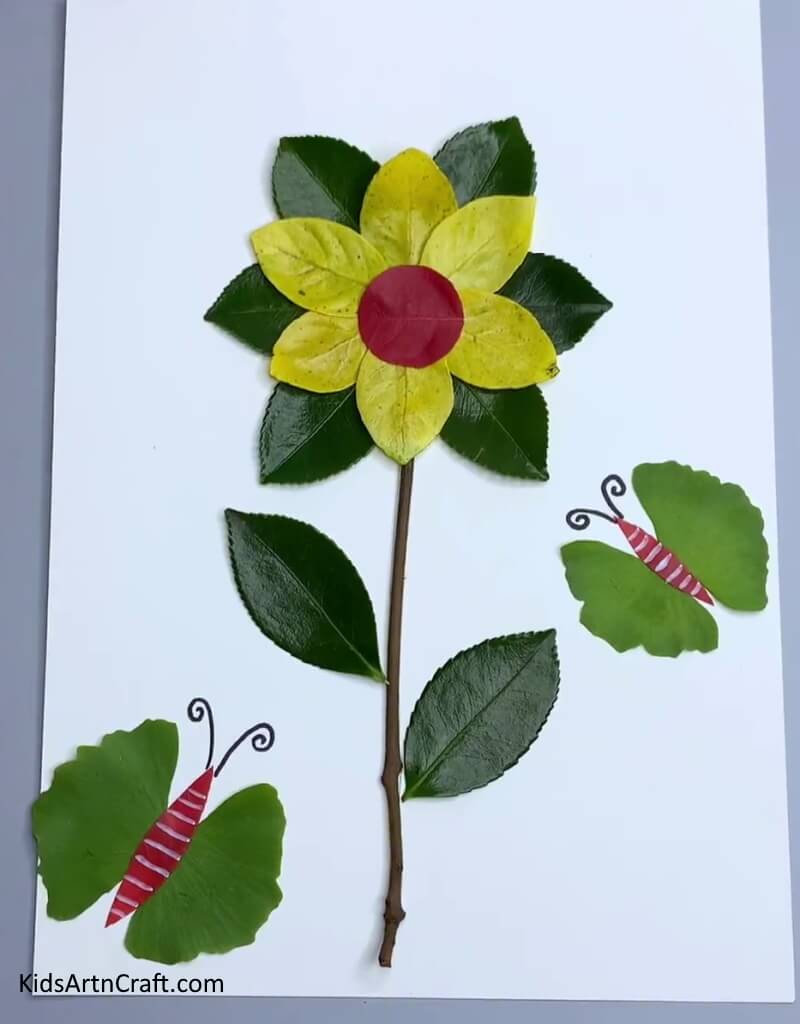
Image Source/Tutorial: Kids Art & Craft
This fun craft activity is perfect for kids of all ages! Create beautiful flowers out of fresh leaves and watch the creative process unfold. With a few simple materials, your kids will be able to bring their inner artist to life.
A Basic Paper Flower Craft For Kids

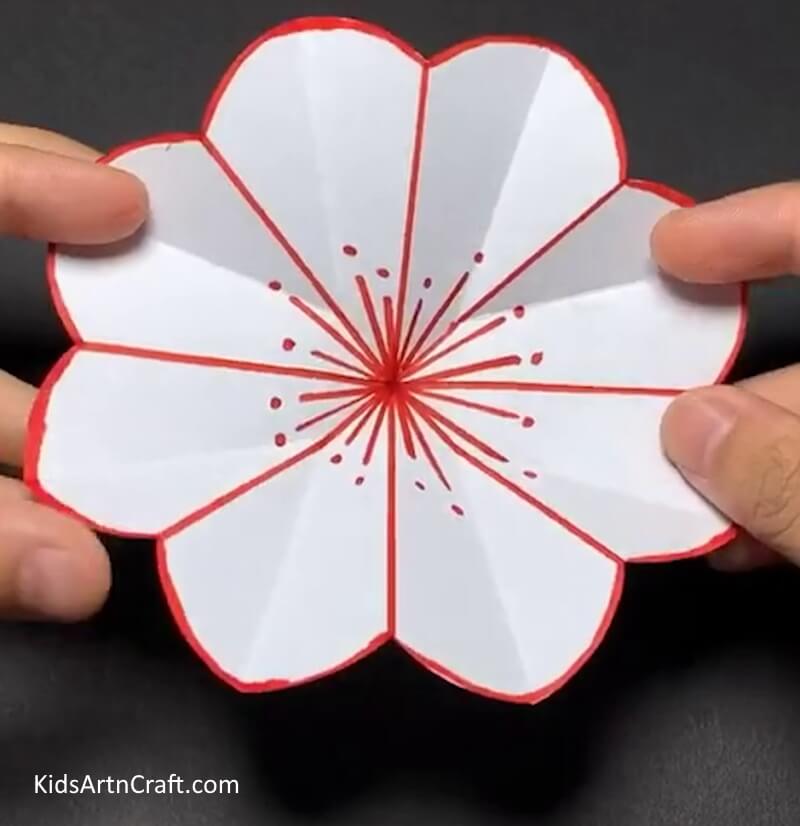
Image Source/Tutorial: Kids Art & Craft
Handmade paper blooms are a fun and creative way to get kids involved in crafts. Kids can make their own colorful flowers that can be used to decorate cards or gifts or simply enjoyed as a beautiful pieces of art. They are a great way to get children engaged in an enjoyable activity.
Beautiful Paper Flower Craft

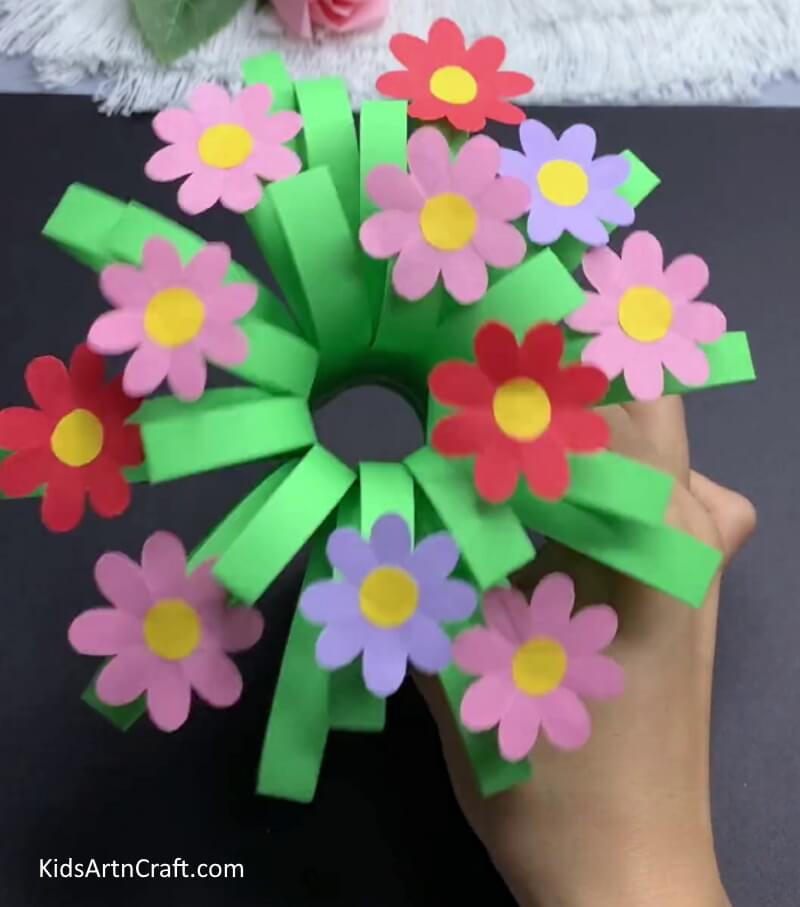
Image Source/Tutorial: Kids Art & Craft
This beautiful paper flower craft is a great way to add a splash of color to any room. It’s a fun and easy project that you can do with your family or friends. The best part is that you can customize the colors and designs to match your decor.
DIY Tulip Flowers with Paper

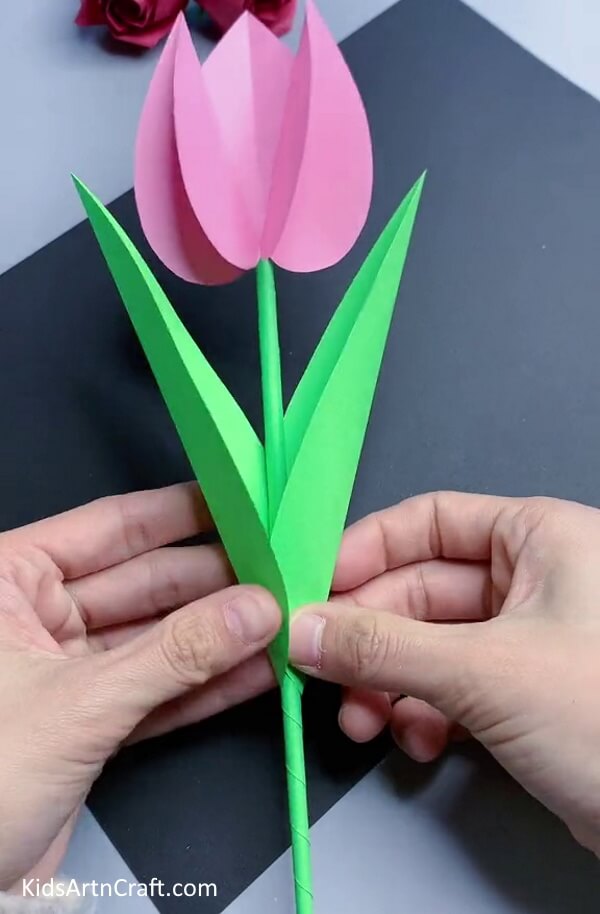
Image Source/Tutorial: Kids Art & Craft
Making tulip flowers out of paper is a fun and creative DIY project! It’s simple, easy to do, and the results are beautiful. Plus, you can customize the colors and size of your tulips to make them perfect for any occasion.
To Make Flower craft With a cardboard tube For Children

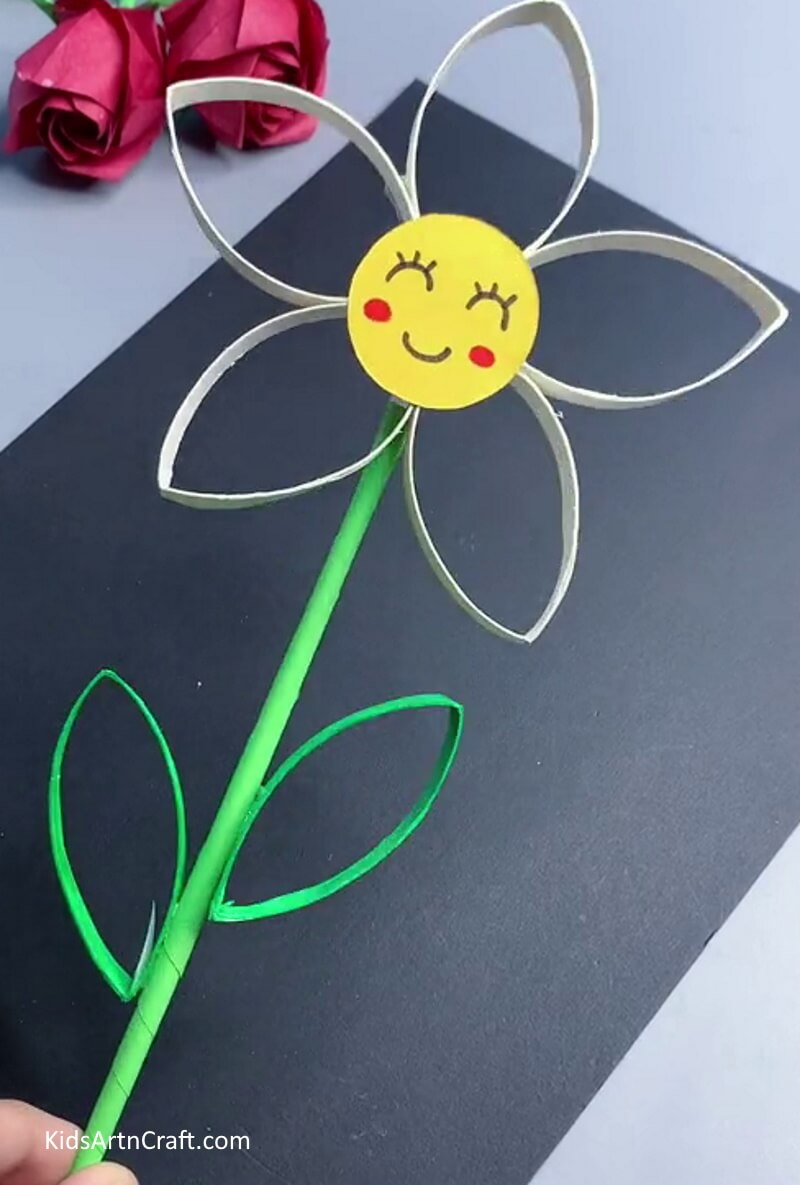
Image Source/Tutorial: Kids Art & Craft
Making flower craft with a cardboard tube is a fun and easy activity for children. It is a great way to encourage creativity and the use of basic materials. This is a perfect activity for a rainy day or a family gathering.
Simple To Make Paper Flower Craft For Kids

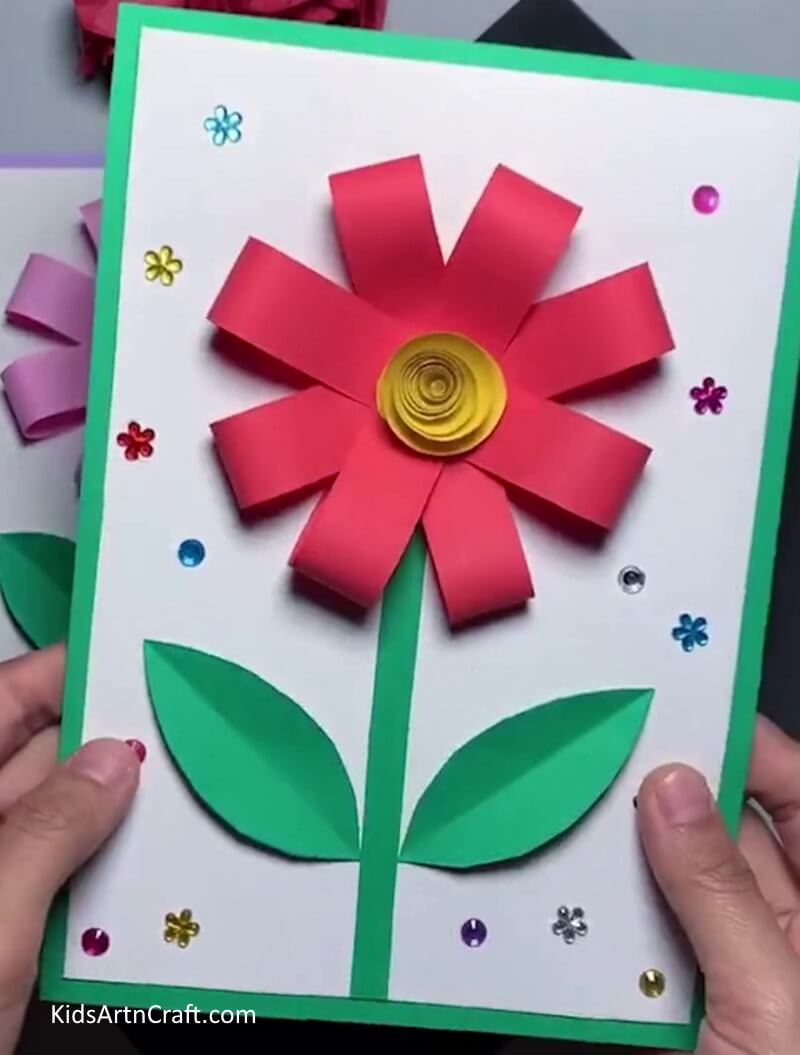
Image Source/Tutorial: Kids Art & Craft
Making paper flowers is a fun and easy activity for kids that allows them to explore their creative side. It’s simple to make and all you need is paper, scissors, and glue. Kids can use their imagination to make their own unique flower creations!
FAQ’S Handmade Paper Flower Craft For Home Decor
1. What colors look best for paper flowers?
You can use any color paper you like, but bright and vibrant colors tend to look best.
2. How can I attach the paper flowers to a wall?
You can use adhesive strips, tacks, or even double-sided tape to attach the paper flowers to a wall.
3. Can I use other materials for the stems?
Yes, you can use anything from sticks and twigs to pipe cleaners and even ribbon for the stems.
4. Are there any special techniques I should use?
Yes, you can use a few different techniques such as crinkling the petals and folding the edges to add texture.
5. How long will the paper flowers last?
The paper flowers should last as long as you take care of them, however, they will eventually start to fade due to sun exposure.
Making handmade paper flowers is a great way to add a touch of beauty and creativity to your home decor. With just a few simple materials and some imagination, you can create beautiful paper flower decorations that will brighten up any room in your house. Crafting handmade paper flowers is an excellent way to add a unique and personal touch to your home decor.
Follow us on Youtube for art and craft tutorials and much more.
More Articles from Kids Art & Craft
- Learn To Make Tree with Paper step by step Tutorial
- DIY Creative Paper Craft Ideas Video Tutorial for All
- Fun Paper Craft Ideas Make At Home Video Tutorial for Kids
- Paper Crafts And Activities Video Tutorial for Kids
- Learn To Make Paper Duck Craft Tutorial