Painting
Easy Handprint Fish Step-by-Step Craft Tutorial For Beginners

This step-by-step craft tutorial is perfect for beginners who want to learn how to make a handprint fish. Get creative with this fun and easy project that can be personalized for any occasion!
Welcome to this step by step tutorial to make easy handprint fish for all the art & craft beginners and enthusiastic. This is super fun and easy DIY craft which can be made by kids as well as adults. You will need some basic materials which are easily available . Also some basic craft skills rest your hands are enough. So now lets get started.
DIY Handprint Fish Craft For Kids

Read More: How to Make Handmade Straw Fan Tutorial for Kids
Materials Required
- Orange paint colour
- White paper or sheet
- Poppy eyes
- Blue paint colour
- Black sketch pen or black marker
- White paint colour
- Paint brushes
Procedure
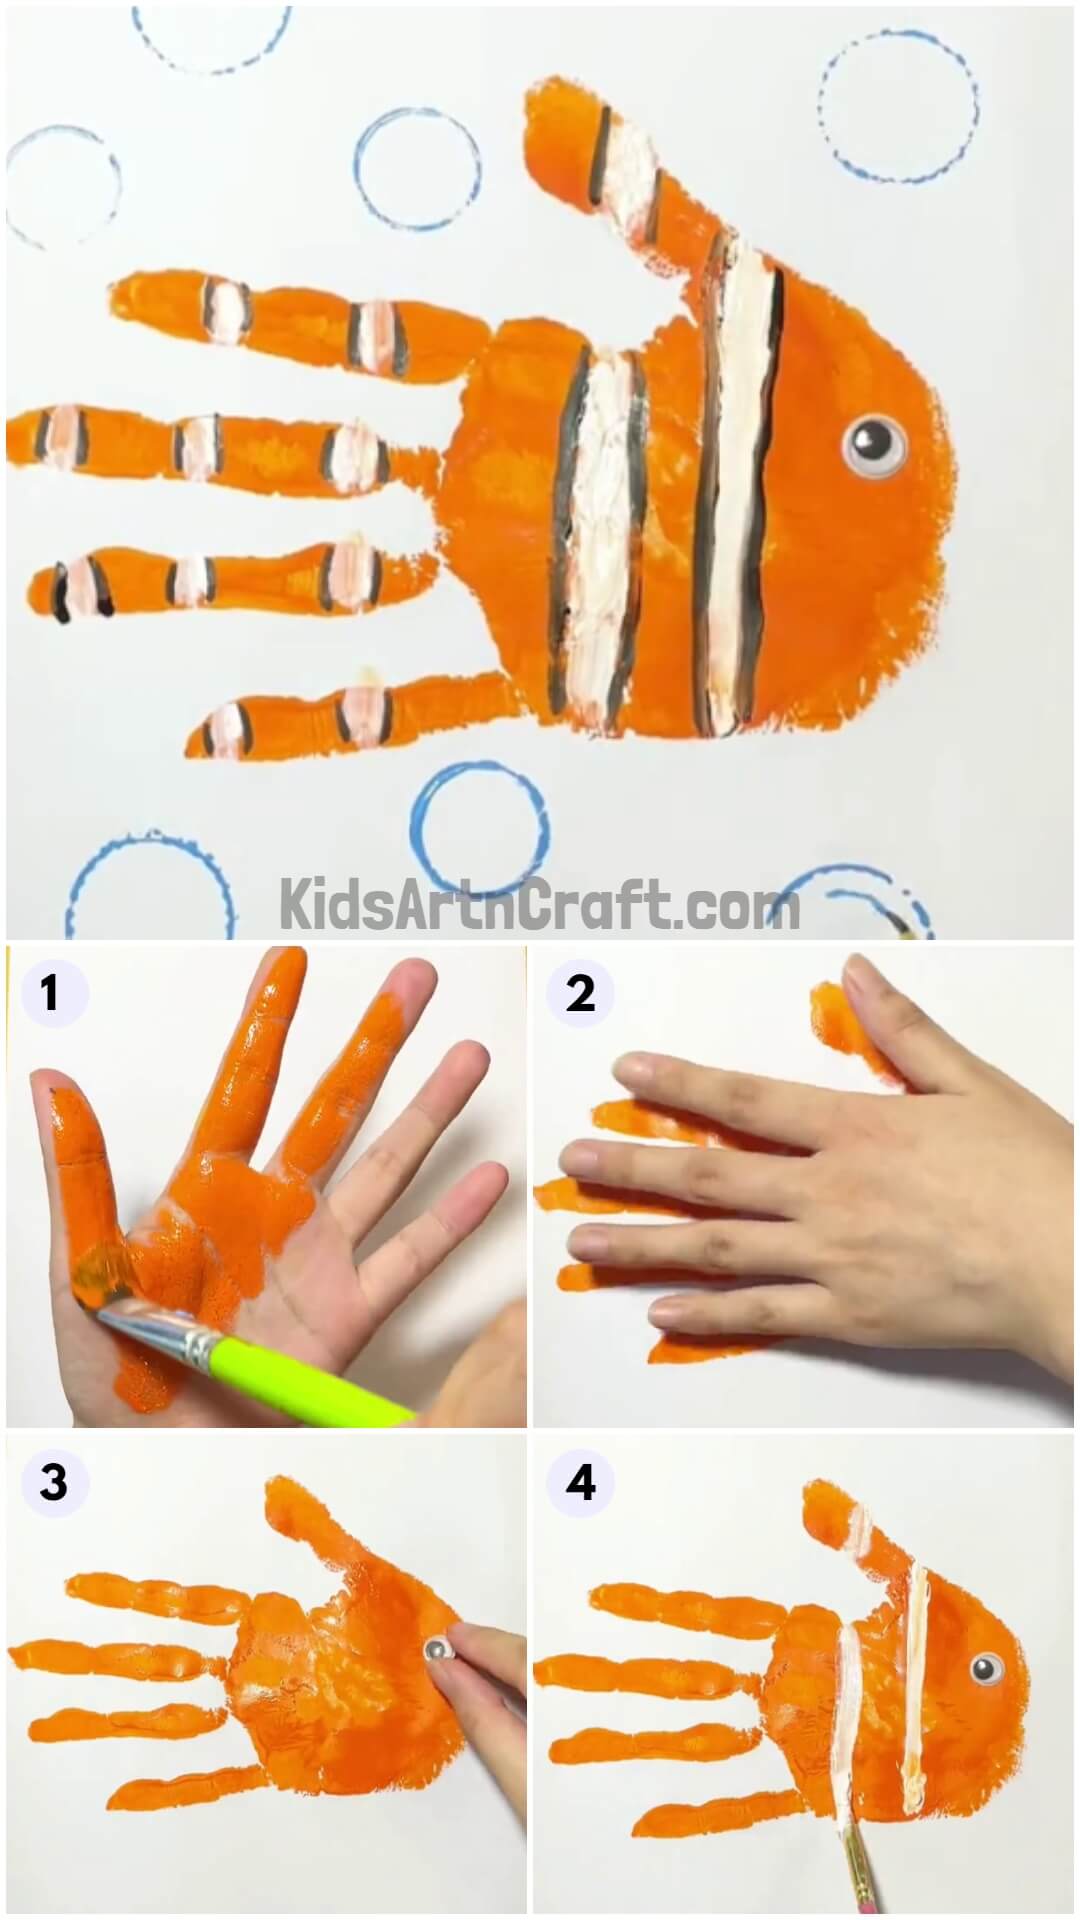
Step 1: Painting One Hand
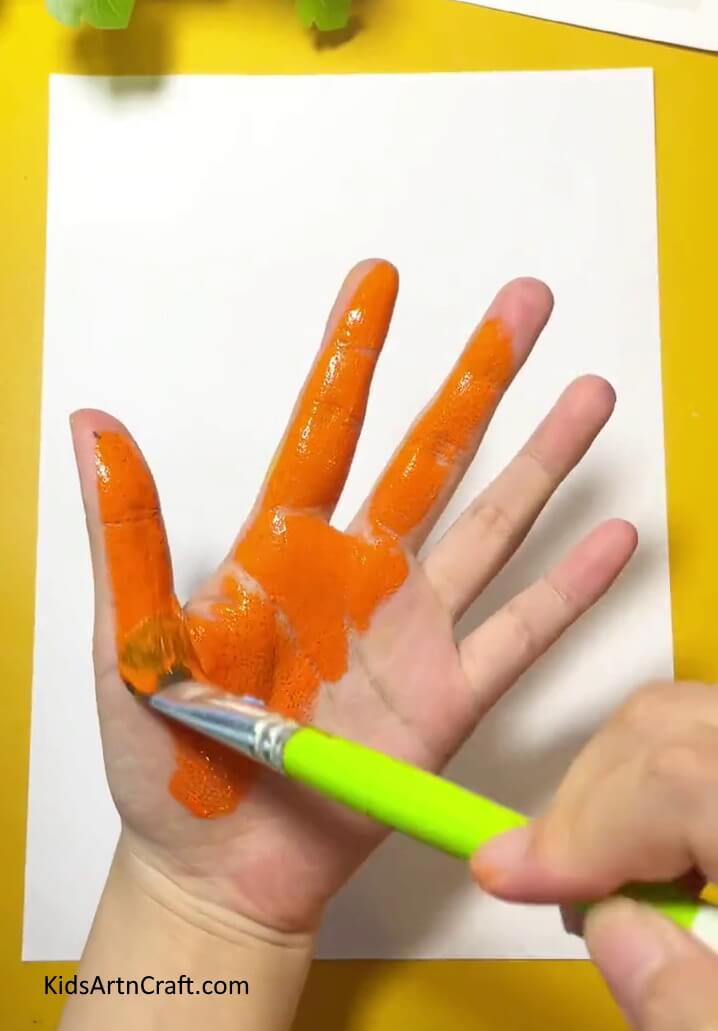

Start this easy craft by painting one palm along with fingers and thumbs with orange paint colour with the help of paint brush. You can get more creative here by using different colours of your choice.
Step 2: Stamping It Over The White Sheet Or White Paper
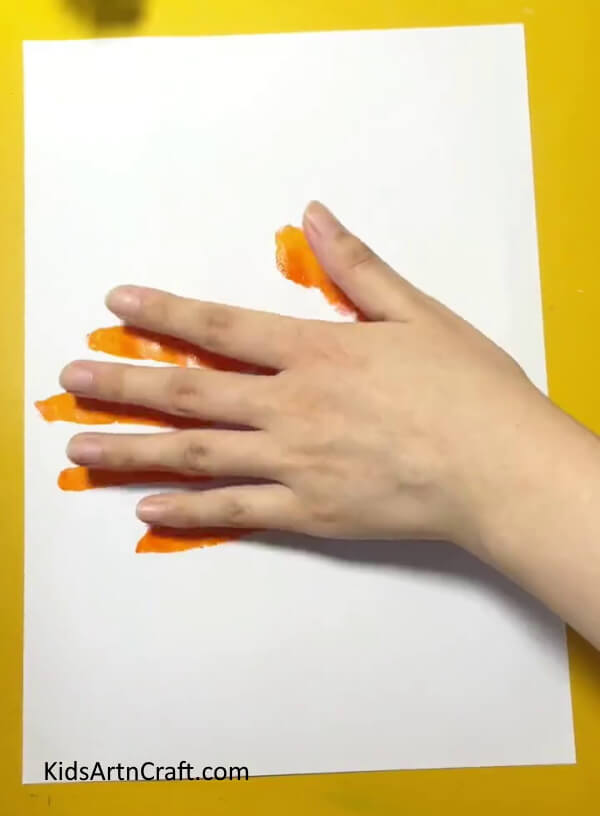

After painting palm , stamp it over white sheet or paper so that colour can get transfer over the sheet as shown in the photo above.
Step 3: Sticking Poppy Eyes To Make Eyes Of The Fish
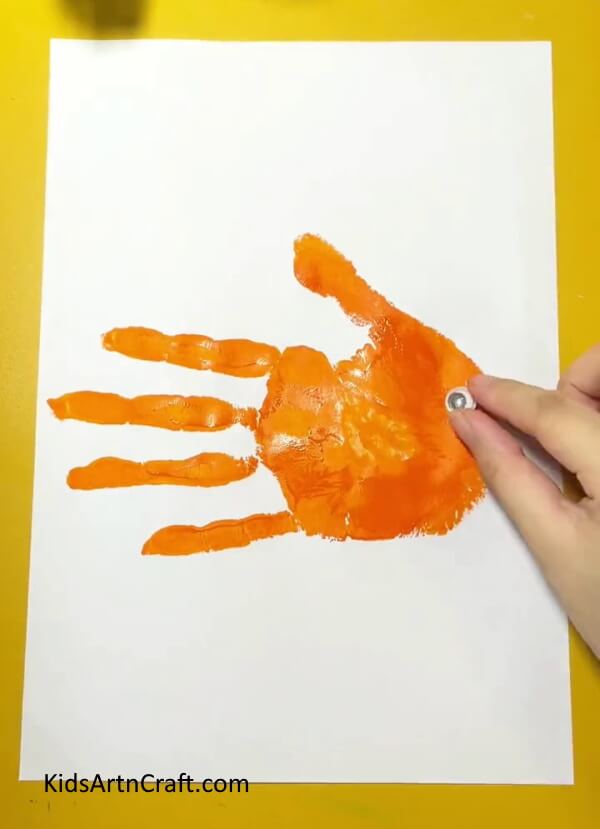

After stamping palm in the sheet, start sticking poppy eye on one side of the palm that is opposite to the fingers side with the help of glue stick.
Step 4: Painting White Lines To Make Strips Of The Fish
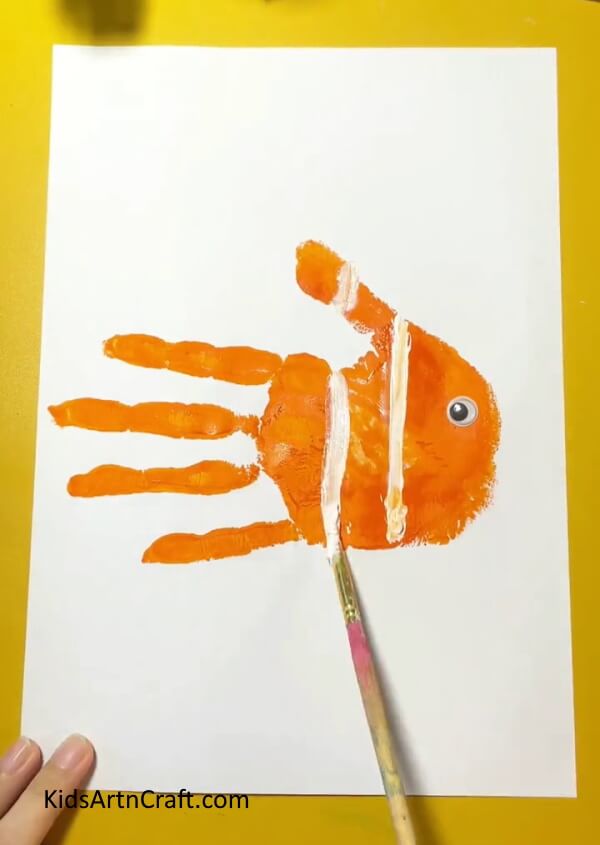

After sticking the poppy eye , start painting strips with the white colour paint in the fish that is make straight lines in the fish which will be strips of the fish.
Step 5: Drawing Outlines Of The Strips Of Fish


After making strips, make the outline of the strips by drawing lines with black marker. Similarly keep making lines of the strips till all are done.
Step 6: Making Water Bubbles
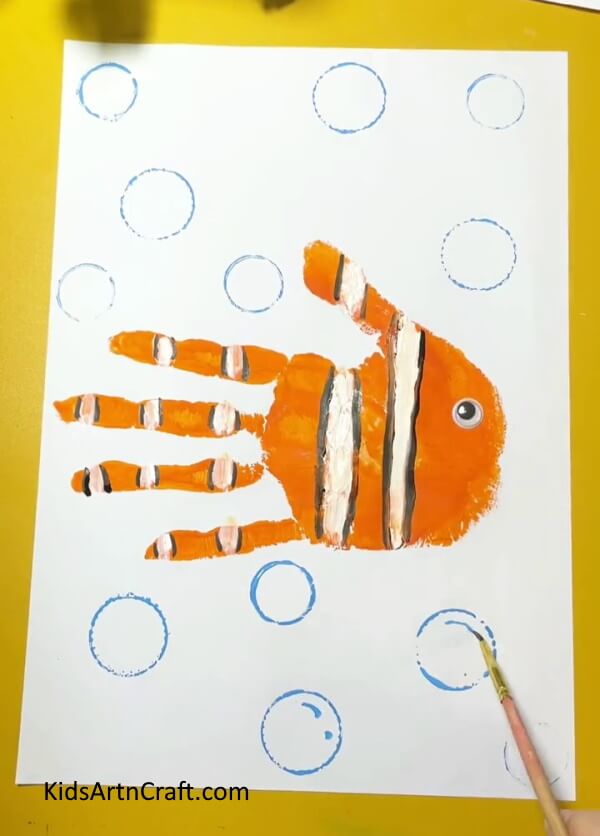

After outlining the strips, now its time to make water for the fish. Take out your paint brush and blue paint colour. Draw circles with blue paint colour with thin brush use size 1 pain brush . Also don’t make complete circle. Make the line dotted in one side and complete line in one side of the circle . It should look line broken circle in one side as shown in the photo above. Then draw some curve lines and dots inside the circles to make it look like bubbles of the water.
Complete Drawing Bubbles To Make Water Around The Fish
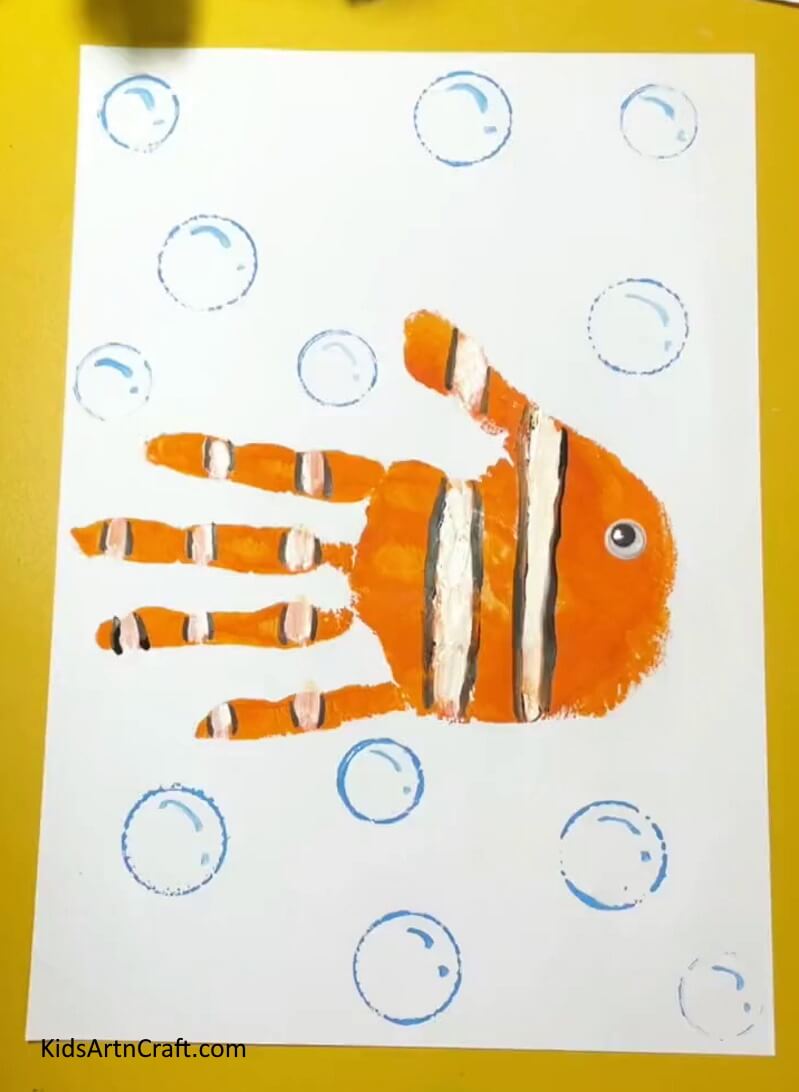

Voila! we have made this beautiful craft with only little bit of efforts and the fish looks so pretty. It is super easy and doesn’t require many materials . You can get creative and make different colour fishes too . Hope you’ve enjoyed the process. Now its your turn to try this super fun and easy craft . And let us know in comments how it turned out and how helpful this tutorial is for you. We would be happy to read all your comments.
And be sure to visit other articles for more such fun and super easy ideas!
Thanks for visiting our website.
Follow us on Youtube for art and craft tutorials and much more.