Paper Crafts
Fun Jumping Frog Paper Craft For Kids

This frog paper craft is a great way to keep kids busy! The instructions are easy to follow, making it a great activity to help kids be creative and learn. Kids will have lots of fun making their own frog and watching it jump!
Frogs are small amphibious creatures who can swim in water and walk on land as well. They have thousands of species all around the world, each unique in its own way. Their one can equate to twenty times the size of their body. You might have seen them outside your homes especially in monsoons or in ponds and lakes swimming or sitting on leaves. This tutorial is inspired by these creatures and we will be making them through craft. They are usually green in color so our craft frogs will be green too. So, collect all the material required, and let’s get started.
Fun Jumping Frog Paper Craft For Kids

Read More: Fun To Make Paper Chick Craft
Material Required
- Green coloured sheets of chart paper
- A small pink colored sheet of paper
- A pair of scissors
- A pair of googly eyes
- A black sketch pen
- A glue stick
Procedure
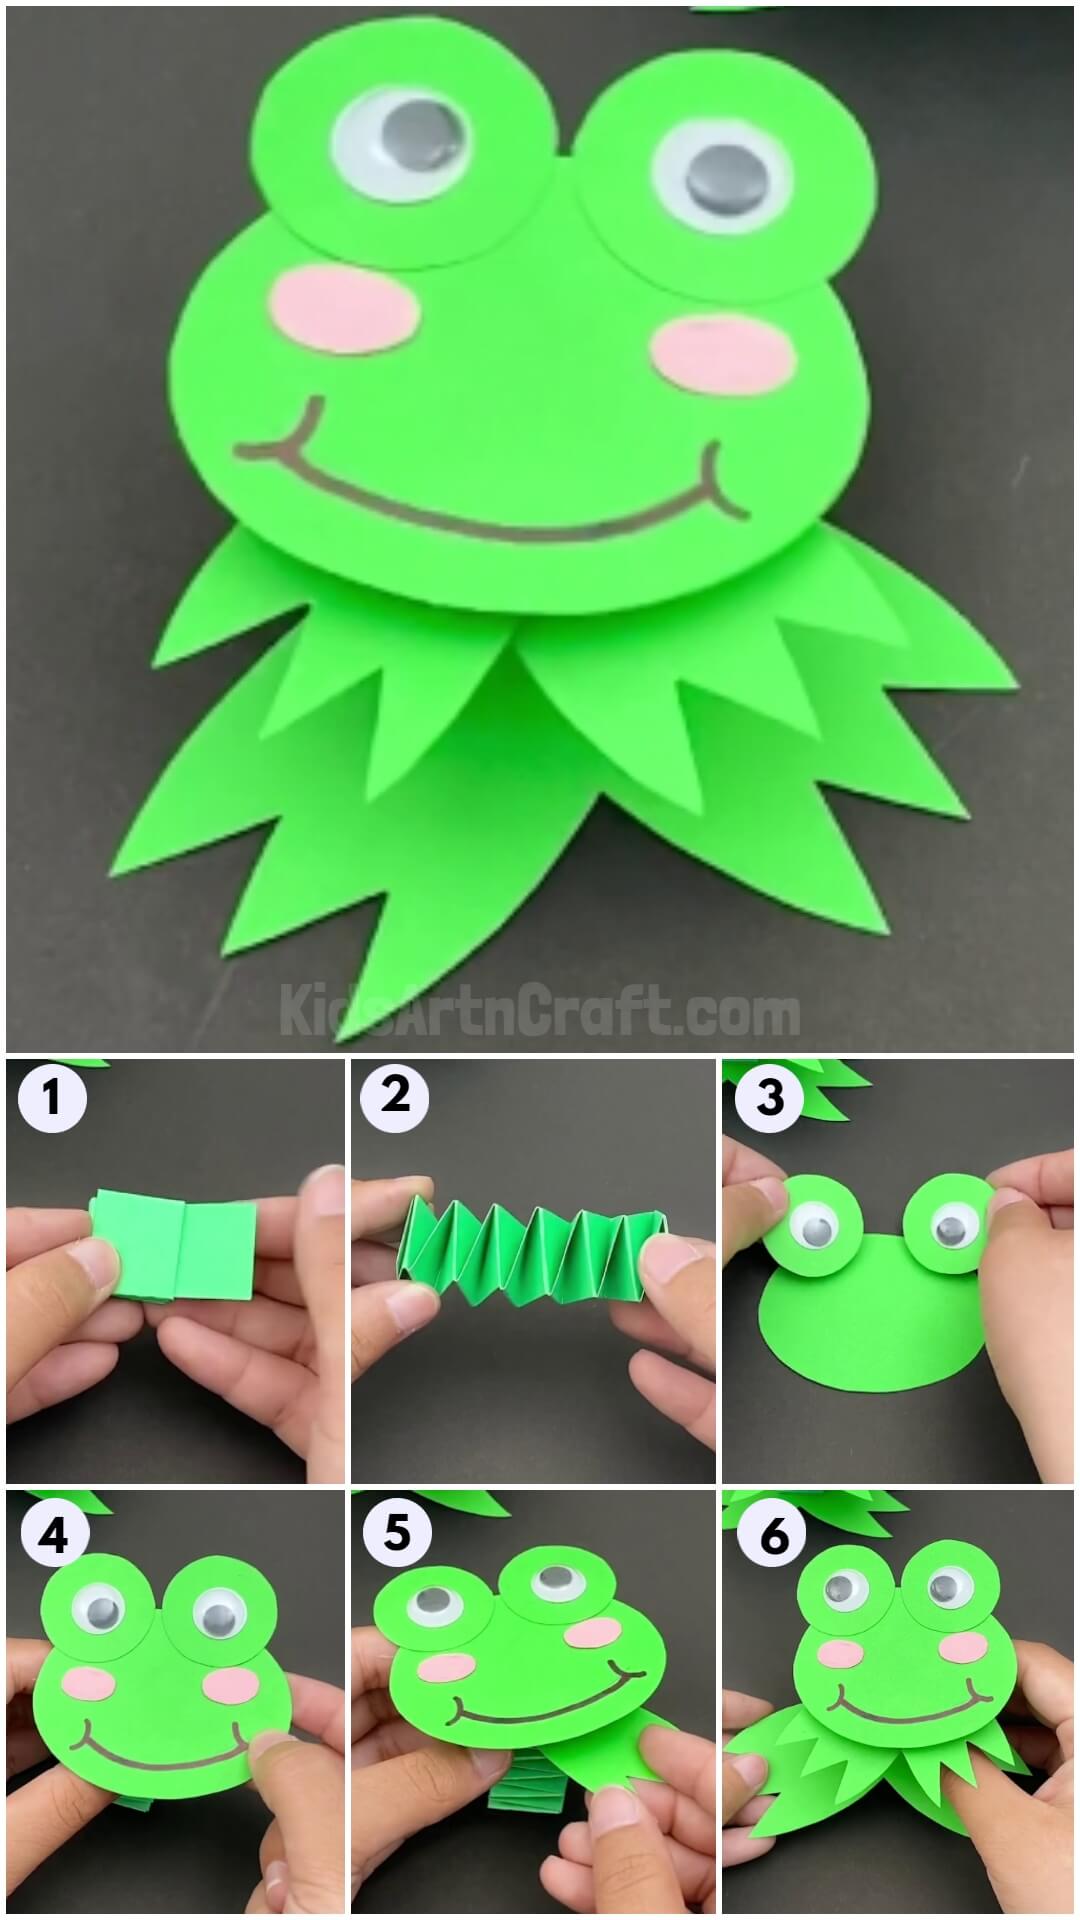
Step 1: Working of the Sheet of Paper
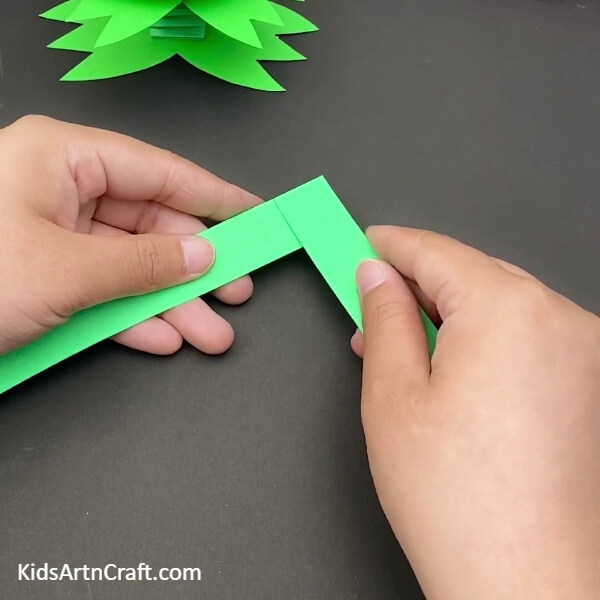

Take a sheet of paper and cut two long strips out. The strips should not be too wide. Now, paste the ends of the two strips together, one kept horizontally and the other vertically. See the picture below for reference.
Step 2: Folding the Strips on Top of Each Other
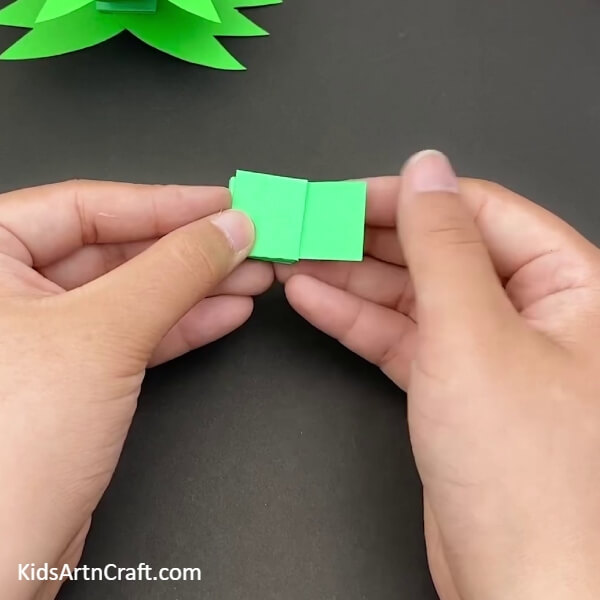
Fold the horizontal strip on top of the intersection, and then fold the vertical strip on top of it. Repeat the process by folding the strips alternately on top of each other until you reach the ends of both the strips. Apply some glue on one of the ends and paste it to the base of the folded strips beneath. Paste the other end on top of the end you pasted on the base. See the picture below for reference.
Step 3: Making the Spring Work
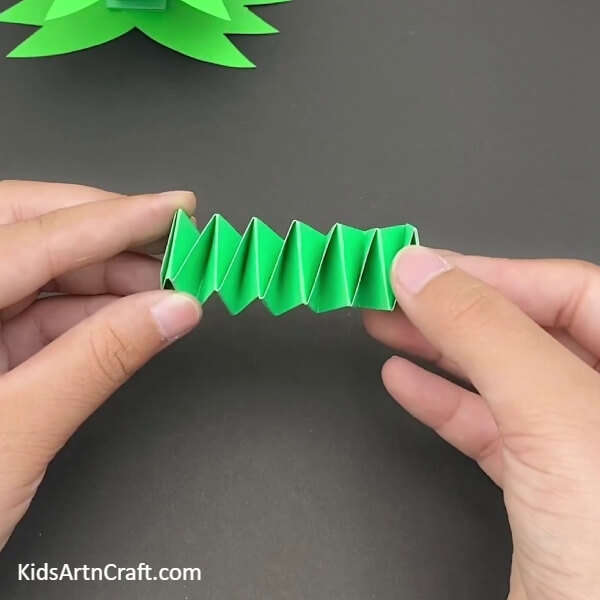
Now that the ends are sealed, stretch the folded strips to reveal the spring like structure created by implementing the steps. See the picture below for reference.
Step 4: Pasting a Small Piece of Paper on Top of the Paper Spring
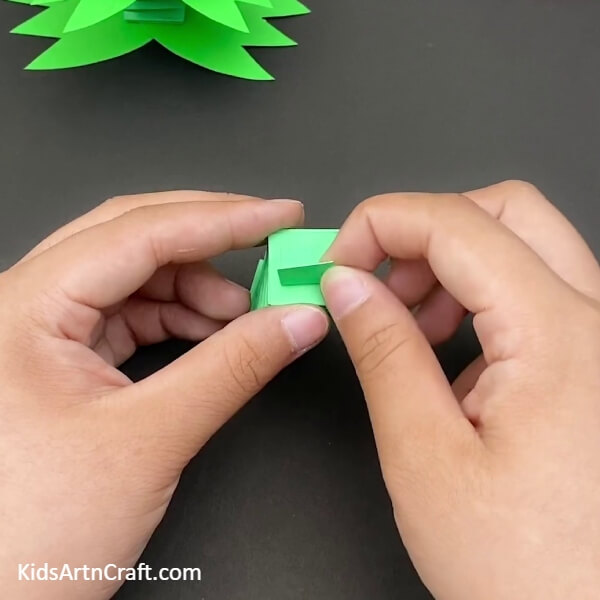
Cut a small piece of paper out and fold it a little at the bottom. Make one of the sides of this folded sheet flat. Paste the flat fold on the top base of the spring. See the picture below for reference.
Step 5: Making the Head of the Frog
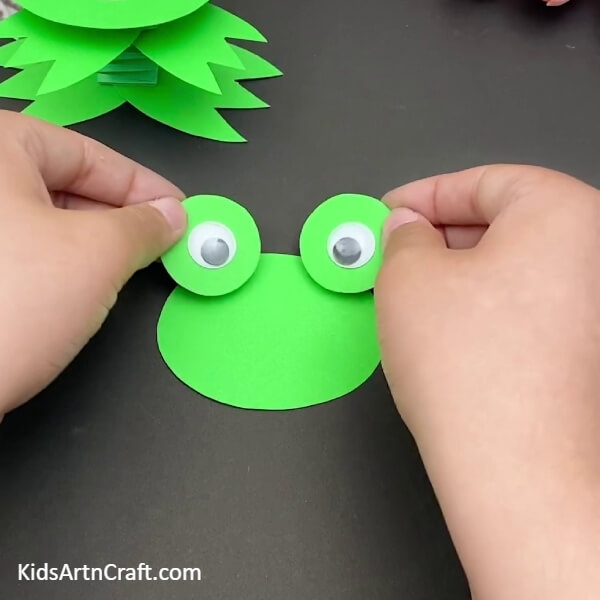
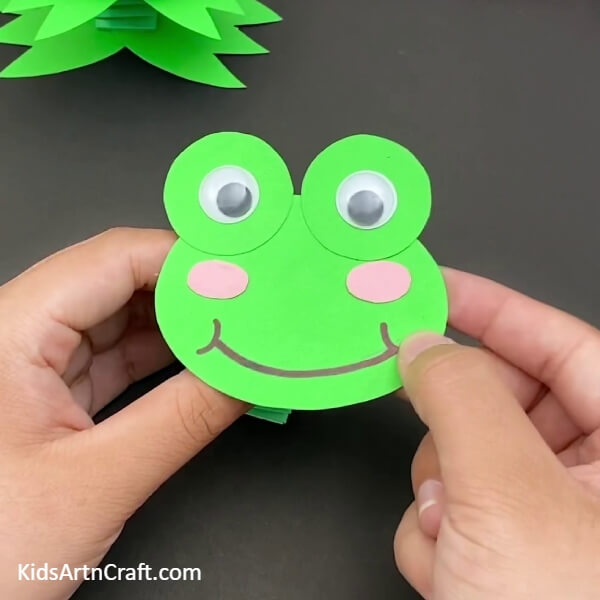
Take another sheet of paper in green colour and cut an oval shape out of it.This will serve as the head of the frog. Place this shape on the table, horizontally. Take another sheet of paper in same colour and cut two circles out of it. The circles should be smaller than the oval shape you made before. Paste one googly eye in the middle of each circle. These will act as the eyes of the frog. Paste these eyes, next to each other on top of the oval sheet placed on the table. See the picture below for reference.
Step 6: Making the Mouth of the Frog
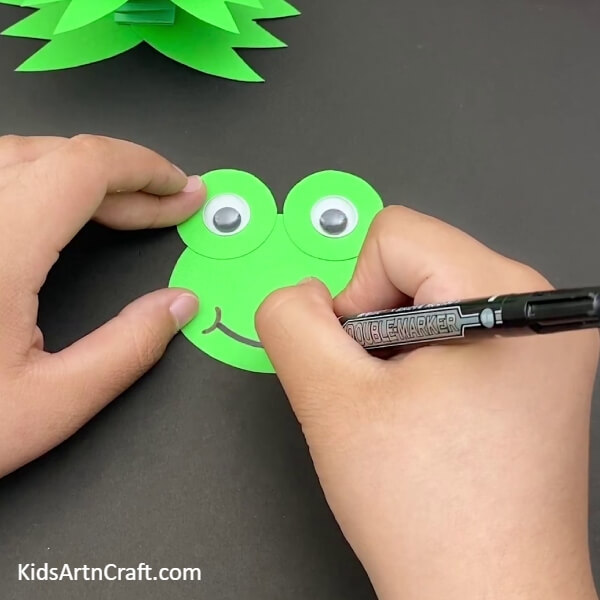
Take a black sketch pen and draw a big horizontal curved line at the bottom of the head. Now, make two small vertical curved lines on the ends of this big curved line. This shall act as the mouth of the frog. See the picture below for reference.
Step 7: Cutting Some More Shapes
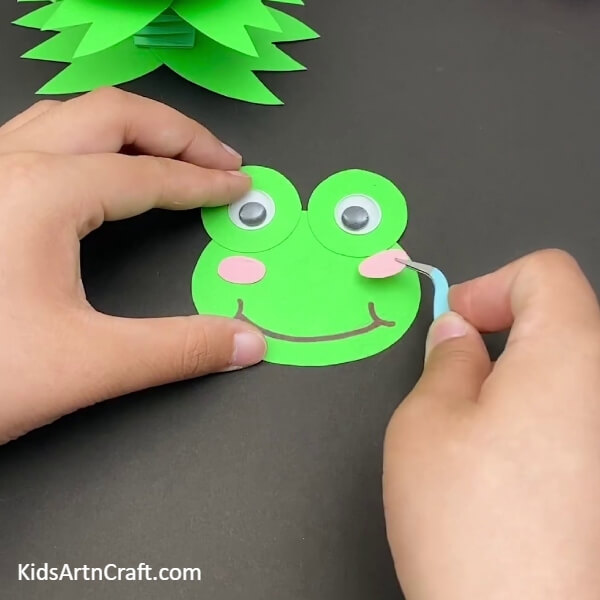
Take a small pink sheet of paper and cut two small oval shapes out of it. Paste one on each cheek of the frog’s face. See the picture below for reference.
Step 8: Pasting the Head on the Spring
Paste this paper frog head on the small piece of paper you pasted on the spring earlier. Press on the back of the small piece of paper to seal the head on the spring properly. See the picture below for reference. This will make the head of the frog bob due to the paper spring beneath it.
Step 9: Pasting the Forelimbs
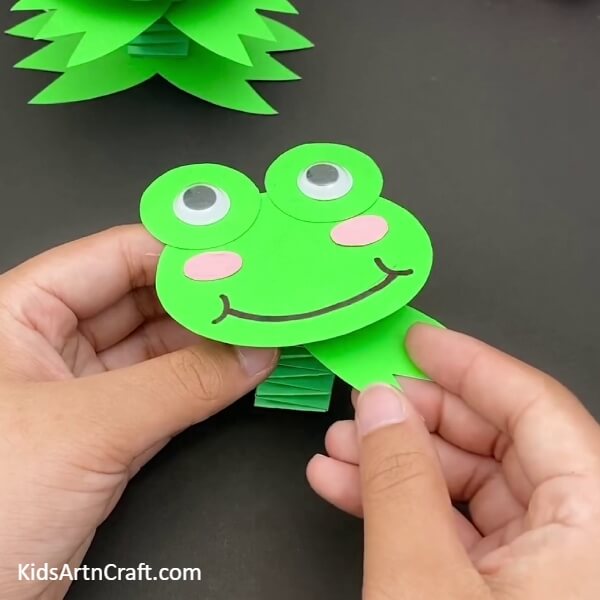
Take a green sheet of paper and make two oval shapes on it. Draw three zig zag patterns on one of the sides of the oval shape, resembling the webbed feet of a frog. Cut the both drawings out and paste them next to each other on the back of the head at the bottom surface of the sheet. See the picture below for reference.
Step 10: Making the Hindlimb
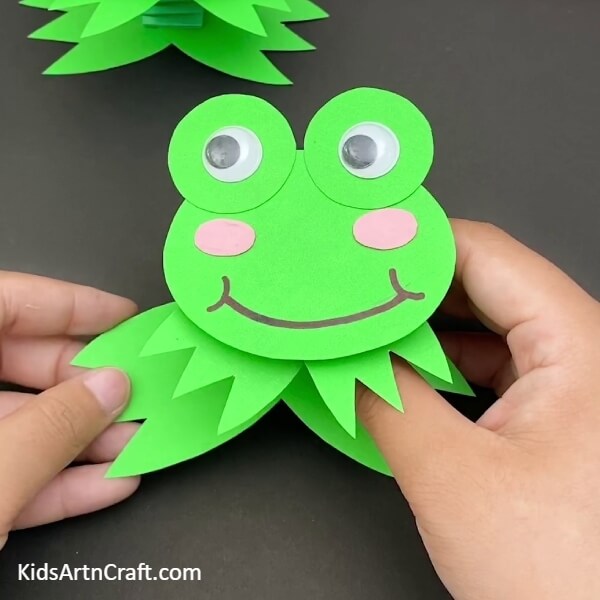
Take a sheet of paper in same colour and make a big circle on it with three webbed claws on one side and three on the other. Remember to make this drawing bigger than the previous ones. Cut the drawing out and paste them on the bottom base of the paper spring. See the picture below for reference.
Making the Frog Leap
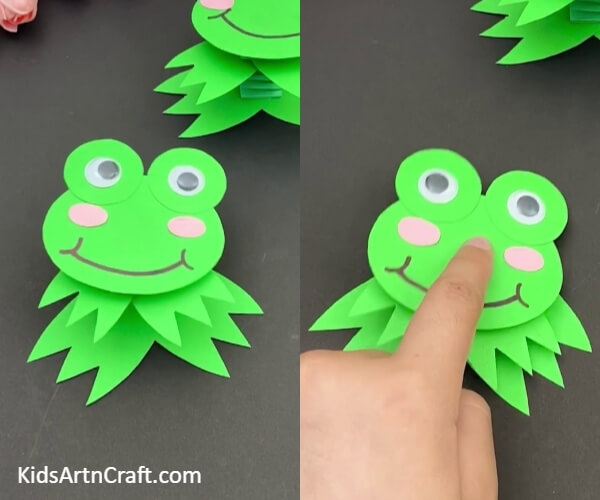

Press the head down and it will bounce back which would seem like took a jump like the real frog as shown in the picture below. How cool is that!
This completes the tutorial of making a moving frog. You can literally see this frog in action, leaping and jumping with the help of the paper spring. This tutorial taught us some great folding and cutting skills. We learned to make a paper spring which can assist a piece of craft in bouncing and moving. Think of more craft you can make with this particular technique and the lovely art it can bring to existence. You can place it on your study table and play with it all the time. Keep following the tutorials to learn more such unique techniques. See you soon in more such tutorials. Till then, good luck and good bye.
Some More Frog Craft Tutorial
Using Paper to Create Frog With Kids

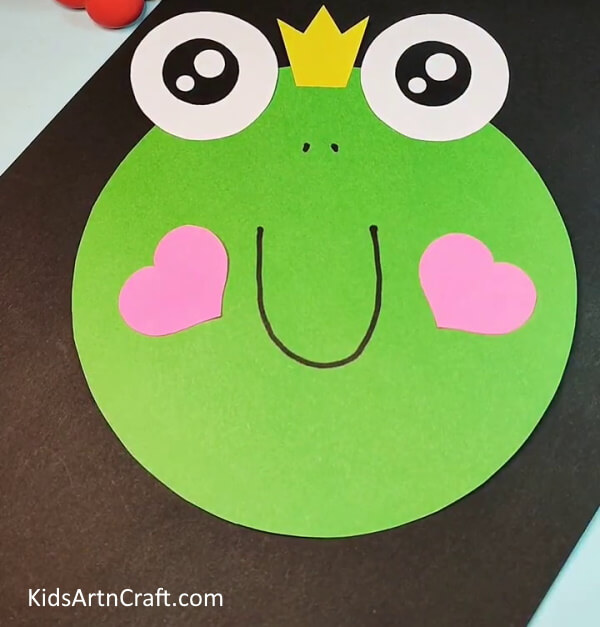
Image Source/Tutorial: Kids Art & Craft
Creating a frog out of paper with kids is a fun and easy craft project. It helps to develop their fine motor skills and teaches them about shapes and colors. It is also a great way to bond with your child and have meaningful conversations.
Paper Frog Craft With Tongue

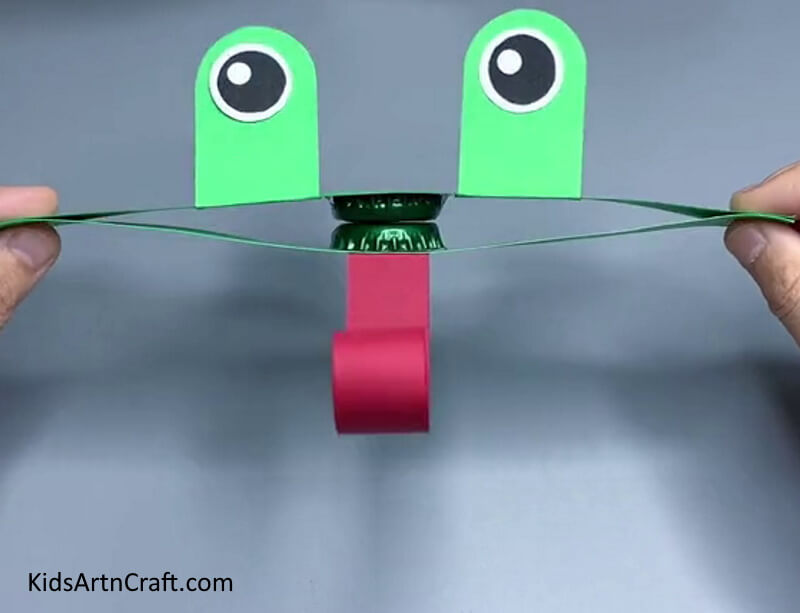
Image Source/Tutorial: Kids Art & Craft
This Frog With Tongue Paper Craft is a fun and easy project for kids of all ages. It’s a great way to bring out their creativity and have a fun craft to take home. With just a few simple materials, you can create this fun frog craft.
Follow us on Youtube for art and craft tutorials and much more.
More Articles from Kids Art & Craft
- Paper Strips Frog Craft Step By Step Tutorial
- DIY Easy Paper Chick Craft For Kids
- Easy Frog Paper Craft For Kids Easy Tutorial
- Handprint Craft Paper Frog Easy Craft for Kids
- Colorful Fish Paper Craft To Make With Kids