Paper Crafts
Kites Flying Paper Craft Tutorial For Kids

Looking for a paper craft to make on any special occasion? This step-by-step tutorial includes steps for making flying kites in the sky craft!
Let’s make a unique craft today! These pretty kites in the soothing sky will be a hit addition to your paper crafts collection! By using up just some easily available crafting materials that you can already find at home, you can create this craft with us in just the blink of an eye! This craft is perfect for kids to have a fun crafting time in the boring afternoon hours! You can even have a classroom activity on making this flying kites in the sky craft! Grab the materials and read on to begin!
Flying Kites From Paper Craft For Kids

Read More: How To Make Easy Frog Using Paper Crafts
Materials Required
- Colored Paper Sheets
- Colored Sketch Pens (Black And Dark Green)
- Scissors
- Glue Stick
Procedure
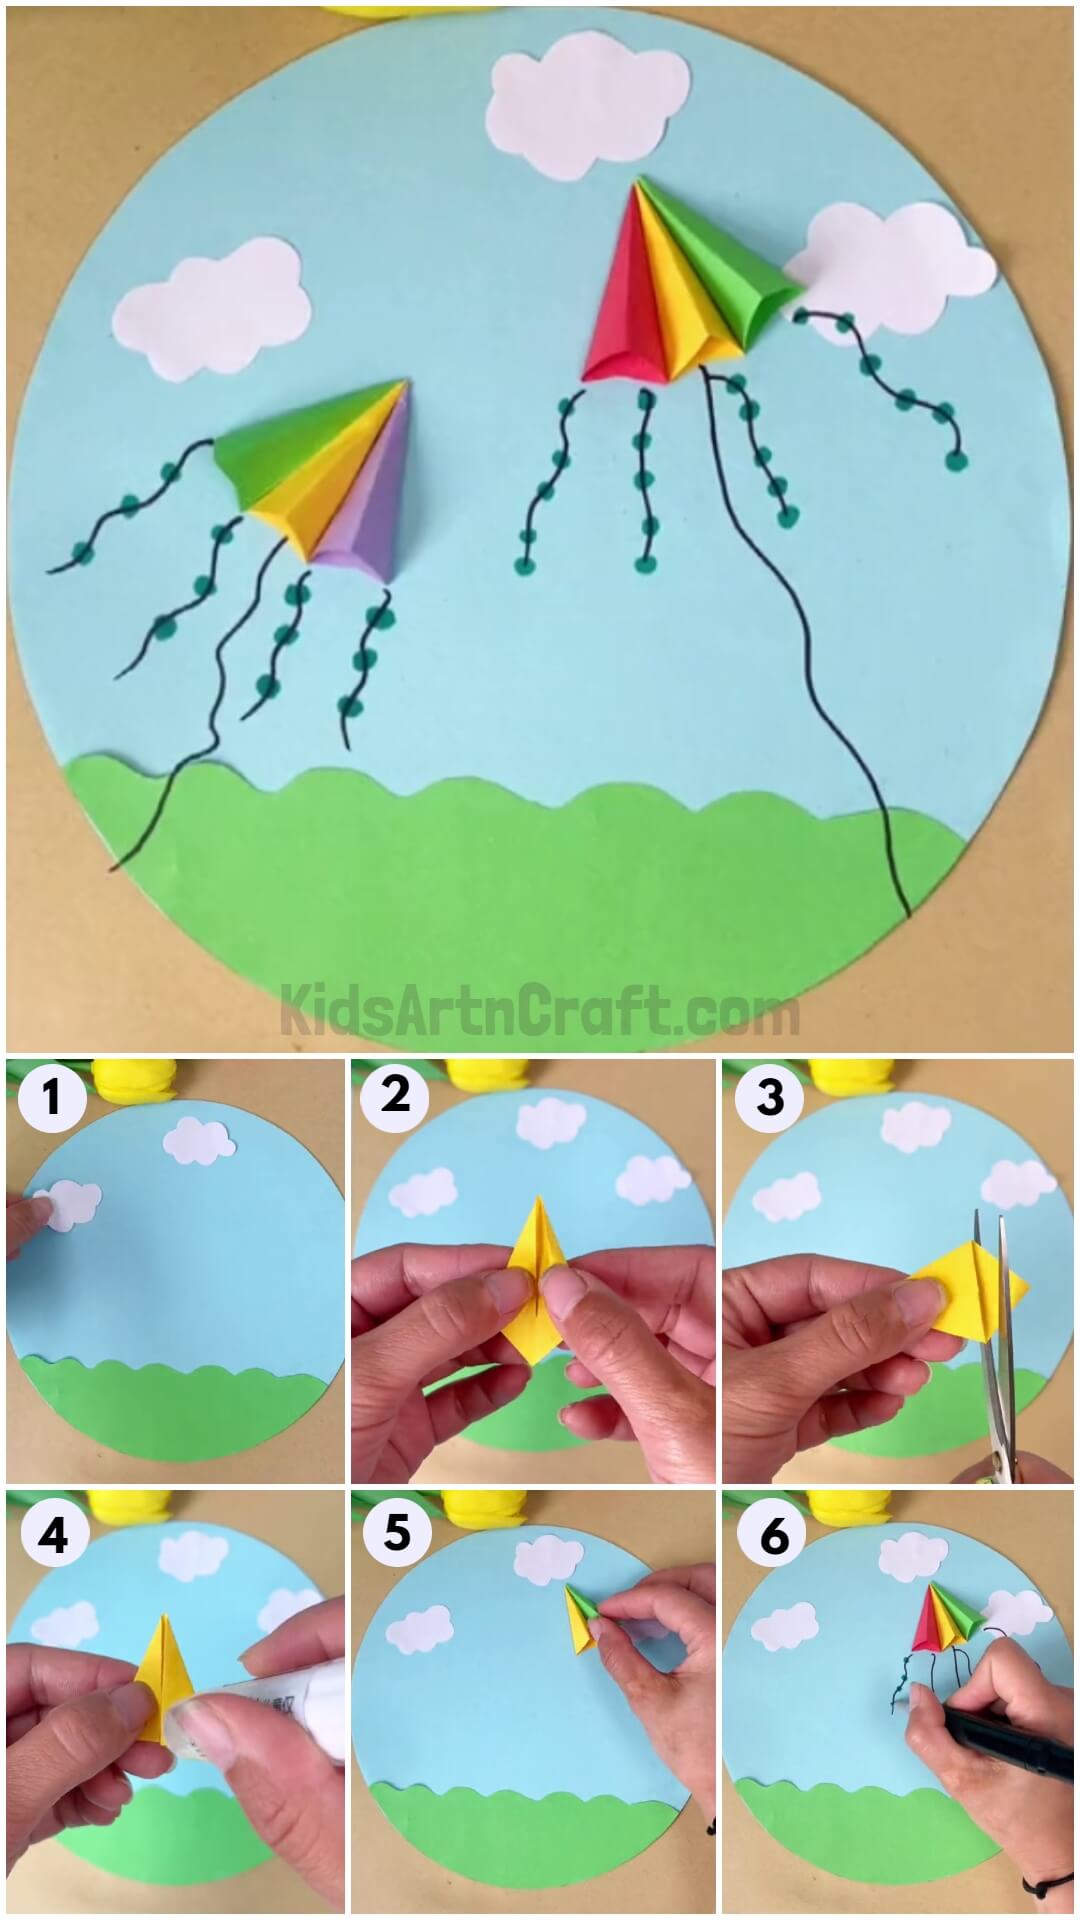
Step 1: Pasting Curvy Ground On The Base
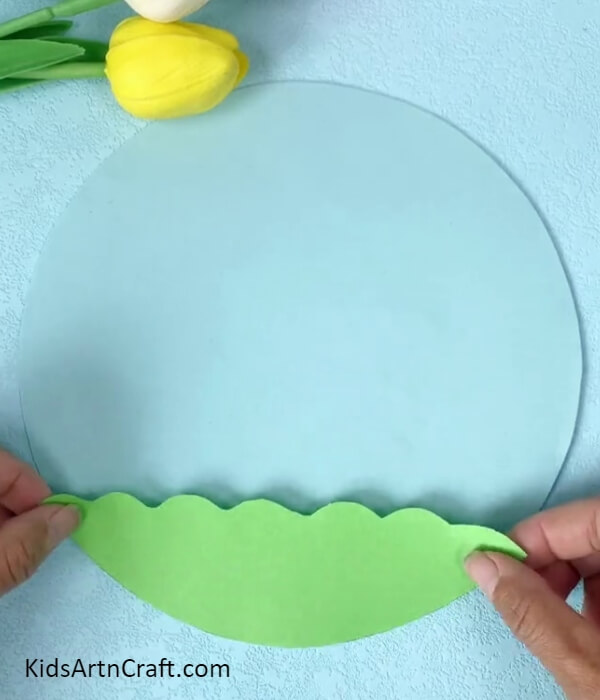

To begin this craft take a blue and green paper sheet and a pair of scissors. Using scissors, cut out the blue sheet into a circle to make the base for your craft cut out the green grassy curvy ground, and use a gluestick to paste it over the blue base. Make sure to cut out the extra part of the ground that is coming out of the base.
Step 2: Adding Clouds To The Base
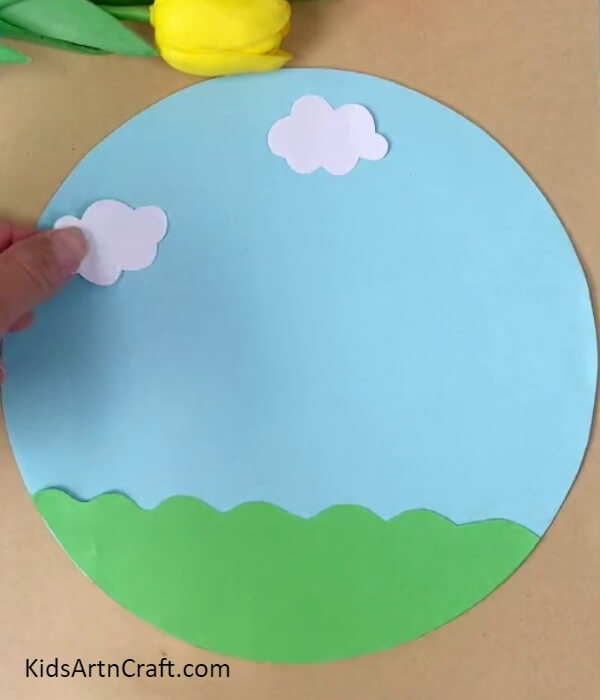
Using scissors, cut out clouds from a white paper sheet, and using a gluestick paste it over the ground on the top of the blue base.
Step 3: Making A Kite Shape
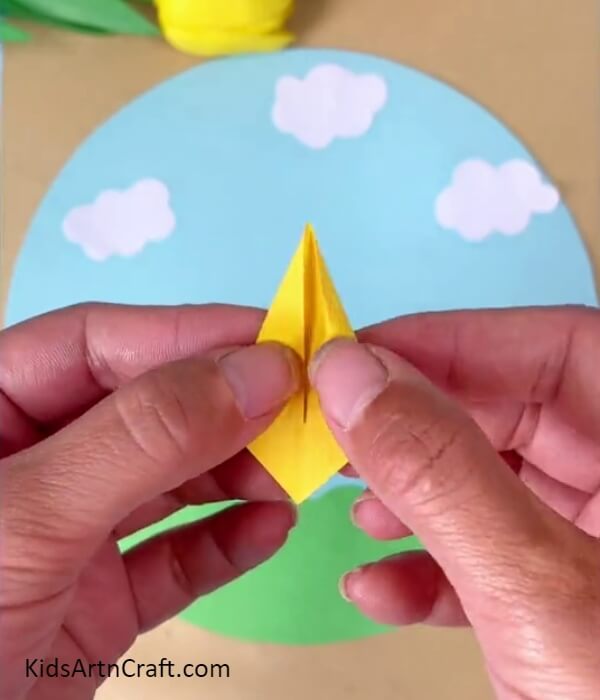
Take a small yellow square piece of paper and fold its 2 adjacent sides to the center to form a kite shape.
Step 4: Cutting Out The Small Triangle From Kite
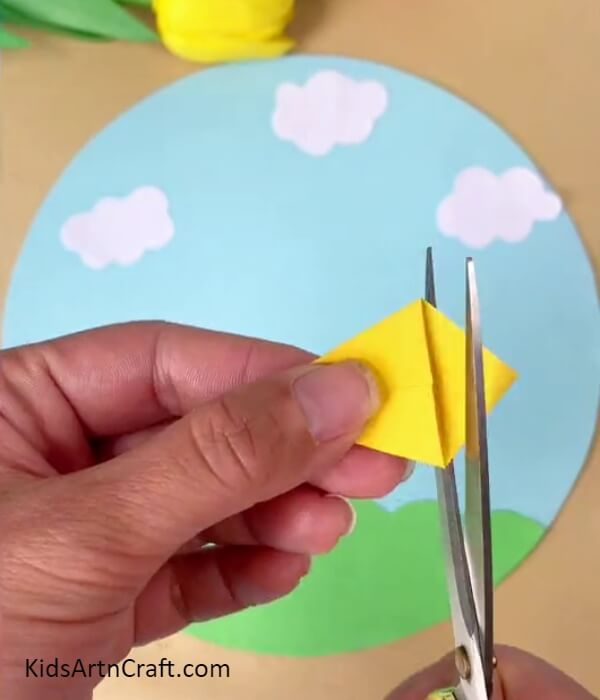
Using scissors, cut out the small triangle from the kite’s top to see a long triangle with a partition.
Step 5: Making A 3D Triangular Cone
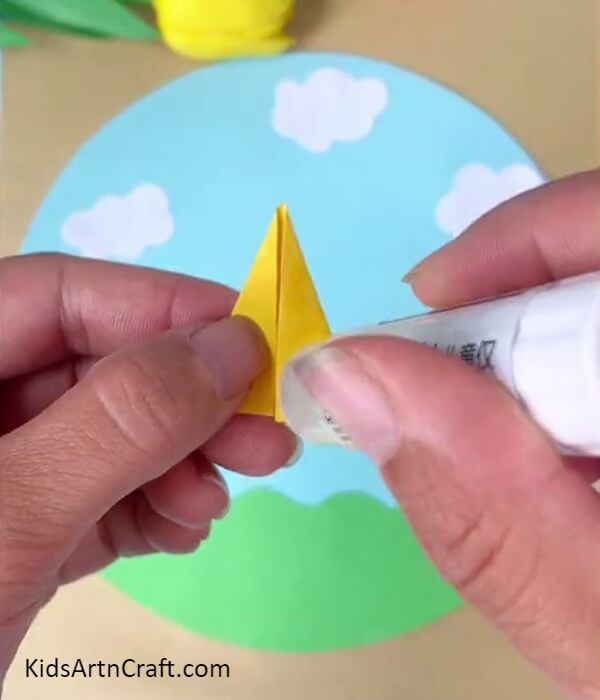
Apply glue stick on one side of the partition of the triangle and paste the other one over it from the inside to make a 3D triangular cone.
Step 6: Making Kite In The Sky
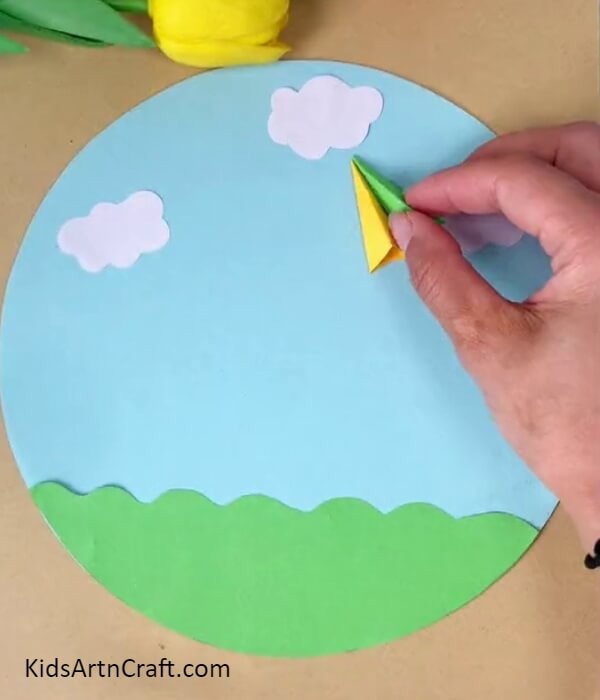
Make another triangular cone by following the same previous steps on a green sheet of square paper and stick the yellow one and green one close to each other on the blue base in the sky using the glue stick to form a kite.
Step 7: Detailing The Kite
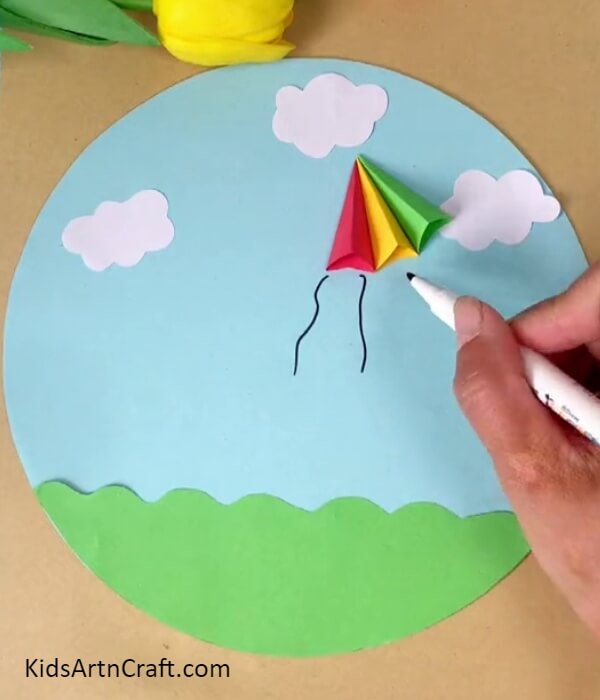
Make another red paper 3D triangular cone and paste it beside the yellow one using the gluestick and use a black sketch pen to make wavy lines from the end of the kite randomly to add details to it. Make sure to make a wavy line touching to the end of the base to make it look like the thread attached to the kite.
Step 8: Completing Detailing The Kite
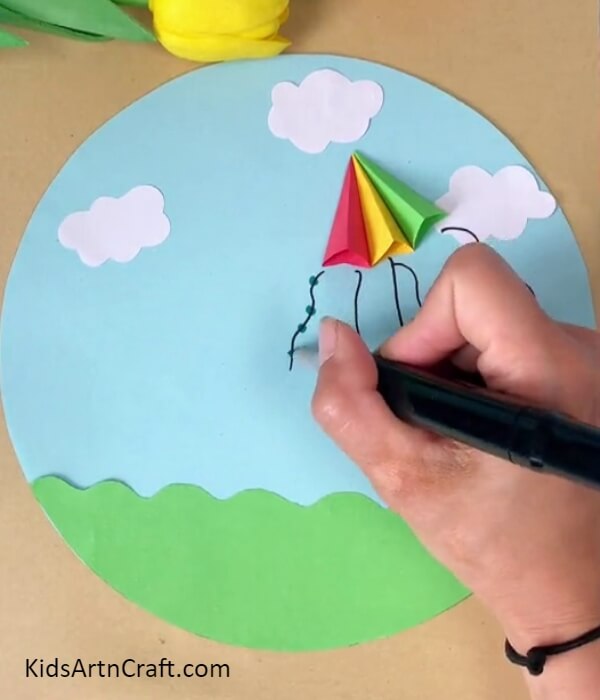
Using a green sketch pen, make circles over the short wavy lines to make them look like the decorations of the kite.
This Is The Final Look Of Your Kites In Sky Craft!

For the last step, create another similar kite on the other side of the sky, using green, yellow, and purple sheets, from the previously mentioned/described steps.
Congratulations! You have finally completed your kites in the sky paper craftwork in no time!
This craft is fun to make and is a banger at times occasions like New Year’s, Independence Day, and other custom-based occasions! You can hang this craftwork on the wall of your room to admire your creation every time you look at it! This craft will give you soothing vibes by just looking at it! You can even customize this craft by customizing the location of decorating the kites even more up to your imagination!
We hope you liked this article. Don’t forget to give it a like a share it as much as you can with your friends and family! Also, share us your crafting journey and feedback in the comments section below!
Follow us on Youtube for art and craft tutorials and much more.
More Articles from Kids Art & Craft
- Learn To Make Easy Heart Shaped Paper Mouse Craft
- Recycled Plastic Bottle Dragon Craft Tutorial for Kids
- How to Make Easy Paper Snowflakes Tutorial
- How to Make a Paper Fall Leaf for Kids
- How to make Paper Butterfly Easy Tutorial For Kids