DIY and Crafts
DIY Ladybug And Plants Easy Artwork For Kids

Make this astonishing ladybug over plants craft using clay and paper sheets! This tutorial will serve as a guide to making this craftwork like a pro!
Whoa! Look at this amazing artwork craft! This is made from paper tearing, drawing using sketch pens, and clay shaping, all the activities are sensory plays for the little ones! This artwork will help them drive their motor skills and creativity to the fullest! They will love to make this artwork and will decorate the resulting craft over the wall to show it off to their friends and family! This can also be said a doodle art due to the random drawings present in it! Try it out today to have fun in the boring afternoon time and stay away from the screens and devices! Grab the required supplies and roll on!
Easy To Make Ladybug & Plants Artwork Tutorial For Kids

Read More: Easy Leaf Fall Artwork And Craft for Kids
Materials Required
- Circular Cardboard
- Glue
- Colored Paper Sheets (Yellow And Green)
- Red Colored Clay
- Black Marker
- Sketch Pens (Red And Green)
- Black Pen
Procedure
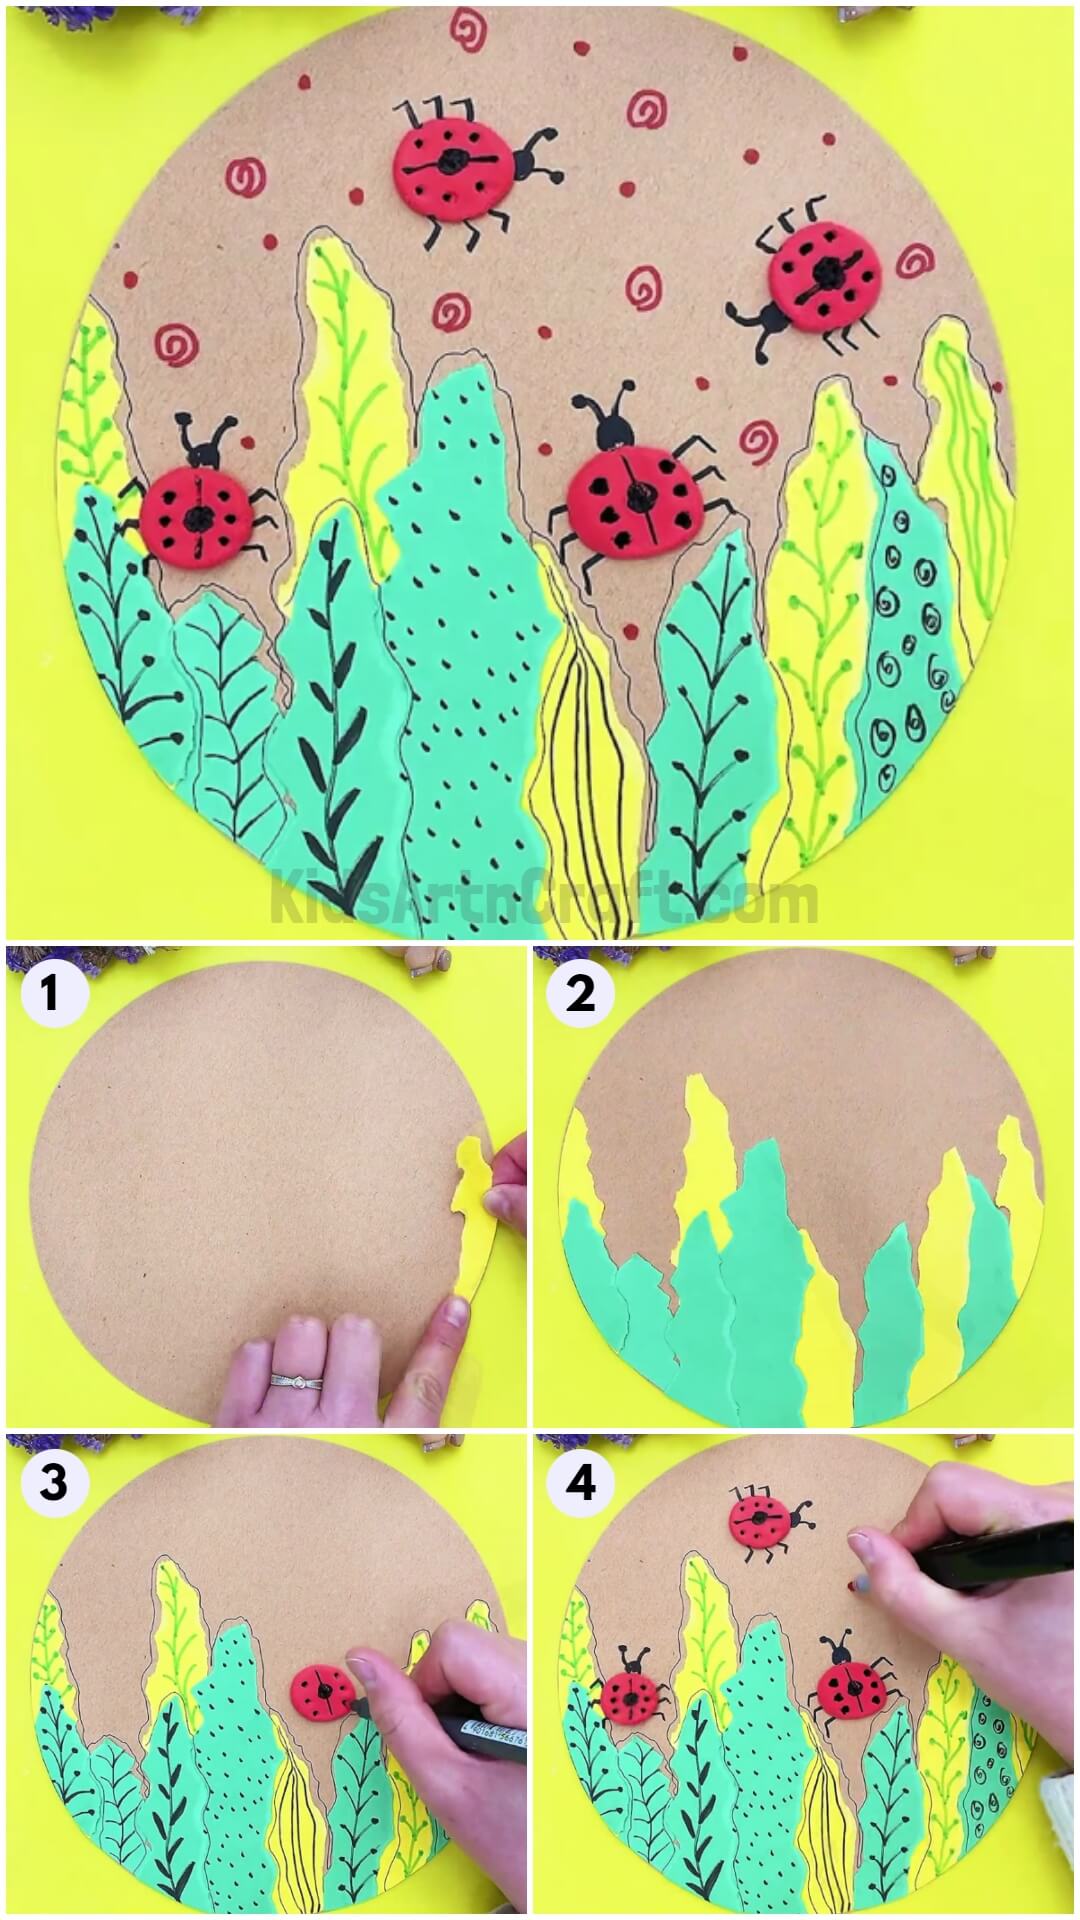
Step 1: Making A Yellow Plant
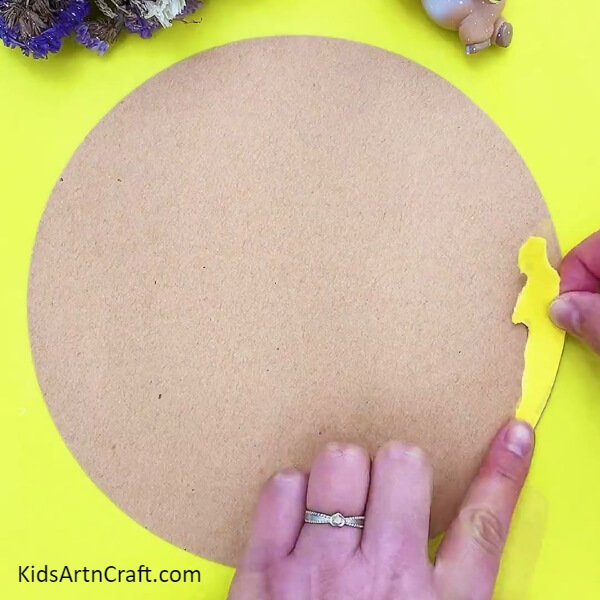

Begin this craft by taking circular cardboard as the base and yellow paper, tear out an irregular strip to make it a plant, using glue paste it on the right side of the base.
Step 2: Making More Plants
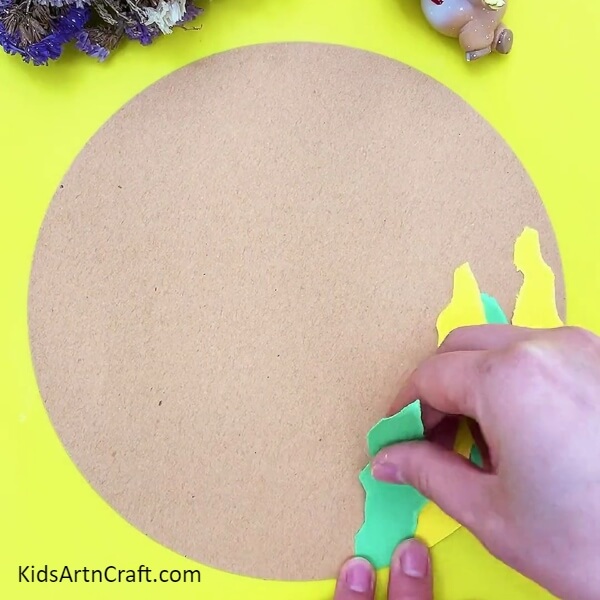
The same as before, tear out more irregular plants of different shapes and sizes from green and yellow colored sheets and paste them along the below half circumference of the circle.
Step 3: Completing Making Plants
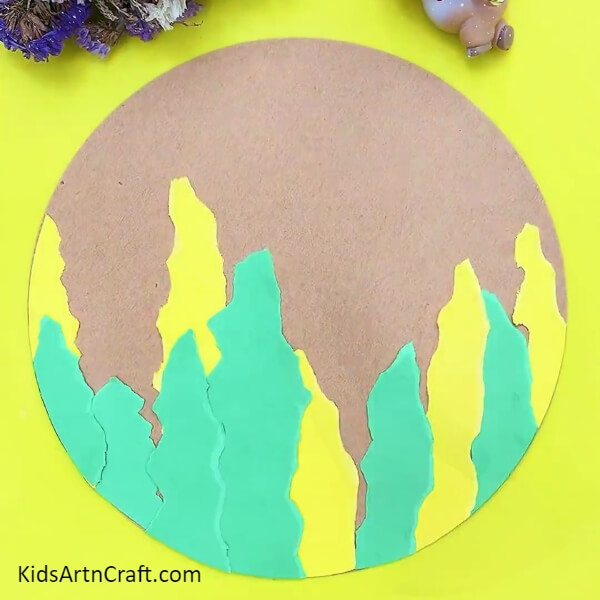
Paste all the plans randomly of any color and slightly overlapping with each other.
Step 4: Detailing A Plant
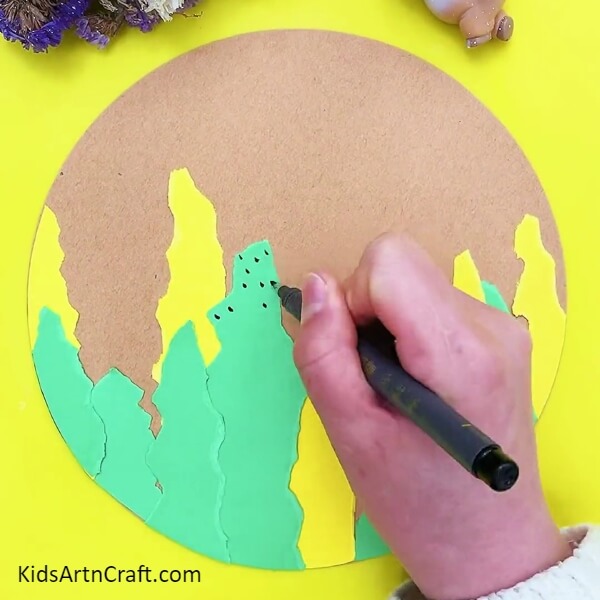
Take a black marker and start detailing the plants, first draw random dots over a plant.
Step 5: Outlining The Plants
Using a black pen, irregularly outline the plants by leaving some same from them.
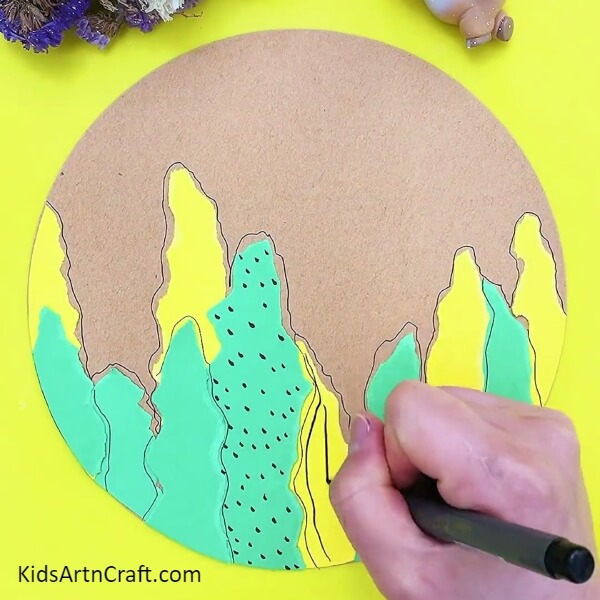
Step 6: Detailing All Plants

Continue with the detailing part of the plants, make wavy lines at one and make leaf veins texture on the other using the black marker.
Step 7: Completing Detailing All Plants
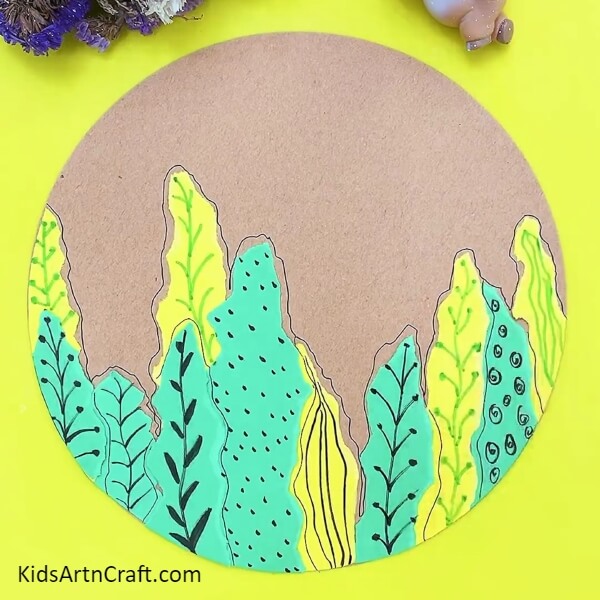
Complete the whole detailing on each and every plant of different-different textures as shown in the image. Also, use a green sketch pen too for detailing the yellow plants to add some more variety.
Step 8: Making A Lady Bugs
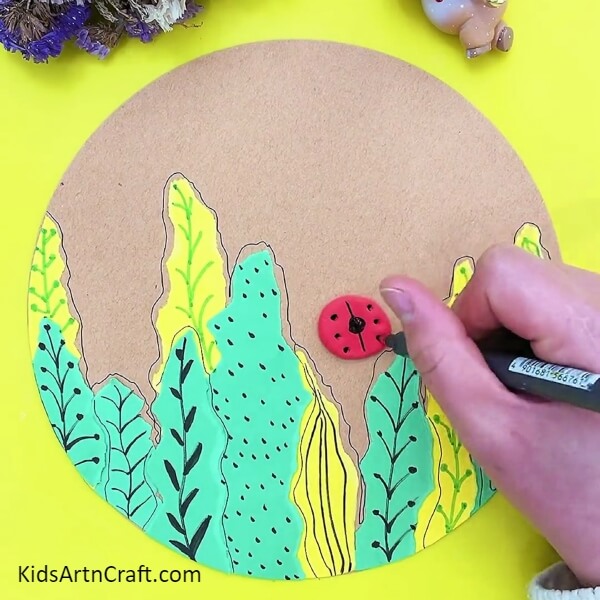
Dough a red-colored clay into a ball and place it over the base a little above the plants and press it to flatten it, now, using the black marker, make the ladybug texture over the red circle to make it look like a ladybug as shown.
Step 9: Decorating The Base
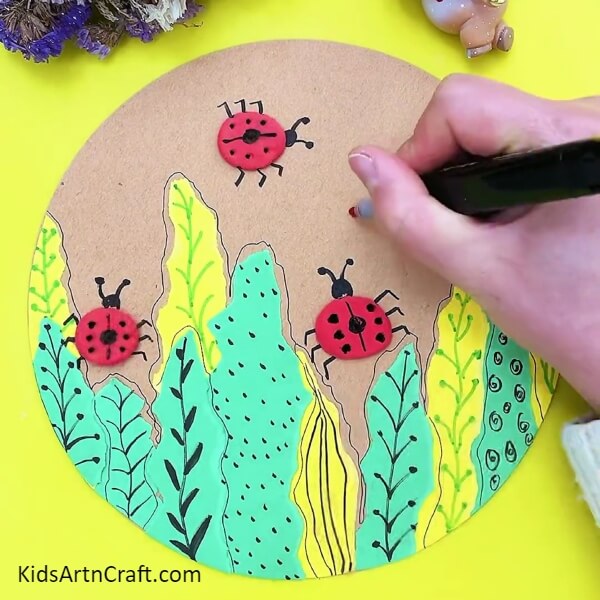
Following the same previous step, make 2 more ladybugs over the craft and also, make their legs, face, and antennas using the black marker. Now, take a red sketch pen and make spirals and dots all over the base to fill it out randomly.
Hurray !Your Ladybug Over Plant Craft Is Ready!
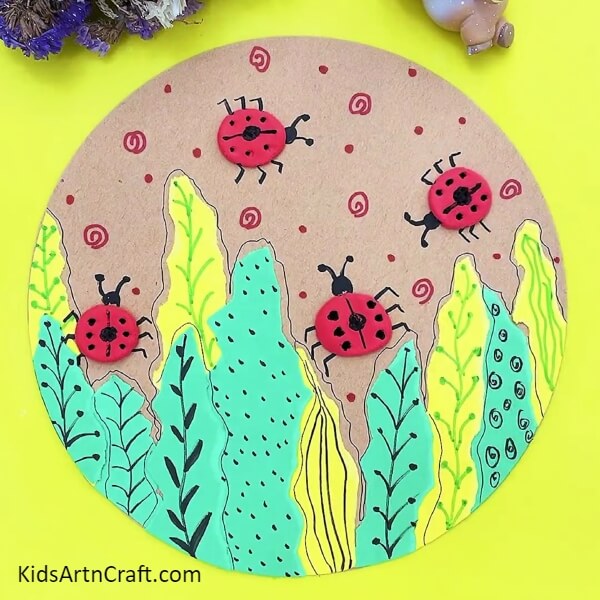
Woohoo! Your clay ladybugs are enjoying between the cool textured plants!
Well, this craft turned out to be highly creative and unique! All the textures in it make it look like it has been made by a pro artist! You can now show it off to your friends daily and flaunt your art and craft skills in front of them! You can even add more to this craftwork by adding more colors, texture, plants, and even insects over the plants! Your imagination is the limit!
Follow us on Youtube for art and craft tutorials and much more.
More Articles from Kids Art & Craft
- Ladybug Art & Craft Using Leaves – Step by Step Tutorial
- Paper-Cutting Designs For Projects
- Fabric Crafts to Gift
- Simple Fall Leaf Reindeer Artwork – Step by Step Tutorial
- DIY Felt Flower Hair Ties for Girls