Drawing
Lighthouse And Sea Scenery Drawing Tutorial For Beginners

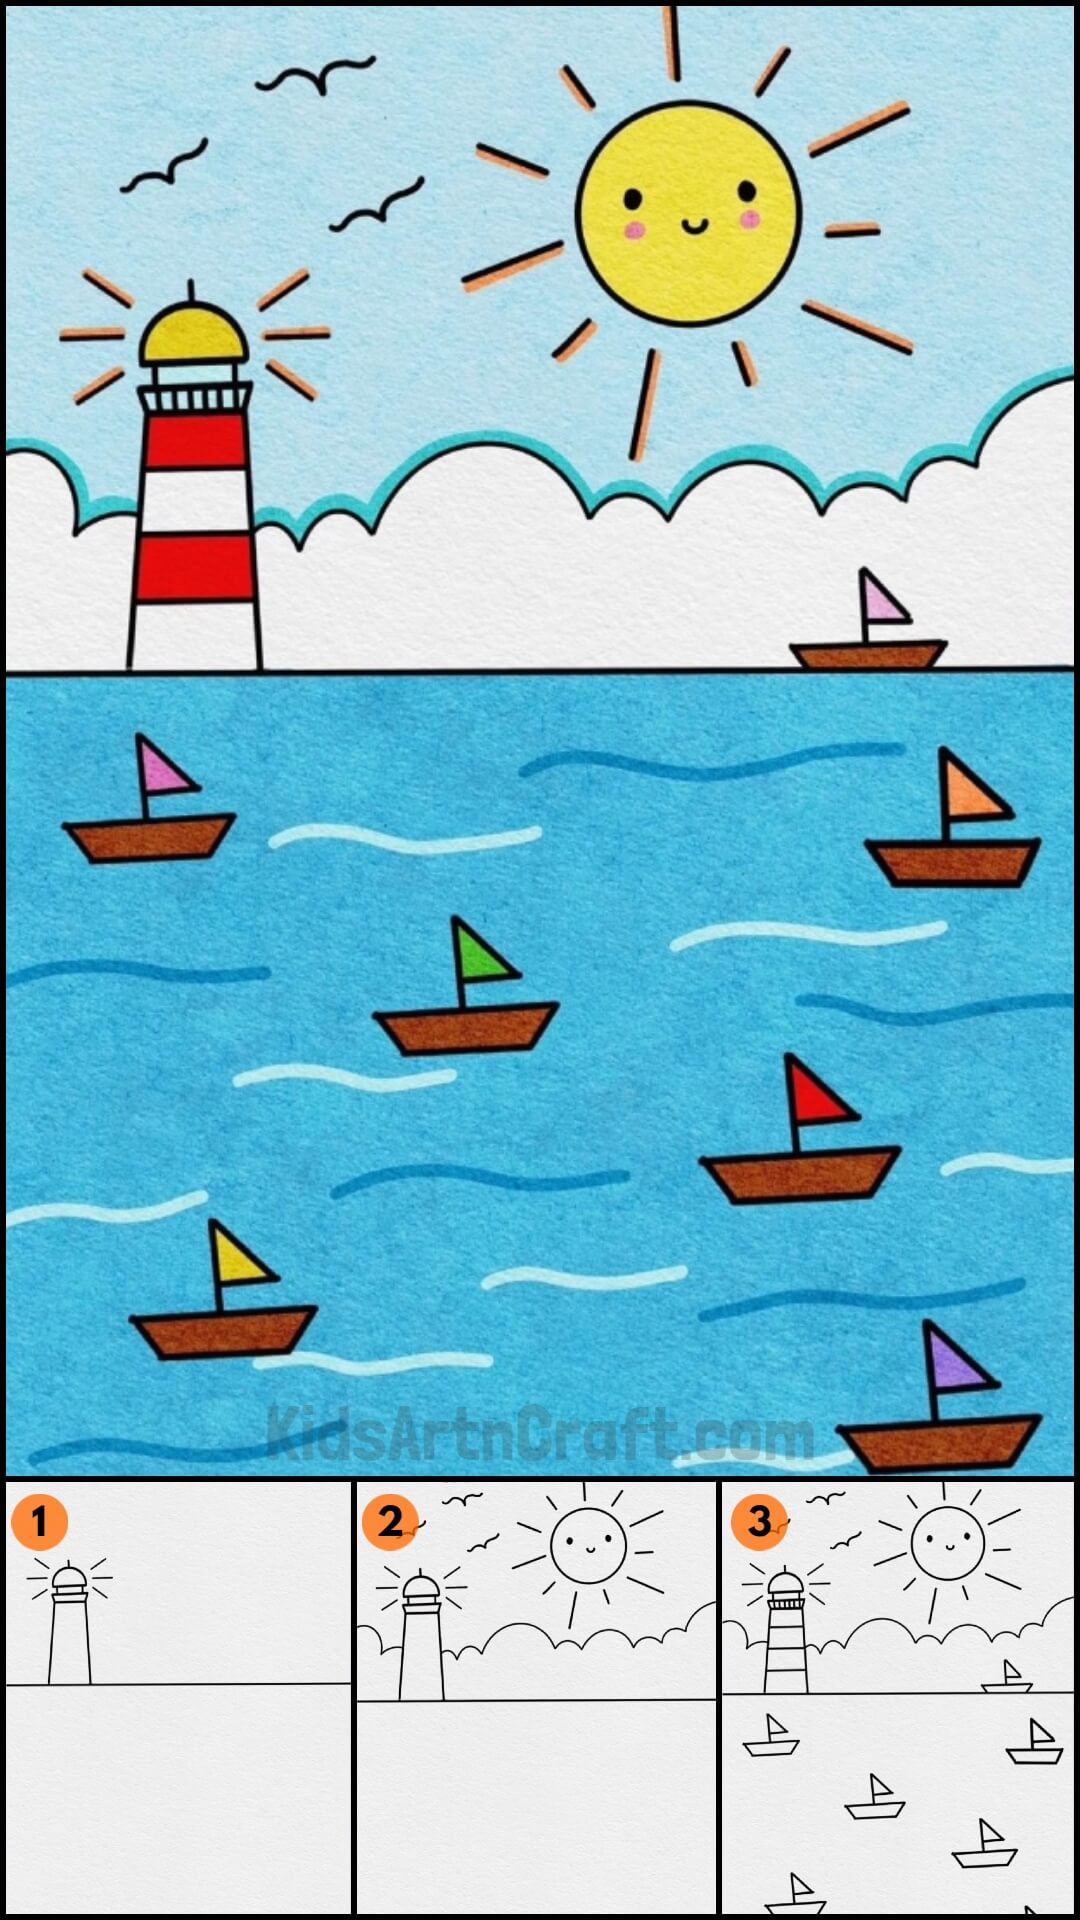
This tutorial will teach you how to draw a lovely lightouse and ocean scene. We’ll provide you with step-by-step instructions and helpful tips for getting great results.
Have you ever been to a lighthouse? A tall structure builds next to sea waves and currents. This tutorial involves making a painting of a sea scenery with ships and a lighthouse in the background. The basic nature of the art makes it great for young kids and beginners. So, gather all the stuff needed for the painting and let’s start making it.
Lighthouse And Sea Scenery Drawing For Kids

Read More: Unique Hand Outline Tree Drawing Step by Step Tutorial
Materials Required
- A white sheet of chart paper
- A pencil
- A black sketch pen
- Colour pencils
- Scale
Procedure
Step 1: Drawing The Lighthouse
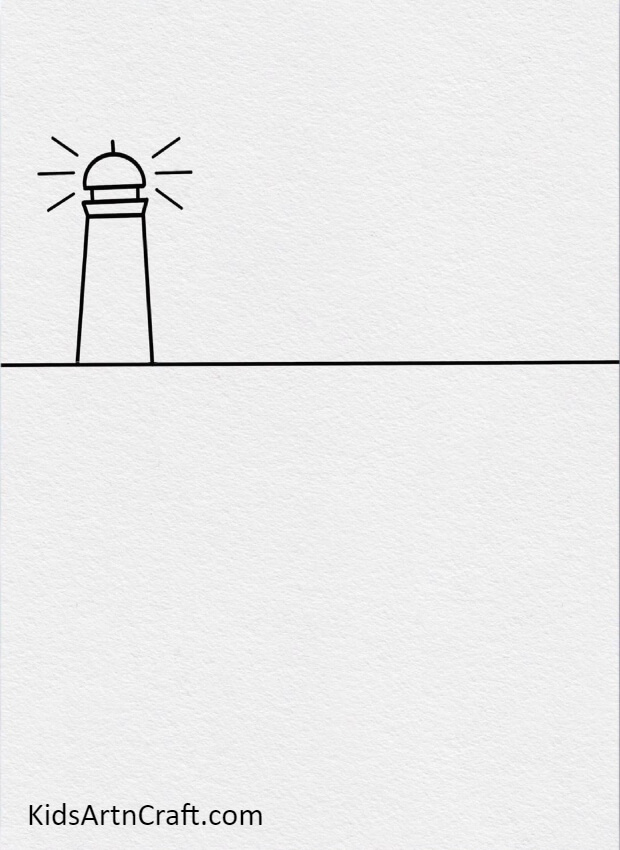

Take a rectangular sheet of white chart paper and place it on the table, vertically.
Firstly, draw a line in the middle of the sheet using a scale and a black sketch pen. Now, draw a lighthouse on the left end of this line. Use two vertical lines as the building with a small structure containing the light on top of it. Finally, draw three lines on each side of the light depicting the beams emitted by it. Check the picture below to understand the drawing.
Step 2: Drawing The Sky Scenery
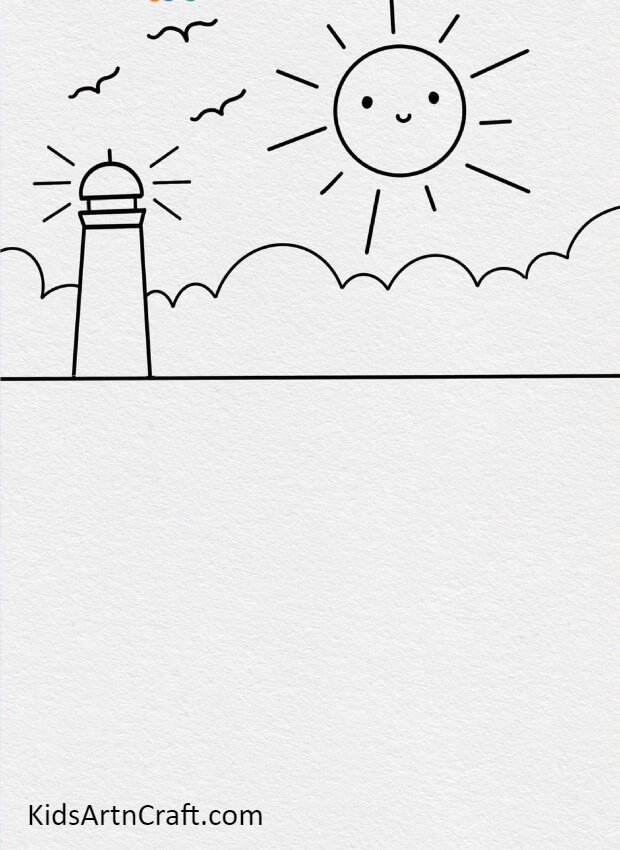
Take a pencil and draw a circle on the right side of the sheet. Now, draw some lines around this circle depicting the rays emitted by the sun. Don’t forget to make a smiling face on this happy, shining sun. Draw some birds on the left side of this sun and cloud linings above the line drawn in the middle of the sheet. These cloud linings should be drawn across the sheet in order to separate the sky from the sea and give both parts some definition. Finally, outline the pencil drawings with a black sketch pen. Have a keen look at the picture below as use it as a reference.
Step 3: Drawing The Boats
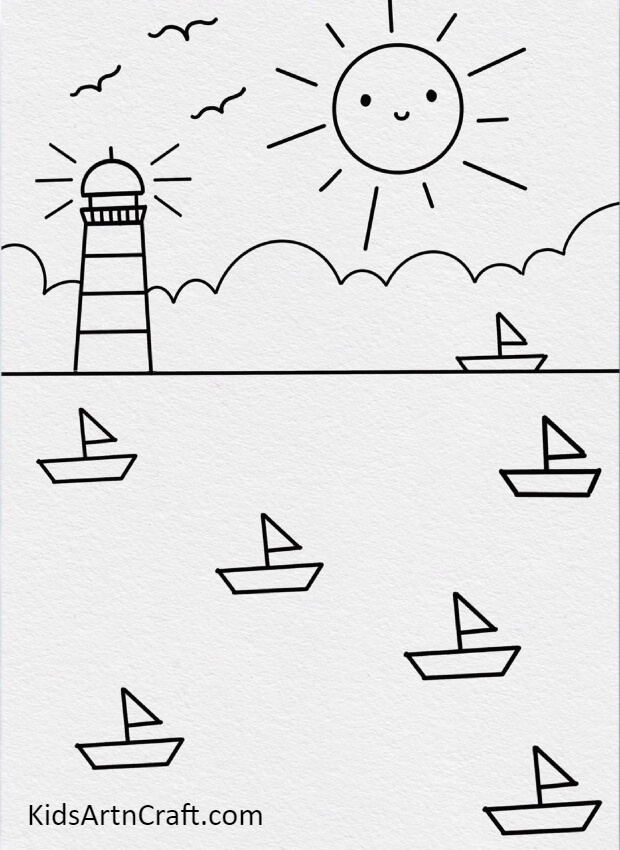
Draw six small boats across the blank space on the bottom half section of the sheet. The boat should just consist of a stern and a sail in the middle. Draw another boat on the surface of the water, i.e., on the right side of the line drawn in the middle of the sheet. Outline the boats with a black sketch pen. Finally, draw three horizontal lines between the two vertical lines drawn as the lighthouse earlier. See the picture below for reference. This completes the process of making the base drawing of the scenery.
Colouring The Drawing
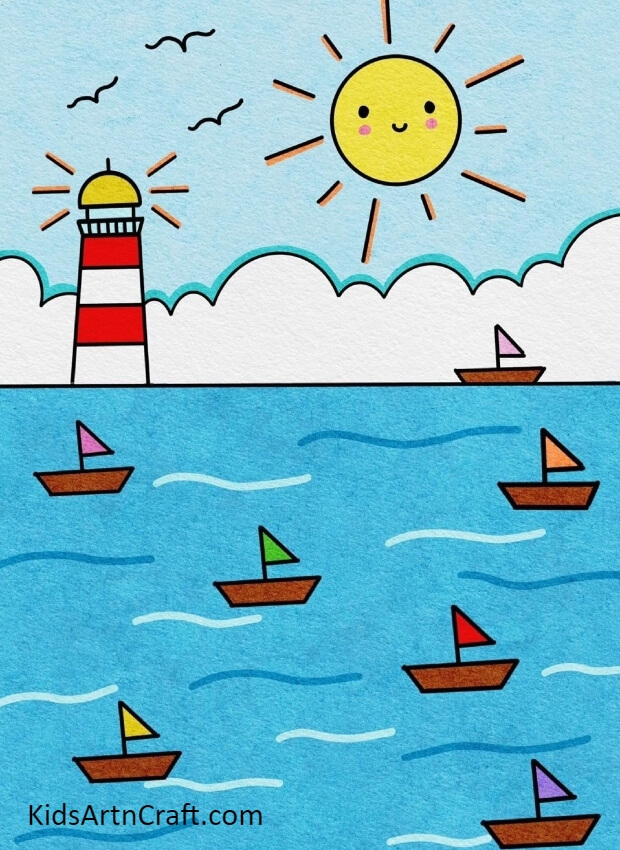
Take a blue colour pencil and colour the sea with it. Draw some curved lines throughout the sea using light and dark blue colour pencils. These lines will act as waves in the sea. Colour the stern of the boat brown and the sails in different colours of your own choice.
Colour the sky with a light blue colour pencil and the sun with a yellow one. Don’t forget to add some blush to its cheeks. Outline the cloud linings with a darker shade of blue than the sky and the rays of the sun with a brown colour pencil. Finally, moving on to the lighthouse, colour the first and the third horizontal section of the building red and the light at the top, yellow. Outline the beams using a brown colour pencil. Observe the picture below for reference.
This completes the tutorial and you have an amazing and unique painting in your possession. You learned clean and basic drawing skills through this craft and amazing colouring skills like colouring in the lines, as well. You can paste it on the door of your room as a decoration or on the walls of your class room as a testament of your creativity. Keep practising the skills that you come across in these tutorials and keep taking inspiration from your surroundings to create more original art.
See in more tutorials. Goodbye.
Follow us on Youtube for art and craft tutorials and much more.
More Articles from kidsArtnCraft
- Easy Drawing Tricks Video Tutorial for Kids
- Easy Crayons Drawing At Home Video Tutorial for Beginners
- Easy Carrot Drawing Step-by-step Tutorial For Kids
- DIY Dandelion Flower Creative Painting Idea For Kids
- Beautiful Tree Painting Using Leaf Impression Step-by-step Tutorial For Kids