Painting
Colorful Lion Artwork Craft Tutorial For Kids

This craft tutorial for kids will show you how to make a fun and colorful lion artwork. Using simple materials like construction paper and markers, your kids can make their own lion masterpieces! Perfect for rainy days or just to get creative!
Creating colorful lion artwork is an exciting craft activity for kids! It sparks creativity and imagination! Join us in this tutorial for a step-by-step process! We will make a vibrant lion art piece by transforming ordinary paper into a majestic masterpiece! Each step brings the lion to life. Our instructions empower kids to express themselves artistically! Let’s embark on this creative adventure together! Gather materials and let’s get started! Watch your child’s imagination roar with delight!
by vihaan israni
Easy Colorful Lion Artwork Craft For beginner

Read More: Easy to Make Paper Pea Craft Tutorial
Materials Required
-
Yellow And White Colored Paper
-
Scissors
-
Glue stick
-
Colorful Sketch pens
-
Black Marker
- Whitener
Procedure
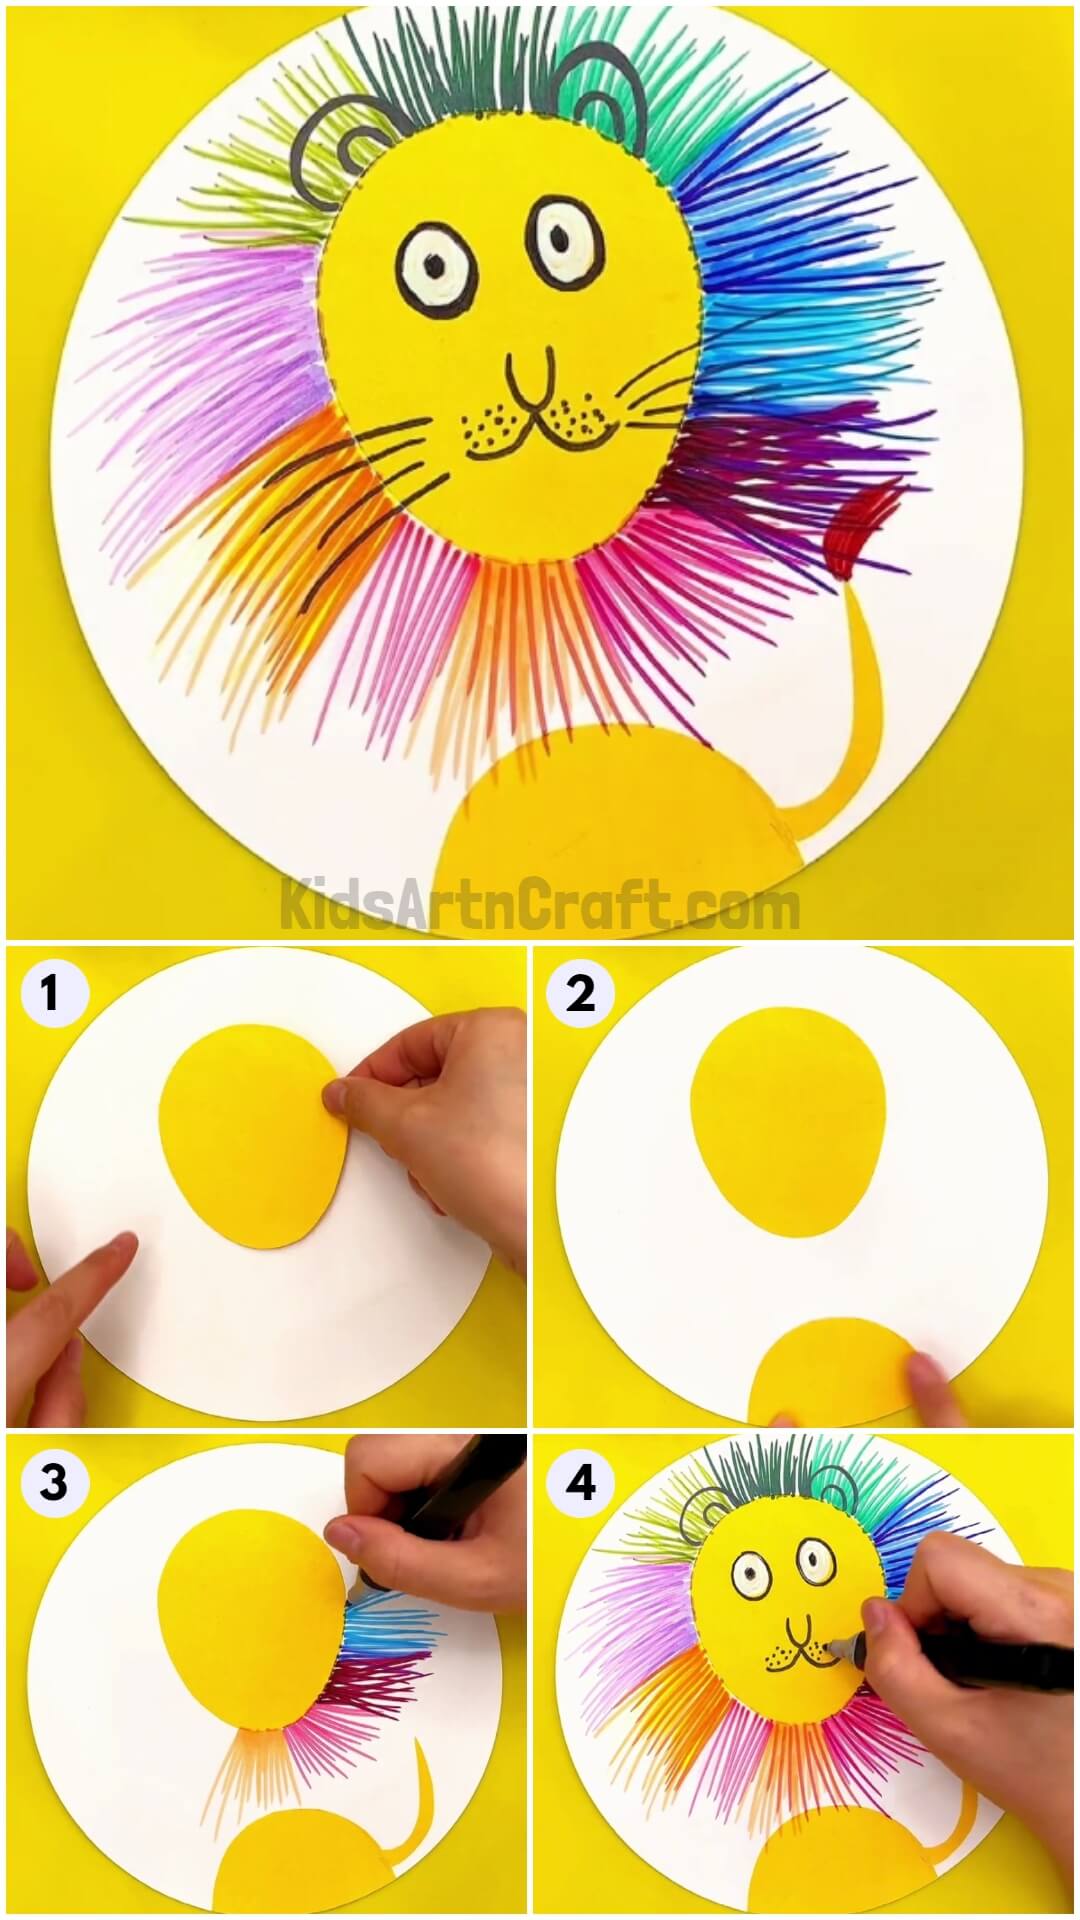
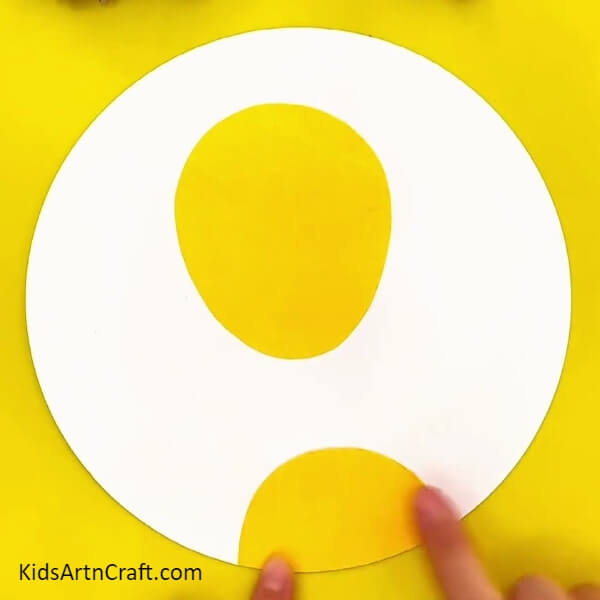
Step 1: Pasting An Oval Shaped Yellow Cut-Out
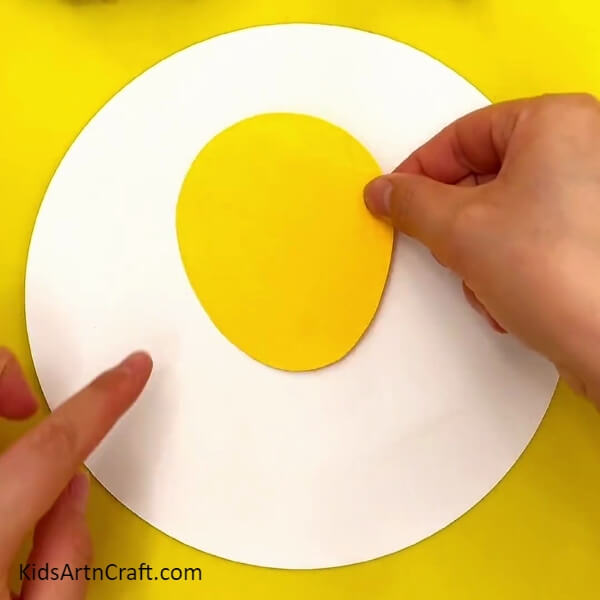

Let’s Begin this craft, take white paper and cut out a circle to serve as the background for artwork, using scissors. Now, cut a small oval shape from the yellow paper to make the face of a lion and paste it in the middle of the white paper using glue.
Step 2: Making Body Of Lion
Step 3: Making Tail
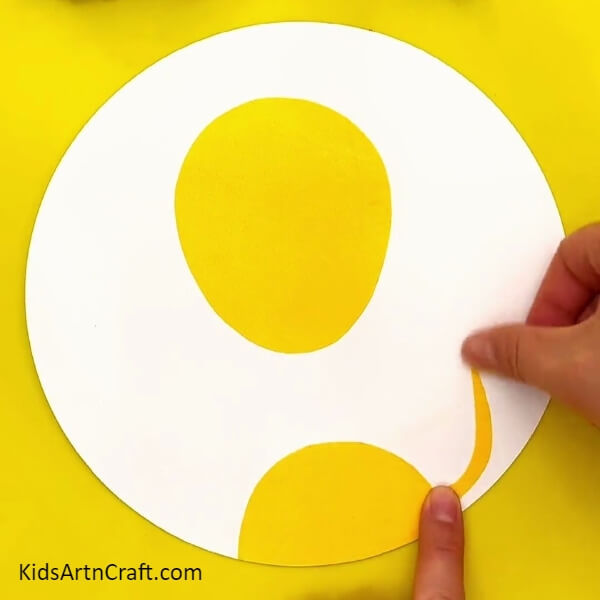
Cut a long curved strip from yellow paper to create the lion’s tail. Paste it from the body on the right side.
Step 4: Sketching Lion’s Hair
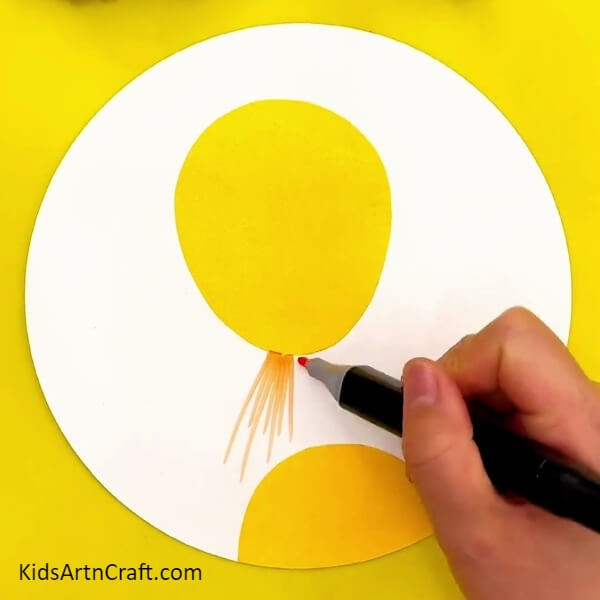
Take an orange sketch pen and start sketching short lines all around the lion’s face to make its hair.
Step 5: Making Colorful Hair
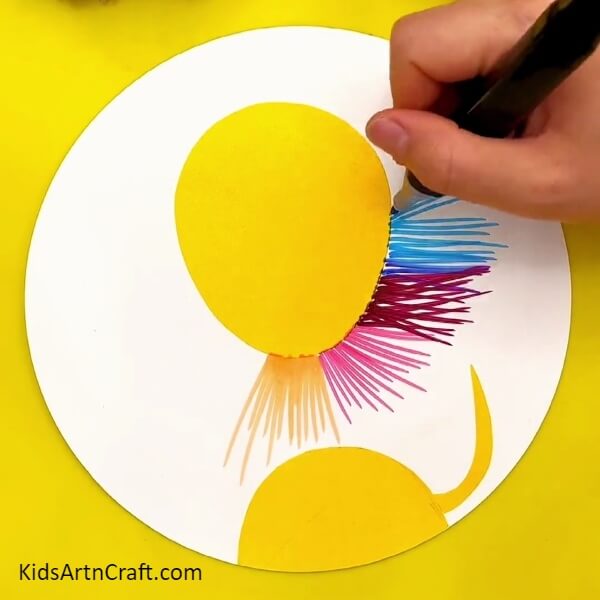
Take a variety of sketch pens and markers in different colors and sketch their hair, as shown.
Step 6: Completing Hair

Continue filling the entire oval face, and make colorful hair around it.
Step 7: Making Lion’s Eyes
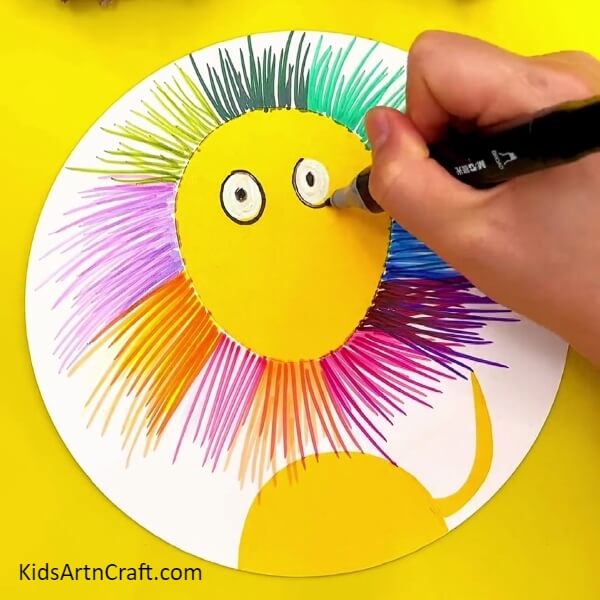
Using a black marker, make its eyes and fill out from whitener and then draw pupils in the center of each white circle.
Step 8: Making Nose, Mouth, And Whiskers
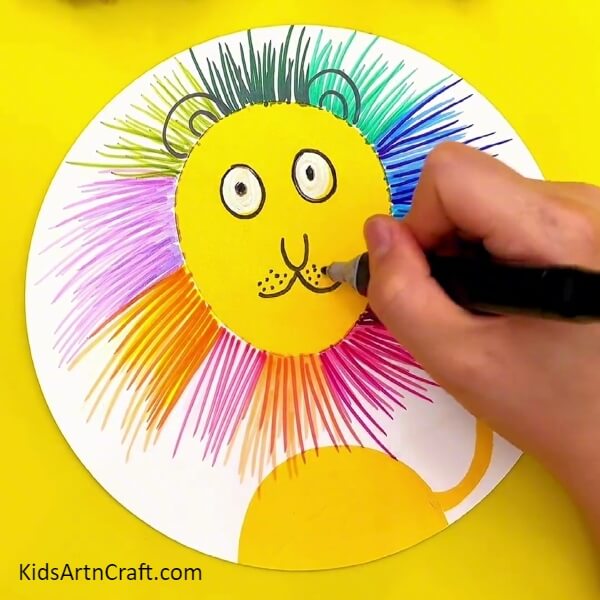
With the black marker, make the lion’s nose, mouth, and dotted whiskers as shown.
Your Lion Is Ready To Roar!
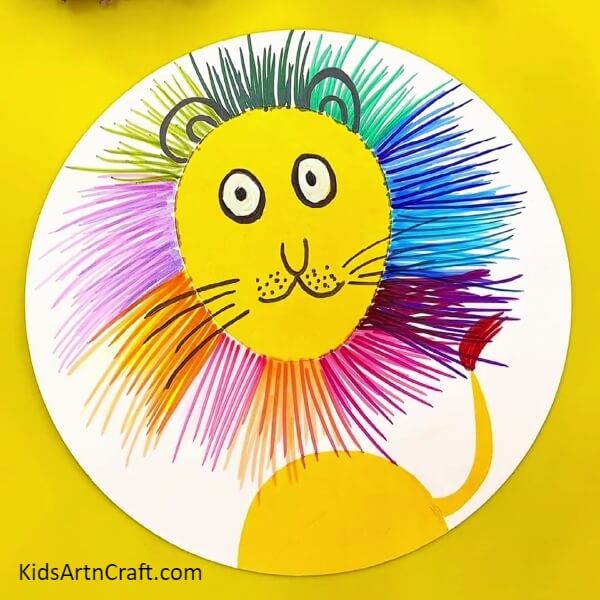
For the last step, take the red sketch pen and draw tufted fur at the end of the lion’s tail. Make small, jagged strokes to give the impression of a fluffy and textured tail.
Congratulations! Your colorful lion artwork is complete. Admire your creation and display. Check out our website for more exciting craft ideas. We will guide you on how to keep your creative journey interesting! Happy crafting!
Follow us on Youtube for art and craft tutorials and much more.
More Articles from Kids Art & Craft
- Recycled Plastic Bottle Dragon Craft Tutorial for Kids
- Easy Paper Folding Crafts Video Tutorial for Kids
- How to Make Origami Flower Easy Tutorial For Kids
- Easy Paper Snail Craft tutorial For Kids
- DIY Easy Paper Candy Craft For Kids