


Paper Crafts
DIY Lion Craft Using Fall Leaves easy tutorial for kids

DIY Lion Using Fall Leaves

Read More: DIY Easy Paper Cactus Craft Tutorial for kids
Materials Required
- White sheet of paper
- Red fall leaves
- Yellow, black, and white craft paper
- Glue
- Scissors
- Black Sketch pen
Procedure
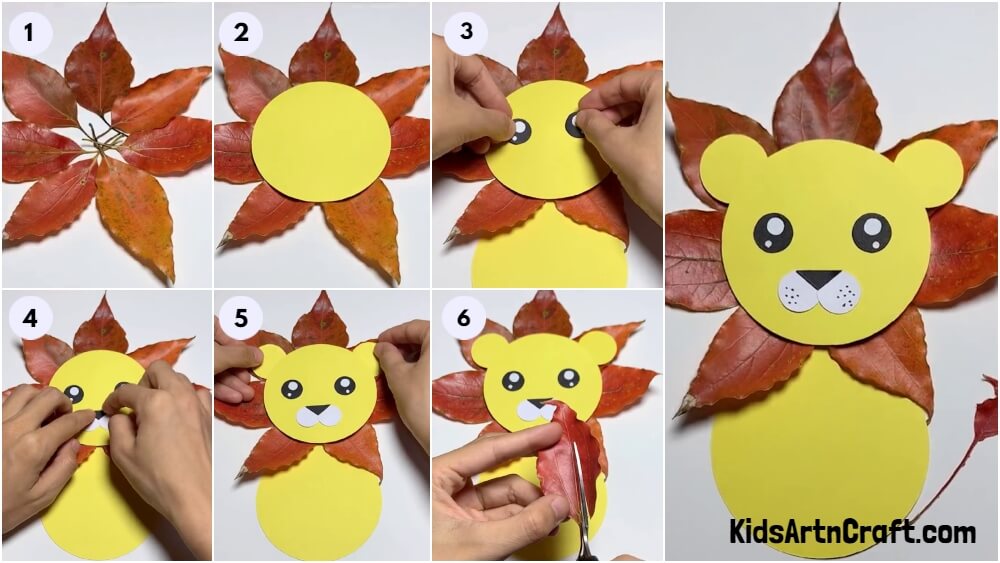
Step 1: Placing The Fall Leaves On The Paper
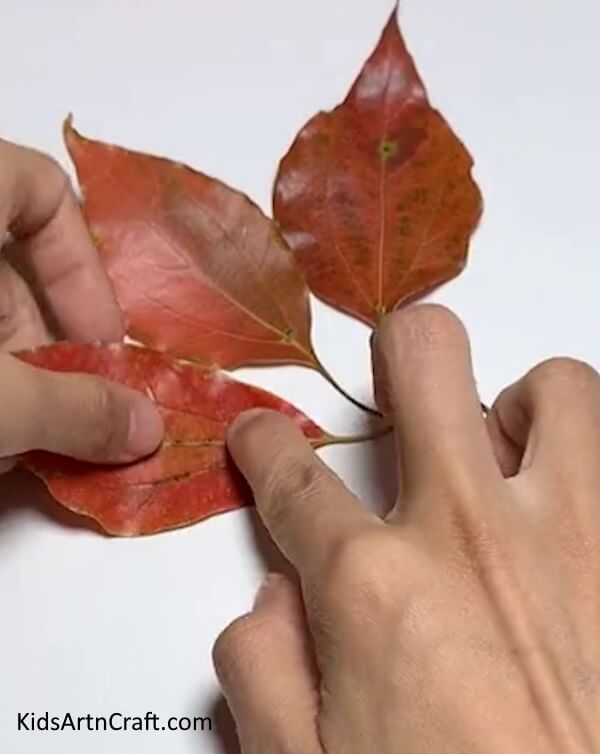
Starting off, you will take your fall leaves and slowly place them down on the white paper one by one. Place them with their stems facing inwards and each other, in a circular formation. Don’t overlap the leaves and space them out properly.
Step 2: Sticking The Leaves Using Glue
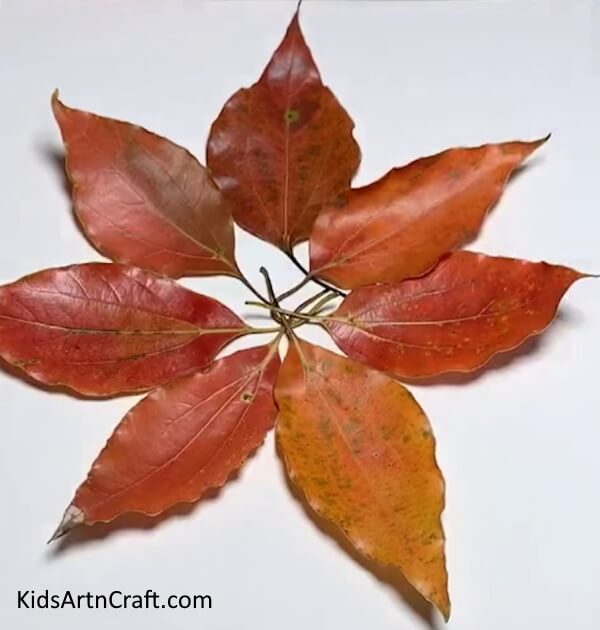
Once you have leaves placed properly, you should have about 7 leaves in the circle you have made out of the leaves. This will be the mane of your lion. Using glue, stick the leaves down onto the paper in the right places, and your lion mane is all fixed in place.
Step 3: Sticking The Face Of The Lion

From yellow craft paper, cut out a big circle using your scissors. This yellow circle will be the face of your lion. Make sure you have a circle that is not too big and not too small. Stick this circle at the center of the circular formation of leaves, where the stems of the leaves meet. Refer to the images attached.
Step 4: Attaching The Body Of The Lion

Next, from yellow craft paper, cut out a big oval for the body of the lion. Stick this oval below the face of the lion, with the leaves and face overlapping the top of the body a tiny bit. Make sure the leaves of the mane are above the oval.
Step 5: Sticking The Eyes Of The Lion
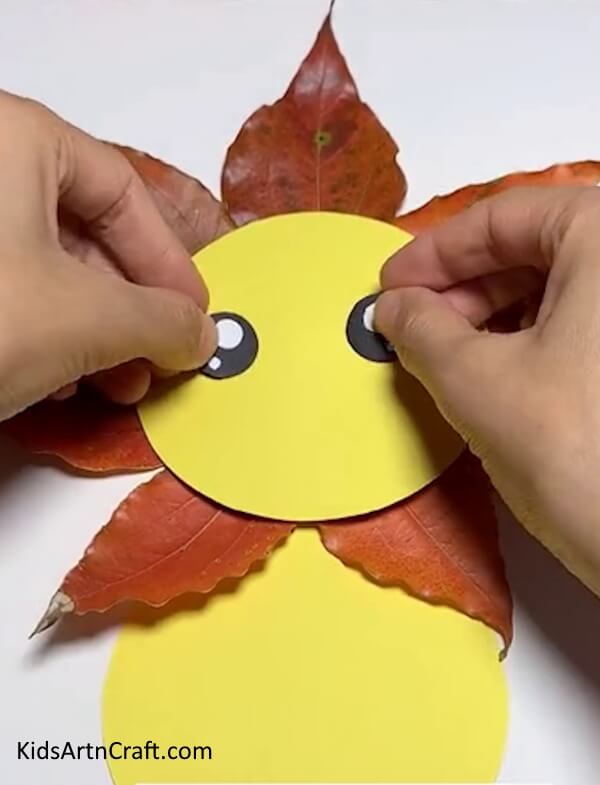
On two small black craft paper circles, make eyes for the lion. On the circle, using a white pen or white craft paper add details of the eyes. Once done, stick these eyes onto the face of the lion.
Step 6: Making The Snout Of The Lion
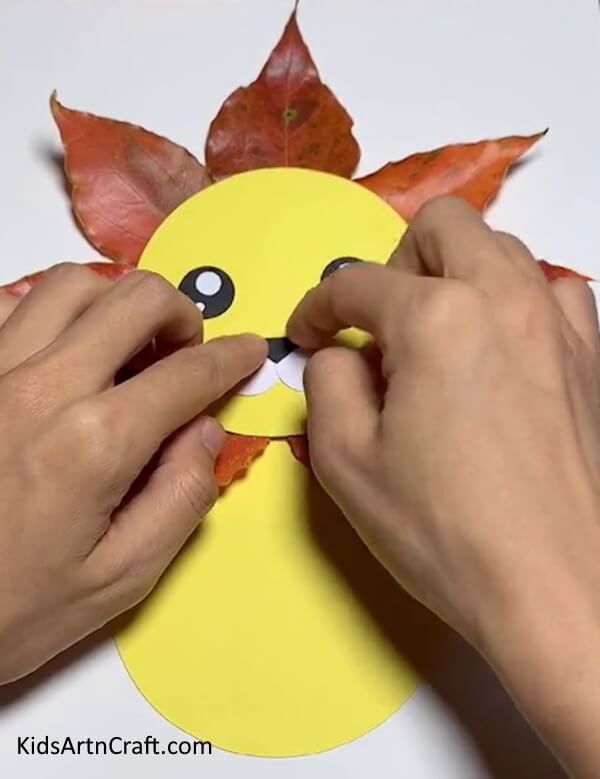
On black craft paper, draw a small triangle nose for the lion. On white craft paper, draw two small circles. Using scissors cut all these out. Stick the two white circles onto the face of the line as shown in the picture. Atop those stick the inverted triangle nose of the lion.
Step 7: Adding The Ears Of The Lion Using Yellow Craft Paper
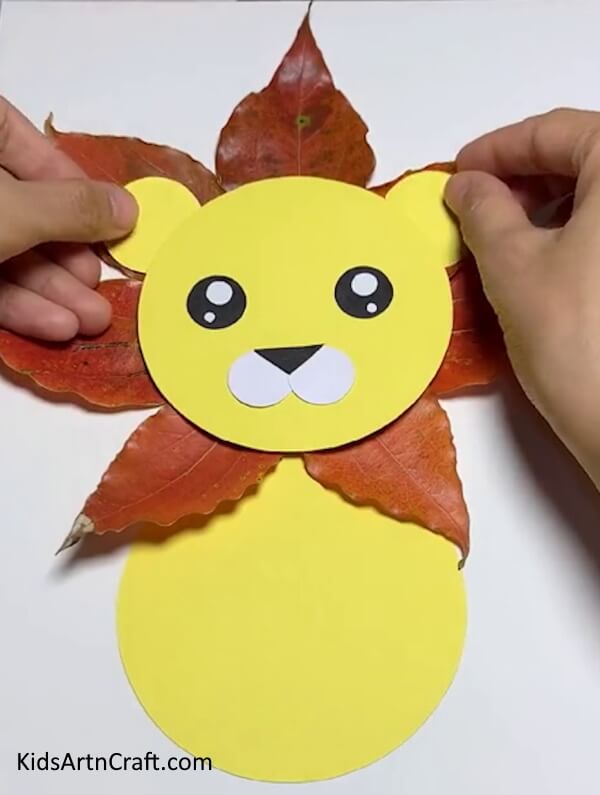
For the ears of the lion, cut out two small circles from yellow craft paper. Stick these two yellow ears atop the head of the lion using glue. The face of your lion is all done and your lion is almost ready!
Step 8: Making The Tail Of The Lion From A Fall Leaf
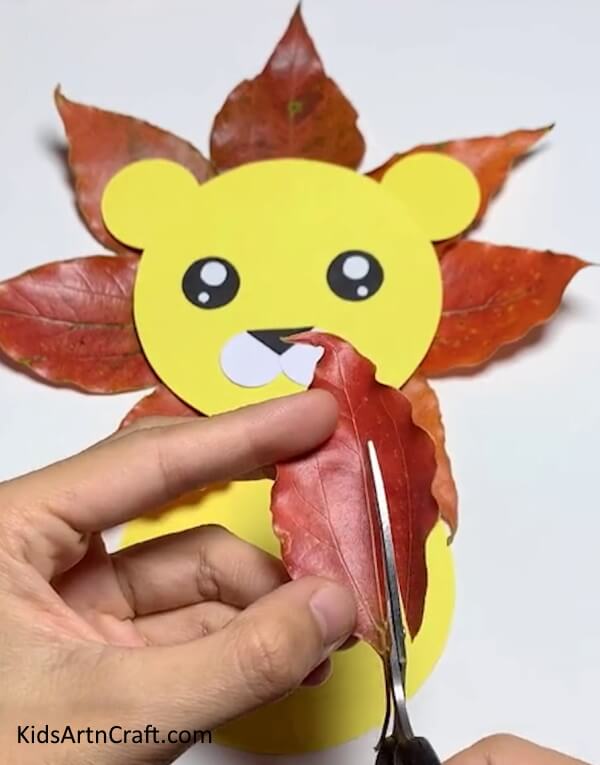
Your last step would be to make the tail of the lion. Grab a fall leaf and using scissors, cut out a tail-like shape from the leaf. Make a long tail for your lion from the leaf.
Sticking The Tail To The Lion
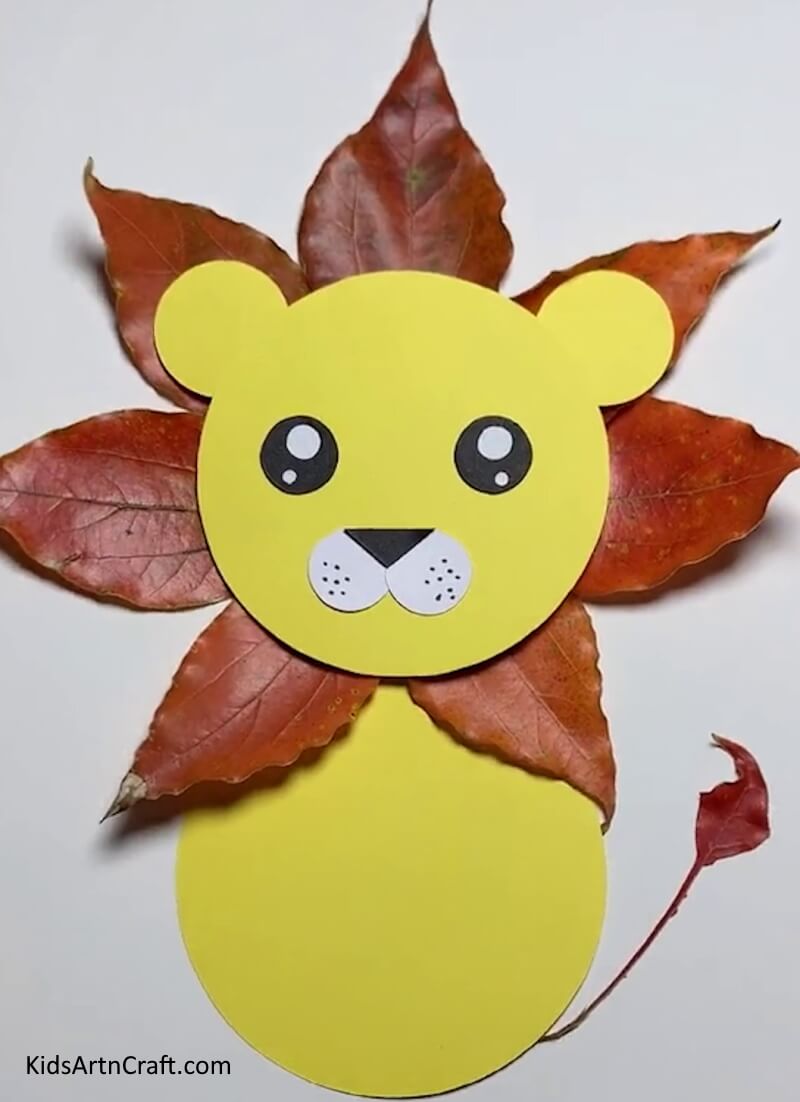
Stick the leaf tail onto the lion at the bottom. And you are all done!
Woohoo! Your Lion from Fall Leaves Craft is all ready and done for you to show the world!
This craft is easy and fun to do. It brings out the creativity of kids and will help you use your skills to make something beautiful. You learn a new way of crafting using leaves and making crafts from natural materials. This craft is perfect for kids and can help you learn new skills and ways. Use this craft to help you spark your creativity and make another new masterpiece. With this step-by-step tutorial, this craft can be made in minutes and with ease. So engage your kids and yourselves in this fun and creative DIY Lion Craft Using Fall Leaves.
Hope you like this DIY Lion Craft with Fall Leaves step-by-step tutorial for kids. We would love to hear your thoughts in the comment section below and hope that we helped you learn something new and interesting. Be sure to visit our other articles for more ideas!
Thank you for visiting our website!
Follow us on Youtube for art and craft tutorials and much more.
More Articles from Kids Art & Craft
- DIY Easy Paper Chick Craft For Kids
- DIY Heart Shape Cat Craft for Valentine’s Day
- DIY Easy Paper Strawberry Tutorial For Kids
- DIY Origami Dragonfly Easy Tutorial for kids
- Easy Paper Bird Step by Step Tutorial For Kids


