Connect with us

DIY Origami Dragonfly Easy Tutorial for kids

DIY Origami Dragonfly Easy Tutorial for kids

DIY and Crafts

DIY Origami Dragonfly Easy Tutorial for kids

Activities for Kids
Learn how to make a beautiful DIY origami dragonfly with this easy-to-follow tutorial! Perfect for kids, this origami dragonfly is the perfect way to keep kids entertained and create a unique work of art.
Hey there, creative kids! Get ready to embark on an exciting origami adventure as we learn how to make a DIY origami dragonfly. Did you know that dragonflies have been a part of ancient Japanese culture for ages? Just like cranes and frogs? It’s incredible to think that this traditional dragonfly design has been around.
In this easy tutorial, we will follow the footsteps of ancient origami enthusiasts. So, fold your very own dragonfly using simple and fun steps. With a total of 18 steps, we will transform a plain sheet of paper into a beautiful and delicate dragonfly. The same that will flutter its wings just like a real one!

How To Make An Origami Dragonfly Using Paper

DIY Origami Dragonfly Easy Tutorial for kids

Read More: Easy Ladybug Craft For Kids Using Leaves and Paper

Materials Required

  • Green 15×15 Origami Sheet
  • A toothpick
  • Scissors

Procedure

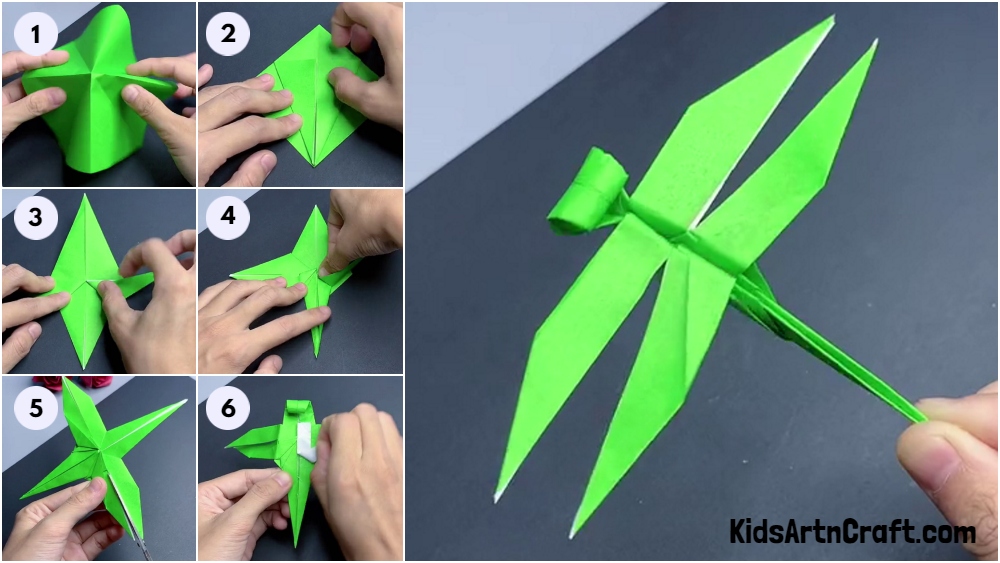
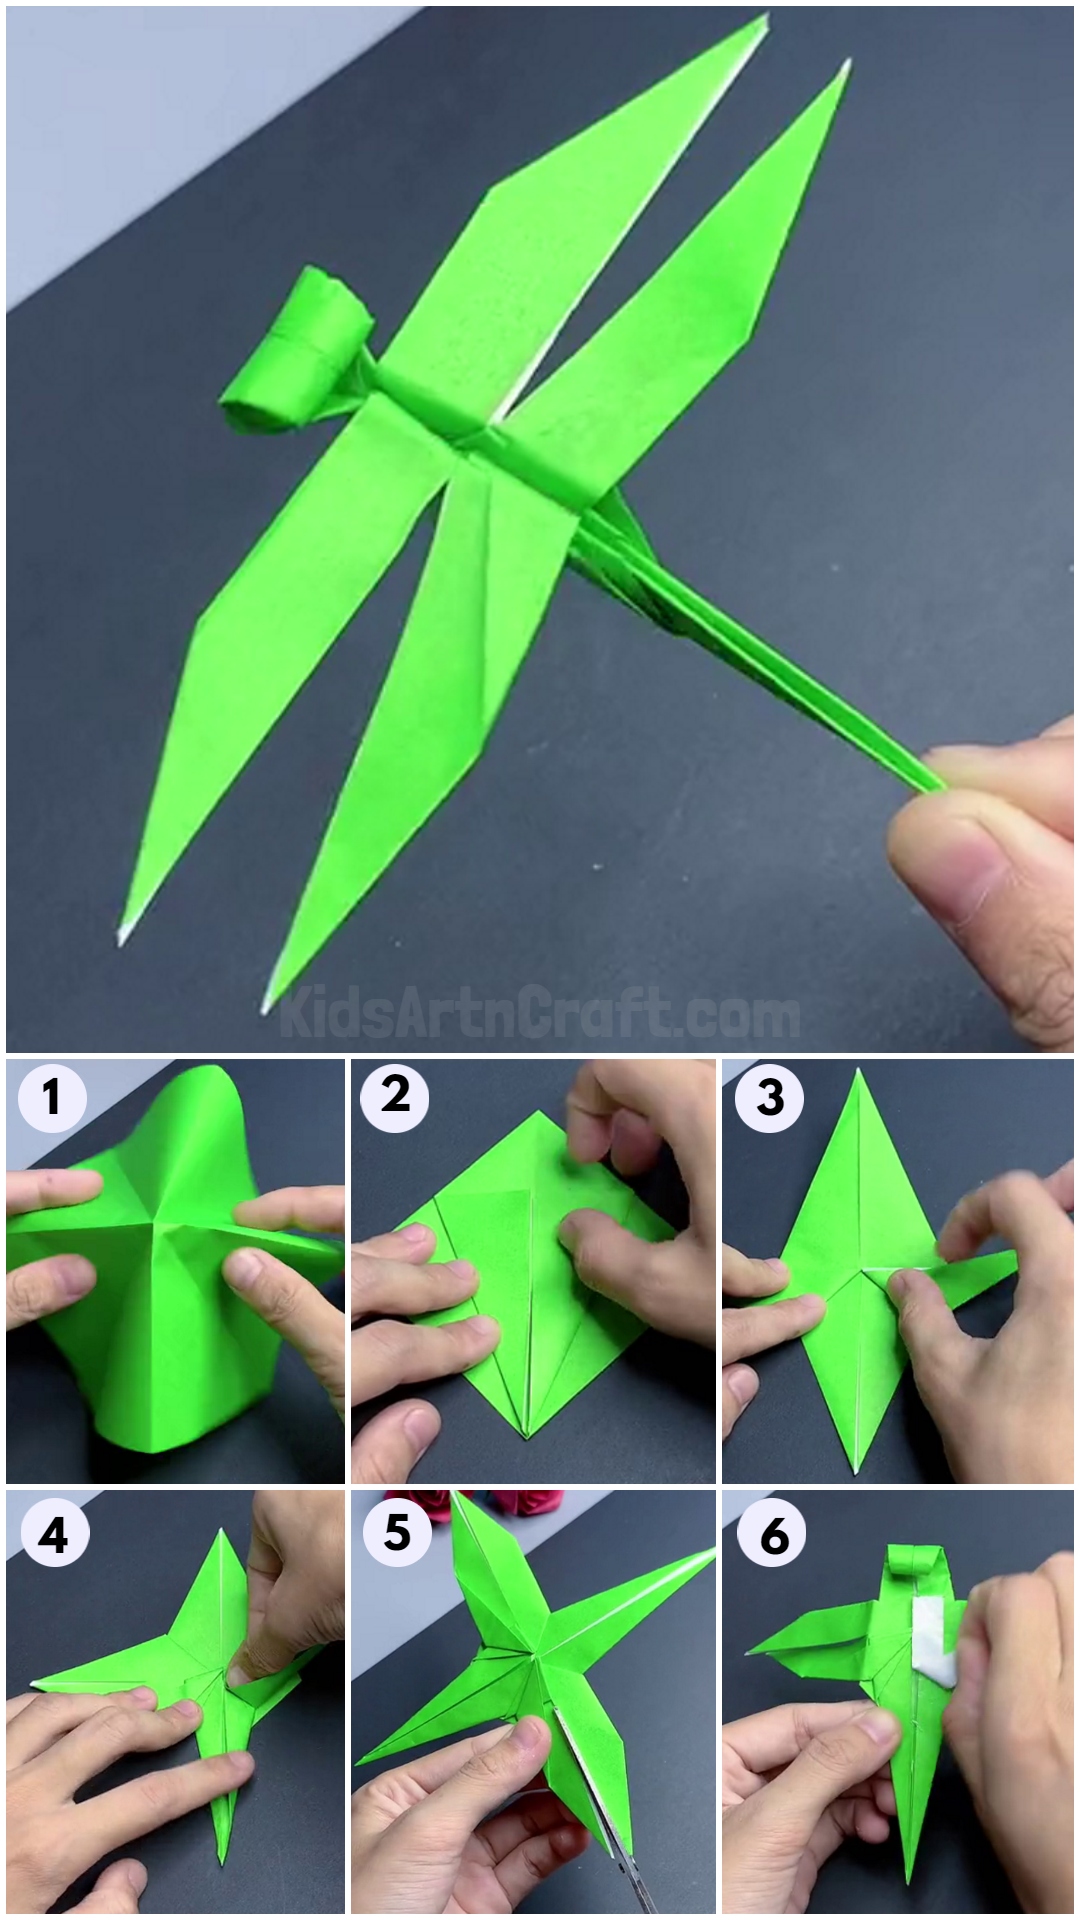
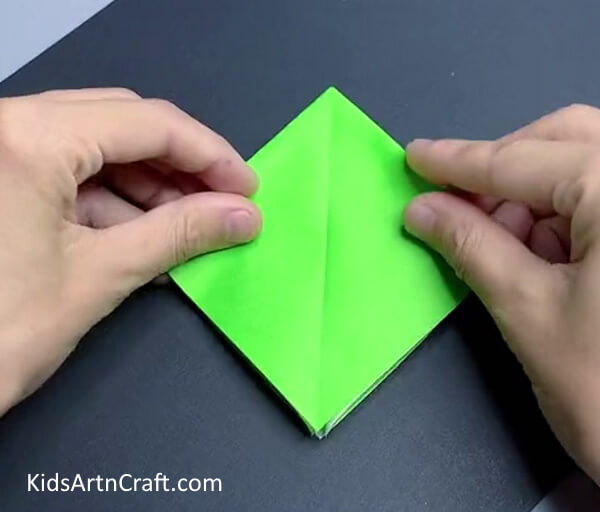
Step 1: Starting With a Square

Starting with a Square-A step-by-step guide for children to make their own origami dragonfly.

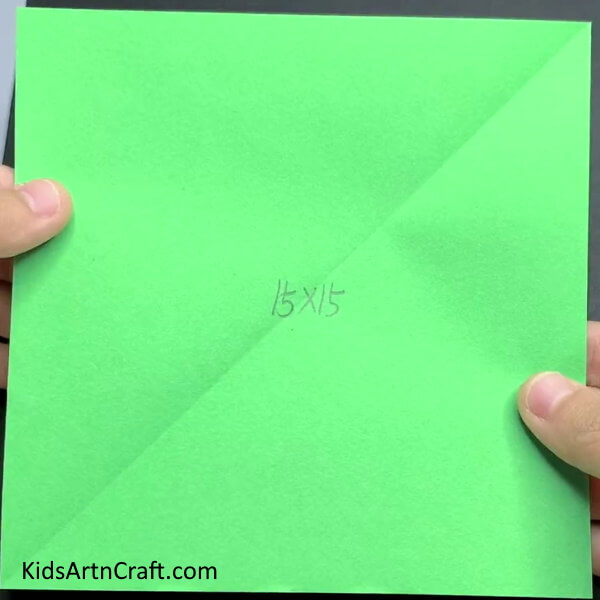
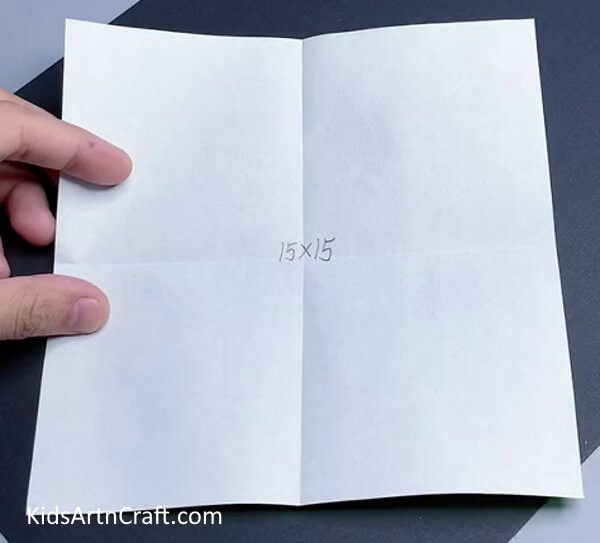
Begin with a square piece of origami paper. If you don’t have one, you can easily create one. Start with a square by folding a rectangular piece diagonally and cutting off the excess. Fold the paper in half diagonally to form a triangle, then unfold it back into its original square shape.

Step 2: Folding the Edges

Folding the Edges-A simple tutorial for kids to create a dragonfly out of origami.

Fold the bottom edge of the square up to meet the top edge, creating a horizontal crease in the middle. Unfold the square and fold the left corner to meet the right corner. This is going to form another diagonal crease.

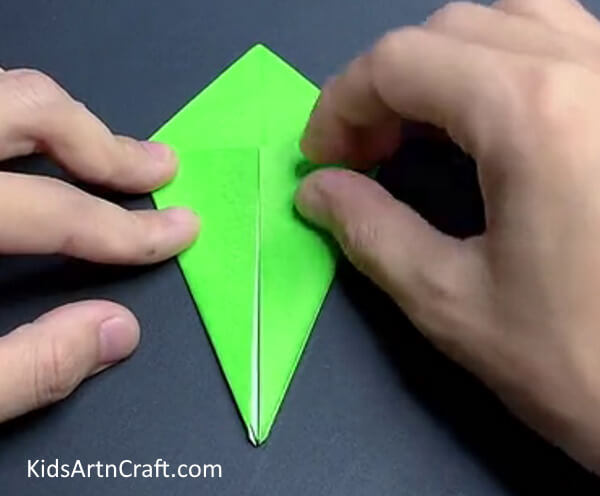
Step 3: Creating the 4-Point Star Shape

Creating the 4-Point Star Shape-Teach your kids to make a dragonfly using origami.

Flip the paper over and fold the left and right corners towards the center crease. This important step forms the 4-point star shape, which sets the foundation. It is very useful when it comes to shaping the dragonfly’s body, wings, and other features.

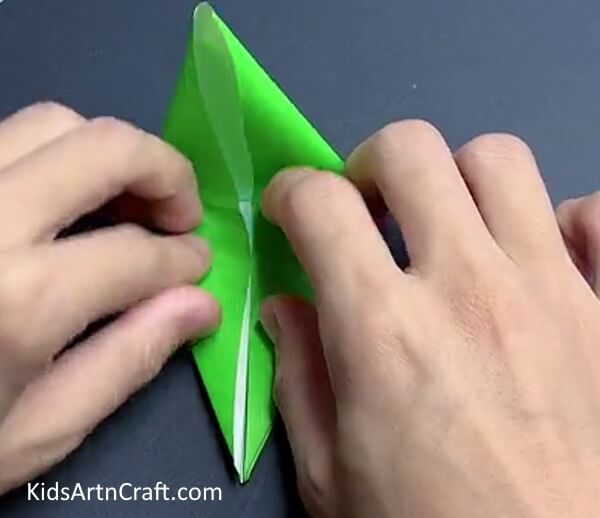
Step 4: Shaping the Body and Wings

Shaping the Body and Wings- Learn how to make a dragonfly with origami for kids.

Carefully push the upper corners of the paper together. Notice the top layer moves towards the lower axis. As you do this, the lower middle axis naturally lifts. Next, swivel the front flap to the right and fold the back flap to the left. These movements add intricate details to your origami dragonfly.

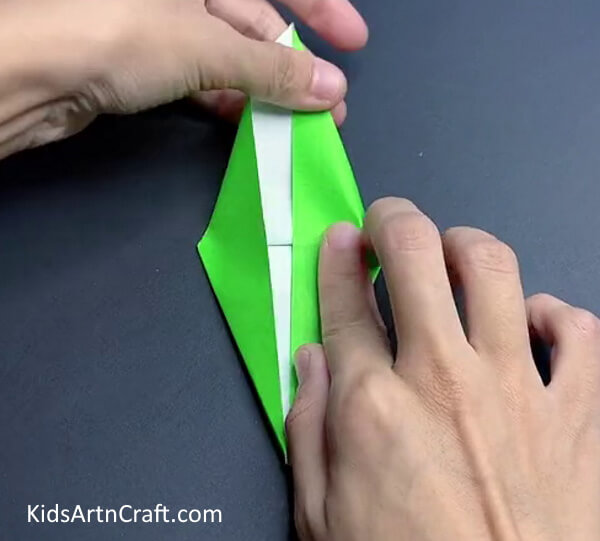
Step 5: Folding the Edges Inward

Folding the Edges Inward-A straightforward origami dragonfly tutorial for youngsters.

Fold the left and right edges of the triangle inward, aligning them with the center crease.

Step 6 Flipping and Repeating

Flipping and Repeating-A do-it-yourself guide for children to craft an origami dragonfly.

Flip the origami over. Repeat the previous step with the right and left edges tucked under the previous folds. This step helps in creating the wings of the dragonfly. If you need assistance, refer to the provided image for clarification.

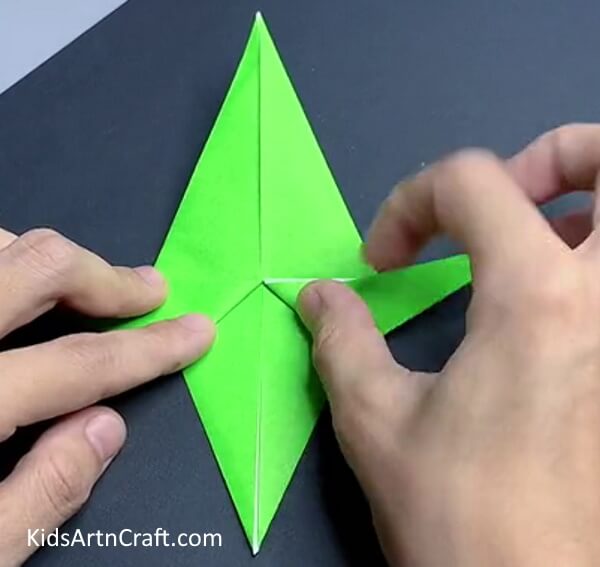
Step 7: Partial Unfolding and Shaping

Partial Unfolding and Shaping-An effortless origami dragonfly tutorial for children.

Partially unfold the wings and gently curve them upward to add dimension. Fold the wings back down, ensuring they stay in a diamond shape. The image provided can guide you in creating the diamond shape for the wings.

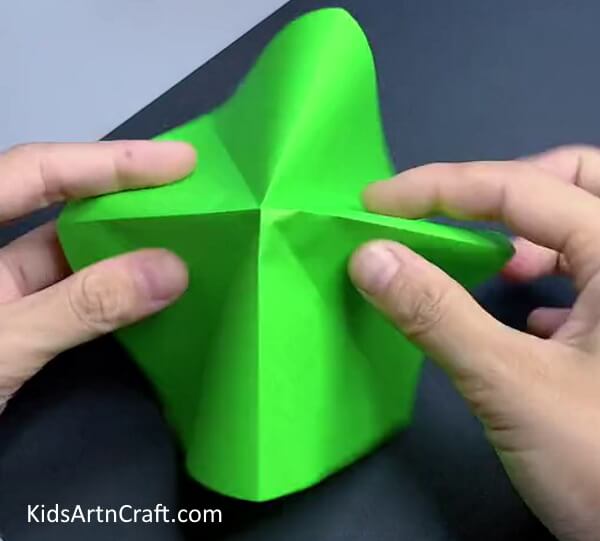
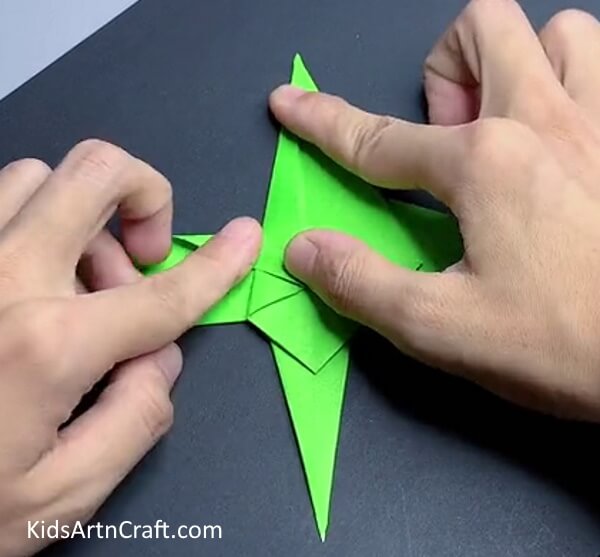
Step 8: Shaping the Body

Shaping the Body A simple origami dragonfly lesson for little ones.

Once you’ve completed the previous step, gently press the folded paper. You will see whether a flat surface is visible or not, as shown in the instructions. Take your time to define the creases clearly. This flat surface is an important element of our origami creation. So be cautious while shaping it.

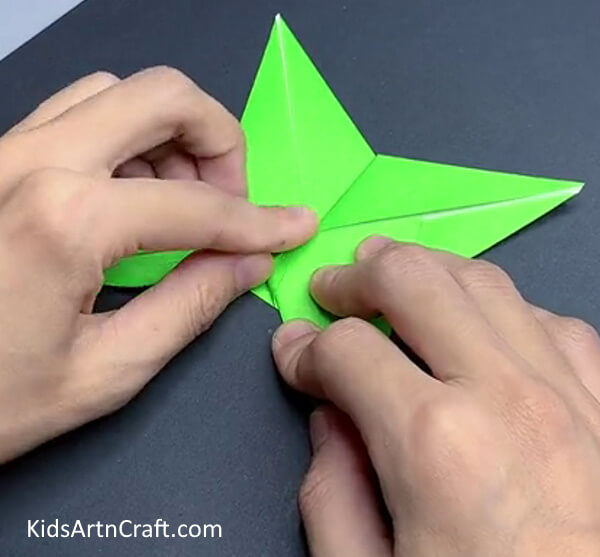
Step 9: Completing the Bird Base

Completing the Bird Base- A quick and easy origami dragonfly DIY for kids.

By now, you should see a transformation called the Bird Base. To enhance our dragonfly, fold up the bottom flaps so they point towards the sides. This strengthens the structure and adds more intricate details. Great job so far, and soon your origami dragonfly will be ready to soar!

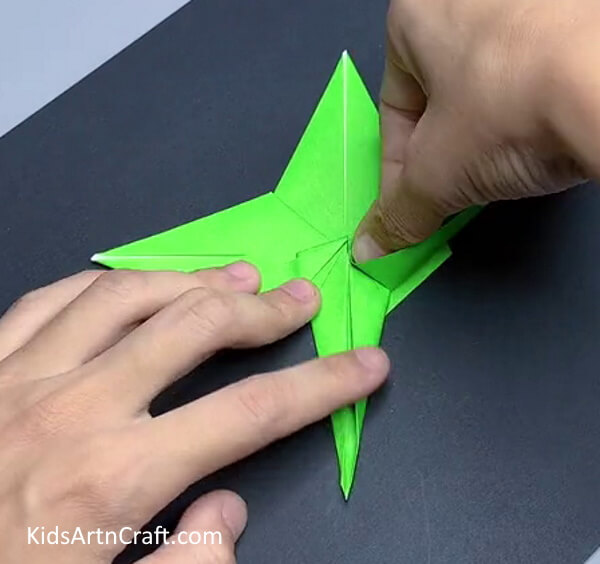
Step 10: Turning Sideways

Turning Sideways-An uncomplicated tutorial for children to craft a dragonfly using origami.

Turn the origami sideways. In this step, you need to fold the outer edges towards the center point of the bird base. If you’re unsure, fold them towards the point indicated in the image above.

Step 11: Narrowing the Body

Narrowing the Body-Crafting a Foldable Dragonfly - Step-by-Step Guide for Children

Repeat the same method for both wings, completely tucking the edges as shown in the image. Narrow the body of the dragonfly by folding the sides of the paper so the edges meet in the middle. Evenly squash the paper at both ends.

Step 12: Further Narrowing

Further Narrowing-Make Your Own Origami Dragonfly - Simple Instructions for Kids

Repeat the narrowing process with the bottom part of the model. Fold the edges inward towards the center, then press down and squash evenly to keep the wings flat.

Step 13: Creating 4 Wings

Creating 4 Wings-Learn to Create a Dragonfly Out of Origami - Instructions for Little Ones

Fold the wings down so they are perpendicular to the body. Cut the wings in half to give the dragonfly the traditional 4-wing appearance.

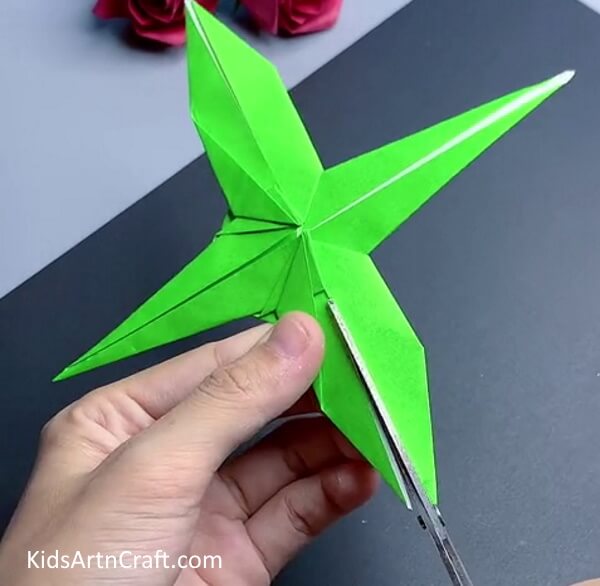
Step 14: Face-On View

Face-On View-How to Make an Origami Dragonfly - A Guide for Youngsters

Rotate the model to face it directly. Fold it inward as indicated, while spreading out the 4 cut wings.

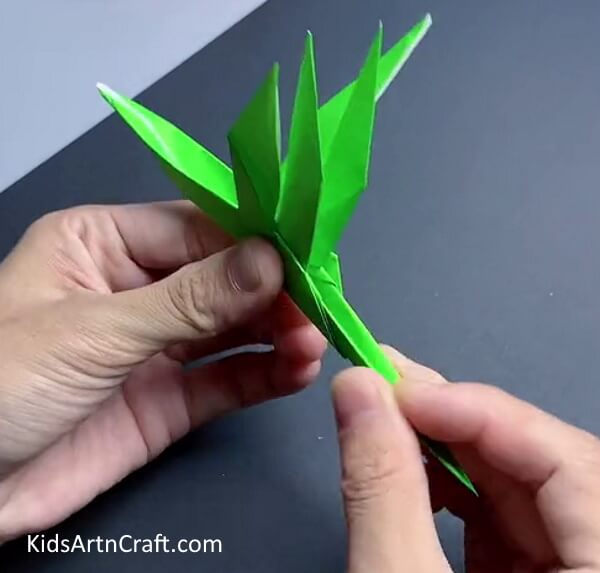
Step 15: Shaping the Wings

Shaping the Wings-DIY Dragonfly Foldable Craft - Step-by-Step Tutorial for Kids

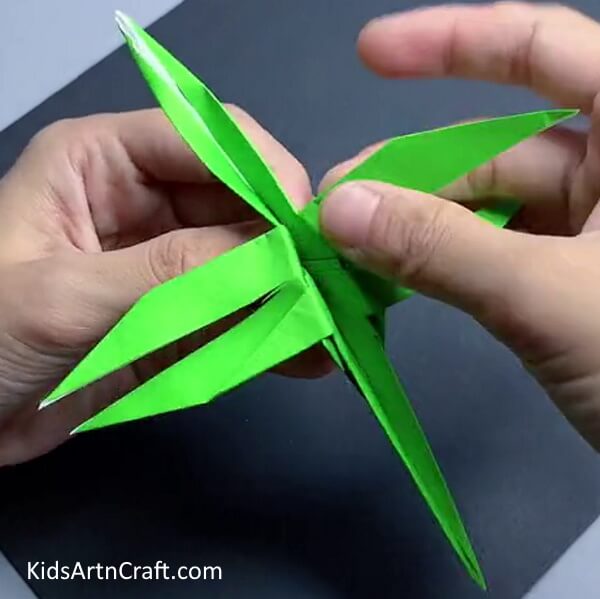
Carefully bend each wing along the side crease surrounding it. Repeat this process for all the wings, one by one.

Step 16: Adding the Head

Adding the Head-Teach Your Kids How to Construct a Paper Dragonfly - Easy Guide

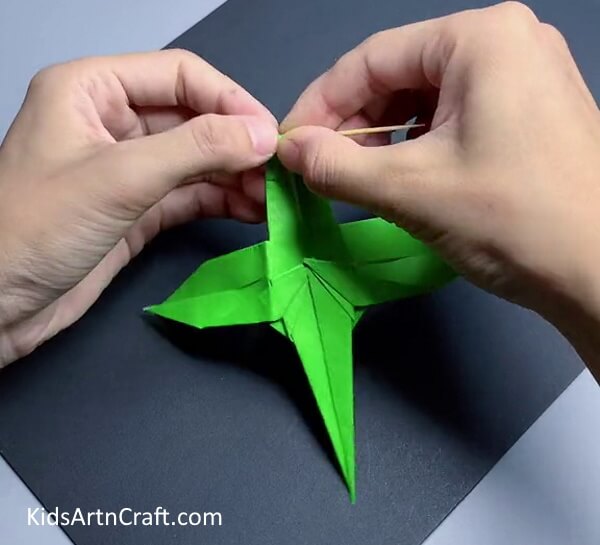
Rotate the model to face it directly. Fold the tip of the paper upward. Then, continue folding up using a toothpick until the paper forms a small head for the dragonfly.

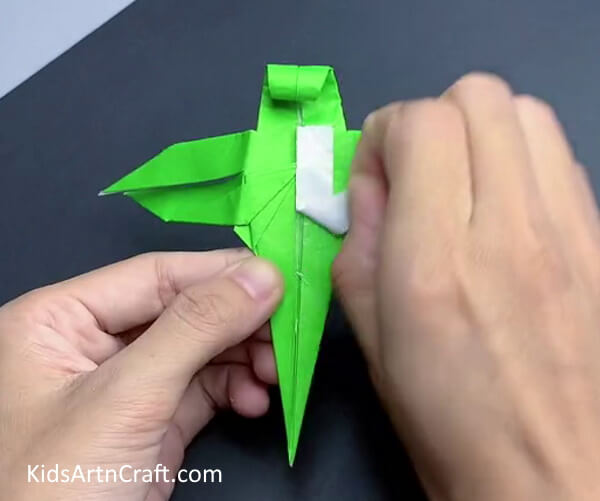
Step 17: Attaching the Sticky Surfaces

Attaching the Sticky Surfaces-Simple Instructions to Create an Origami Dragonfly - For Kids

Remove the double-sided tape from the visible back portion of our dragonfly craft. Press both sticky surfaces together, as demonstrated in the image provided.

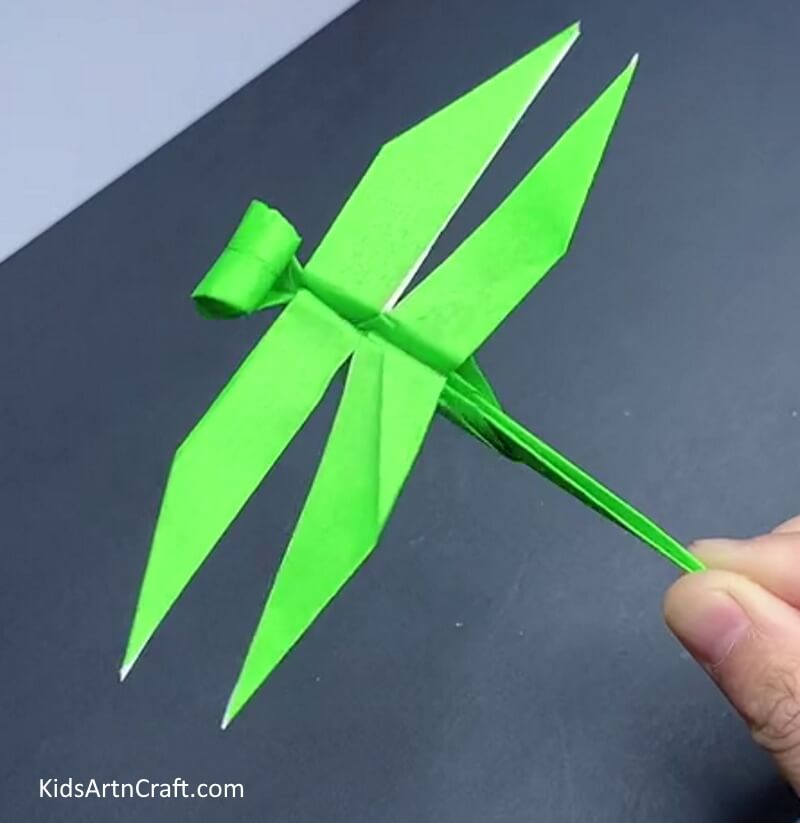
Here it is! Origami Dragonfly Craft is Ready!!

Here it is-Learn How to Make a Dragonfly with Paper Folding - Kid's Tutorial

Congratulations! You have successfully followed these steps to create your origami dragonfly. Enjoy the process of folding and have fun with your paper creation!

Some More Dragonfly Craft Tutorial

Plying with Popsicle Stick Dragonfly Craft For Children

Popsicle Stick Dragonfly Craft For Room Decor

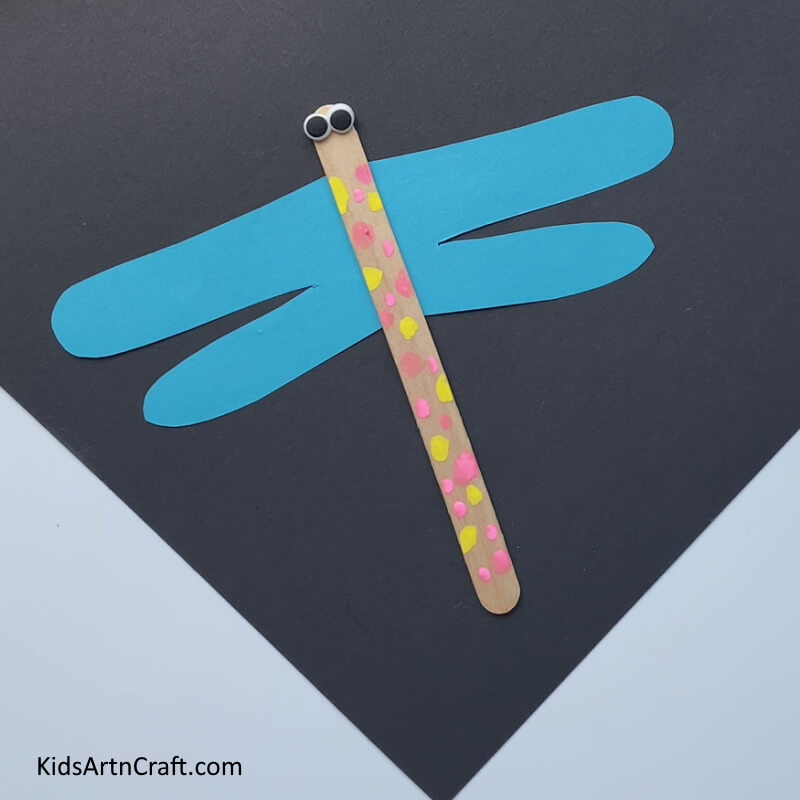
Image Source/Tutorial: Kids Art & Craft

This craft is a fun and creative way to bring a little extra decoration to your room. All you need is some popsicle sticks, paint, and some other craft supplies. Follow the step-by-step instructions and you’ll have a fun and colorful dragonfly to hang in your room.

You’ve now mastered the art of origami and brought your very own dragonfly to life. It’s incredible how a simple sheet of paper can transform into something beautiful. Now, you can impress your friends with your origami skills. Explore the fascinating world of this ancient Japanese craft. Keep folding and discovering new origami adventures!

Follow us on Youtube for art and craft tutorials and much more.

More Articles from Kids Art & Craft

Activities for Kids
Continue Reading

More in DIY and Crafts

Like us on Facebook

Advertisement

Recent Post

DIY and Crafts

DIY Fun To Make Cardstock Paper Crafts

By April 27, 2024
Easy & Simple Art & Craft Ideas to Keep Your Kids Busy and Entertained

DIY and Crafts

Button Crafts For Toddlers

By April 27, 2024

DIY and Crafts

Crochet Dishcloth Patterns For Cleaning

By April 27, 2024

Kids Fashion

Bunny Costume DIY Ideas for Kids

By April 26, 2024

Kids Activities

Acrylic Leaf Painting Art Ideas

By April 26, 2024
Advertisement

Popular Tags

To Top
Get Free Worksheets & PrintablesDownload
+