DIY and Crafts
How To Make Mountain Scenery Drawing For Kids Tutorial

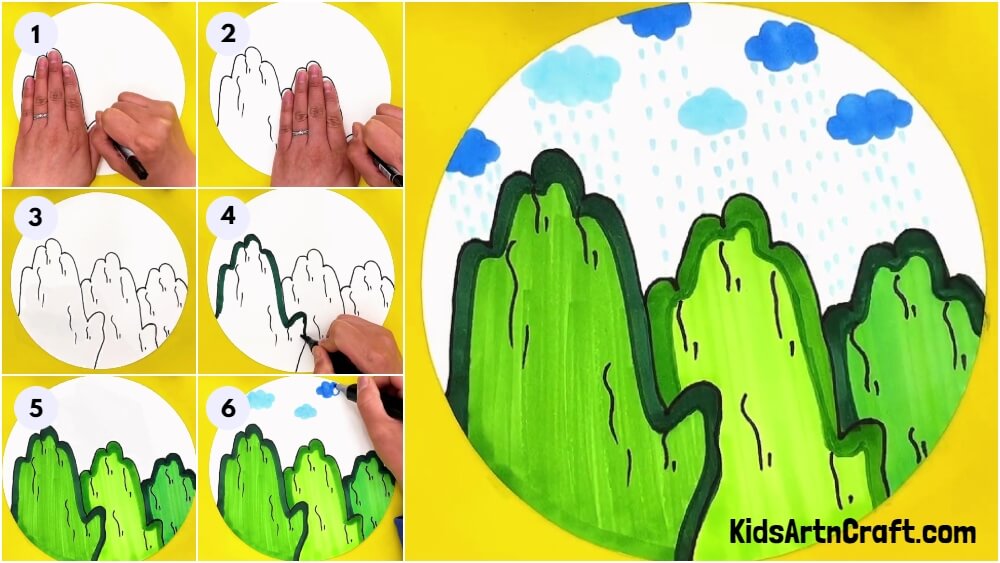
This tutorial will teach you how to draw an enjoyable mountain landscape with basic materials and some imagination! It’s a great way to let your kids explore the outdoors and have fun at the same time.
Hello everyone! Welcome to this tutorial, do have kids who love to draw and who always play with sketch pens. Then, this drawing is perfect for your kids. In this tutorial, we going to draw a simple mountain scenery drawing with our step-by-step tutorial. Within a very short time and with a few sketch pens you can draw it very easily. Are you ready to draw? Grab your sketches.
Easy To Make Mountain Scenery Drawing For Kids
Read More: Autumn Leaf Squirrel Craft Tutorial For Beginners
Materials Required
- The white sheet (Cut a big circle from it)
- Sketch pens (Black, Light green & blue, Dark green & blue)
Procedure
Step 1: Drawing Mountain With Hand
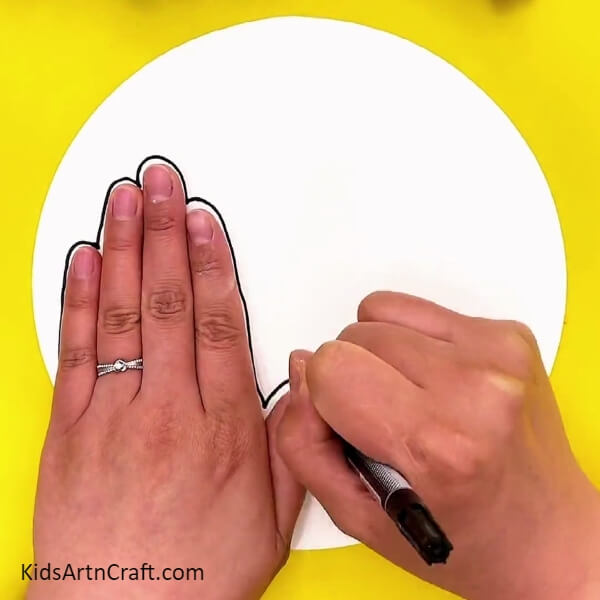
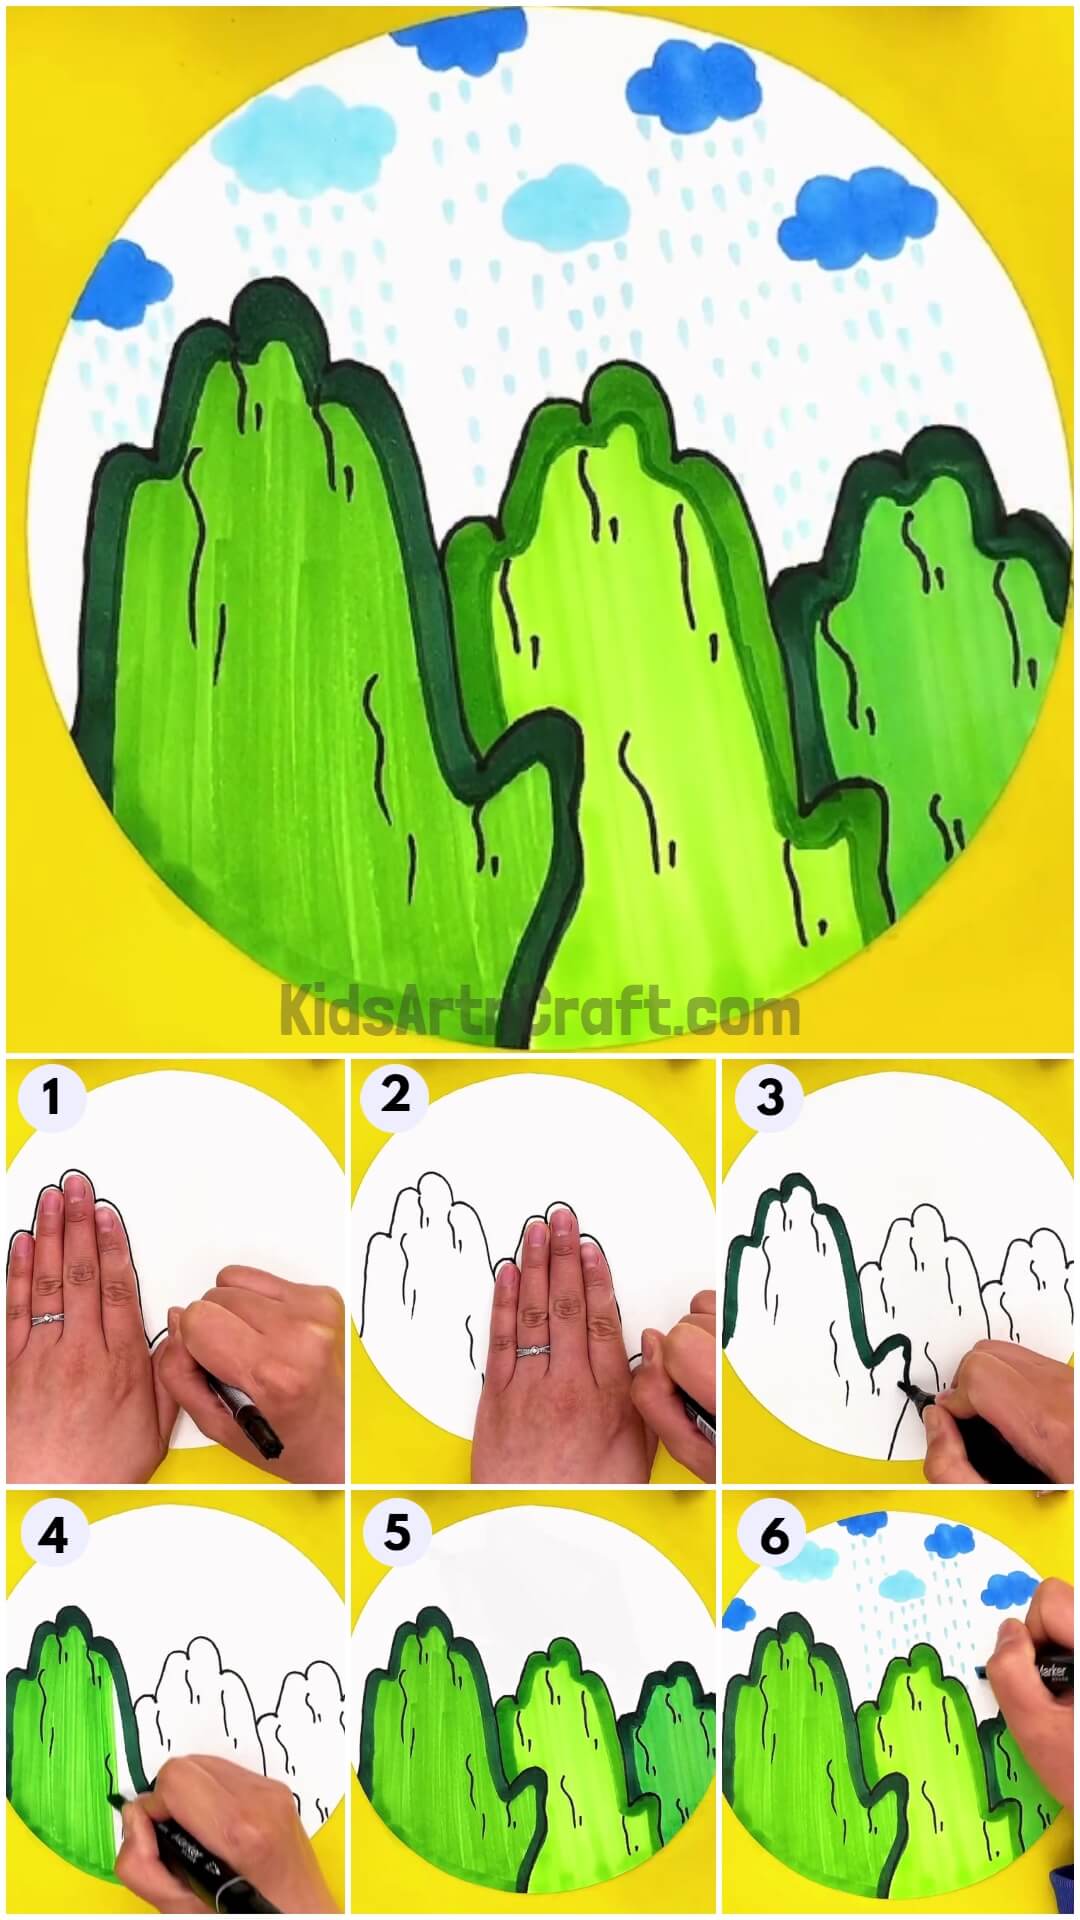
Let’s begin with drawing a mountain, place your left hand on a white sheet and draw an outline around your hand with the use of the black pen.
Step 2: Drawing The Second Mountain
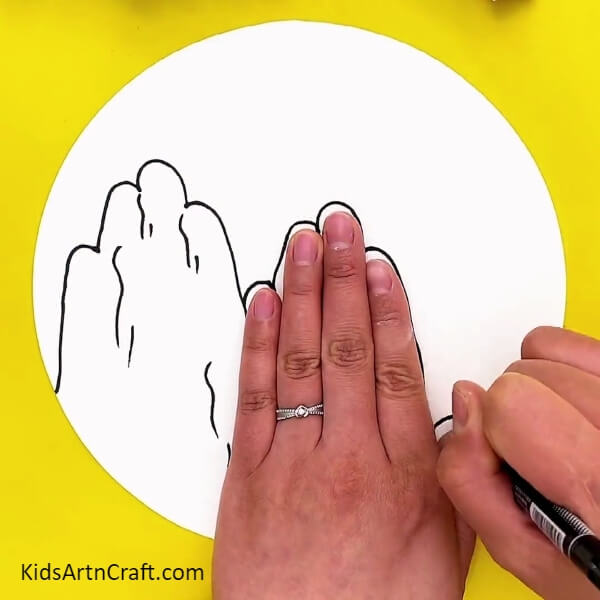
Then draw small curvy lines in that mountain and after, place your hand near your first mountain and draw an outline around your hand to draw the second mountain as shown in the image.
Step 3: Drawing The Third Mountain
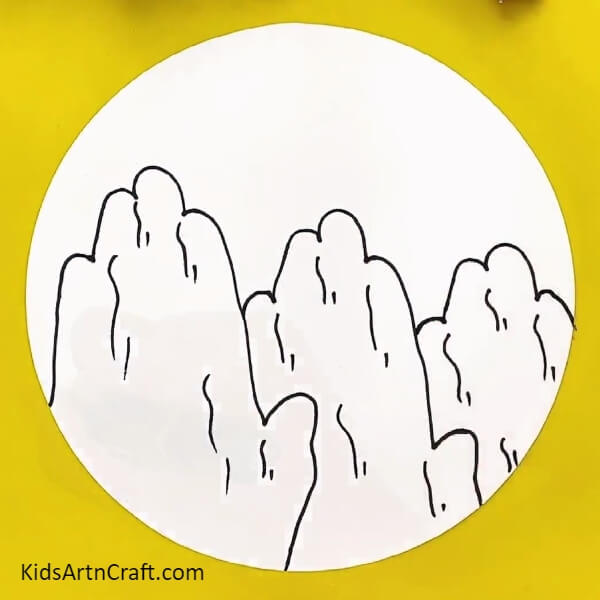
As same as the first and second mountains, place your hand near the second mountain and draw an outline around your hand and draw some curvy lines inside of all three mountains.
Step 4: Coloring Outline Using A Dark Green Sketch Pen
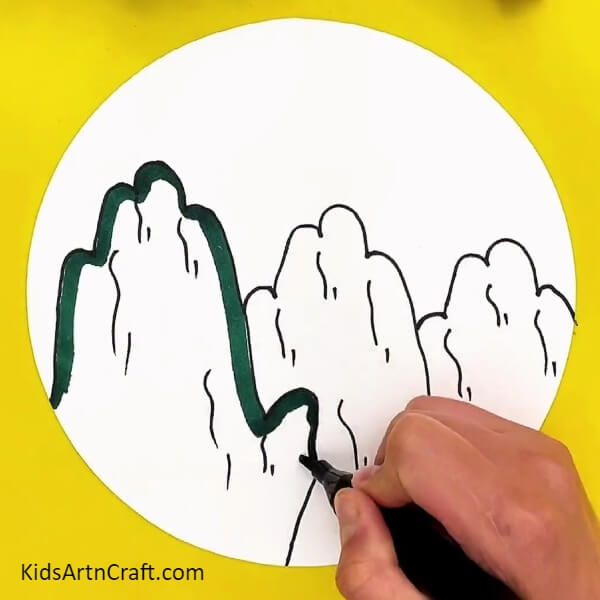
With the use of a dark green sketch pen, the color outline of your first mountain is shown.
Step 5: Coloring Mountain With A Light Green Color Sketch Pen
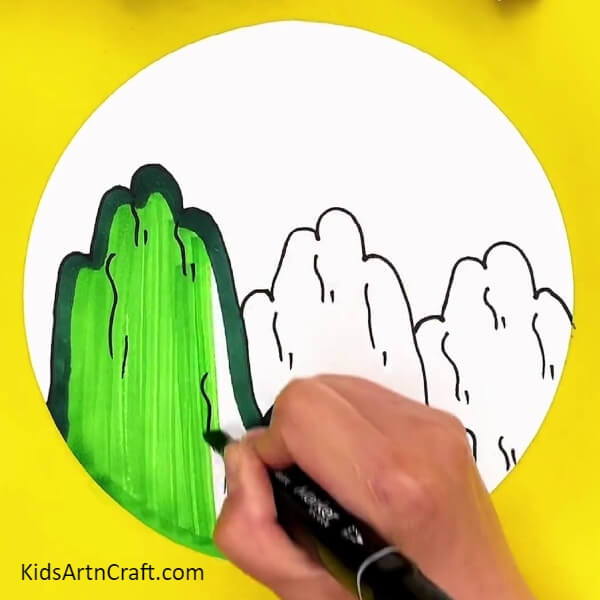
Grab your light green sketch and start to color inside your first mountain.
Step 6: Coloring The Second Mountain
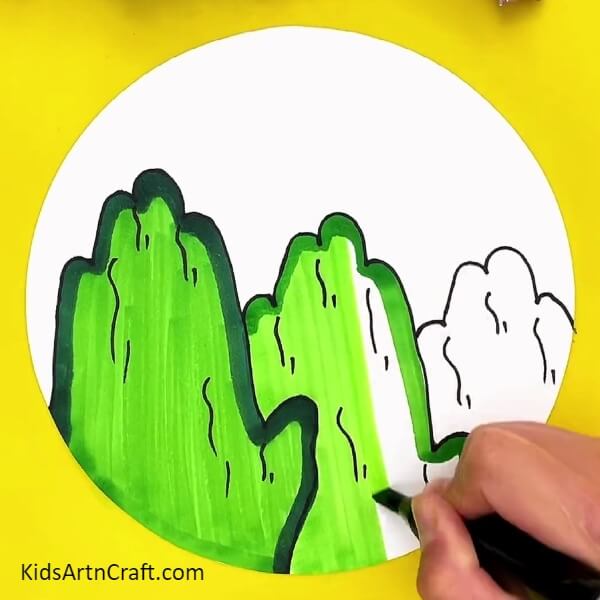
Are ready to color the second mountain? In this step, we have to use a light green pen to color the outline, draw the outline twice, and also use the same light green pen to color the inside of your mountain.
Step 7: It’s Time To Color The Third Mountain
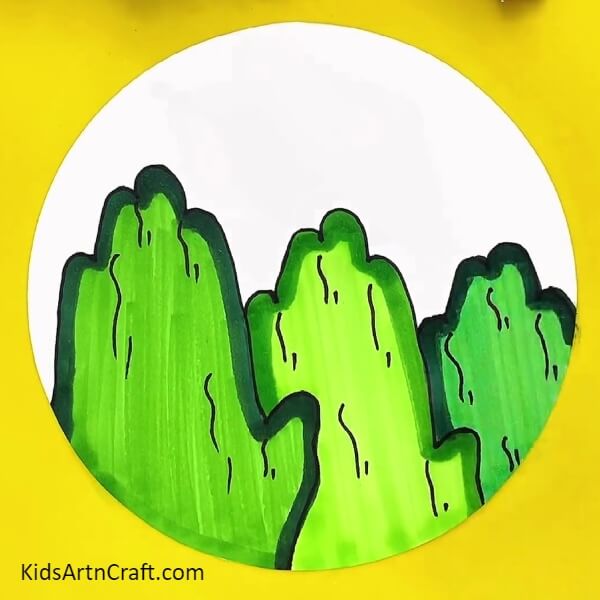
Here, like your first mountain, use a dark green pen to draw the outline and light green pen to color inside.
Step 8: Drawing Clouds With A Light Blue Sketch Pen
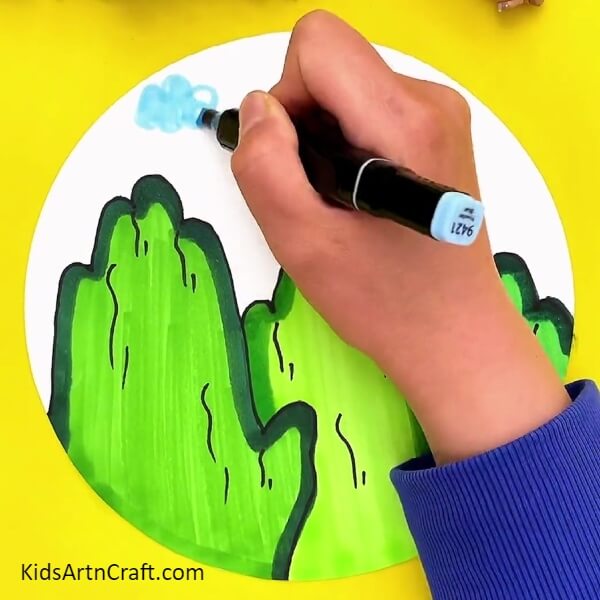
It’s time for clouds! With the use of a light blue sketch pen, draw a cloud on the top-left side of your white sheet and draw one more cloud in light blue color.
Step 9: Drawing Clouds With A Dark Blue Sketch Pen
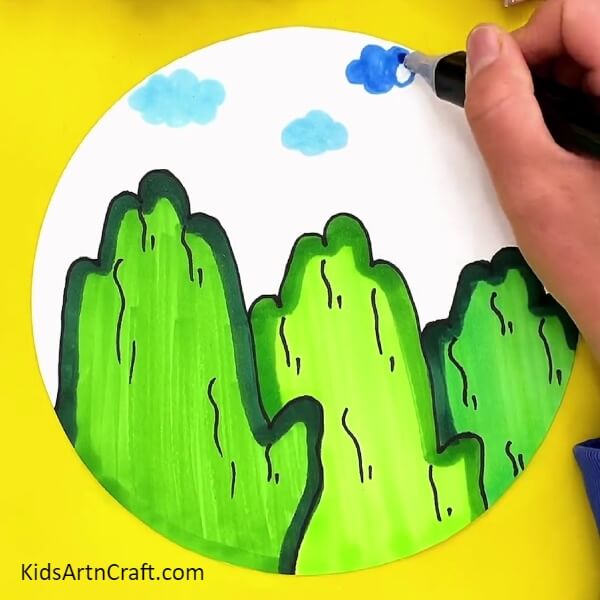
Then draw some more clouds with the use of a dark blue sketch pen on the right side.
Step 10: Drawing Raindrops From Clouds
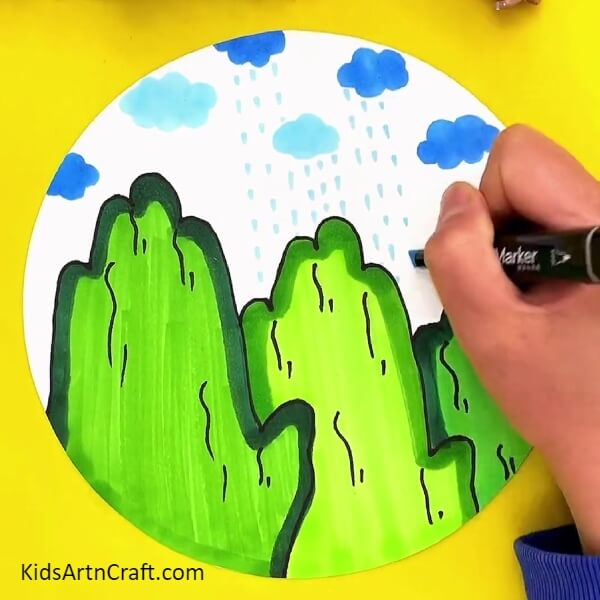
We going to use light blue color for raindrops, and start to draw raindrops from clouds to mountains as shown in the image.
The Final Output Of Our Mountain Scenery Drawing
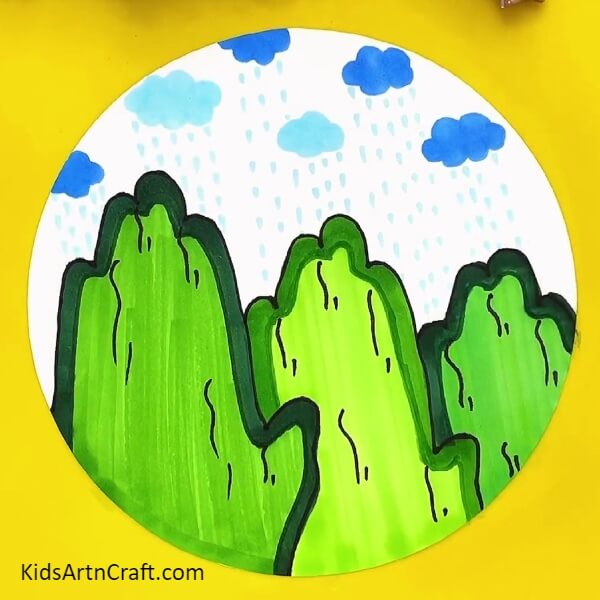
That’s all everyone, this is the final step, draw raindrops from each cloud that you draw. This is quite simple, right? This simple drawing is for all ages kids and also beginners, without any effort anyone can draw this drawing within a short time.
We hope you found this step-by-step tutorial useful and this tutorial is perfect for beginners. Improve your drawing skills with our tutorials and for more tutorials like this, visit our website. Let us know your feedback in the comment box.
Thank you for visiting our website!
Follow us on Youtube for art and craft tutorials and much more.
More Articles from Kids Art & Craft
- Creative Art & Craft Activities Video Tutorial for All
- Cute Craft Activities Video Tutorial for Kids
- Easy Craft Activities that Make Everyone Video Tutorial for All
- Cool Paper Craft Video Tutorial for Kids
- Easy to Make Handmade Bee Craft Tutorial for Kids


