


DIY and Crafts
Easy Paper Bird Step by Step Tutorial For Kids

This easy paper bird step-by-step tutorial is perfect for kids! Learn how to make a paper bird with minimal materials and simple instructions. Follow along to create a unique papercraft that will keep your kids entertained for hours.
Origami is an ancient art form that has been around for centuries. It involves folding paper into various shapes and designs. This is a great activity for kids of all ages, and it’s a great way to teach kids about geometry, symmetry, and patience. It’s also a great way to pass the time and get creative.
Welcome to our origami paper bird step-by-step tutorial for kids! In this tutorial, we’ll guide you through the steps of folding a traditional origami bird. This simple yet beautiful project will help children develop their motor skills, problem-solving ability, and creativity. With our step-by-step instructions, they can create a unique paper bird in no time!
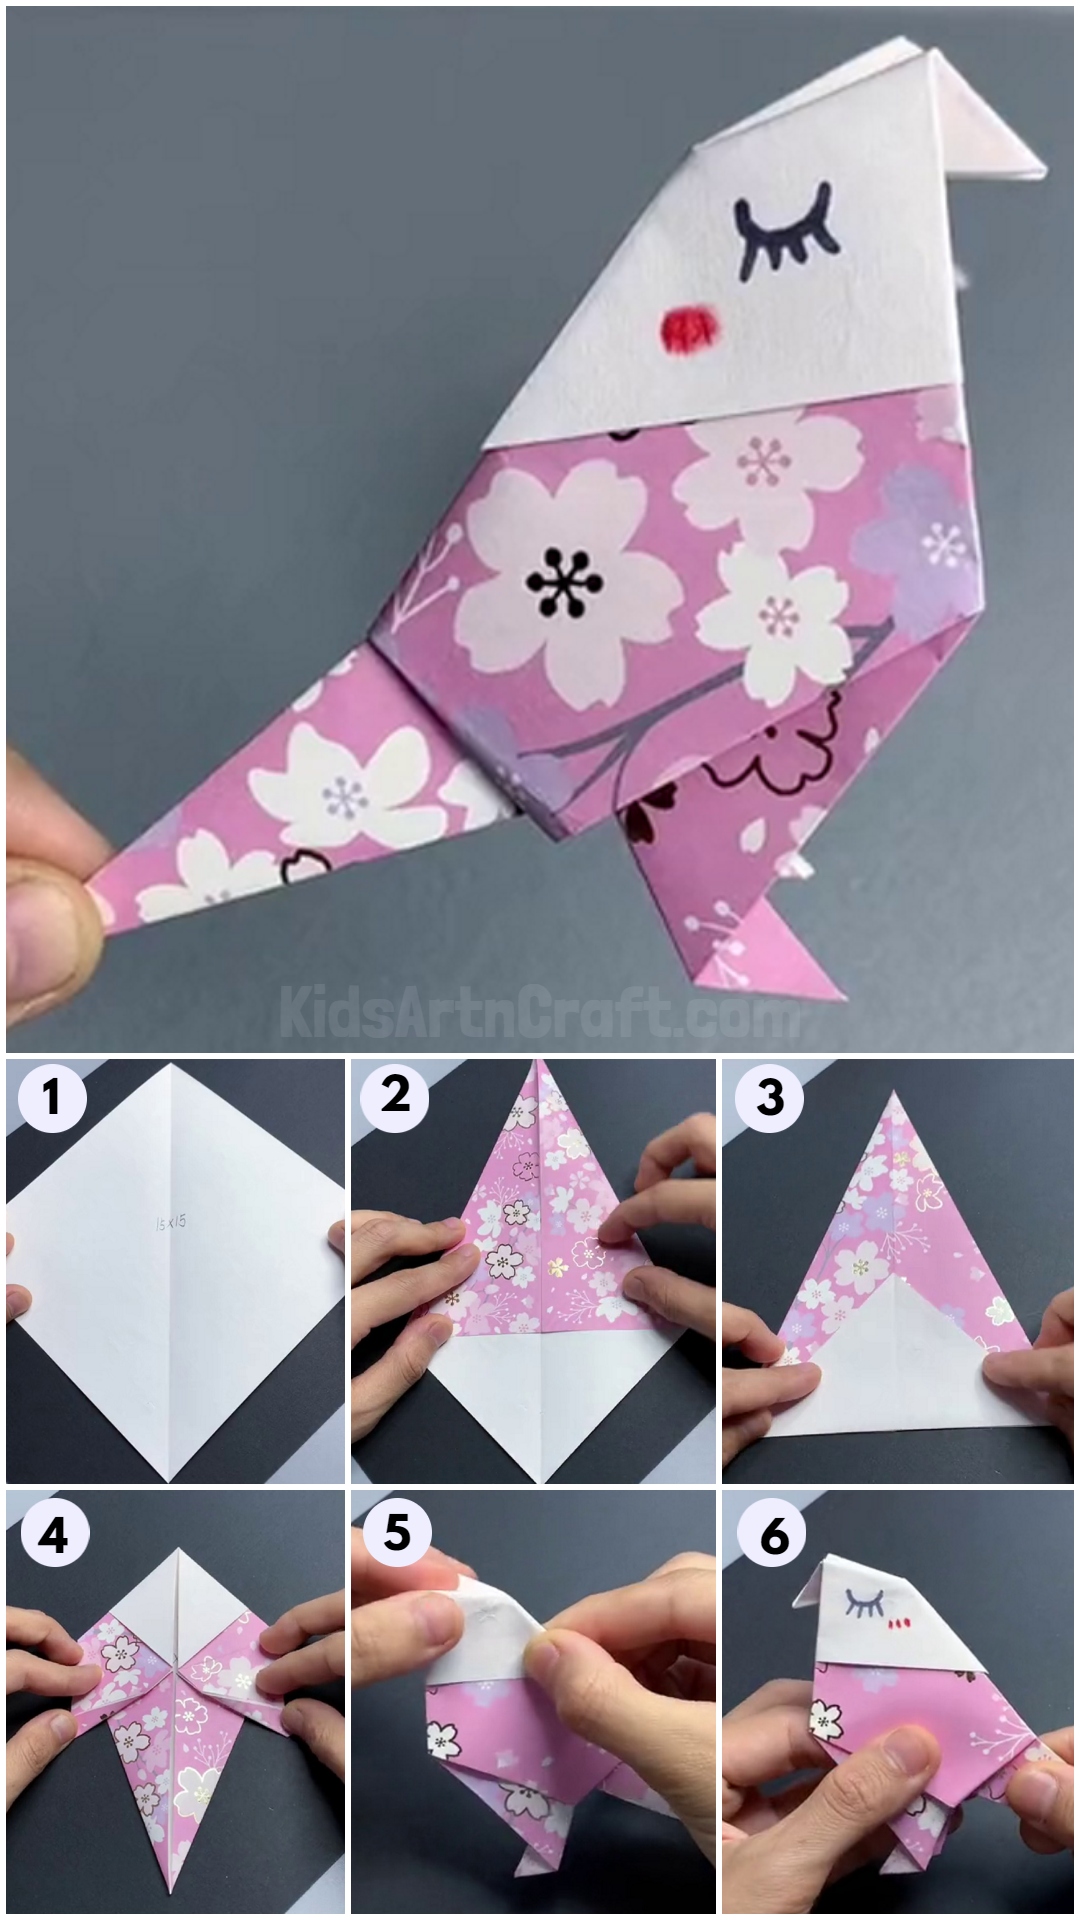
DIY Paper Bird Craft Tutorial With Step By Step Instructions
Read More: Easy Paper Robot Craft Step-By-Step Tutorial
Materials Required
- Designer Origami Paper
- Black Marker
Procedure
Step 1: Turning Around Square Paper To Make Diamond Shape
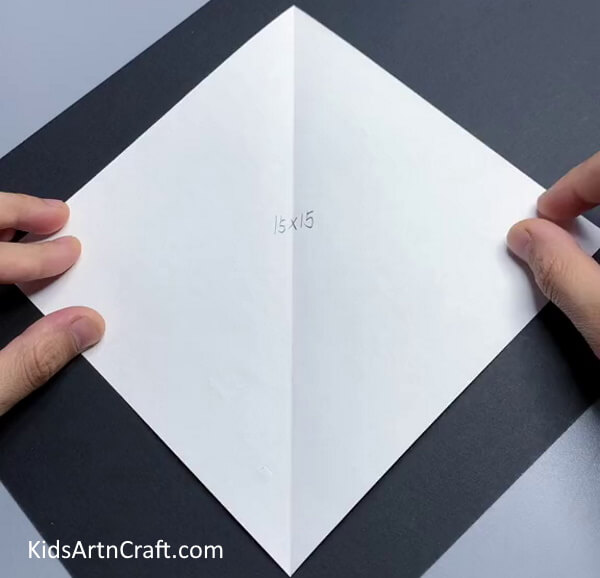
First, take a square designer origami paper and fold it in half diagonally. Crease it well and unfold it. Turn the square shape around to make a diamond shape.
Step 2: Folding Corners Of The Paper To The Middle
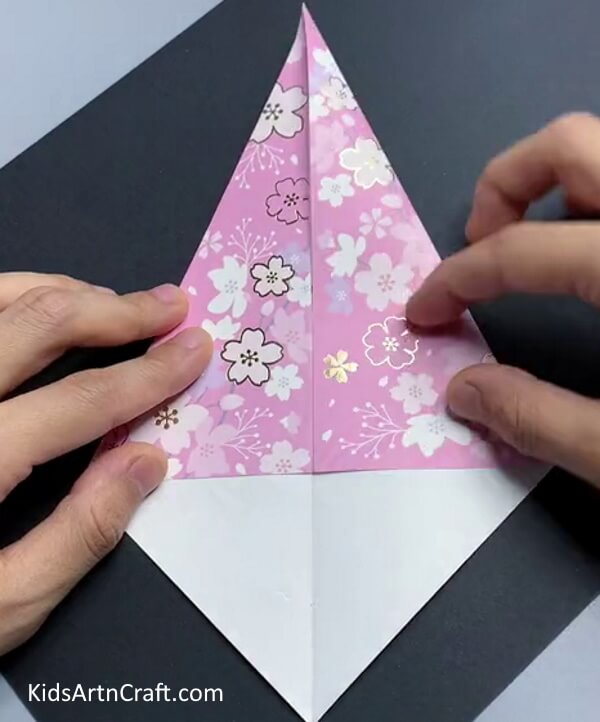
Take the right corner of the paper and bring it to the middle crease made previously. Repeat the same with the left corner.
Step 3: Folding Bottom Triangle
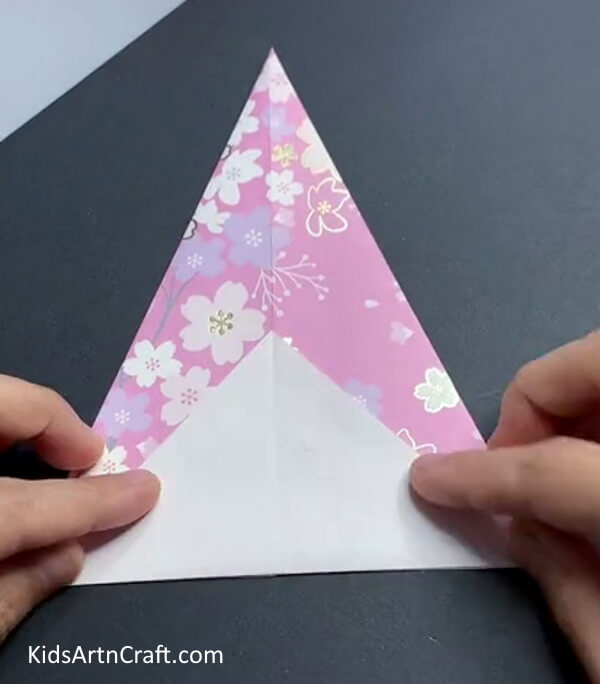
Now, flip the paper and fold the bottom triangle in an upwards direction.
Step 4: Folding Top Corners
Now, again flip the paper. Take the top left and right corners of the paper and fold them to the middle crease. Crease them well and unfold them.
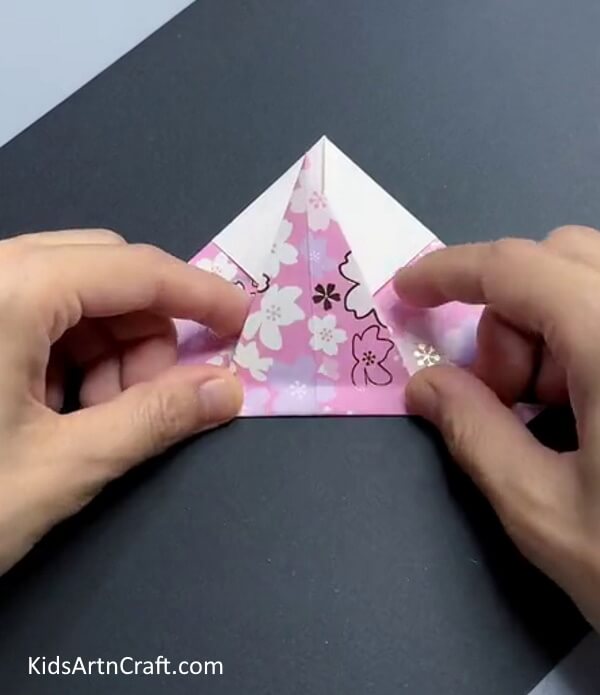
Also, unfold the sides of the paper folded in the first step. Fold the sides along with the creases formed by pushing in the paper. You should get a cone shape.
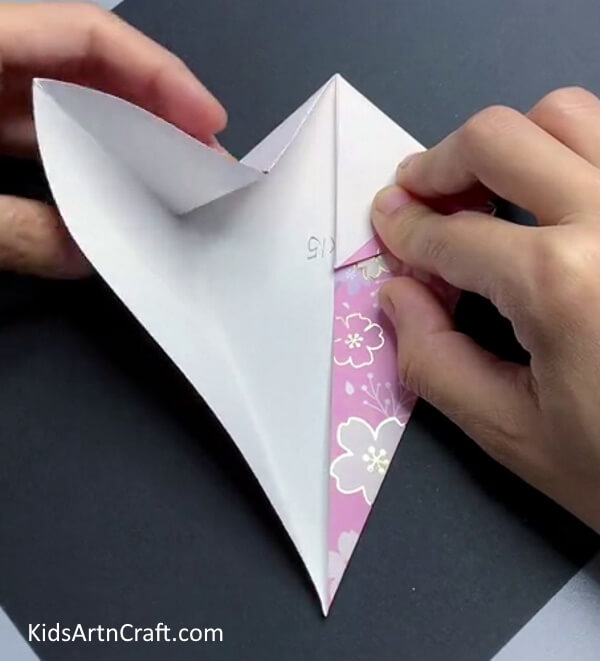
Step 5: Bringing Down The Top Layer
Take the top left outer layer of the paper model and bring it down as shown in the above figure.
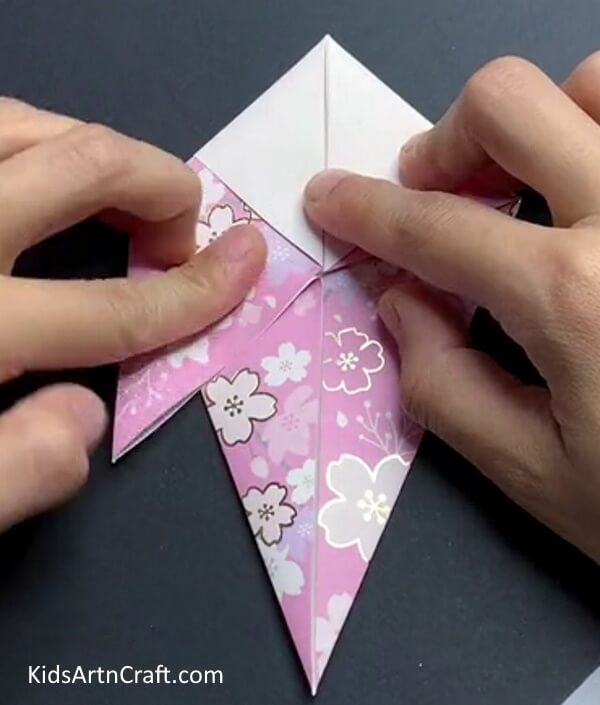
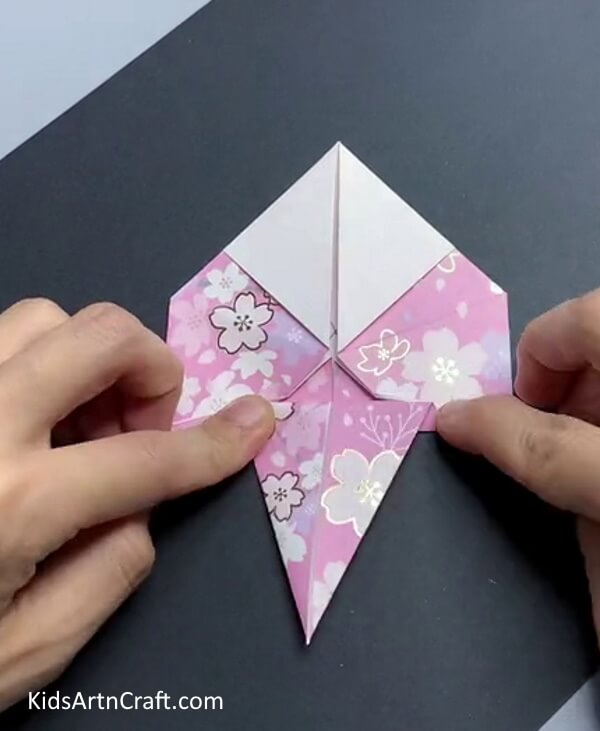
Step 6: Bringing Down the Right Corner
Repeat the last step on the top right outer corner layer of the paper.
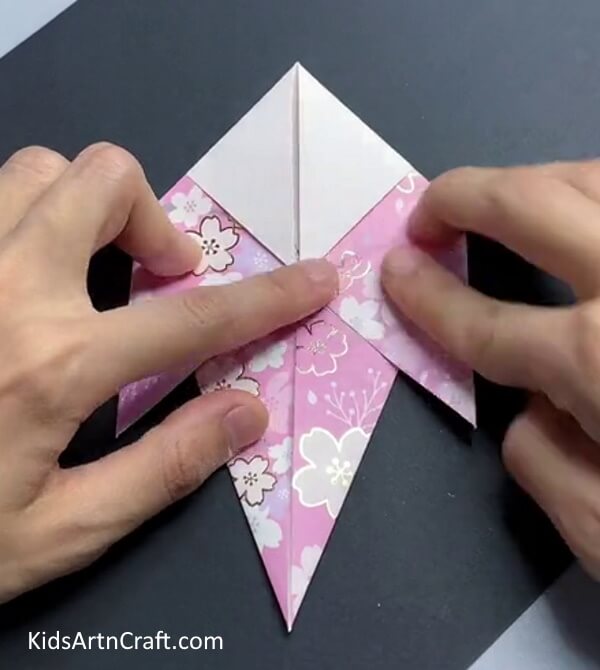
Step 7: Folding The Wings Of The Bird
Take the right wing and fold its bottom corner to the right side as shown in the above image. Repeat the same with the left wing.
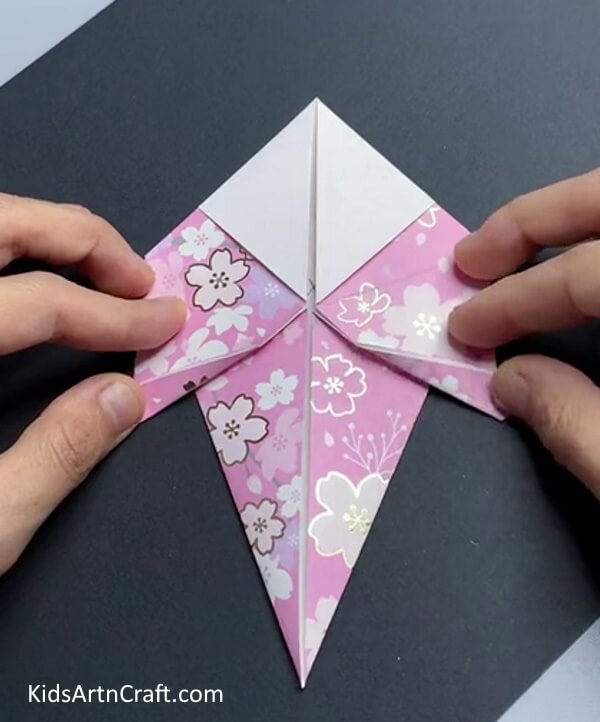
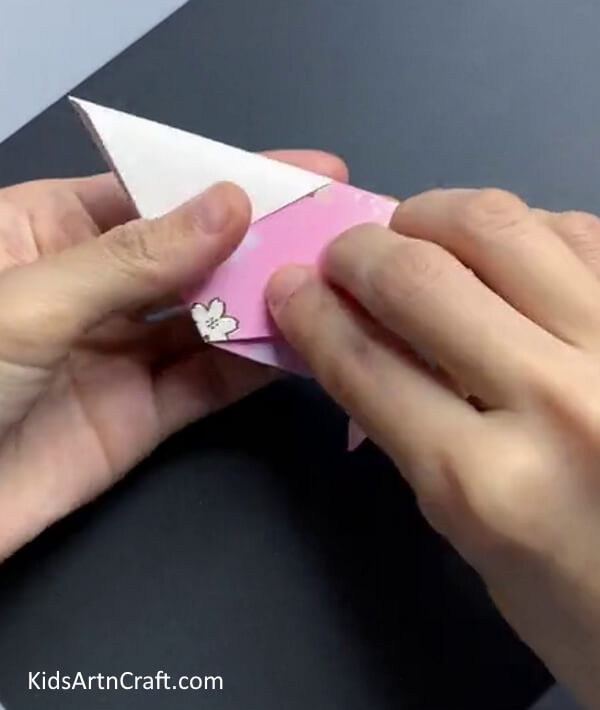
Step 8: Folding Bottom Triangle Upwards
Now, fold the bottom triangle in an upwards direction.
Step 9: Bringing Triangle Down
By leaving about 1 cm on the bottom crease, bring the triangle downwards.
Step 10: Folding In Half
Fold the paper bird in half from an upwards direction.
Step 11: Making Beak Of The Paper Bird
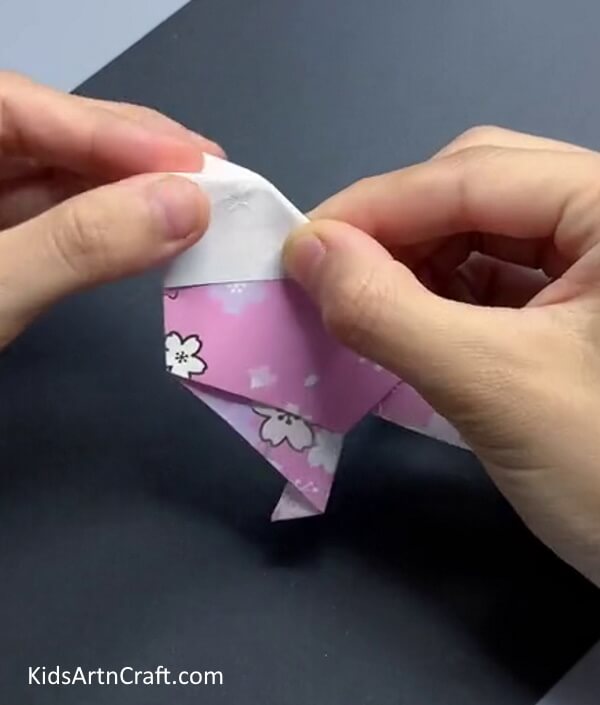
Now, to make the beak of the bird, push in the white corner inside to make the beak of the paper bird. Pull out the corner a little.
Step 12: Drawing Eyes and Cheeks
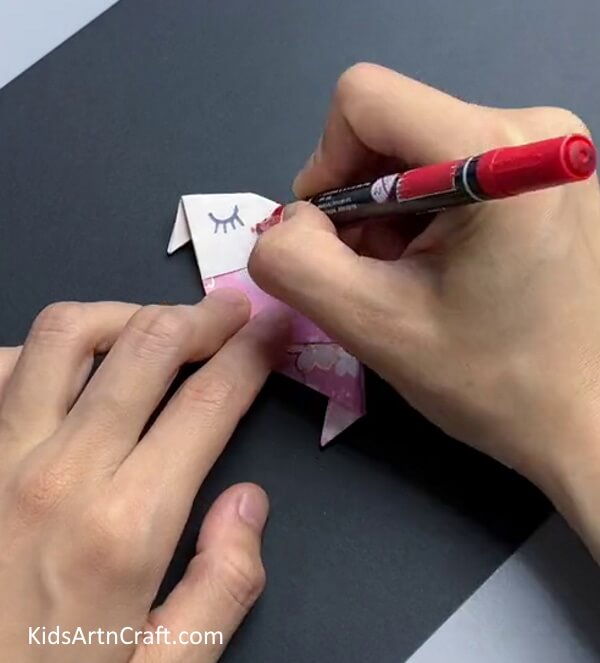
Using markers, draw the eyes and the cheeks of the bird.
Step 13: Adjusting the Tail Of The Bird
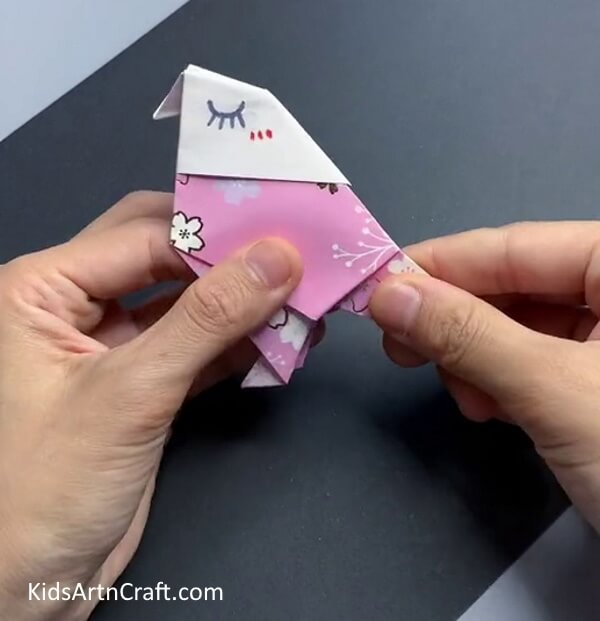
Lastly, adjust the tail of the bird by pressing it.
Origami Paper Bird Is Ready!
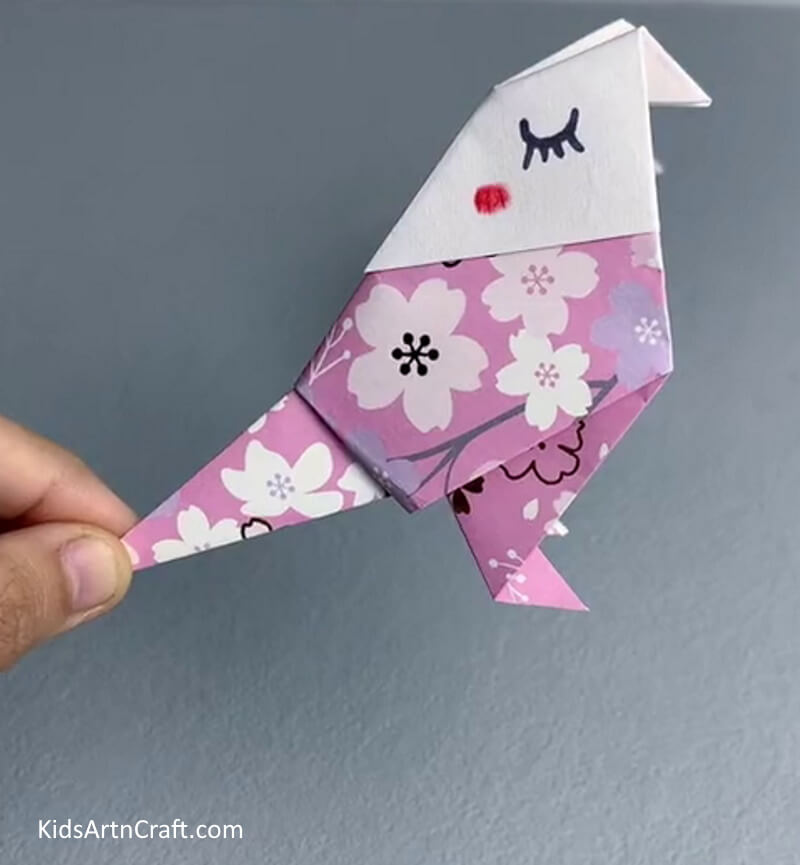
Congratulations on completing your beautiful origami paper bird! It’s amazing how something so delicate can be created with just a few simple folds. It’s a great way to show my creativity and also bring a little bit of nature into my home. Have fun showing it off to your friends and family.
Some More Bird Craft Tutorial
Pretty Bird Craft Using Paper
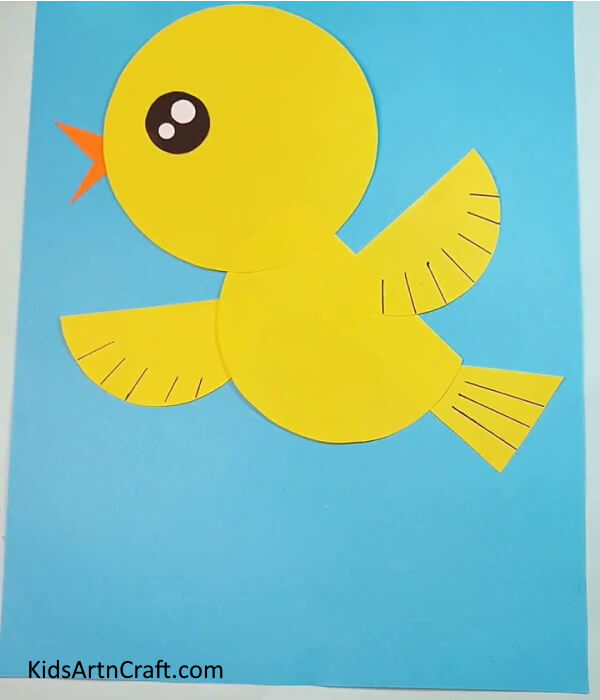
Image Source/Tutorial: Kids Art & Craft
Creating pretty birds out of paper is a great way to make beautiful and unique decorations for any occasion. This craft is easy to make and you can customize the birds to your own liking. Let your creativity take flight and make some beautiful paper birds!
Easy To Make Birds Nest Paper Craft For Kids
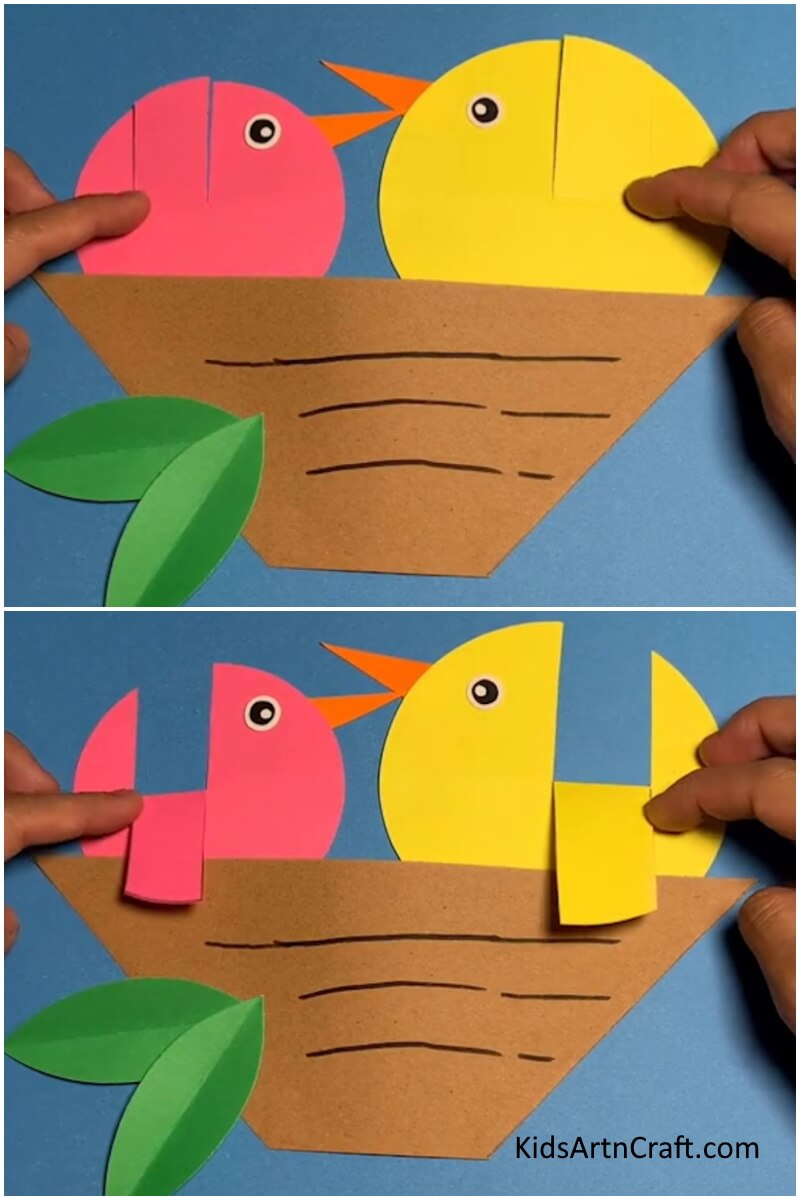
Image Source/Tutorial: Kids Art & Craft
This paper craft is perfect for kids of all ages. It is easy to make and the materials needed are simple and affordable. With a few steps, kids can make a beautiful birds nest to hang in their room or give as a thoughtful gift.
Easy To Make Paper Birds Craft For Kids
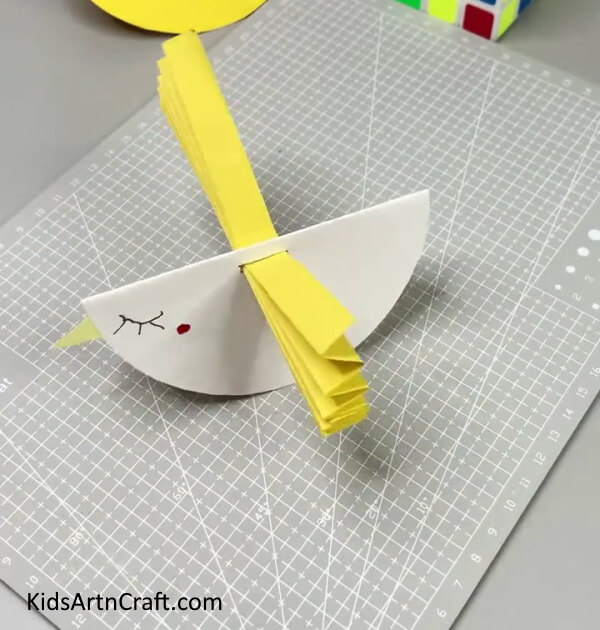
Image Source/Tutorial: Kids Art & Craft
This fun and easy paper bird craft is perfect for kids. It requires minimal materials and is a great way to have fun with the family. With just a few simple steps, you can create a beautiful bird in no time.
A Bird Craft Out Of Paper For Kindergarteners

Image Source/Tutorial: Kids Art & Craft
This is a fun and creative activity for kindergarteners. Making a bird out of paper craft allows children to explore their imagination and have fun with art. This activity helps children to develop their fine motor skills as well as their creativity. It’s a great way to bring joy and learning into the classroom.
Crafting a Paper Bird with Fingers for Children
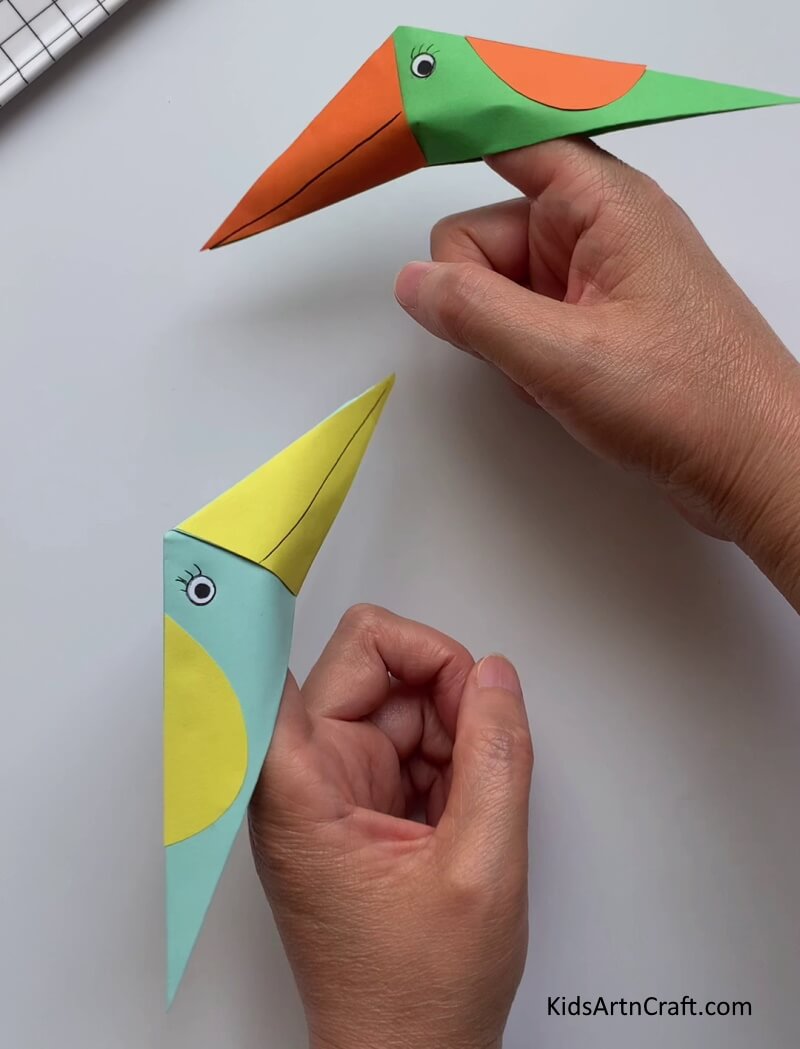
Image Source/Tutorial: Kids Art & Craft
Crafting a Paper Bird with Fingers is a fun and easy way to keep kids entertained. It’s a great way to teach children how to fold paper and create something creative from it.
Easy Method Yellow Paper Bird Craft For Kids
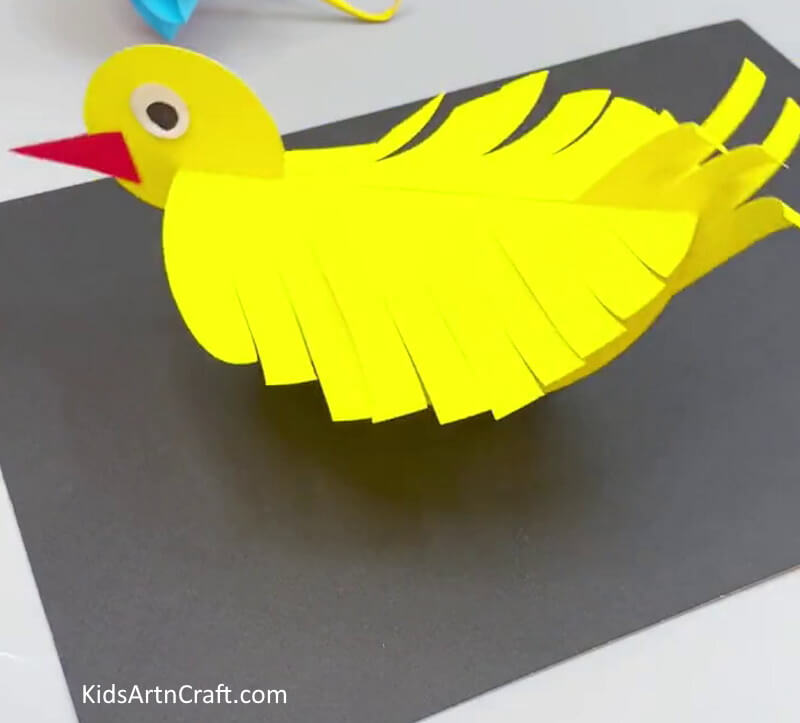
Image Source/ Tutorial: Kids Art & Craft
This craft is perfect for kids! It’s an easy method that requires only yellow paper and a few simple steps to make a beautiful bird. It’s perfect as a creative activity or to make decorations for a bedroom. Kids will love it!
FAQs Origami Paper Bird Craft Tutorial
1. What type of paper should I use for my origami bird?
For this project, you should use lightweight origami paper, which is thinner and easier to fold than traditional paper. You can find origami paper in many craft stores or online.
2. How big should my paper be?
The paper should be square, and the size depends on the size of the bird you are making. For a small bird, use a 5-inch square. For a larger bird, use an 8-inch square.
3. Do I need glue for this project?
No, you do not need glue for this project. All the folding and tucking will hold the bird together.
4. How long will this project take?
This project will take approximately one hour, depending on the size and complexity of your bird.
5. Is this project appropriate for children?
Yes, this project is appropriate for children over the age of seven, as long as they are supervised by an adult.
6. What other projects can I make using origami paper?
You can make a variety of animals, flowers, and other objects using origami paper.
7. How do I store my origami paper?
You can store origami paper in a flat, airtight container.
8. How many birds can I make with one sheet of origami paper?
You can make two or three small birds with one sheet of origami paper.
9. Can I use a different type of paper for this project?
No, you should only use origami paper for this project. Other types of paper are too thick and will not fold properly.
Creating a paper bird is a fun and creative way to get kids engaged in a craft activity! With this easy step-by-step tutorial, it will be a breeze for kids of all ages to make their own paper bird.
Follow us on Youtube for art and craft tutorials and much more.
More Articles from Kids Art & Craft
- DIY Paper Crafts Video Tutorial for All
- Paper Christmas Trees Step-by-Step Tutorial For Kids
- Easy Paper Craft Activities At Home Video Tutorial for All
- Super Easy Craft Activities Video Tutorial At Home
- Paper Origami Frog Craft Tutorial for Kids


