Kids Activities
How To Draw A Cute Mouse Animal For Kids

This tutorial will teach you how to draw a cute mouse. Simply follow the steps and you’ll be able to make your own fun animal drawings.
Welcome to this fun step-by-step tutorial on how to draw a mouse. This is a fun project for kids and an exciting way for them to learn more about animals. You will require some common stationaries and basic artistic skills for this tutorial. Our aim is to show you the easiest possible way for drawing a mouse. We will teach you to draw a mouse step-by-step so that you can have fun as well as learn from it at the same time. Let’s begin!
Cute Mouse Animal Drawing for Kids


Read More: Heart Shaped Paper Mouse Craft Step by Step Tutorial
Materials Required
- Blank white paper
- Black sketch pen
- Colour sketch pens
Procedure
Step 1: Drawing The Basic Shape Of A Mouse
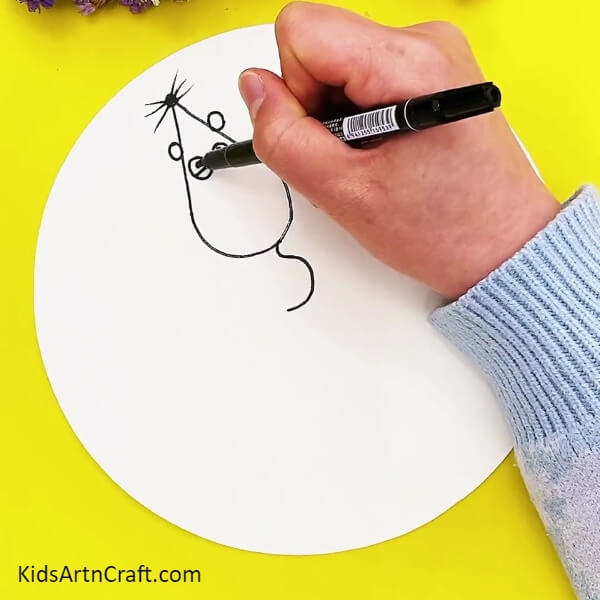

Begin by drawing an upside-down ‘V’. Join the two ends of the upside-down ‘V’ by drawing a semi-circle.
Next, draw a small circle on the sharp tip of the ‘V’ and colour it black, then draw three straight lines one below the other on either side of the black circle, just like the whiskers of a cat! Now, draw two small circles on either side of the straight lines to form the ears of the mouse. Let’s draw the eyes now! Draw two circles inside, draw a straight line inside each circle and give a dot above the lines. Finally, draw a tilted hook at the bottom of the semi-circle to form the tail of the mouse. There you go, the outline drawing of our mouse is ready. It looks so cute!
Step 2: Colouring The Mouse
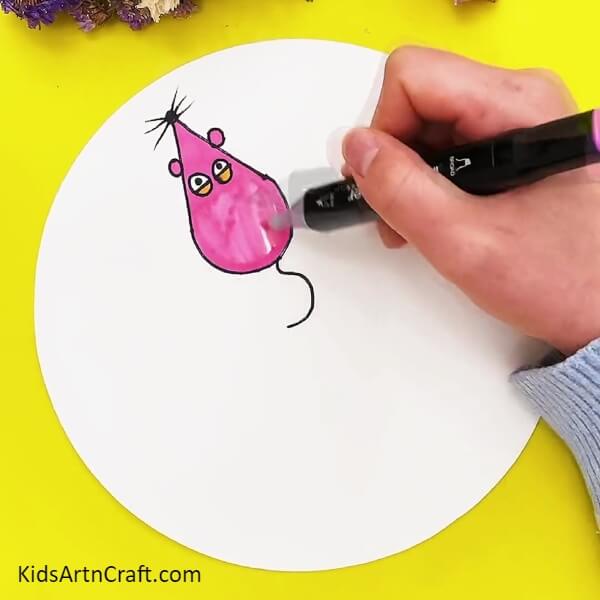
Use the colourful sketch pens to colour the mouse. We have used purple colour over here. Feel free to use any colour of your choice. See that you have coloured properly the entire body of the mouse. Use a lighter colour sketch pen to colour the eyes. Let’s give a bit of detailing to our mouse.
Step 3: Finishing Details On The Mouse
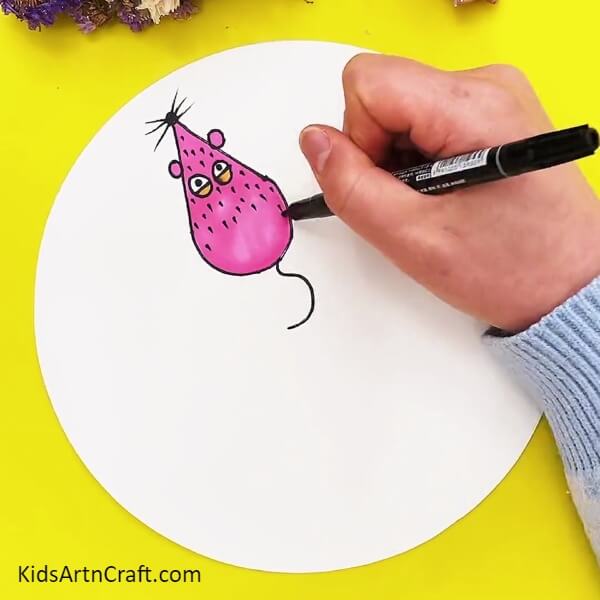
Using the black marker, draw little straight lines inside the entire body. This is the fur of the mouse. The detailing looks great. Good job!
Step 4: Drawing Multiple Mice
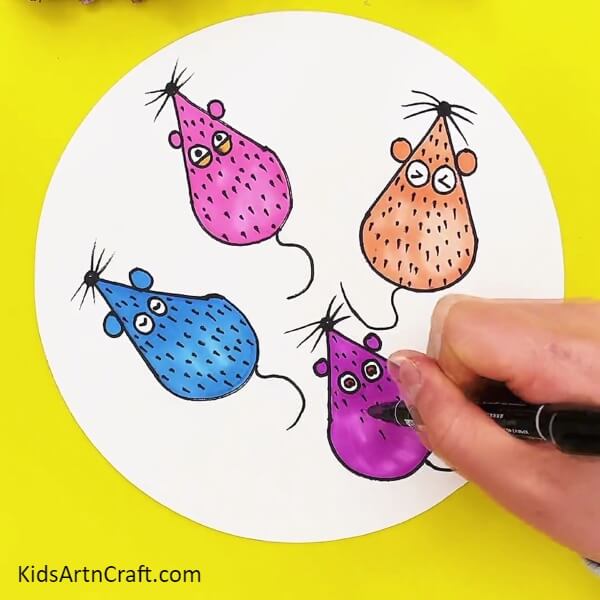
Following the Step 1 instructions, draw some more mice on the paper. Fill the paper with cute little colourful mice.
Step 5: Completing The Background
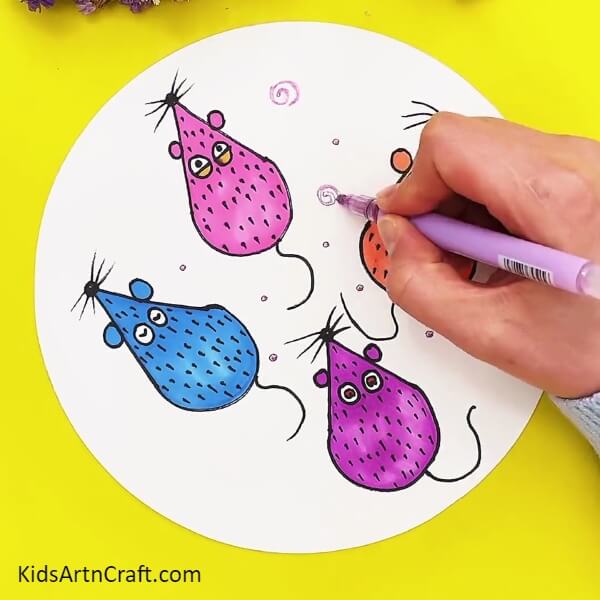
Use different colour pens to draw circular patterns. small bubbles and dots to make the background look beautiful. The background will make the mice look even more beautiful. The background as well as the detailing on the mice are absolutely essential to complete the drawing and giving it a realistic and artistic look.
Finally, The Mouse Cute Animal Drawing Is Ready

Take a final look at this completed drawing of the mouse. It looks stunning as well as cute. The children can learn creative ways to easily draw animals through this step-by-step tutorial. The sense of colours in the drawing will also help the children to understand the essence of paintings. This project will give them a larger and better sense of the geometric shapes. Why delay? Try this fun drawing for kids now!
Hope that you find this article useful and educational. We would love to hear your thoughts on this project in our comments section below. Please visit our website for many more such fun and creative articles.
Thank you for visiting our website.
Follow us on Youtube for art and craft tutorials and much more.
More Articles from Kids Art & Craft
- Learn to Make Dinosaur Paper Craft Tutorial for Kids
- How to Make Snowman by Using Paper Tutorial for Kids
- Learn to Make Penguin Step by Step Instructions
- Paper Crafts And Activities Video Tutorial for Kids
- How to Make Paper Reindeer Craft Tutorial