Recycled Crafts
How to Make a Flower Out of a Paper Cup For Kids

Paper Cup Flower Craft – An Easy Step-by-Step Tutorial for Kids
Read More: How to Make Frog by Toilet Paper Roll Step-by-Step Tutorial
Materials Required
- Blue And Yellow Colored Paper Cups
- Black And Green Paper Sheets
- Scissors
- Toothpick
- Scissors
- Glue
Procedure
Step 1: Cutting Out The Border Of The Cup
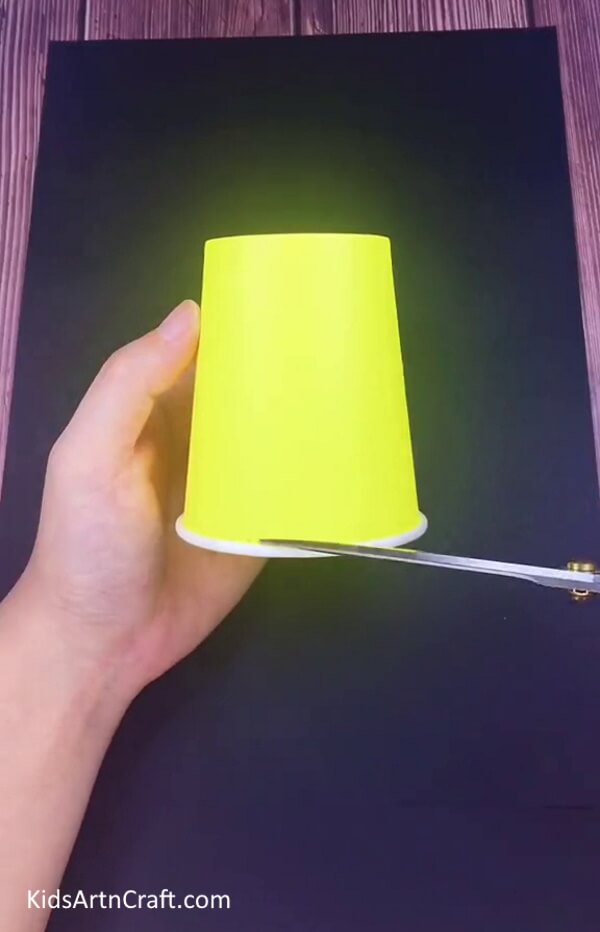
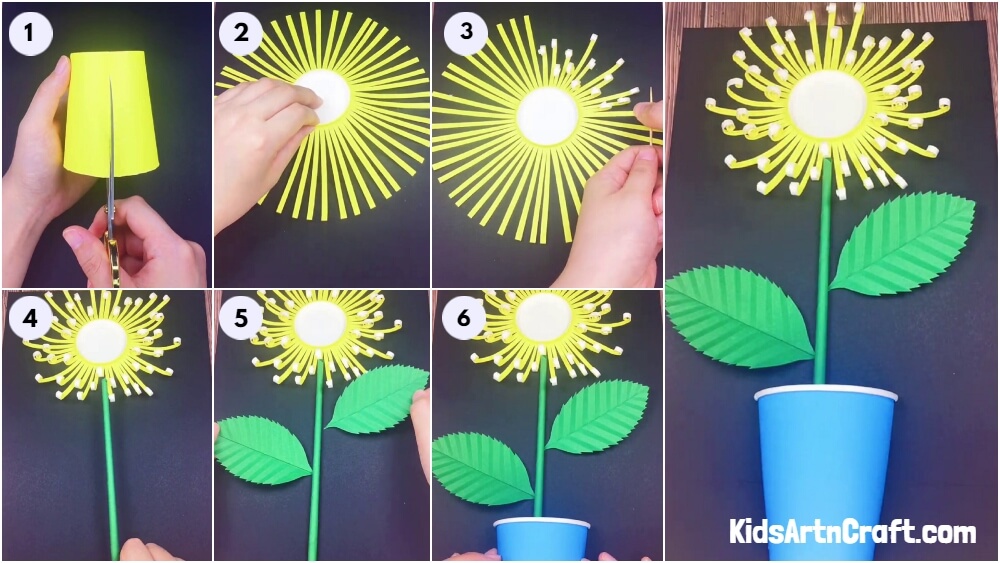
Place your black sheet in front of you. That will be your canvas. Take the yellow cup, using scissors, and cut out the open edge of the cup, the white border.
Step 2: Cutting Strips Of Cup
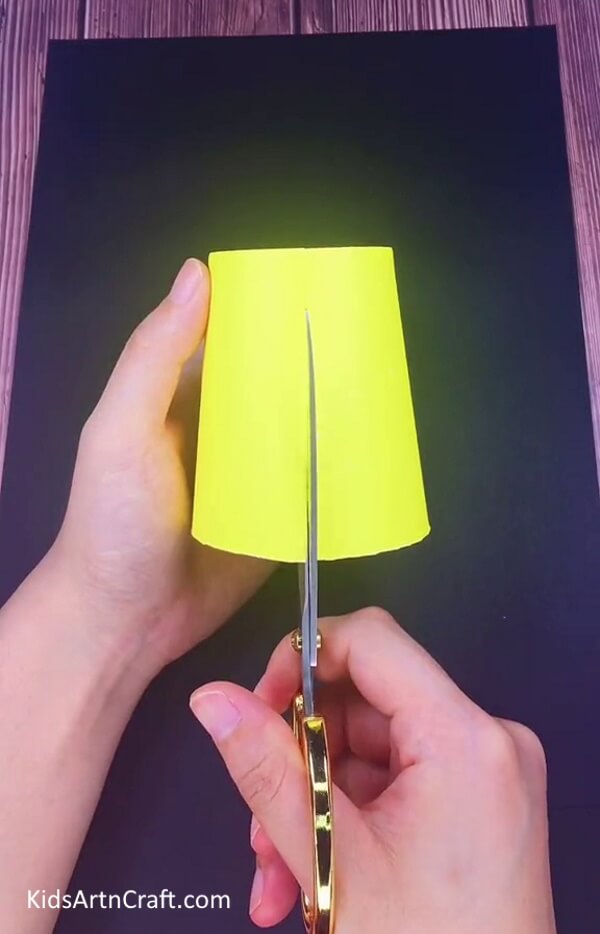
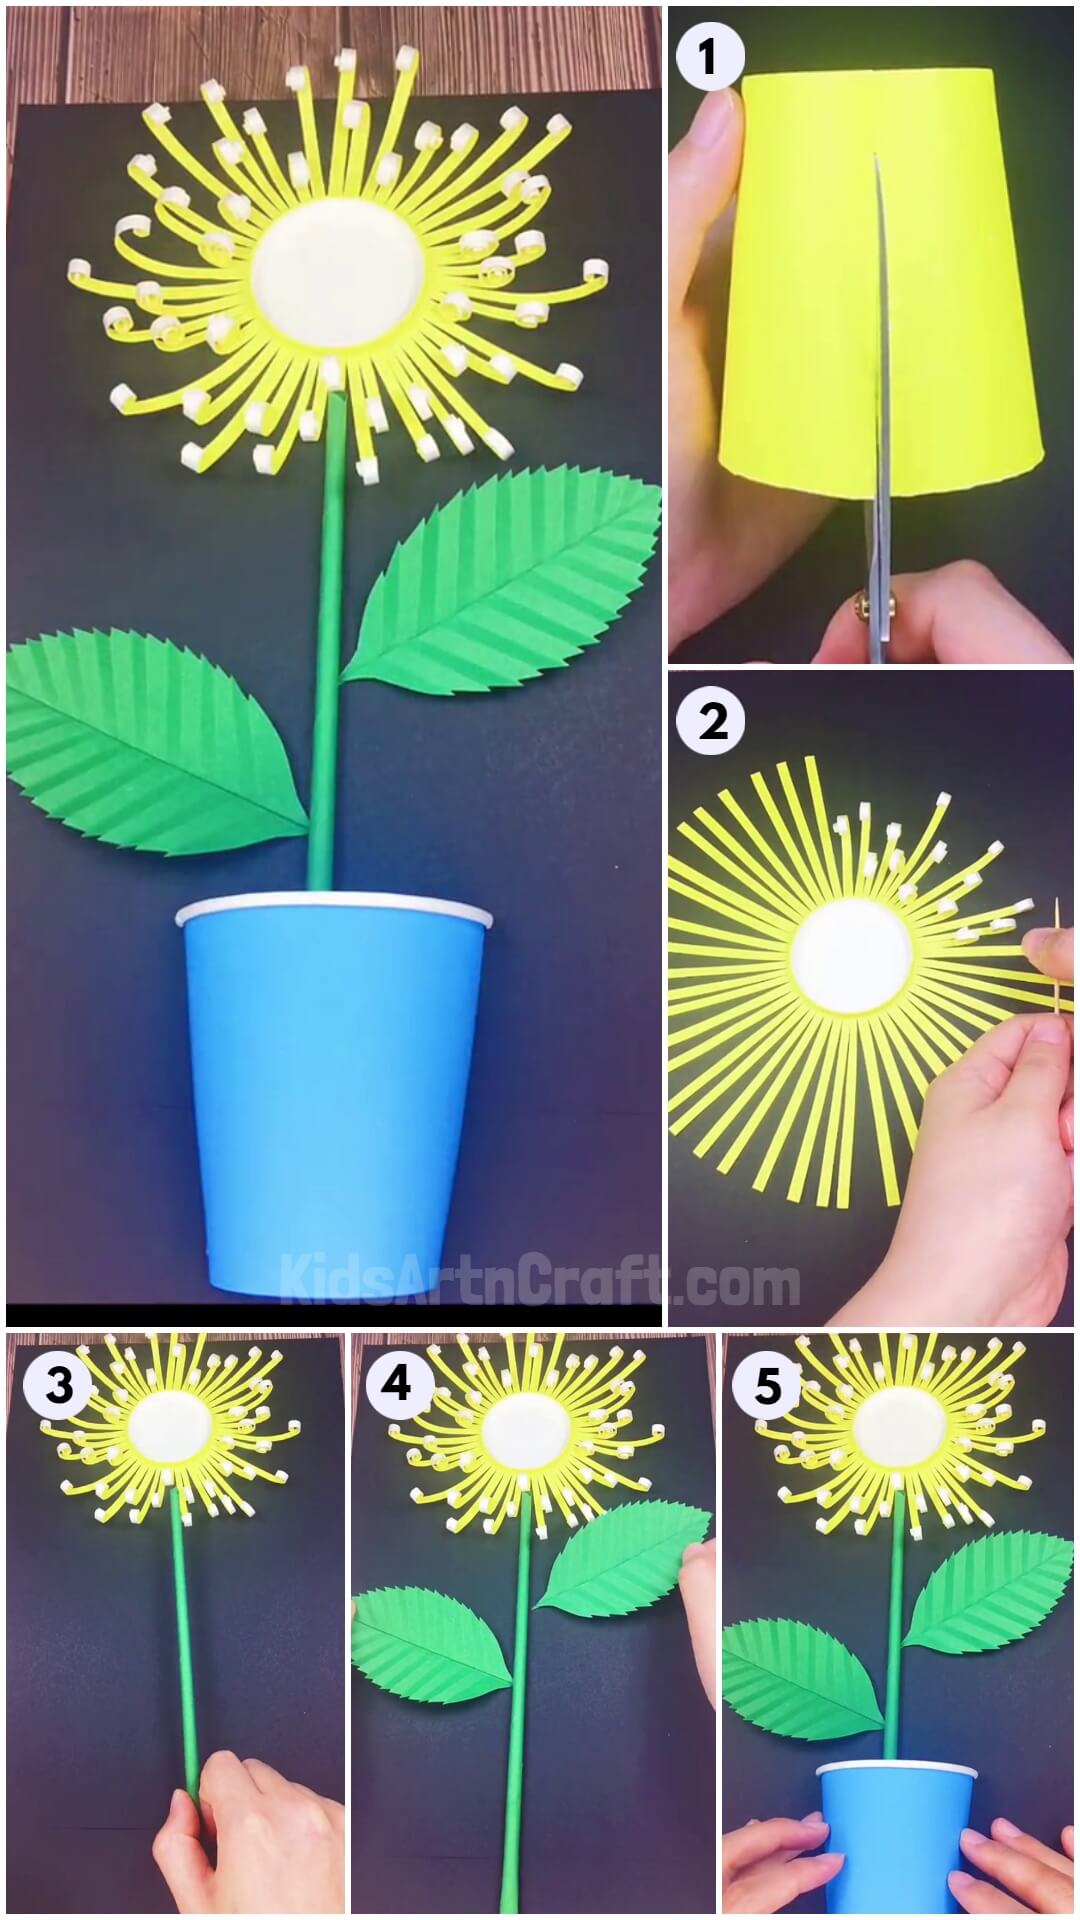
Cut thin strips to the base of the cup using your scissors. Make sure the strips don’t detach from the base!
Step 3: Sticking The Flower
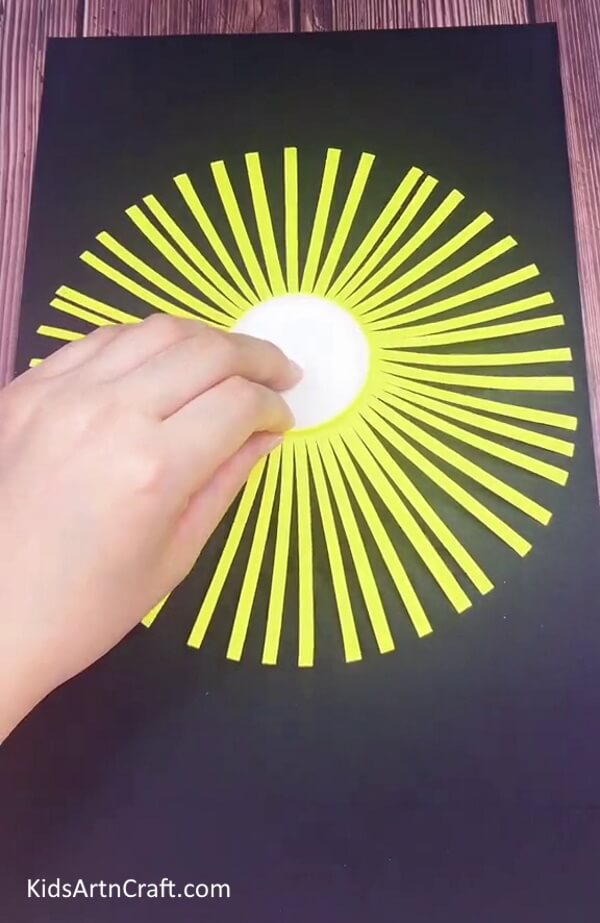
Hold the cup from the base and press it over the black sheet and keep the stips outwards. Press it down hard enough for the strips to spread out and look like petals.
Step 4: Curling The Petals
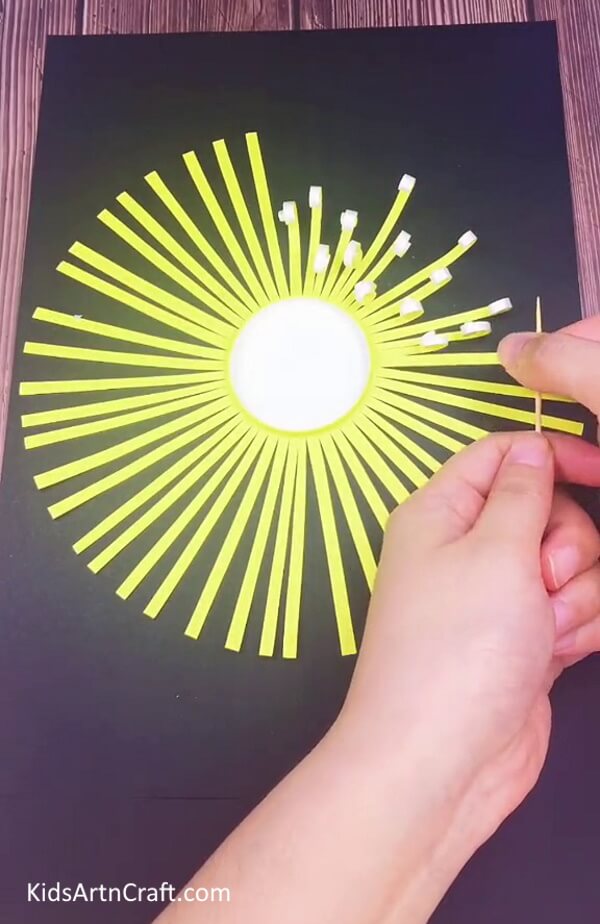
Using a toothpick, roll the strips inwards. Do it in varying measurements to give your flower a more realistic look.
Step 5: Finishing Up The Curls
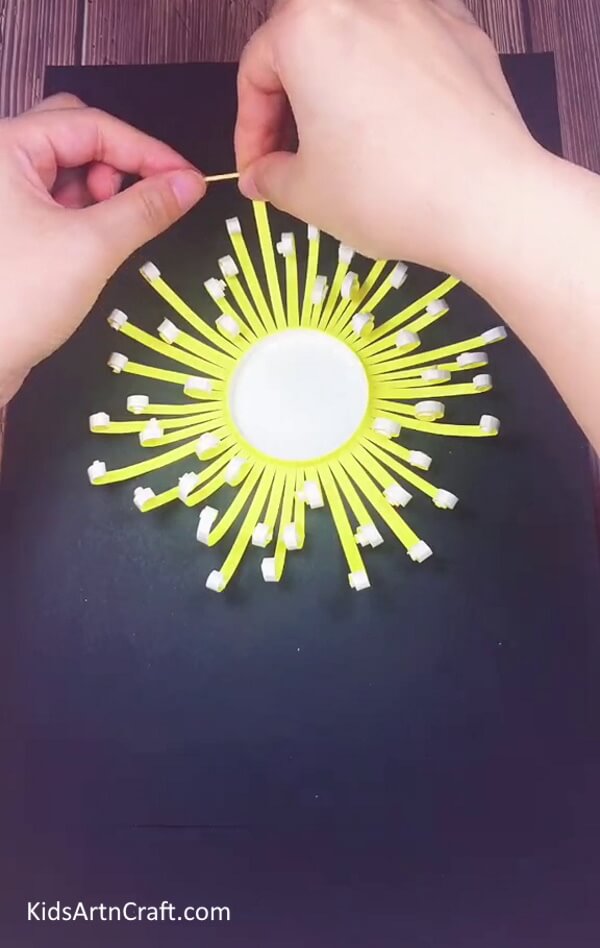
Keep curling and curling till you’ve done every petal. Make sure they are curly and bouncy!
Step 6: Pasting The Flower
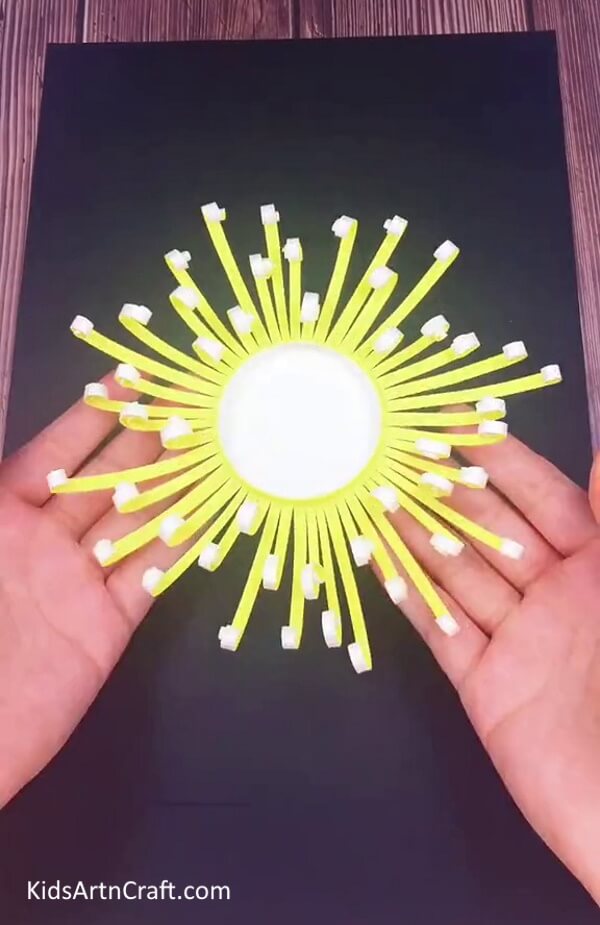
Your flower is all ready! Grab your glue and stick the flower at the top of the page. Make sure it sticks well.
Step 7: Making Stem
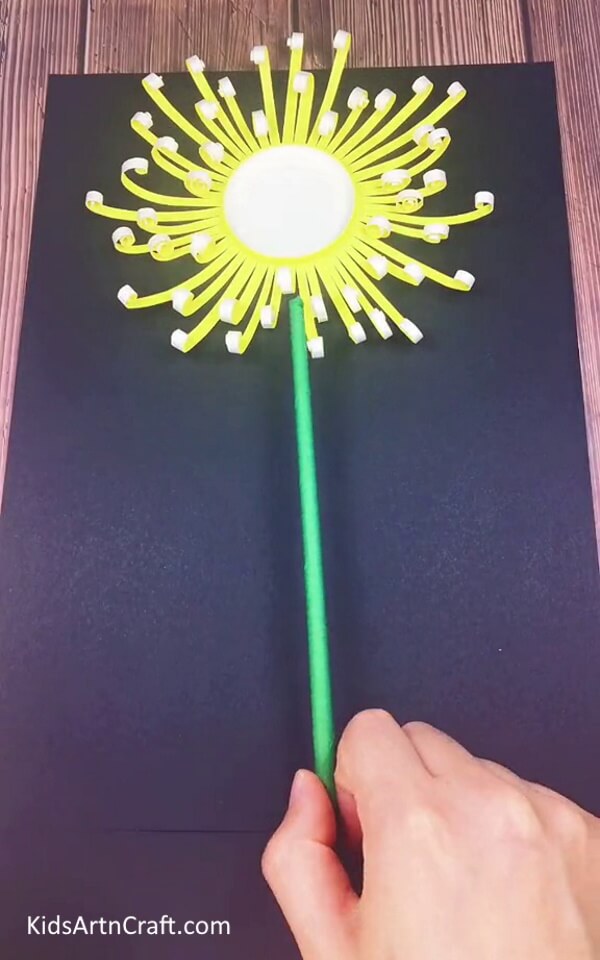
Roll up a green sheet of paper to make it look like a stem and stick it under the flower using glue.
Step 8: Making Leaves
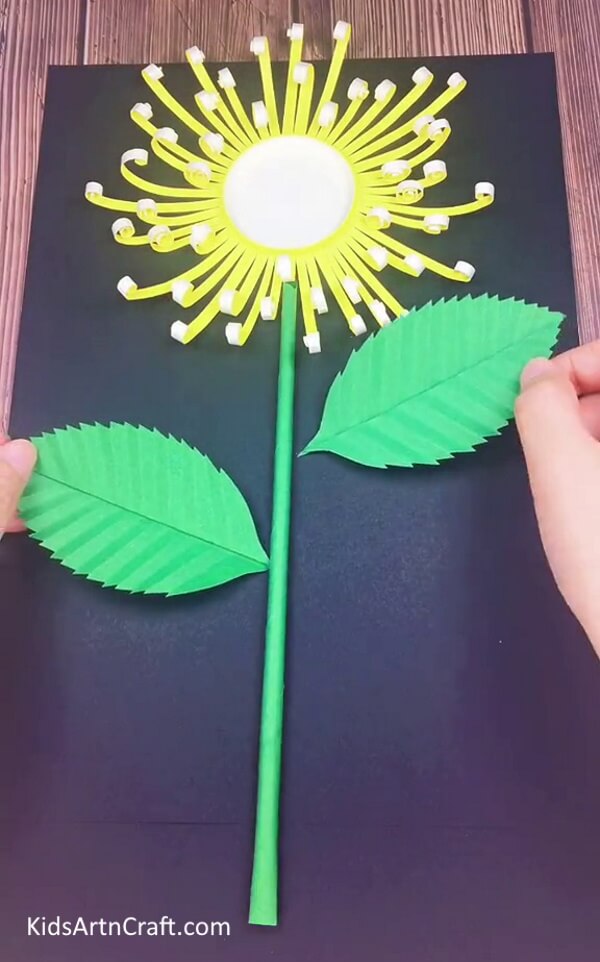
From the green sheet, cut out 2 leaves. Fold the leaves in half and do zig-zag folds over them, unfold them again. Stick these realistic leave to each side of the stem as shown.
Step 9: Making Flower Pot
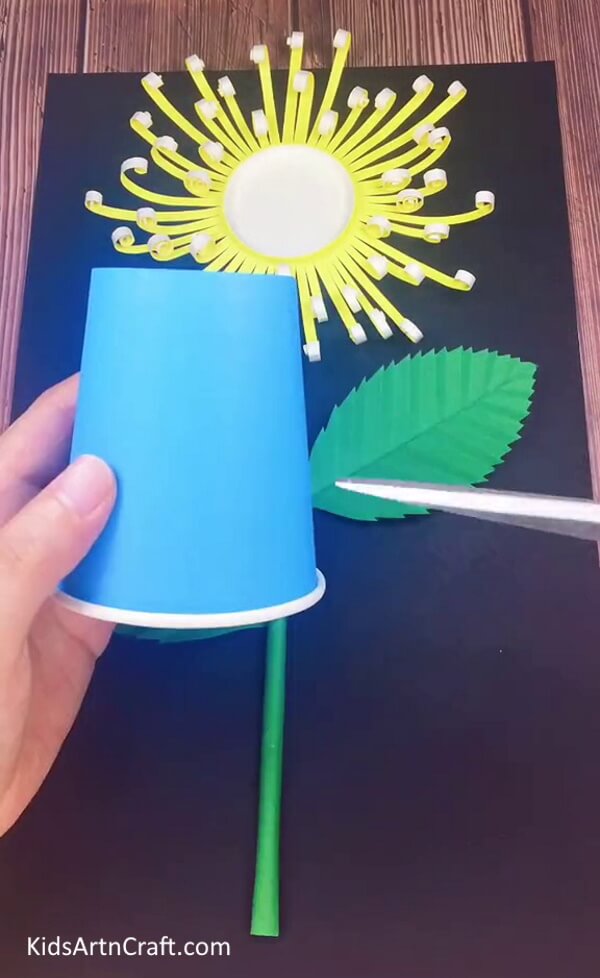
Grab your blue paper cup and using your scissors cut it vertically from the middle.
Step 10: Pasting The Flower Pot
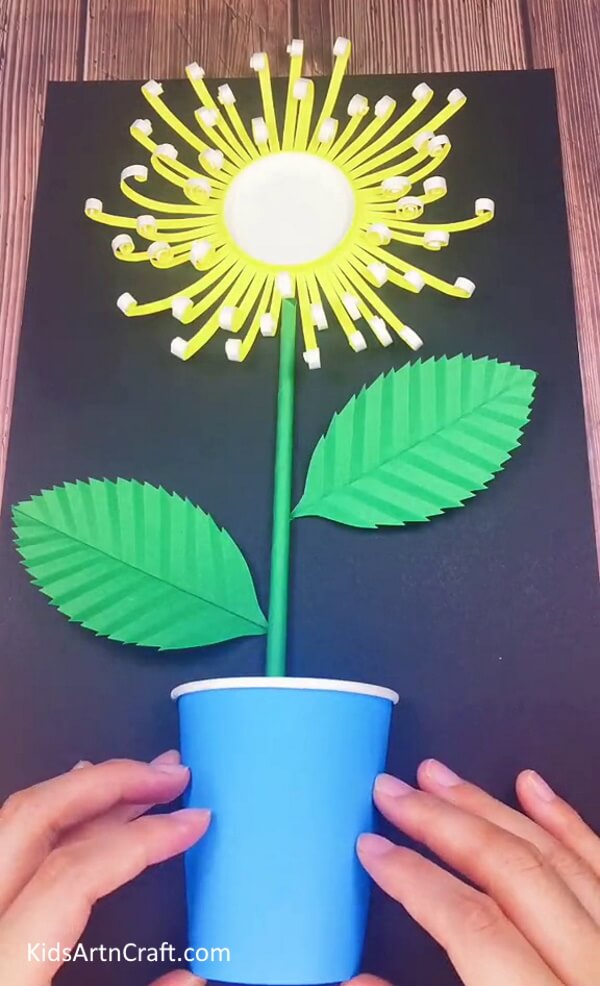
Take your cut paper cup and stick it at the middle end of the paper in such a manner that it hides a part of the straw.
Your Paper Cup Flower Craft is Ready!
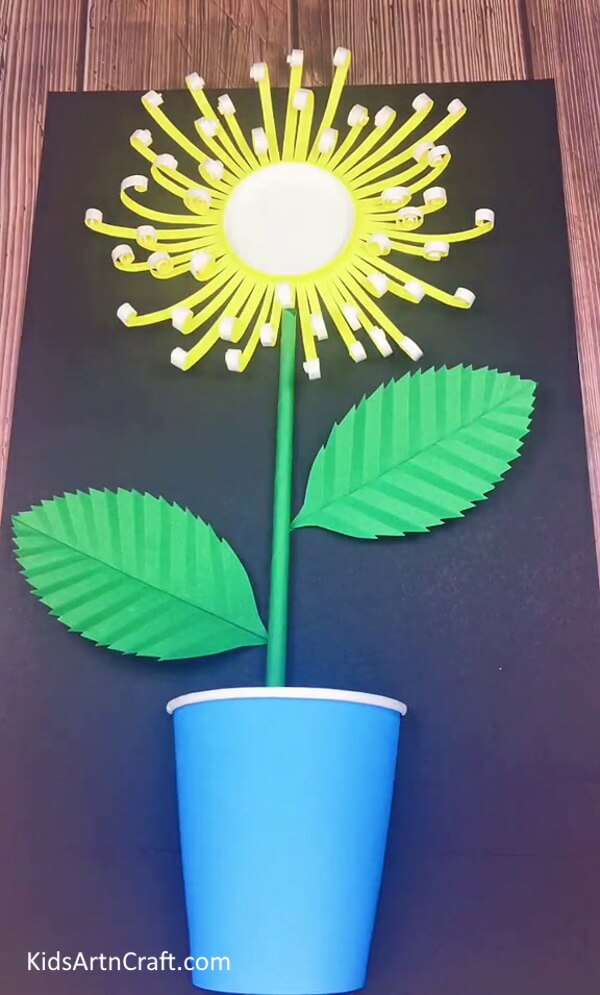
It is ready! Your paper cup Flower Craft is all done!! With this easy tutorial, kids can make an easy and beautiful craft in minutes. Use it as gifts or craft decorations. You can get even more creative by drawing more details on the sheet. This craft is engaging, fun and creative and will be liked by all kids! So give it a try and engage your kids in a fun craft-learning activity!
Hope you like this Paper Cup Flower craft step-by-step tutorial. We would love to hear your thoughts in the comment section below. And be sure to visit our other articles for more ideas!
Follow us on Youtube for art and craft tutorials and much more.
More Articles from Kids Art & Craft
- Tissue Paper Flower Artwork For Kids
- Creative Art and Crafts Video Tutorials for Kids
- Easy to Make Snowman by Bottle Craft Tutorial
- Easy Peanut Shells Giraffe Art And Craft For Kids
- How To Make Easy Fall Tree Craft From Leaves


