Step By Step
How to Make a Paper Cup and Jute Hat at home

Learn how to make a unique and creative paper cup and jute hat from the comfort of your home. This guide will show you the step-by-step process of crafting these two items with easy-to-follow instructions. Get creative and have fun with this simple project that will make your home decor stand out!
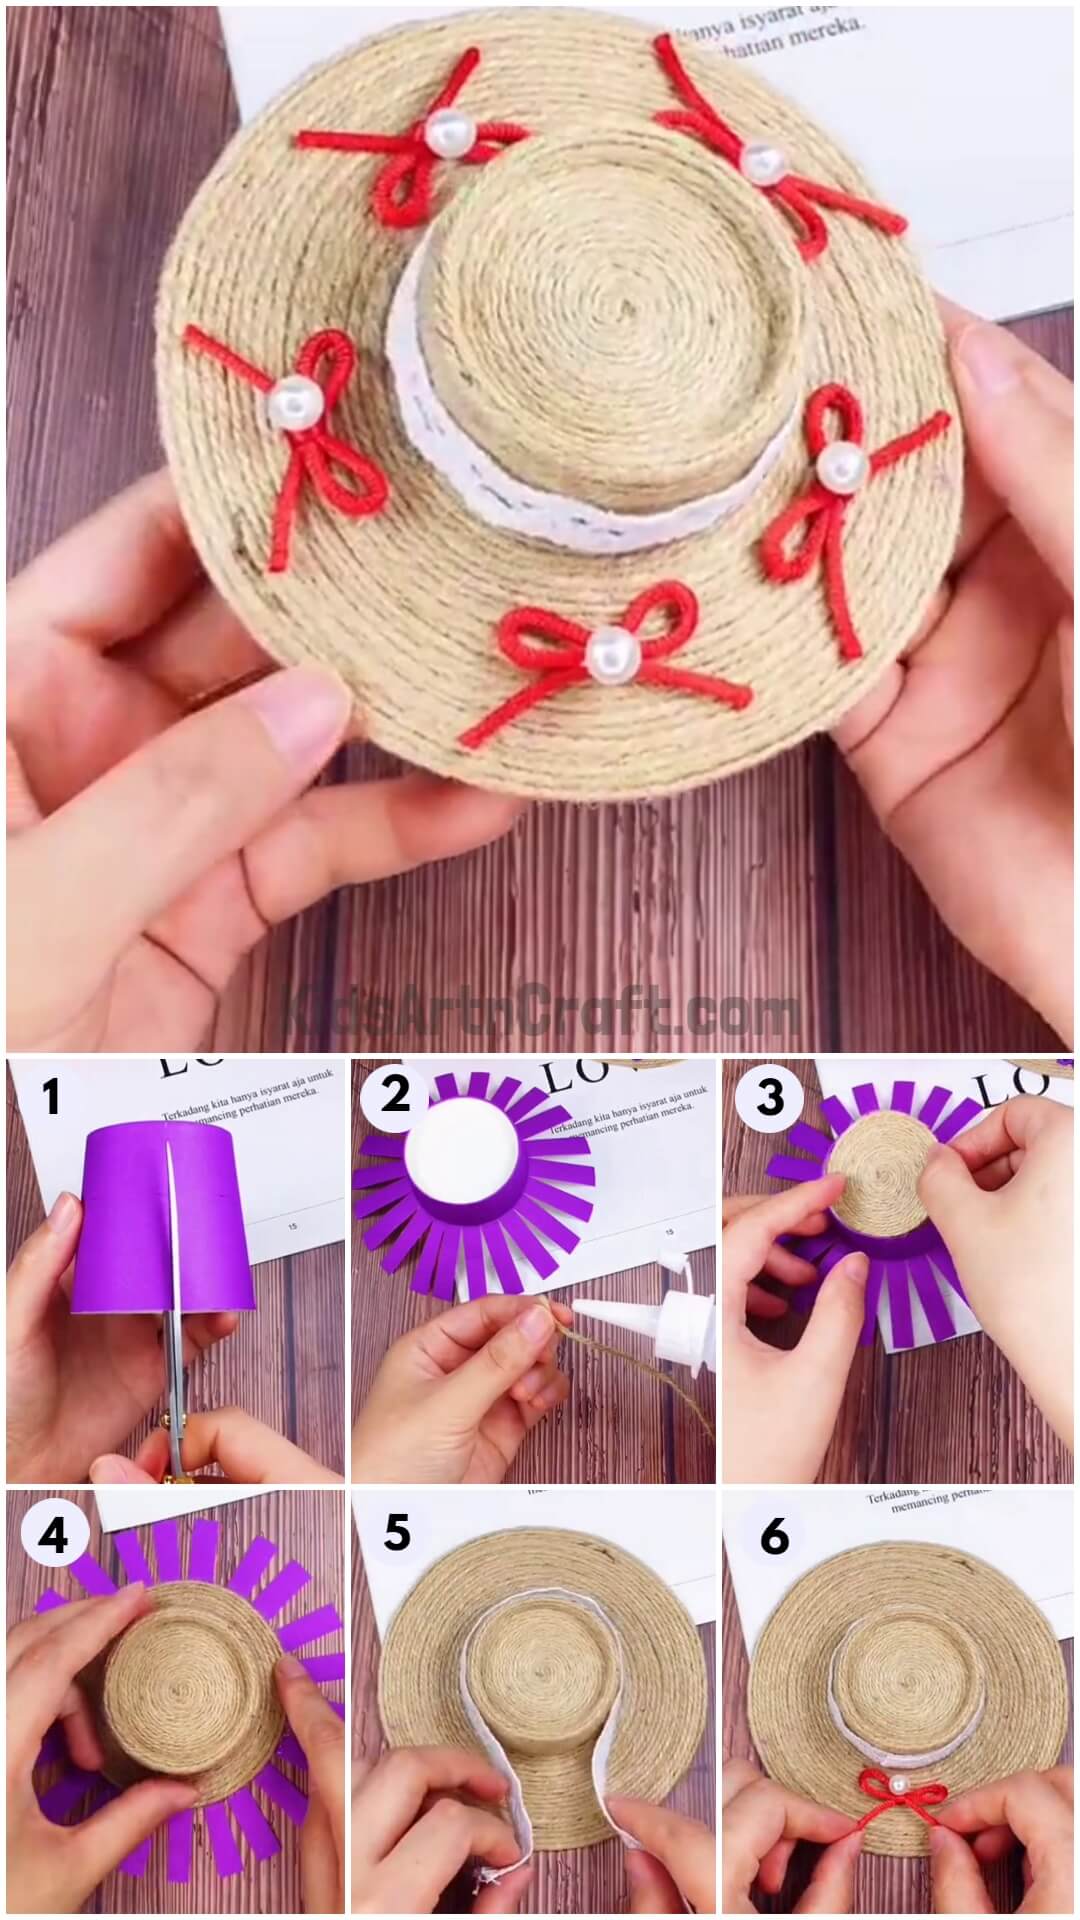
This tutorial brings to you an object of clothing made out of a paper cup and some jute threads. It is extremely simple to make and won’t consume much of your time. This broad-rimmed summer hat will have a basic fawn color. It can be used as a showpiece and a decor for the kids’ room, showcasing their creativity and hard work. So find a peaceful place to sit and make this unique craft, collect all the materials, and let’s get started!
DIY Paper Cup & Jute Hat Craft Tutorial For Kids

Read More: Art & Craft Activities At Home Video Tutorial for Kids
Materials Required
- Paper cup
- Jute thread
- Cotton Cloth (White)
- Thread (Red)
- White pearls
- Scissors
- Glue
Procedure
Step 1: Getting A Paper Cup


Take a paper cup and start cutting the sides into thin strips ending a little below the round base. You need to cut a total of twenty rectangular strips of equal width.
Step 2: Flattening The Strips
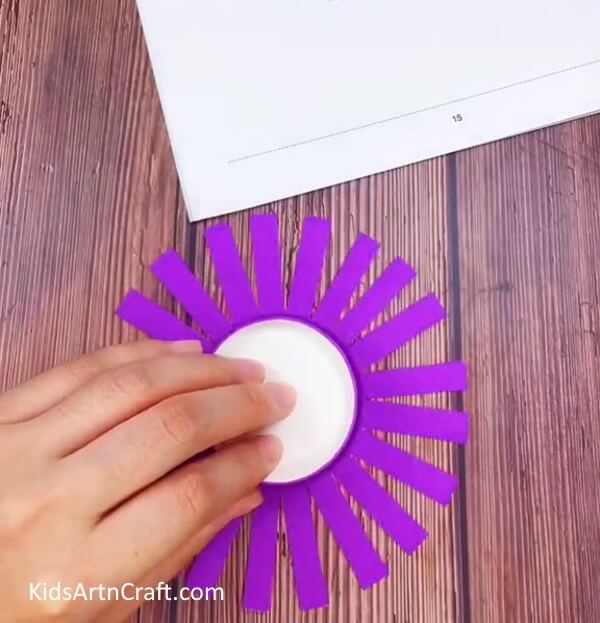

Stretch the strips out up to the end of the cut and flatten them on the table surface making the circular base in the middle with strips on its sides. Do this with all the strips as shown in the picture below.
Step 3: Applying Glue On The Jute Thread
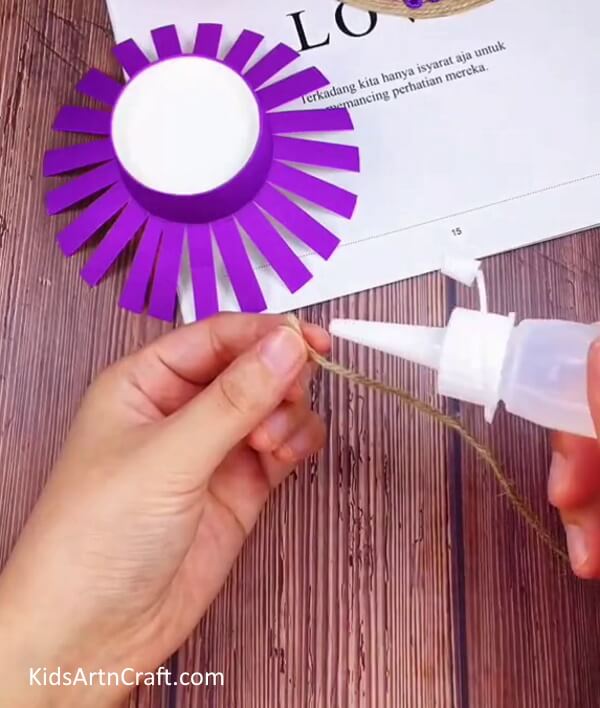

Take the end of the jute thread and start applying liquid glue to it. Now, roll the jute thread to make a spiral shape.
Step 4: Making A Big Spiral
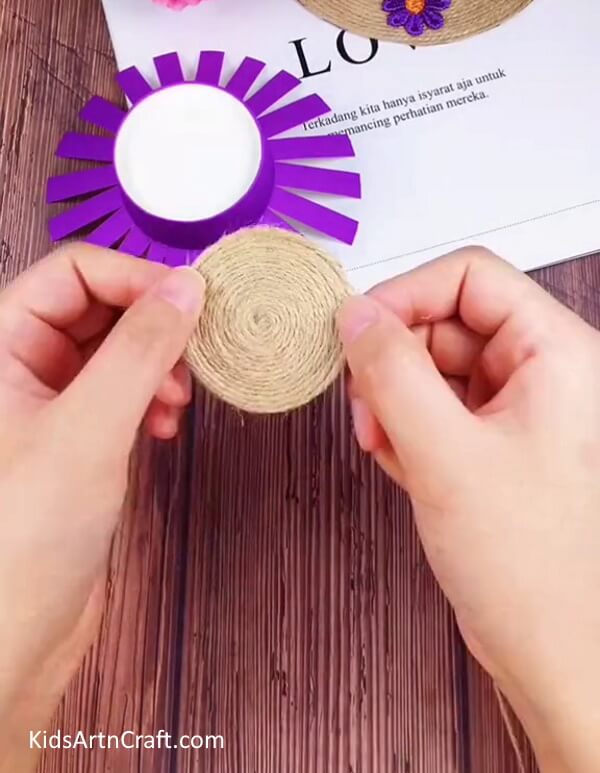

Keep rolling the thread to make the spiral bigger as shown in the picture below. The glue on the thread will seal the spiral shape completely. Keep in mind that the size of the thread spiral should be equal to the size of the circular base. Do not cut the jute thread off after making the spiral.
Step 5: Fitting The Spiral On The Base
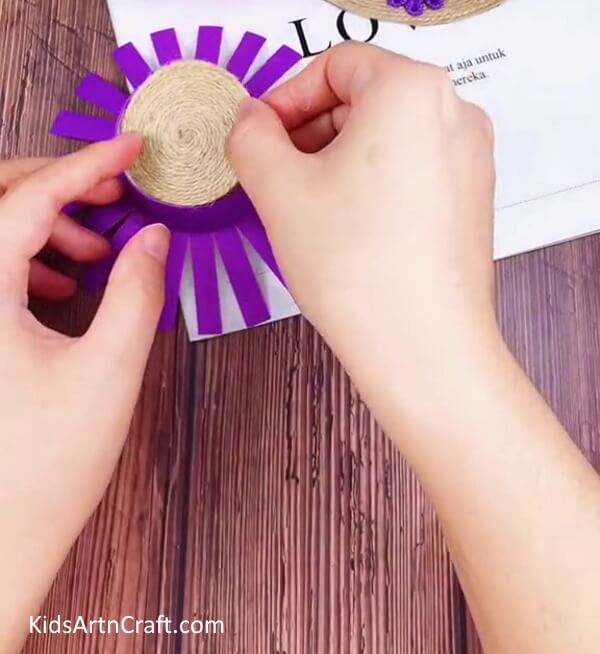

Take this jute spiral and apply some glue on its back and fit it on the round base. Press it carefully to seal it on the circular base.
Step 6: Pasting The Jute Thread Outside The Base Circle
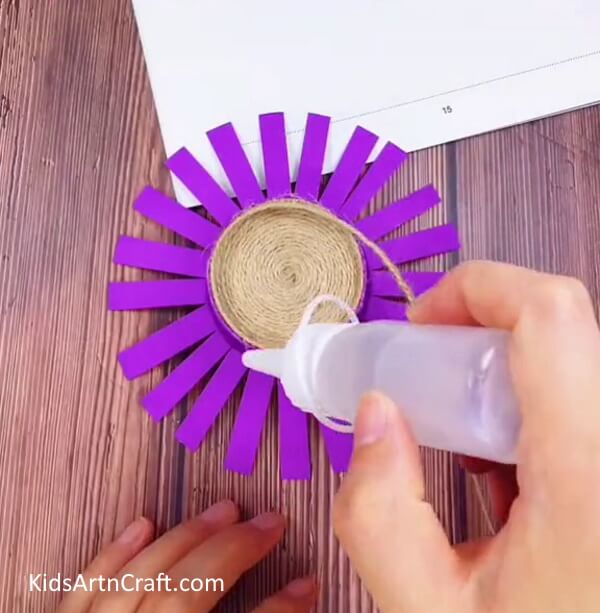

Take the jute thread connected to the spiral and start applying glue to it. Now, paste the thread on the round surface connected to the base of the paper cup. Start pasting the thread around this surface in a clockwise motion.
Step 7: Pasting The Thread On The Strips

Applying glue to more thread, paste the thread on the strips using a circular clockwise motion covering all the twenty strips including the spaces in between. See the picture above for reference.
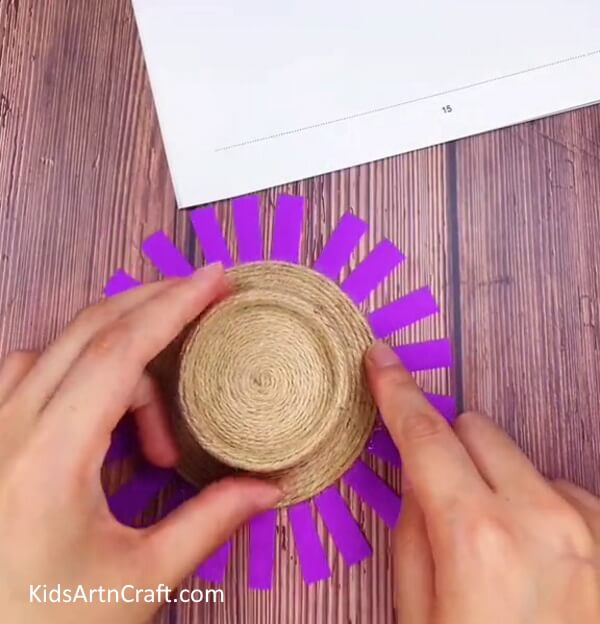
Step 8: Covering The Entire Strips’ Surface
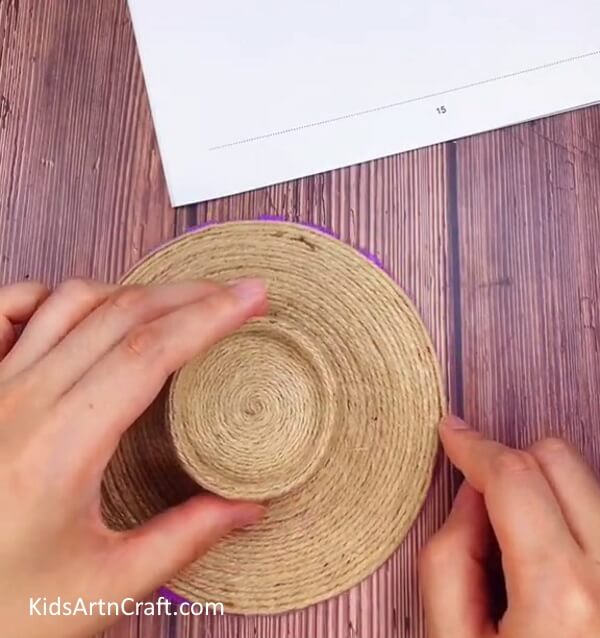

Keep similarly pasting the thread until you cover all the ends of the strips with the spaces in between as well as shown in the picture. Press the thread to stick it on the cup properly.
Step 9: Pasting A Cotton Cloth Strip
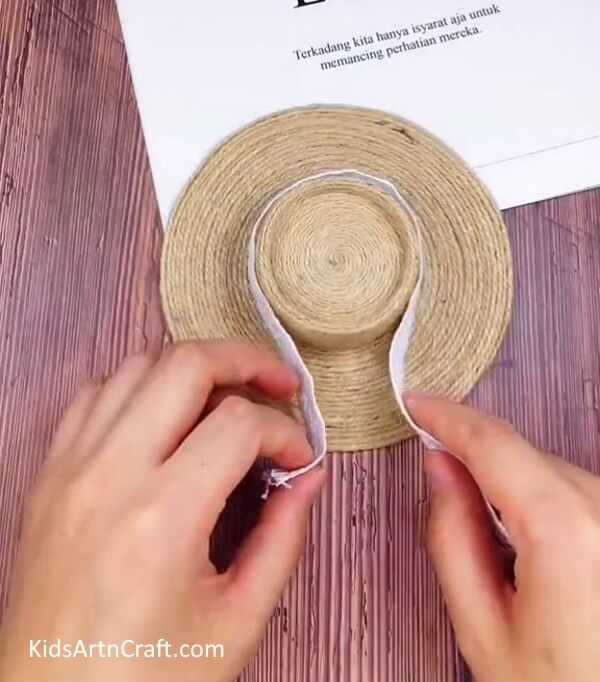

Take a white cotton cloth and cut out a strip with its width equal to the width of the vertical paper cup surface below the circular base. Paste the strip on the same surface as shown.
Step 10: Making The Bows


Take a thick nylon thread in red color and cut it into five equal pieces. Now, tie a bow knot with all these pieces and paste one of the bow’s on the bottom side of the hat rim as shown in the picture below. Take an artificial white pearl and paste it in the middle of the two loops.
The Jute And Paper Cup Hat Craft Is Ready!


Make more such bows and paste them on the remaining surface of the hat rim, as shown. Paste the little artificial pearls in the middle of each bow knot.
This completes our hat with its big rim and cute little red bows. You can make this hat for your dolls or place it anywhere in your room for decoration purposes. You learned to work with a thread, rolling it into shapes and using it in creating a good art piece. Keep practicing these techniques and start using them to create your ideas to make your artistic skills grow. Keep following these tutorials to learn more about art and craft!
For More Hat Craft Tutorial
Adorable Hat Craft Using Paper Cups for Kids

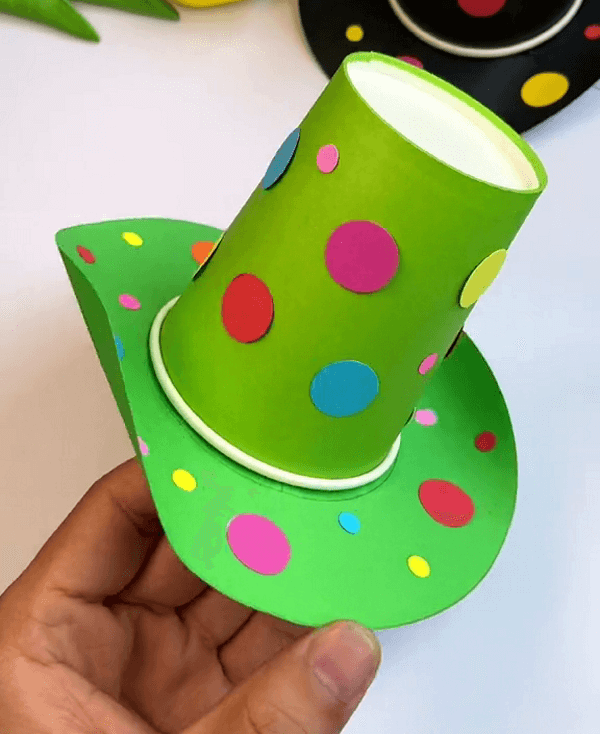
Image Source/Tutorial: Kids Art & Craft
This creative craft is perfect for kids who love to get creative. Using a paper cup and some craft materials, kids can make an adorable hat that they can wear and be proud of. It’s sure to be a fun activity for the whole family.
Follow us on Youtube for art and craft tutorials and much more.
More Articles from Kids Art & Craft
- Step-by-Step Drawing Tricks Video Tutorial for Beginners
- Easy Leaf Fall Artwork And Craft for Kids
- Easy Craft Activities At Home Video Tutorial for Kids
- Tissue Paper Flower Artwork For Kids
- Clay watermelon ice cream easy craft tutorial
- DIY Creative Clay Craft Activities Video Tutorial for Kids