Recycled Crafts
Easy Windmill Fan Toy Craft For Kids Using Paper Cup

This craft is great for kids and only requires a paper cup! It creates a fun windmill fan toy that will keep them entertained for a long time. All they need to do is follow the instructions and they can easily make it with minimal materials.
This craft is a blast for kids to make! It only requires a few items and a paper cup. Have you ever played with a windmill fan? It is fun when you play with your fan in the air. So, today we are going to make a windmill fan too but it will be unique and cute, and different from other windmill fans.
You just need to grab these materials and follow the tiny simple steps to make your cute and unique windmill fan.
DIY Windmill Fan Toy For Kids

Read more: Summer Paper Fan Step-by-Step Tutorial for Kids
Materials Required
- Recycled Paper Cup (White)
- Black & Red Marker/Sketch Pen
- Ruler & Pencil
- Scissors & Sellotape
- Color
- Earbud
- Foldable Straw
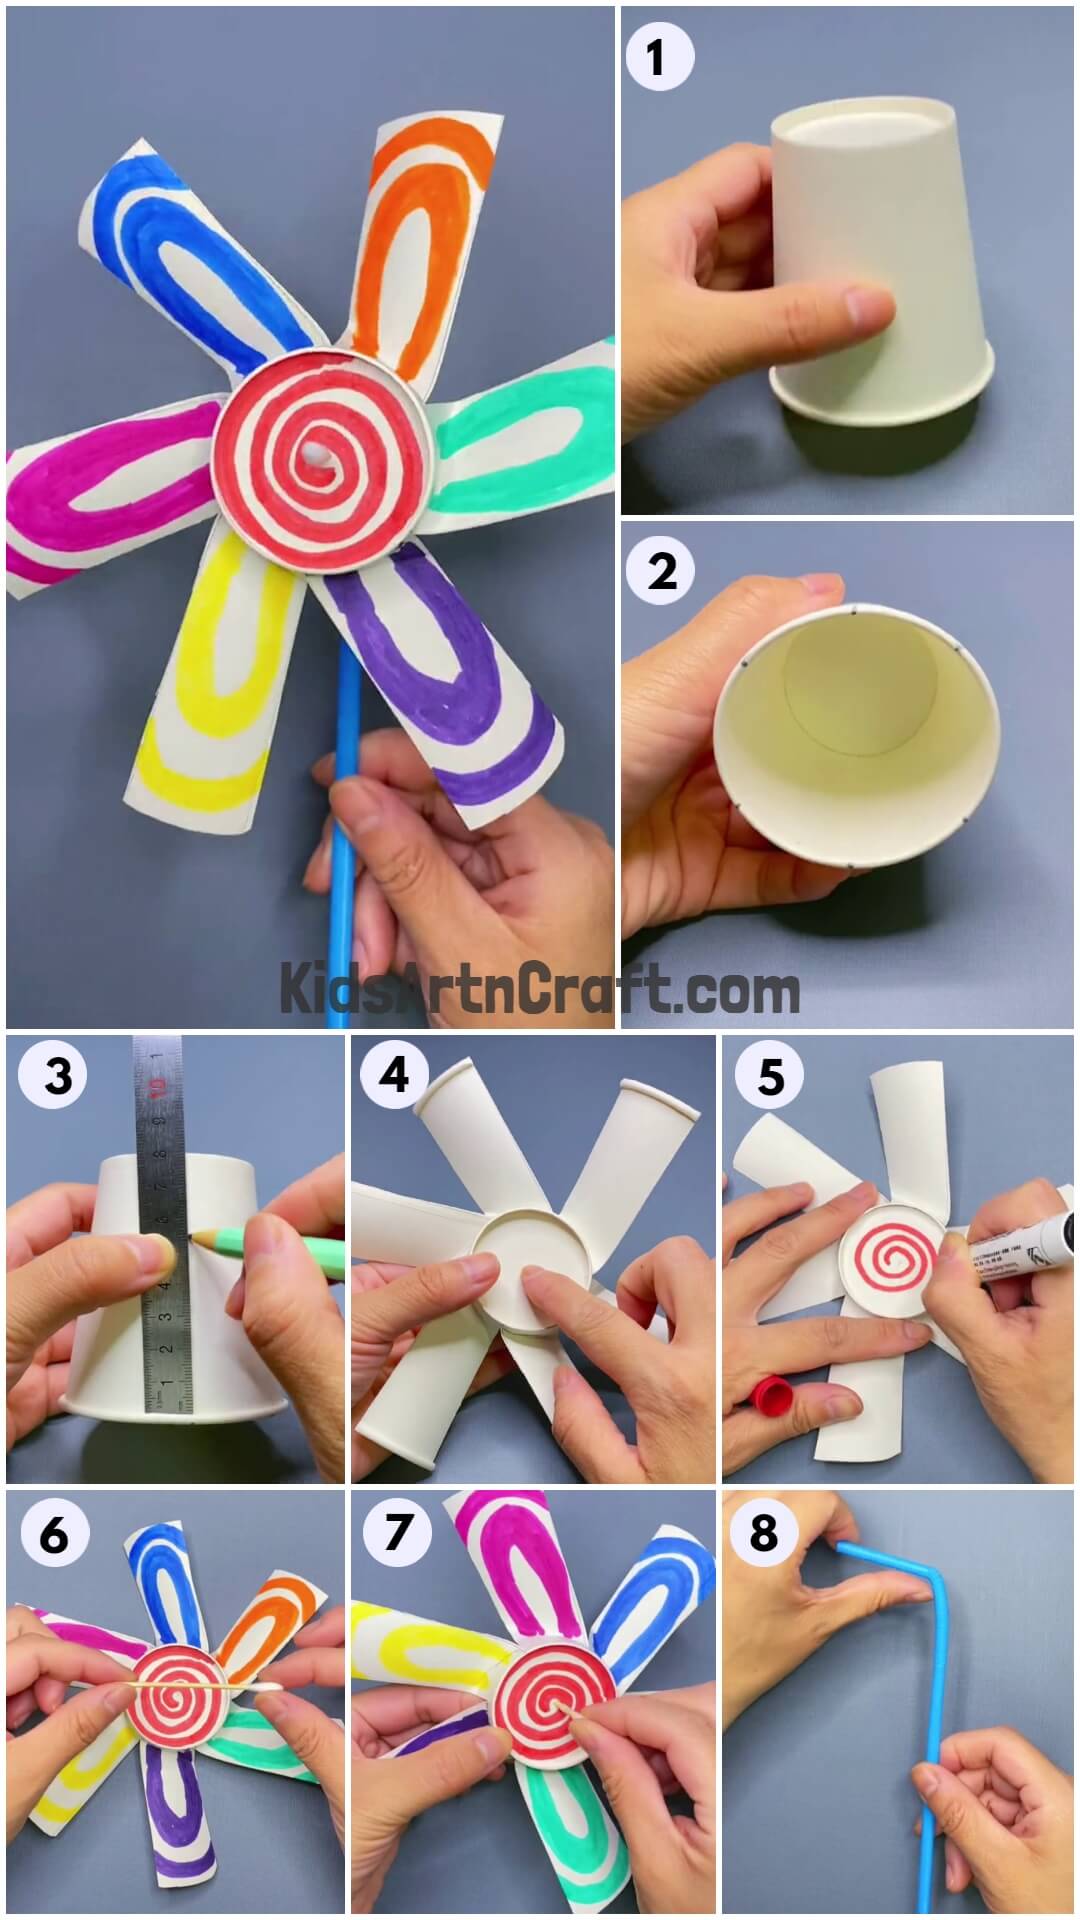
Procedure
Step 1: Taking a White Recycled Paper Cup
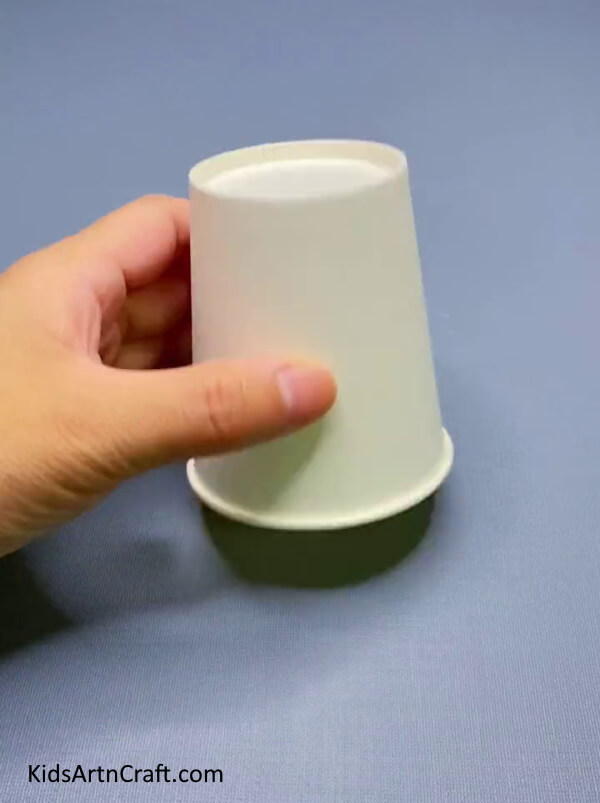

The first step is to take a white recycled paper cup.
Step 2: Marking The Brim With a Black Marker/Sketch Pen


Now, with the help of a black marker/sketch pen mark small dots on the brim of the white recycled paper cup.
Step 3: Marking Six Dots On The Brim
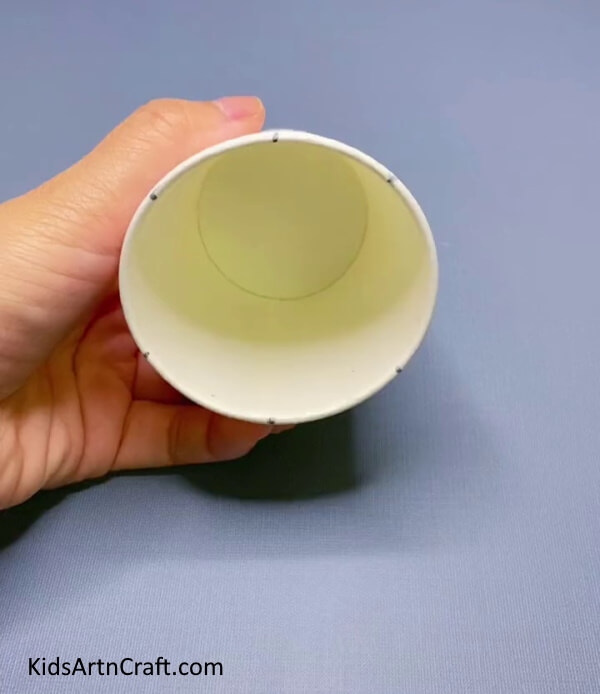

With the use of the black marker/sketch pen mark six dots on the brim of the white recycled paper cup leaving some space between each dot.
Step 4: Making a Line With a Pencil And Ruler
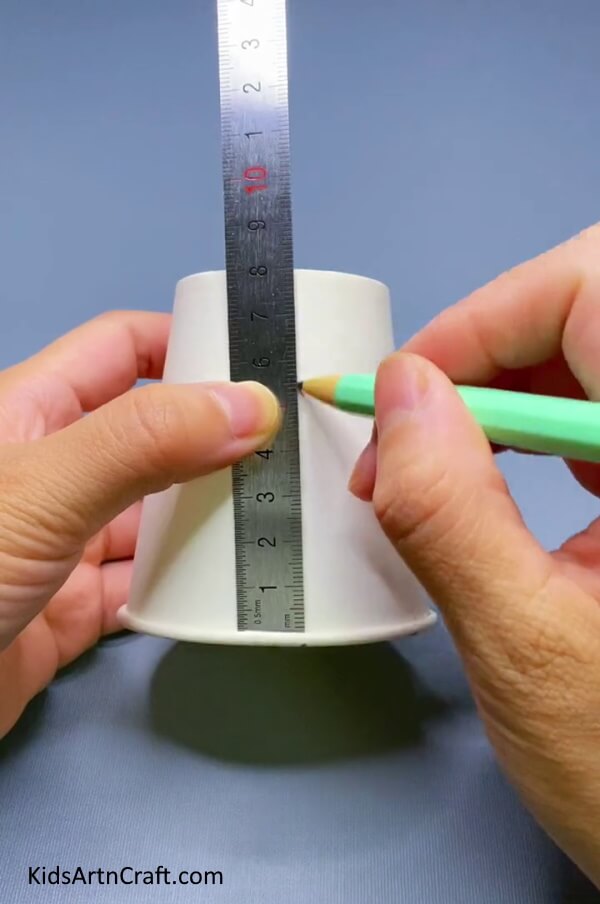

Now, with the help of a pencil and ruler make a line on the white recycled paper cup from top to bottom. You don’t have to make lines randomly. You have to make lines where you have to mark the dots with a black marker/sketch pen. Therefore, you have to make six lines like six dots.
Step 5: Cutting The Lines With Scissors
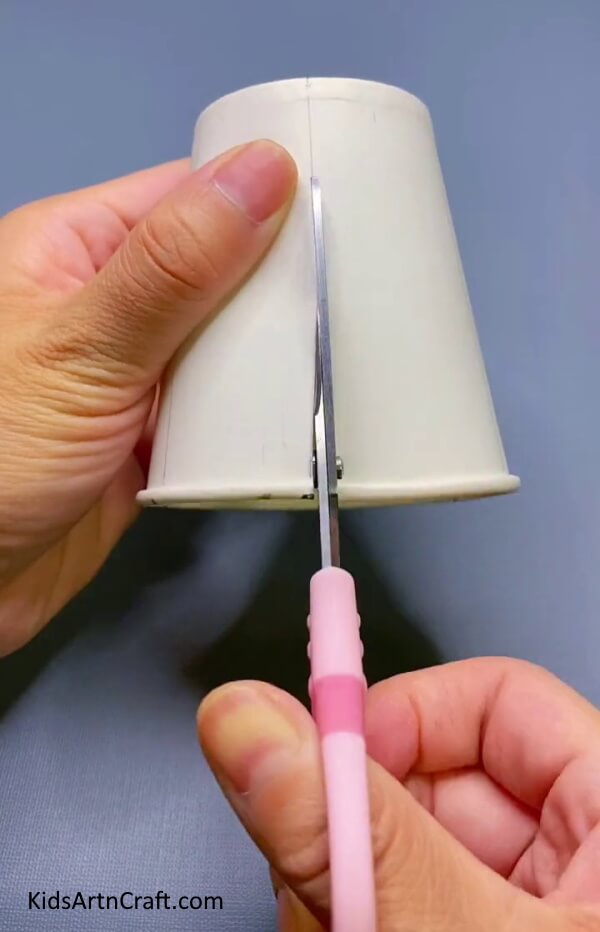

With the help of scissors, cut the six lines that you have made with a pencil and ruler.
Step 6: Opening the Each Part Of The Line
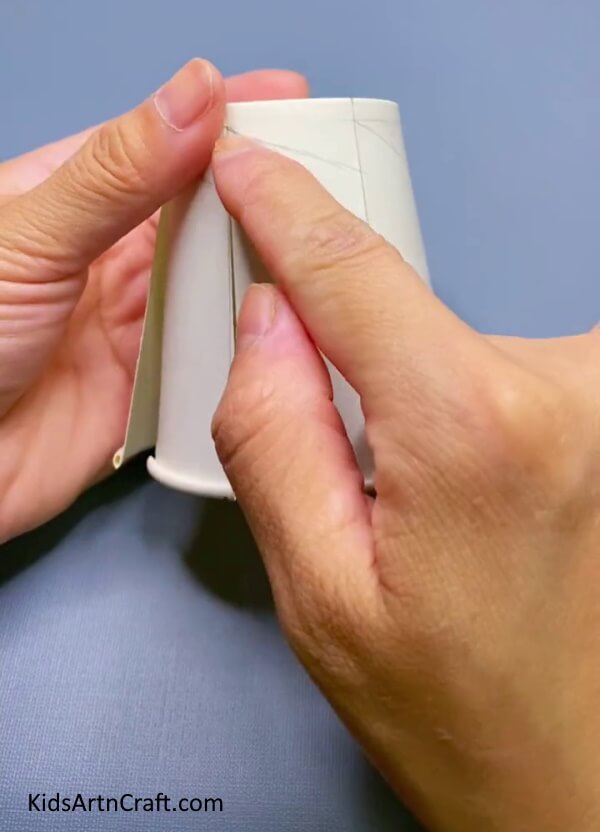

After cutting the lines, try to open each part of the lines that are cut.
Step 7: Opening All The Parts Which Is Cut
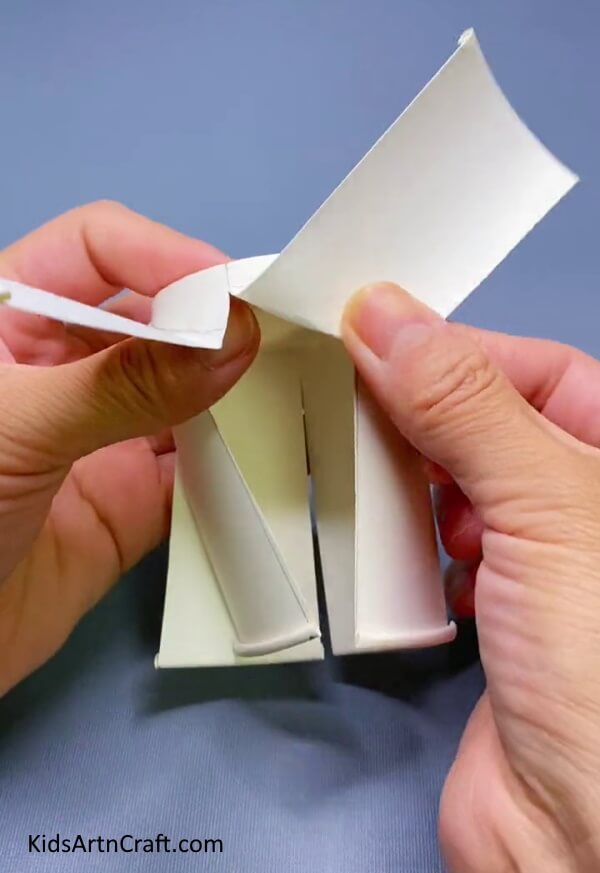

Open all the parts of the lines which were cut from the scissors earlier. You will have to open six parts. You will get six thick lines as shown.
Step 8: Getting a Fan-Like Shape
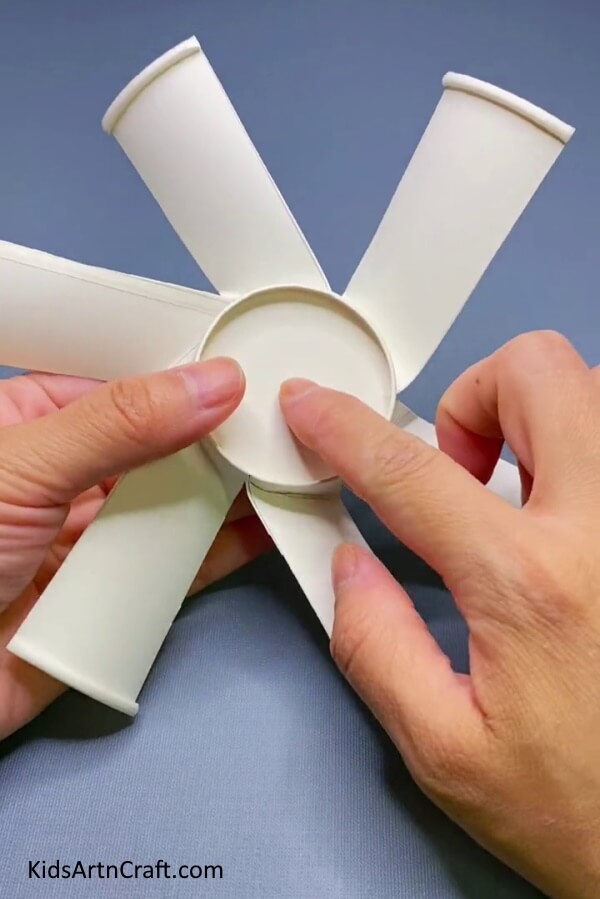

After opening all the lines, spread it out like shown in the picture and you will get a fan-like shape.
Step 9: Cutting The Brim
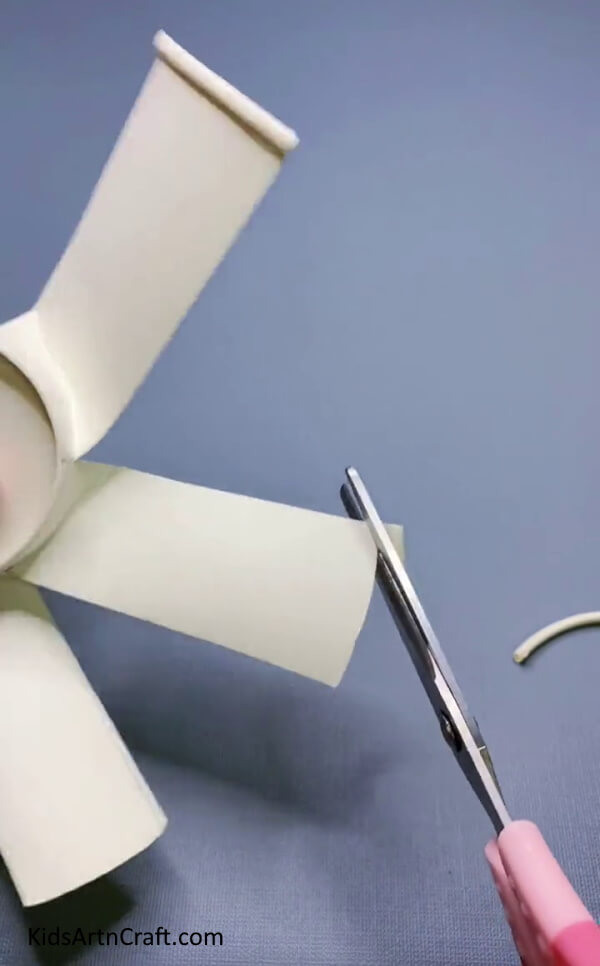

After spreading out the lines, cut each brim part/top part of a white recycled paper cup with the help of scissors as shown in the image.
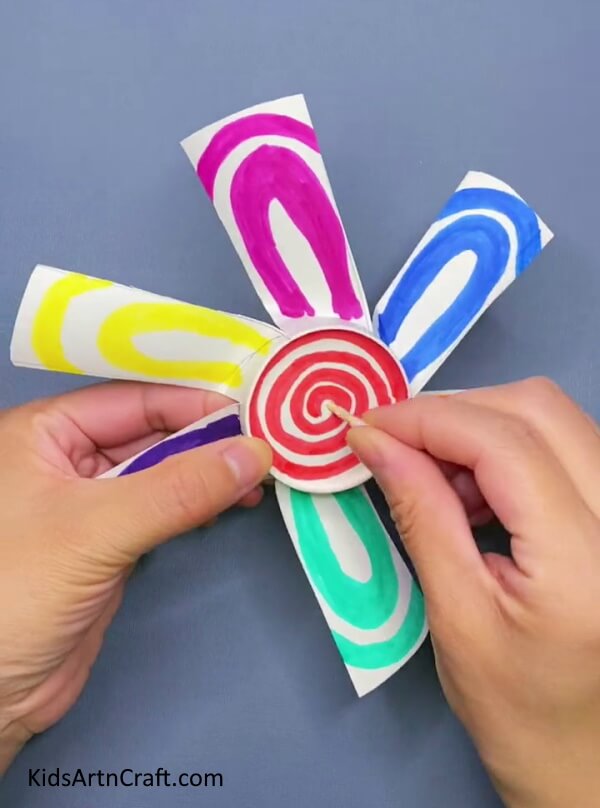
Step 10: Drawing a Spiral Shape At the Bottom Part
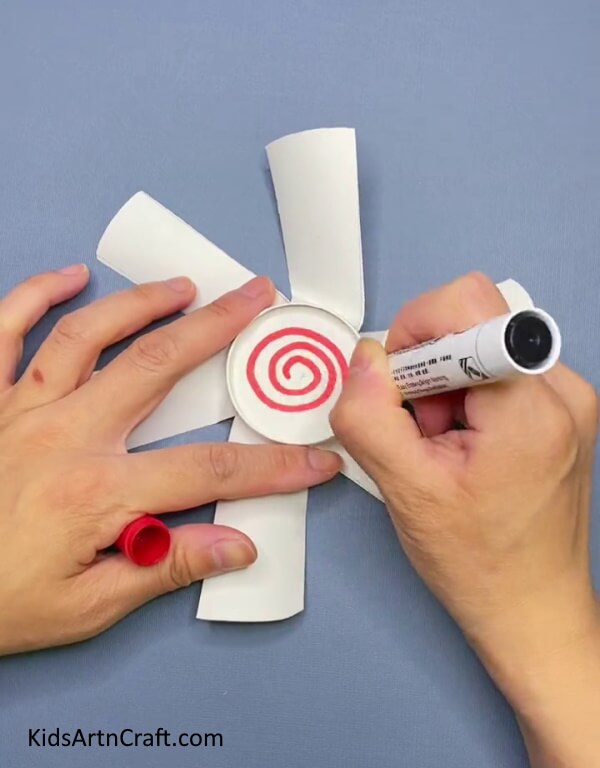

Now, with the help of a red marker/sketch pen draw a spiral shape at the bottom part of the white recycled paper cup.
Step 11: Drawing Petal Shapes With Different Colors
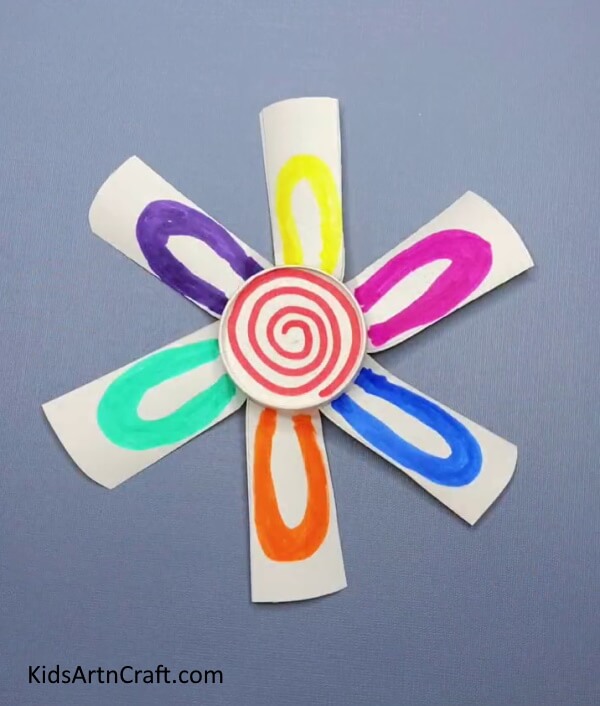

Now, choose your six different favorite colors from your color box and draw a petal shape on each white line with different colors of your choice. In the end, it will look kind of like a flower as shown in the picture.
Step 12: Taking One Earbud
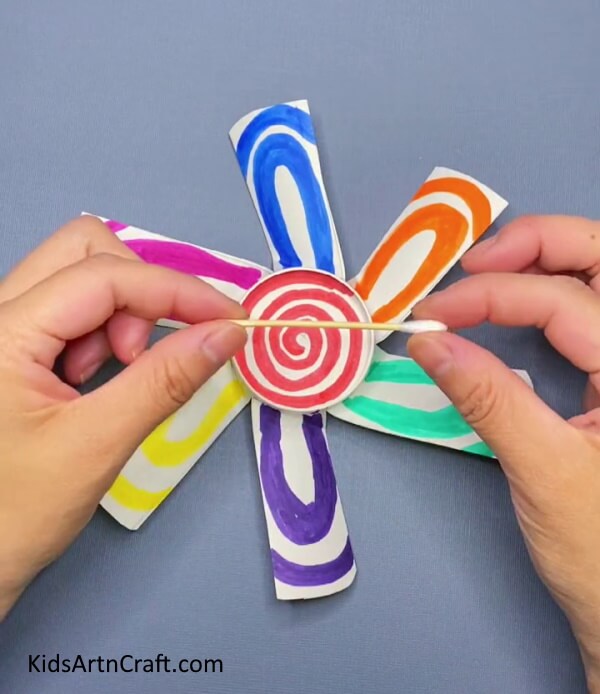
Now, take out one earbud from your materials box.
Step 13: Putting Sellotape On The Earbud
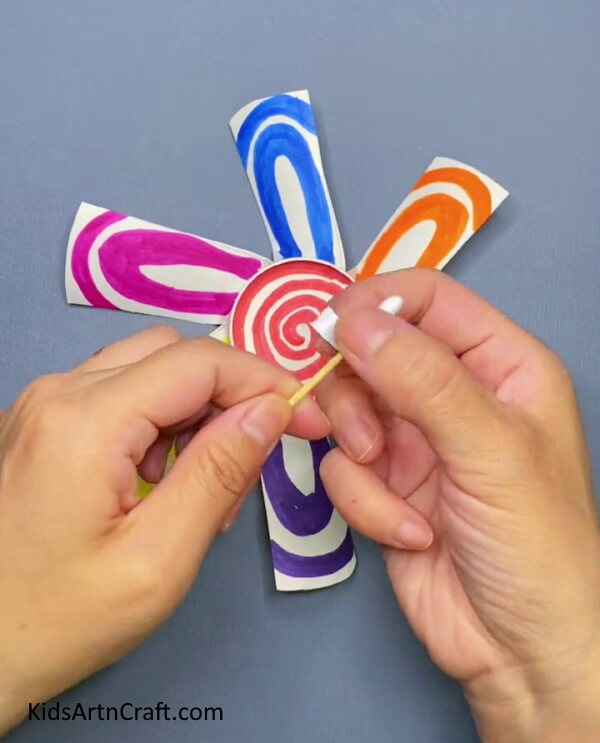

Now, with the help of the sellotape, cover one side of the earbud as shown in the picture.
Step 14: Putting The Earbud In The Middle Of The Fan

Now, put the earbud in the middle of the white recycled paper cup/bottom part of the white recycled paper cup as shown in the picture.
Step 15: Folding The Straw
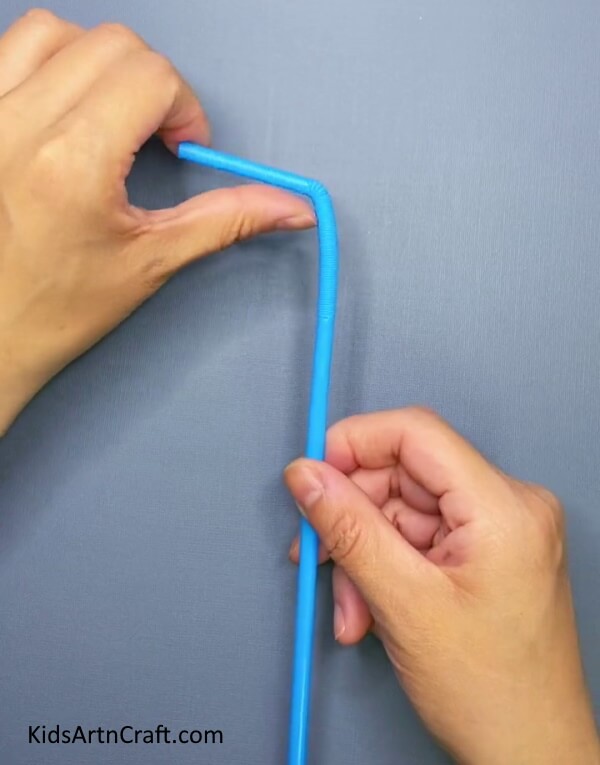

Now, take the foldable straw and fold it from its crease. If you don’t have a foldable straw, you can use a normal straw and try to fold it but it won’t be as effective as foldable straw.
Step 16: Putting The Foldable Straw Inside The Earbud
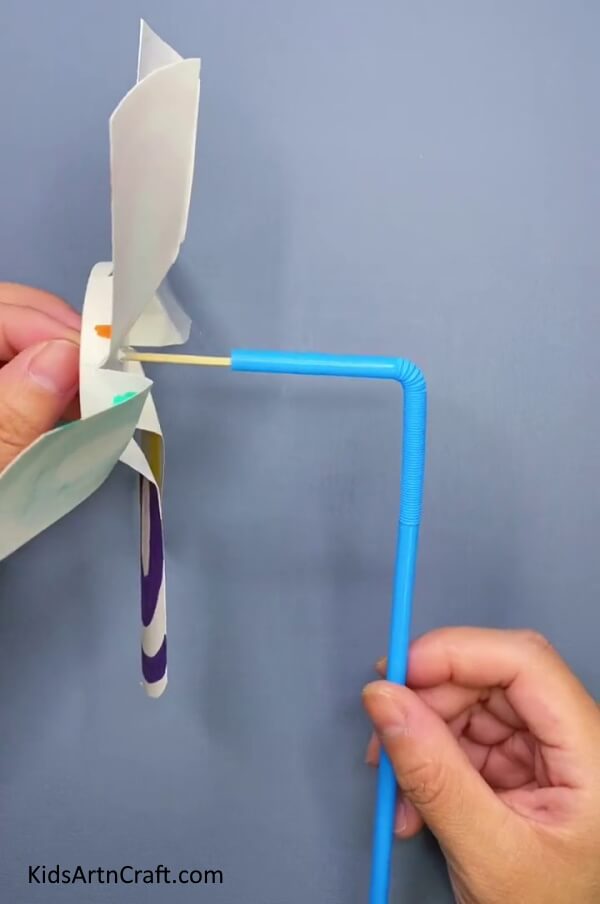
Put the foldable straw inside the earbud from the backside of the windmill fan.
Finally, Your Paper Cup Toy Windmill Cratf is Ready!!


Tada! Your windmill fan toy is finally ready. Wasn’t this craft so easy? You can play with this toy all day long and will never get bored with it. This fan literally looks so cute and unique that if anyone sees this, they will eventually be left in awe of your craftwork.
So, want everyone to know that you are a craftwork genius? Then, go and grab these materials and follow the teeny tiny steps from above and make your toy today to play with it forever.
Some More Toy Craft Tutorial
Make Your Own Toy Car Craft Using Bottle Cap & Straw

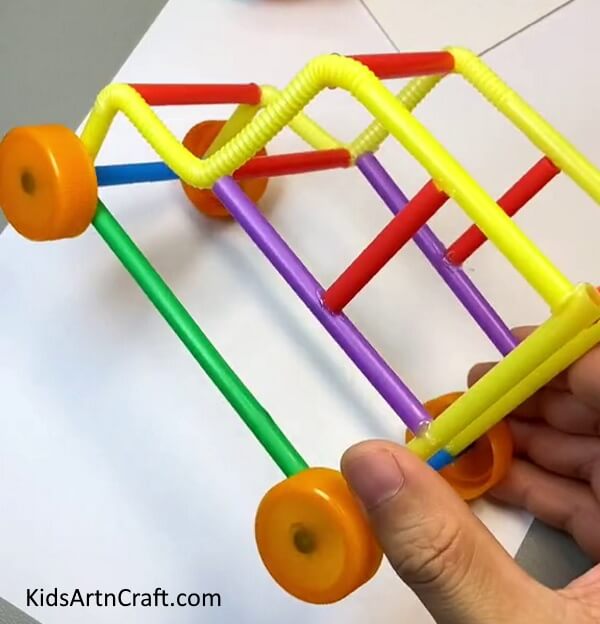
Image Source/Tutorial: Kids Art & Craft
Making your own toy car for kids can be a fun and rewarding experience. With just a few simple materials and tools, you can create a unique and creative toy car for your little ones to enjoy. Put your skills to the test and make your own toy car today!
Straw And Bottle Caps Toy Car Craft For Kids

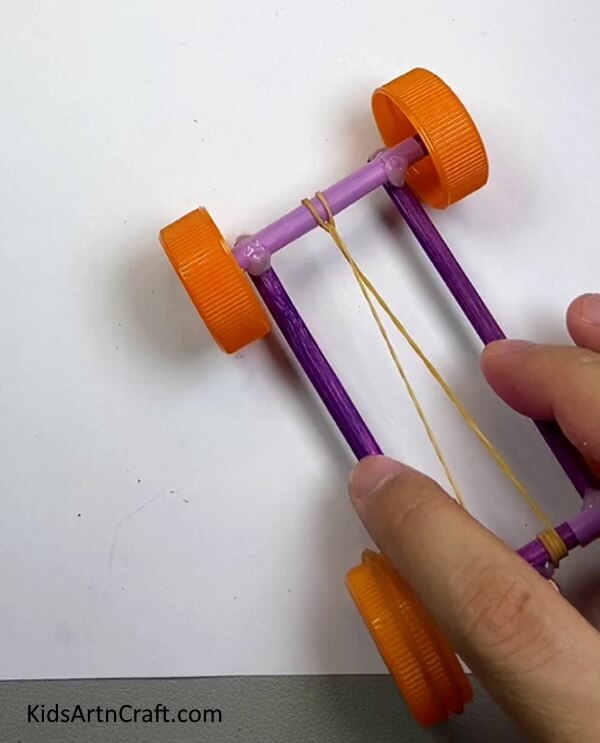
Image Source/Tutorial: Kids Art & Craft
This fun and creative craft is perfect for kids of all ages. With just a few simple materials, like straws and bottle caps, kids can build their own toy car. This is a great way to encourage creativity and have some fun.
How To Make Paper Cup Fan Craft For Kids

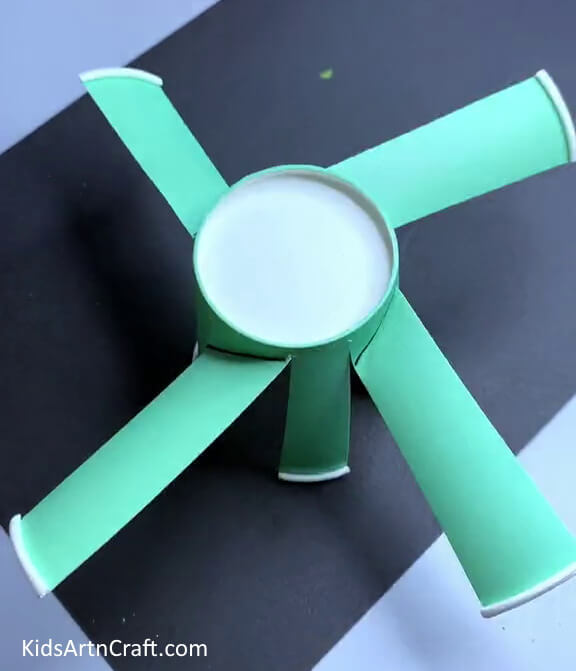
Image Source/Tutorial: Kids Art & Craft
This craft is easy and fun for kids to make. All you need is some paper cups, scissors, and glue. Cut the cups in half and glue them together, then fan them out to create an interesting fan shape. Let the kids get creative with color and decorations. A great craft for kids of all ages to enjoy!
Follow us on Youtube for art and craft tutorials and much more.
More Articles from Kids Art & Craft
- Colorful Paper Cup Windmill Craft – Easy To Make Tutorial
- How to Make Paper Cup Wrist Watch Tutorial for Kids
- DIY Easy Paper Cup Octopus Craft For Kids
- Creative Way To Make Sunflower Seed Shell Tree Craft For Kindergarteners
- Beautiful House Craft Tutorial With Cardboard And Cotton Swab